
This post may contain affiliate links. Please see our disclosure policy.
Pickled banana peppers are the mild, tangy rings piled onto sub sandwiches and pizza, and they’re easy to put up at home. This canning recipe keeps them crisp, with no food dyes or preservatives, so a few jars in the pantry keep you in sandwich toppings, salads and snacks all year long.

Table of Contents
- Notes from My Kitchen
- Quick Look at the Recipe
- Choosing Banana Peppers for Pickling
- Ingredients for Pickled Banana Peppers
- Brine Strength and Substitutions
- How to Make Pickled Banana Peppers
- Canning Pickled Banana Peppers
- Altitude Adjustments
- Tips for Crisp Pickled Banana Peppers
- Ways to Use Pickled Banana Peppers
- Storage and Shelf Life
- Yield Notes
- Pickled Banana Peppers FAQs
- Pepper Pickling Recipes
- Pickled Banana Peppers Recipe
- Vegetable Pickling Recipes
This recipe has been reviewed for safety and accuracy by a Master Food Preserver certified through the University of Cornell Cooperative Extension.
Banana peppers are long, curved yellow peppers with waxy skin and a mild, sweet flavor. Their name comes from their shape and color, and if you leave them on the plant, they ripen to orange and then red. Picked yellow, they have a firm bite that holds up well in a vinegar brine.
The heat is gentle, just a little warmth at the back of the tongue, so even people who skip spicy food tend to like them. Pickling adds a bright tang and keeps that mild, sweet flavor.
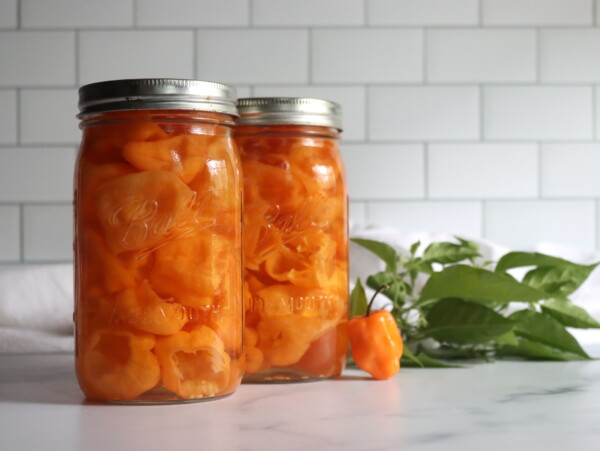
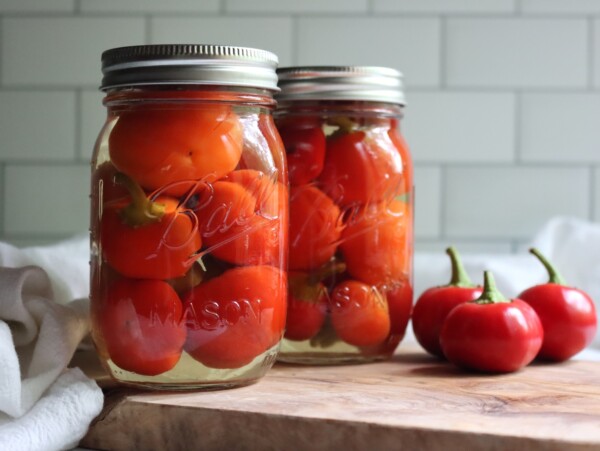
The plants are easy to grow and generous, so a short row gives plenty for the canner. Fresh banana peppers also go into the Ball Blue Book’s Southwestern Vegetable Soup, and they share a shelf nicely with sweet, round pickled cherry peppers.
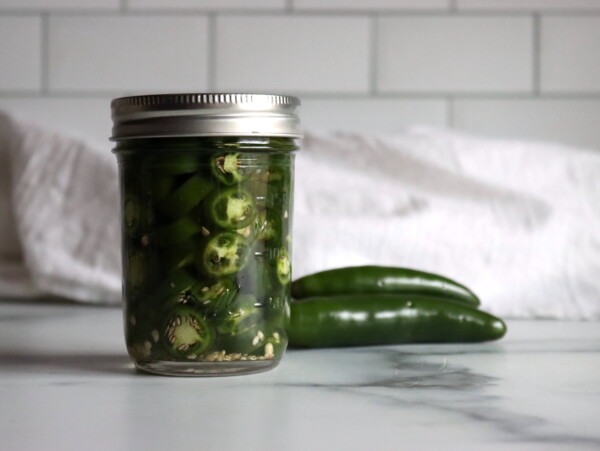
For more heat, try pickled jalapeños or pickled serrano peppers. A garden full of peppers can keep going into pepper canning recipes all season, and the list of pickle recipes goes well beyond peppers.
Notes from My Kitchen

I really love pickled banana peppers, but it’s hard to find them at the store without food dyes and preservatives. Some popular brands get that bright yellow color from dye. So we decided to grow our own banana peppers and make them at home, and they’re wonderful.
Ours come out a softer golden green, and they taste like the peppers we picked. Don’t skip the Pickle Crisp. It’s just calcium, no funny stuff, and it makes a huge difference in crispness.

Quick Look at the Recipe
- Recipe Name: Pickled Banana Peppers
- Recipe Type: Pickle Canning Recipe
- Canning Method: Water Bath Canning
- Prep Time: About 30 minutes
- Cook Time: About 5 minutes for the brine
- Canning Time: 10 minutes for half pints and pints, 15 minutes for quarts
- Yield: About 4 pints or 2 quarts
- Jar Sizes: Half pints, pints or quarts
- Headspace: 1/2 inch
- Ingredients Overview: Banana peppers, cider vinegar, water, canning salt, Pickle Crisp, and optional mustard and celery seed
- Safe Canning Recipe Source: Adapted from the National Center for Home Food Preservation’s Pickled Yellow Pepper Rings and Colorado State University Extension’s Making Pickled Peppers, which gives the quart processing time
- Difficulty: Easy
- Similar Recipes: For something hotter, try pickled habanero peppers. For more mild, sweet peppers, make pickled bell peppers or Italian-style marinated peppers.
Choosing Banana Peppers for Pickling
Pick banana peppers while they’re yellow, firm and glossy, with walls that feel thick for their size. Skip any that are soft, wrinkled or bruised, since a soft pepper only gets softer in the jar.
Garden peppers picked the same day make the crispest rings. At the farmers market, look for peppers with green, fresh-looking stems and no shriveling at the tips.
Orange and red banana peppers are riper and a little sweeter. They’re fine in this recipe, and a few red rings mixed in with the yellow look pretty in the jar.
Hungarian wax peppers look almost identical but carry a lot more heat. They work in this recipe too, for some or all of the banana peppers, if you want a spicier ring. Extra peppers that won’t fit in the pickle jars can go into a pressure canner instead, with no vinegar at all, using this guide to canning peppers.
Ingredients for Pickled Banana Peppers
The swaps readers ask about most are the vinegar and the salt. White vinegar works just as well as cider vinegar, as long as the label says 5% acidity, and canning salt or kosher salt are both fine.
Everything beyond the vinegar and water is there for flavor or crunch. The recipe card has the amounts.
- Banana peppers: Firm yellow peppers, stemmed and sliced into rings. Seeding them is optional.
- Cider vinegar: Check that the label says 5% acidity. Cider vinegar gives a mellow, slightly fruity tang, and white vinegar keeps the brine clearer.
- Water: Just enough to mellow the vinegar. Use less if you like, but never more.
- Canning salt: Pure canning and pickling salt dissolves clear, with no anti-caking agents to cloud the jar. Kosher salt works too, though it’s lighter by the spoonful. Here’s more on pickling salt and its substitutes.
- Pickle Crisp: Ball Pickle Crisp is calcium chloride, and a pinch in each jar keeps the rings crunchy. You don’t need it for safety, but banana peppers are fragile, and I always use it.
- Mustard seed and celery seed: Optional. They give the classic spiced flavor of an old-fashioned pepper ring. Leave them out for a cleaner pepper flavor, or try a spoonful of homemade pickling spice instead.
Brine Strength and Substitutions
This brine is 4 parts vinegar to 1 part water, using vinegar at 5% acidity. You can always use a little more vinegar and less water, but never the other way around.
Cider and white vinegar are interchangeable. The salt, spices and Pickle Crisp are there for flavor and texture, so adjust them however you like, and a spoonful of sugar is fine for a sweet and tangy ring.
Any other pepper, hot or sweet, can replace some or all of the banana peppers, as long as the total amount stays the same. My guide to safe canning recipe changes has more on what you can swap.
Just don’t reduce the vinegar!

My husband loved these so much that he ate 2 of the 4 pints in 2 weeks. He was so excited to try them he opened the first jar the day after I made them. He can’t get enough of them!
How to Make Pickled Banana Peppers
Learning how to pickle banana peppers is mostly a matter of slicing. This is a raw pack, so the rings never see the stove. Boiling brine goes straight over them in the jar, and the canner does the rest.
Get the water bath canner heating first, since it takes the longest. If you’re swapping in hot peppers, wear gloves for the prep.
Prep the Peppers
Wash the peppers and cut off the stem ends. Seeding is optional, but I like to take the seeds out, because the rings look cleaner in the jar and work better in recipes.
It’s easiest to seed them while they’re still whole. Run a chopstick around the inside of each pepper to loosen the core, then tip the seeds out.

Slice the peppers into rings about 1/4 inch thick. A sharp knife is all you need, though a mandoline slicer speeds up a big batch.
For extra crunch, soak the rings in a bowl of ice water for about an hour while the canner heats. Drain them well before packing.
Make the Brine
Combine the cider vinegar, water and salt in a stainless steel or enamel pot. Bring it to a boil, stirring until the salt dissolves.
Keep the brine at a boil while you pack the jars. It should still be boiling hot when it goes over the peppers.
Pack the Jars
If you’re using the spices, put 1 teaspoon of mustard seed and 1/2 teaspoon of celery seed in the bottom of each hot pint jar. Use half that for half pints and double it for quarts. Add the Pickle Crisp now too: 1/8 teaspoon per pint, 1/4 teaspoon per quart, or a pinch for half pints.
Pack the pepper rings in tightly, leaving 1/2 inch of headspace. Press them down as you go, since they settle once the hot brine hits them.
Fill the Jars
Ladle the boiling brine over the peppers, leaving 1/2 inch of headspace. A canning funnel keeps the rims clean.
Slide a bubble remover or a clean chopstick around the inside of each jar to release trapped air, then top up the brine if the level drops. Wipe the rims, center the lids, and screw on the bands fingertip tight.

Canning Pickled Banana Peppers
Canning is optional. If you’d rather make refrigerator pickles, let the jars cool, put them in the fridge, and skip the canner.
For shelf-stable jars, set them in a water bath canner of hot water, about 140 degrees F. The peppers went in raw, and water that’s hot but not boiling keeps the glass from cracking. The jars should sit under at least an inch of water.
Bring the canner to a full rolling boil, then process half pints and pints for 10 minutes or quarts for 15 minutes, adjusting for altitude with the chart below.

Altitude Adjustments
These processing times are for water bath canning, and they go up at higher elevations.
- 0 to 1,000 feet: 10 minutes for half pints and pints and 15 minutes for quarts
- 1,001 to 6,000 feet: 15 minutes for half pints and pints and 20 minutes for quarts
- Above 6,000 feet: 20 minutes for half pints and pints and 25 minutes for quarts
When the time is up, turn off the heat, take the lid off the canner, and leave the jars in the water for 5 minutes. That short rest helps prevent liquid loss (siphoning). Then lift them out with a jar lifter.
Set the jars on a towel and let them cool undisturbed for 12 to 24 hours. You’ll hear the lids ping as they seal.
Tips for Crisp Pickled Banana Peppers
Use the Pickle Crisp. Banana peppers have thin walls, and without it the rings go soft in the canner. Calcium chloride is the same firming salt commercial picklers use, and a tiny amount in each jar keeps the rings snappy.
Pickle them fresh. Peppers that sit in the fridge for a week lose their snap before they ever reach the jar. Picked in the morning and pickled that afternoon is ideal.
Don’t slice them paper thin. Rings cut about 1/4 inch thick hold their shape, while thinner ones turn floppy.
Time it from the boil, and pull the jars on time. Start the timer only once the canner is at a full rolling boil. Extra minutes in boiling water just soften the peppers.
Ways to Use Pickled Banana Peppers
Sandwiches are the obvious place to start. Pile them onto Italian subs and turkey clubs, or chop a few into tuna or egg salad for a tangy bite.
They’re just as good scattered over pizza and nachos. A handful brightens a Greek salad or an antipasto platter, and they make a good topping for a bowl of chili.
Save the brine when the jar is empty. A splash adds zip to salad dressing, potato salad or a marinade for chicken.
For a mixed jar of hot and sweet peppers, try my pickled pepper recipe too. It’s a good way to use up the last of the garden peppers in fall.

Storage and Shelf Life
Once the jars have cooled, press the center of each lid. If it flexes or pops back up, that jar didn’t seal, so keep it in the fridge and eat it first.
Take the bands off the sealed jars, label them, and store them in a cool, dark place for 12 to 18 months. After opening, keep the jar in the fridge with the rings covered in brine.
Refrigerator pickles that skipped the canner keep for a few months in the fridge, as long as the peppers stay under the brine.
Yield Notes
One batch takes 2 1/2 to 3 pounds of banana peppers and fills about 4 pints or 2 quarts. How thick you slice the rings and how tightly you pack them changes the count a little.
The brine makes more than you’ll need, which is handy for topping up jars. Leftover brine keeps in the fridge for your next batch. To make more, double or triple the whole recipe.
Pickled Banana Peppers FAQs
These are the questions that come up most in the comments, from the brine to keeping the rings crunchy.
No. I adapted this recipe from the National Center for Home Food Preservation’s Pickled Yellow Pepper Rings and Colorado State University Extension’s pepper pickling guidance, and the vinegar is what makes it safe to can. You can use white vinegar instead of cider vinegar, or add more vinegar, but never cut it or add more water.
Banana peppers have thin walls, so they soften easily in the canner. Pickle Crisp makes the biggest difference, at 1/8 teaspoon per pint or 1/4 teaspoon per quart. Fresh, firm peppers, rings cut about 1/4 inch thick, and pulling the jars out of the canner on time all help too.
The rings are thin, so they pickle faster than most vegetables. They’re good to eat after about 48 to 72 hours, and the flavor keeps getting better over the next couple of weeks.
Yes. Canning just makes them shelf stable. Skip the water bath, let the jars cool, and keep them in the fridge, where they’ll last a few months.
Yes. Any pepper, hot or sweet, can stand in for some or all of the banana peppers, as long as the total amount stays the same. Hungarian wax peppers make a hotter version that looks almost the same in the jar.
Pepper Pickling Recipes
Pickled peppers for every heat level, from mild to fiery.
If you tried this Pickled Banana Peppers recipe, or any other recipe on Creative Canning, leave a ⭐ star rating and let me know what you think in the 📝 comments below!
And make sure you stay in touch with me by following on social media!

Pickled Banana Peppers
Equipment
- Canning Jars, Lids and Bands
- Bubble remover
Ingredients
- 2½ to 3 lbs banana peppers
- 5 cups cider vinegar, 5% acidity
- 1¼ cups water
- 5 tsp canning and pickling salt
- 1/2 tsp Pickle Crisp, 1/8 tsp per pint or 1/4 tsp per quart
Optional Spices
- 4 tsp mustard seed, 1 tsp per pint
- 2 tsp celery seed, 1/2 tsp per pint
Instructions
- Wash the banana peppers and cut off the stem ends. To seed them, run a chopstick around the inside of each whole pepper to loosen the core, then tip the seeds out.
- Slice the peppers into rings about 1/4 inch thick. For extra crunch, soak the rings in ice water for about an hour while the canner heats, then drain them well.
- Heat the water bath canner, and keep the jars hot until you fill them.
- Combine the cider vinegar, water and salt in a stainless steel or enamel pot. Bring to a boil, stirring until the salt dissolves.
- Put the Pickle Crisp and the mustard and celery seed, if using, in the bottom of each hot jar. Pack in the pepper rings tightly, leaving 1/2 inch headspace.
- Ladle the boiling brine over the peppers, leaving 1/2 inch headspace. Remove air bubbles and top up the brine if needed. Wipe the rims and apply the lids and bands fingertip tight.
- Set the jars in a water bath canner of hot water, about 140 degrees F, with at least 1 inch of water over them. Bring to a full rolling boil, then process half pints and pints for 10 minutes or quarts for 15 minutes, adjusting for altitude (see notes).
- Turn off the heat, take the lid off the canner, and let the jars sit in the water for 5 minutes before lifting them out.
- Cool the jars undisturbed for 12 to 24 hours, then check the seals and store them in a cool, dark place. They’re ready to eat in 2 to 3 days.
Notes
- 0 to 1,000 feet: 10 minutes for half pints and pints and 15 minutes for quarts
- 1,001 to 6,000 feet: 15 minutes for half pints and pints and 20 minutes for quarts
- Above 6,000 feet: 20 minutes for half pints and pints and 25 minutes for quarts
Nutrition
Nutrition information is automatically calculated, so should only be used as an approximation.
Vegetable Pickling Recipes
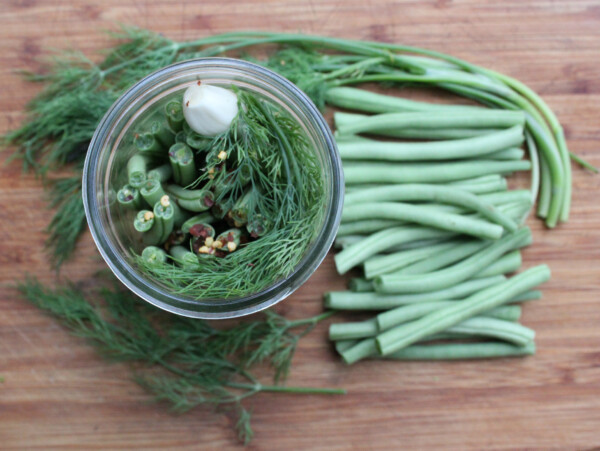
More garden vegetables for the pickle shelf.
Find the perfect recipe
Searching for something else? Enter keywords to find the perfect recipe!


I ended up with soggy peppers. Someone I know doesn’t do the bath and there’s came out crunchier than mine. Any suggestions keep this crunchy? Between the hot liquid and the bath not sure how to salvage these in the future.
Sorry these came out soft! A few things make a big difference with pickled peppers. Pickle Crisp (1/8 teaspoon per pint) is the biggest help, and it’s listed as an optional ingredient in the recipe. Use the freshest, firmest peppers you can, ideally picked the same day, and soak the sliced rings in ice water for an hour or so before packing. Slicing them a little thicker helps too. When canning, start your timer only once the canner is at a full boil, and take the jars out after the 5 minute rest so they don’t keep cooking. Peppers that skip the water bath will stay crunchier, but they have to live in the fridge. The water bath is what makes them safe on the shelf, so it’s worth keeping even if they soften a bit. The soft ones you have now are still great chopped onto sandwiches, pizza, or mixed into a relish. Hope this helps!
Hi Ashley-
I am growing Sweet Banana Peppers and plan to use this recipe to can them up.
Can I add a whole garlic clove to this instead of a sliced one?
Thank you!
They have found that whole garlic cloves don’t absorb the vinegar very well, and can take too long to pickle in the center (leading to potential food safety issues). These days, it’s recommended that you slice garlic cloves at least in half so the pickle can get to the center of the clove.
Hi! Do I need to use canning salt or could it be substituted for kosher?
You can use canning salt or kosher salt, either is fine.
Hello, I have a lot of left over brine since I only canned 1/2 pint jars. Can this brine be saved for any amount of time and then be re-boiled to make more pickles? And thanks so much for your recipes and the work you put in to share them.
Yes, you can keep the brine in the refrigerator for quite a while and re-use it for other canning recipes. You can also just simply can the brine itself without the peppers, and then it’s shelf stable and ready when you’re ready to pickle something else.
Can I add pickle crisp? If so how much should I use?
Yes, you can definitely use pickle crisp. The rate is 1/8 tsp per pint or 1/4 tsp per quart, and it works wonderfully with banana peppers. Enjoy!
Can I use white vinegar in this recipe
Yes. Any vinegar that’s standardized to 5% acidity will work. Look at the ingredients label, it’ll say the acidity %.
can I add sugar to make it spicy sweet?
Yes! The only thing about this recipe you can’t change is the water/vinegar ratio. Beyond that, you can add sugar or spices, and you can reduce or increase the salt to suit your tastes. Enjoy!
Can I use only celery seed if I don’t have mustard seed?
Yes, that’s perfectly fine. The spices are optional, and you can adjust them as needed based on your preference, or what you have on hand. Enjoy!
Can I use different peppers? I bought my plants and they said salsa peppers, they look like big jalapeños but not as hot. Any thoughts?
Yes. In canning recipes, you can always substitute one kind of peppers for another (hot or sweet). They can all be used interchangeably, so you can use any peppers in this recipe. Enjoy!
Can I follow the recipe but skip the water canning part?
Yes. Canning is optional, and it’s just used to make these shelf stable. If you keep them in the refrigerator you don’t have to can them.
Can I use white Vinegar instead of apple cider?
Yes, that’s perfectly fine. Any vinegar standardized to 5% acidity works. It’ll list the acidity % in the ingredients list.
Too easy, thank you.
I had an excess of banana peppers, and this solved that burden of abundance. 🙂
Wonderful!
My husband loved these so much that he ate 2 of the 4 pints in 2 weeks. He was so excited to try them he opened the 1st jar the day after I made them. He can’t get enough of them….I’m out rustling around the pepper plants to see if I can find more to make! Thank you so much for your websites they are an absolute pleasure to read.
my first attempt at canning – and it truly was easy considering how nervous i was that i would make a mistake. looks so pretty on the shelf, and i can’t wait to open and share it. just one question, how long should i leave it sealed (for best flavour) before i can open and start snacking ?
These pickle faster than most things because the pieces are quite small. Normally, I say wait 2 weeks for best flavor with pickles, but these should be good after about 48 to 72 hours. Enjoy!