
This post may contain affiliate links. Please see our disclosure policy.
Pickled garlic scapes capture the punchy, fresh garlic flavor of spring in a crisp, snackable pickle you can pull off the pantry shelf all year long. They are crunchy and savory right out of the jar, lovely tucked beside a sandwich, and a little bit of a conversation piece when they go out on a charcuterie board.
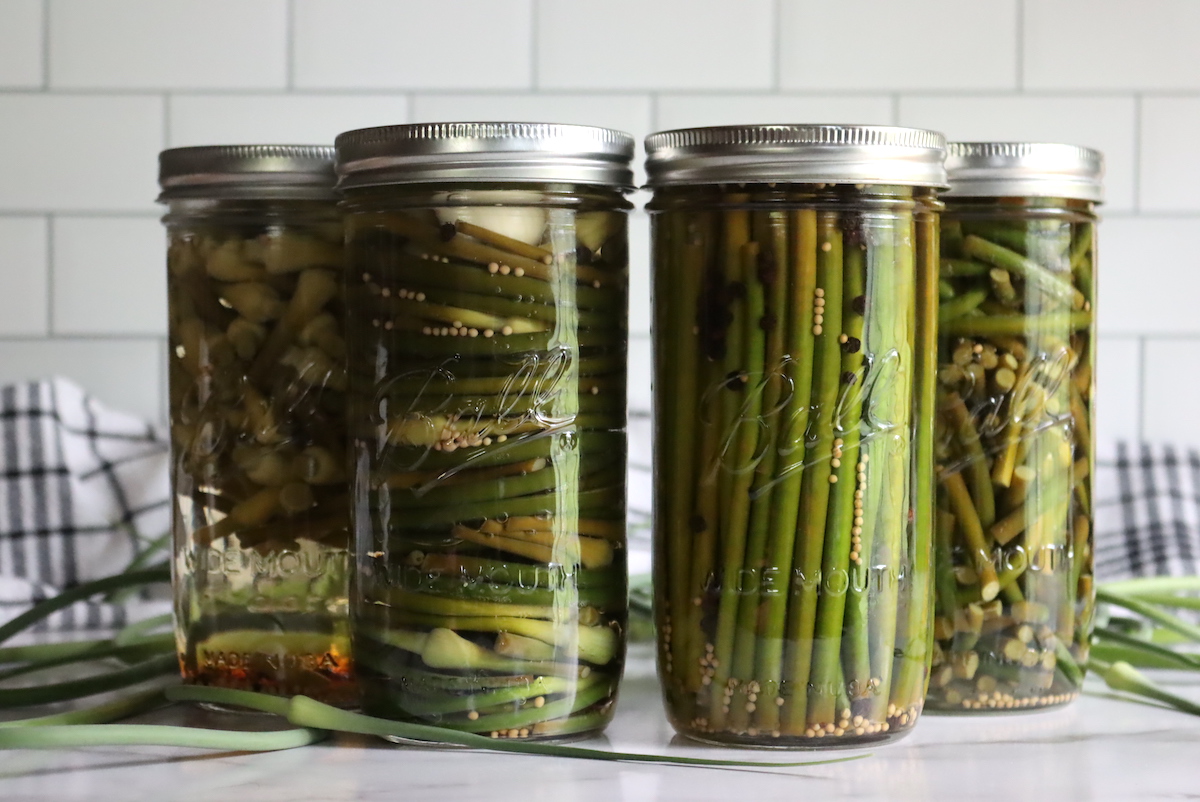
Table of Contents
- Notes from My Kitchen
- Quick Look at the Recipe
- Choosing Garlic Scapes for Pickling
- Ingredients for Pickled Garlic Scapes
- Brine Strength and Substitutions
- Brine Variations for Pickled Garlic Scapes
- How to Make Pickled Garlic Scapes
- Canning Pickled Garlic Scapes
- Altitude Adjustments
- Tips for Crisp Pickled Scapes
- Ways to Use Pickled Garlic Scapes
- Yield Notes
- Pickled Garlic Scapes FAQs
- Vegetable Pickling
- Pickled Garlic Scapes Recipe
- Pickling
This recipe has been reviewed for safety and accuracy by a Master Food Preserver certified through the University of Cornell Cooperative Extension.
We grow a lot of garlic on our homestead, and a few hundred hardneck garlic bulbs means a few hundred garlic scapes every spring. Hardneck varieties do well up here in the north because they are hardier than softneck garlic, and they reward you with a bonus crop of curly scapes early in the season, weeks before the bulbs are ready to dig.
Every year I find myself working through new garlic scape recipes, and pickled scapes always find their way back into the rotation. They taste a lot like old fashioned dilly beans, only crunchier, with a mellow garlic note that is far gentler than a raw clove.
If you would rather turn your scapes into a sweet spread instead, there is also a garlic scape jam that goes the other direction entirely. That one really turns heads!
Notes from My Kitchen

Scape season is short, and it always seems to land in the same busy stretch when the garden needs everything at once. I have learned to put up a few jars of pickled scapes first thing, before I even think about making garlic scape pesto or freezing bulk batches of scapes, because they take almost no time and they keep me in garlicky snacks long after the fresh scapes are gone.
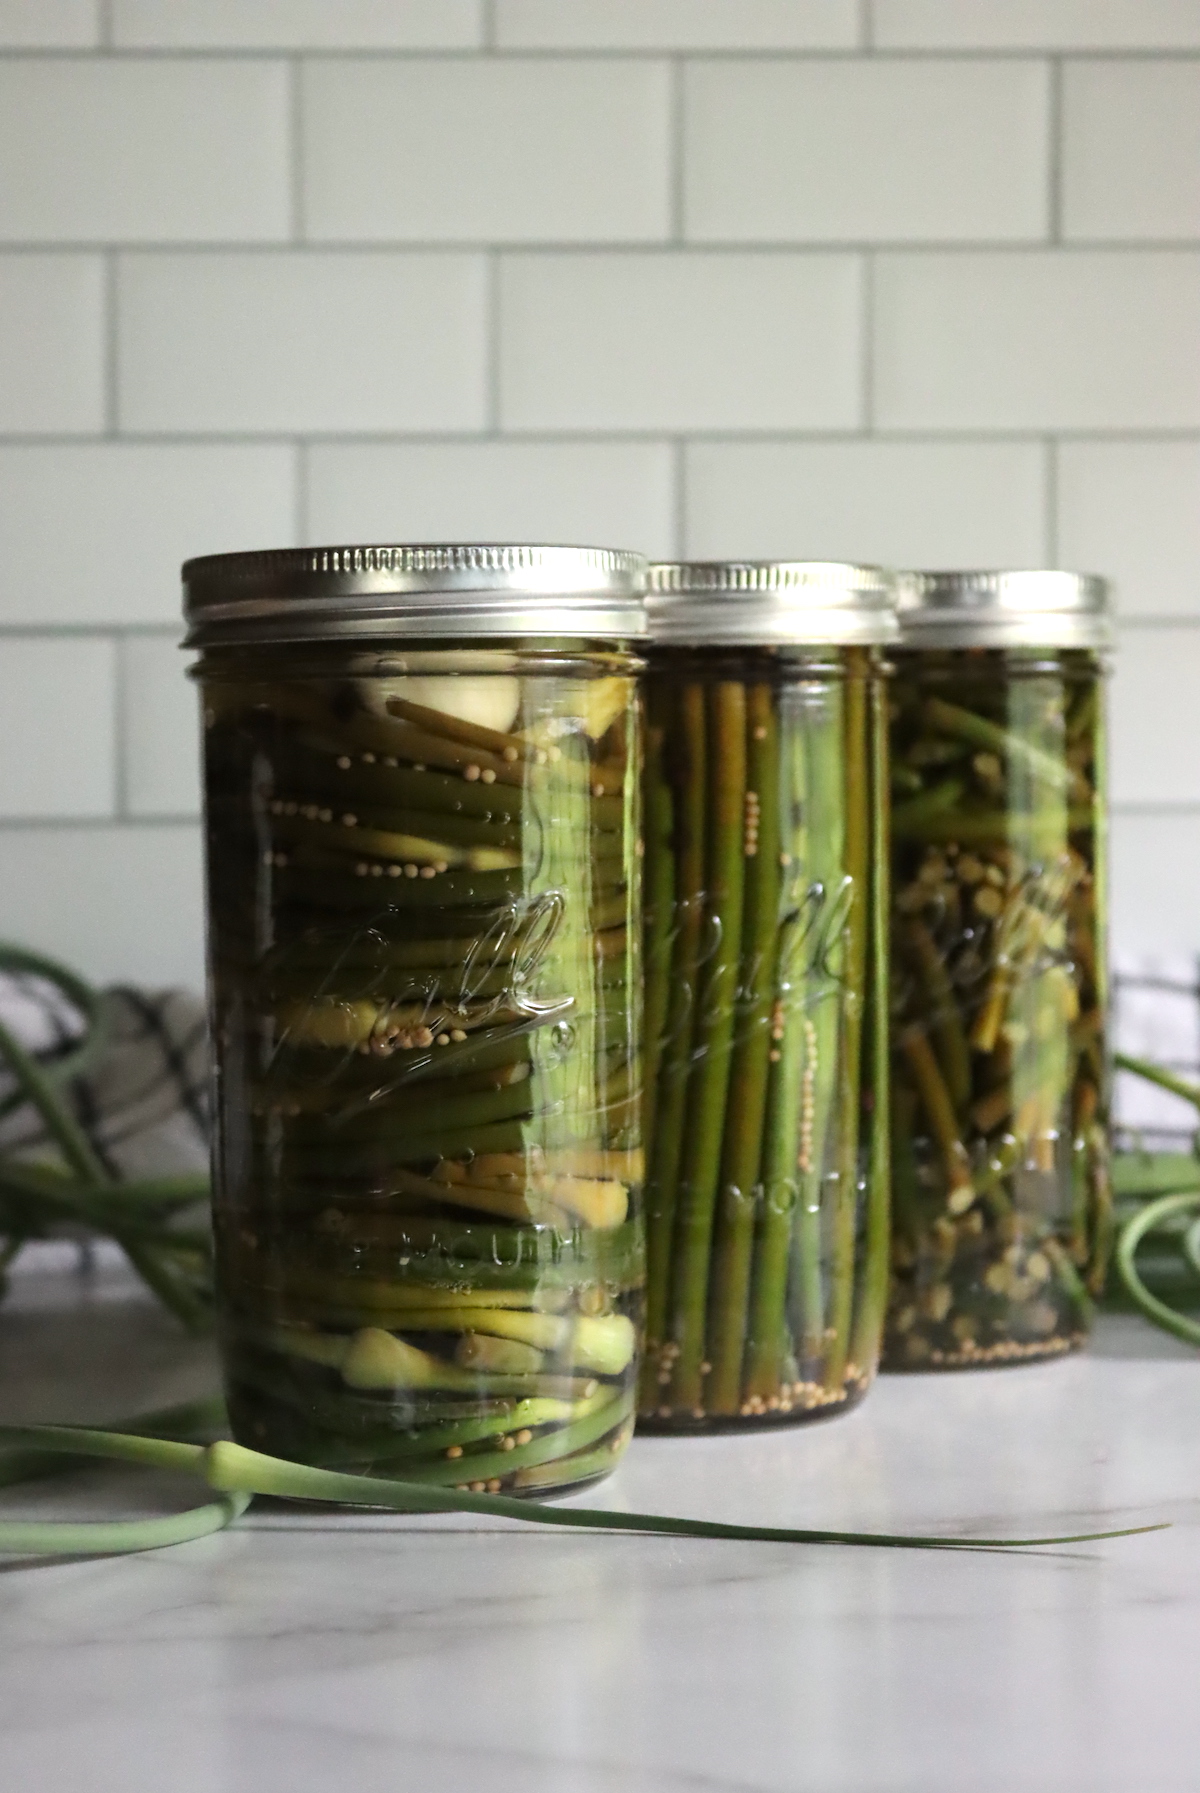
I usually pack a couple of jars of plain stem segments for everyday eating and tuck one fancier jar of curls or flower buds aside for company. The flower buds in particular tend to disappear fast, so I do not feel bad keeping a jar back for myself.
Quick Look at the Recipe
- Recipe Name: Pickled Garlic Scapes
- Recipe Type: Vegetable Pickles
- Canning Method: Water Bath Canning
- Prep Time: About 20 minutes
- Cook Time: About 5 minutes for the brine
- Canning Time: 10 minutes for pints
- Yield: About 2 pints per batch
- Jar Sizes: half pint, pint or quart
- Headspace: 1/2 inch
- Ingredients Overview: Garlic scapes, vinegar, water, pickling salt, and pickling spices, with sugar in some variations
- Safe Canning Recipe Source: Adapted from tested vinegar-brined vegetable pickle formulas, including NCHFP dilled beans and pickled asparagus, using a 1:1 ratio of 5% vinegar to water and tested boiling-water processing times.
- Difficulty: Easy
- Similar Recipes: These are made the same way as other vinegar-brine vegetable pickles, including Dilly Beans and Pickled Ramps, another foraged spring allium. If you have a glut of scapes, you can also turn them into Garlic Scape Jam.
Choosing Garlic Scapes for Pickling
When you are harvesting garlic scapes, it helps to get them early, while they are just starting to uncurl out of the center of the plant. Wait too long and the garlic flower will open, the stem will toughen, and the scape turns fibrous and woody instead of tender and crisp. Younger scapes make a more tender pickle, so I try to cut ours while they are still in a tight curl.
Ideally they are no longer than about 12 inches, though you can sometimes get away with a bit longer if they are still tender and it has been a cool spring. If you are buying scapes at the farmers market, look for fresh, firm bunches with a tight curl, since the scapes straighten out as they age. Even straighter, slightly older scapes still pickle nicely, they are just a touch less tender.
Preparing Garlic Scapes for Pickling
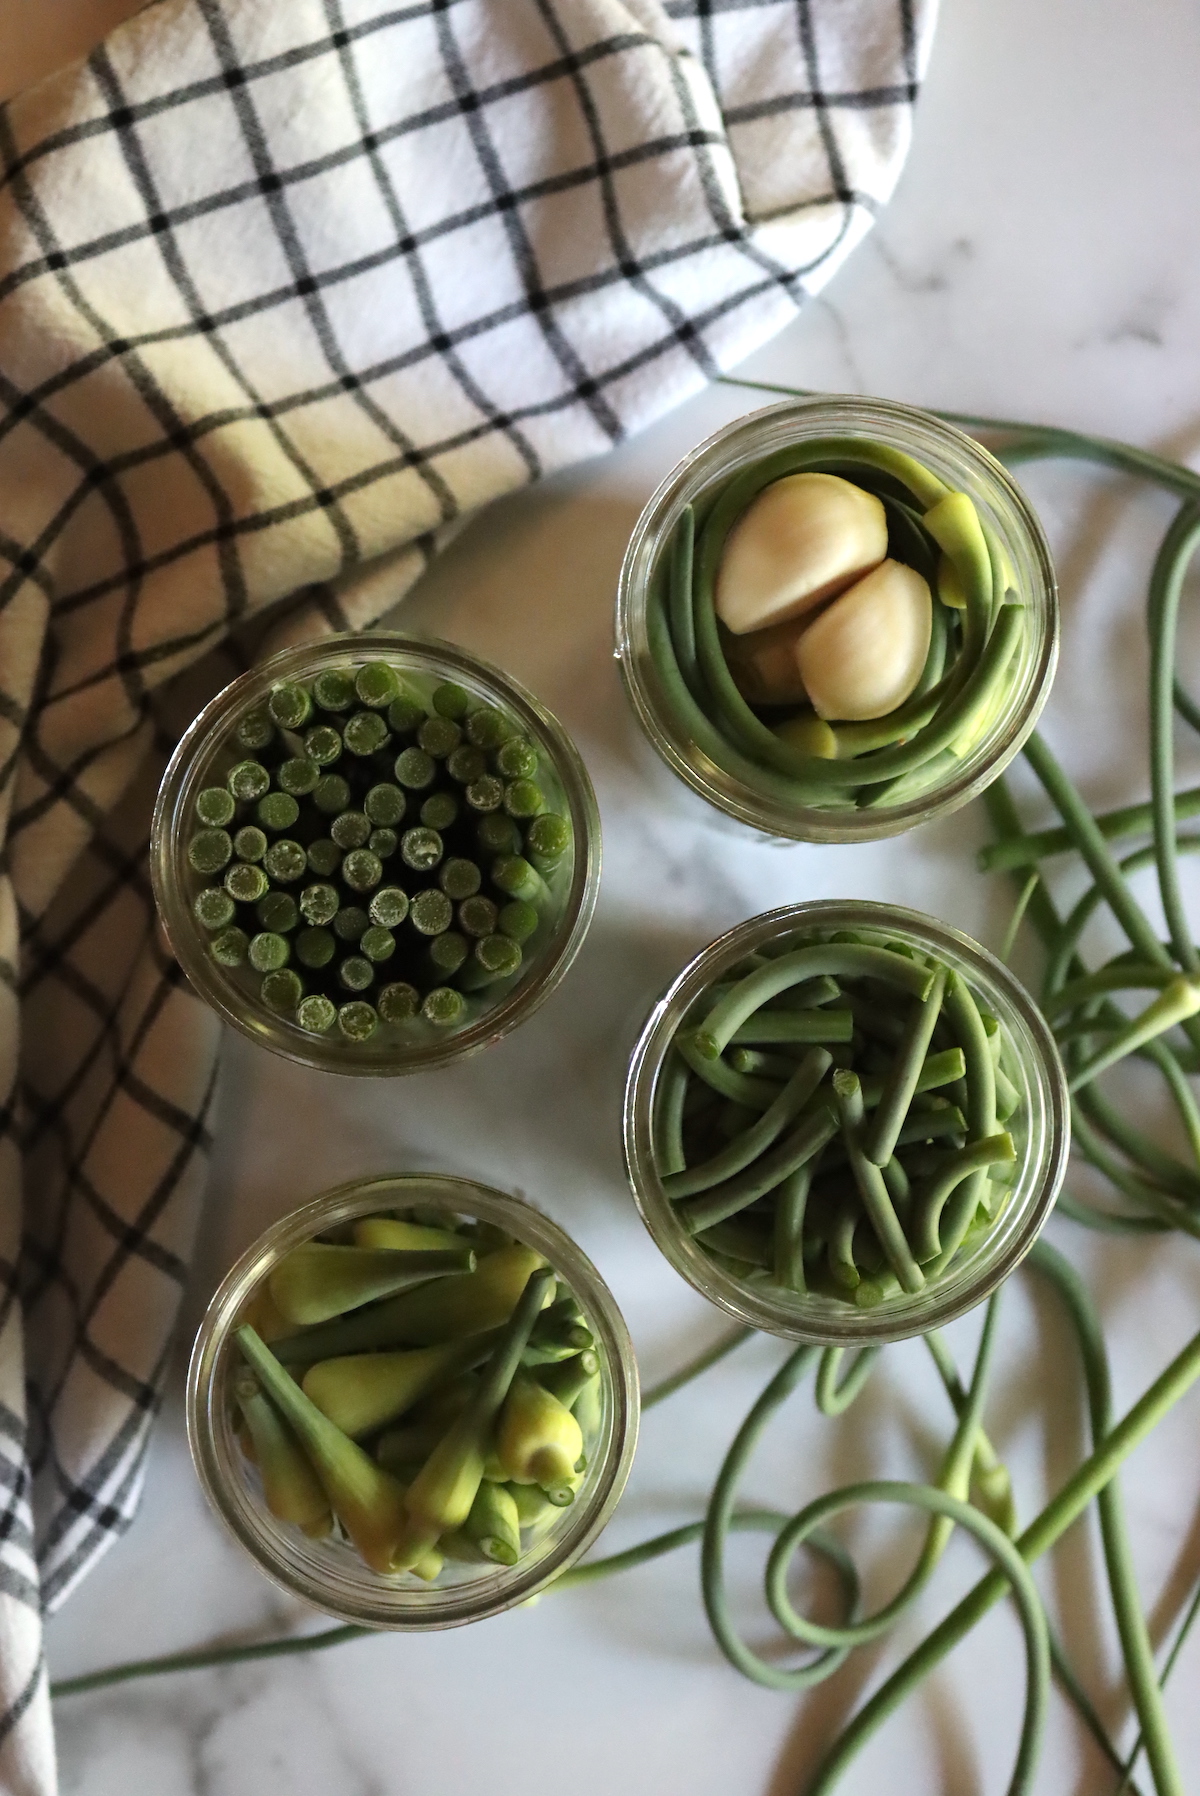
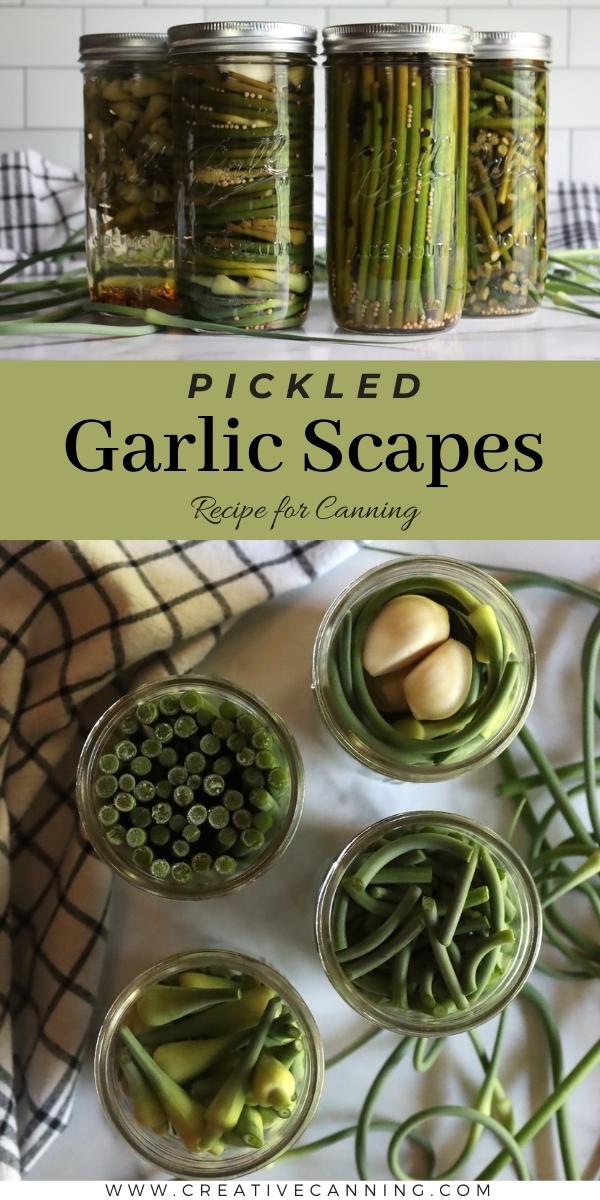
There are quite a few ways to cut and shape garlic scapes for the jar, and the choice is mostly about presentation and how you plan to eat them. You can go elaborate with curls and long sticks, or keep it practical with short segments. None of these choices changes the safety of the pickle, so pick whatever suits your patience and your jars.
Whichever shape you choose, pack the raw prepared scapes into the jars first. That way you can see how much room you have and judge how much brine you will actually need before you start heating it on the stove.
Small Pieces
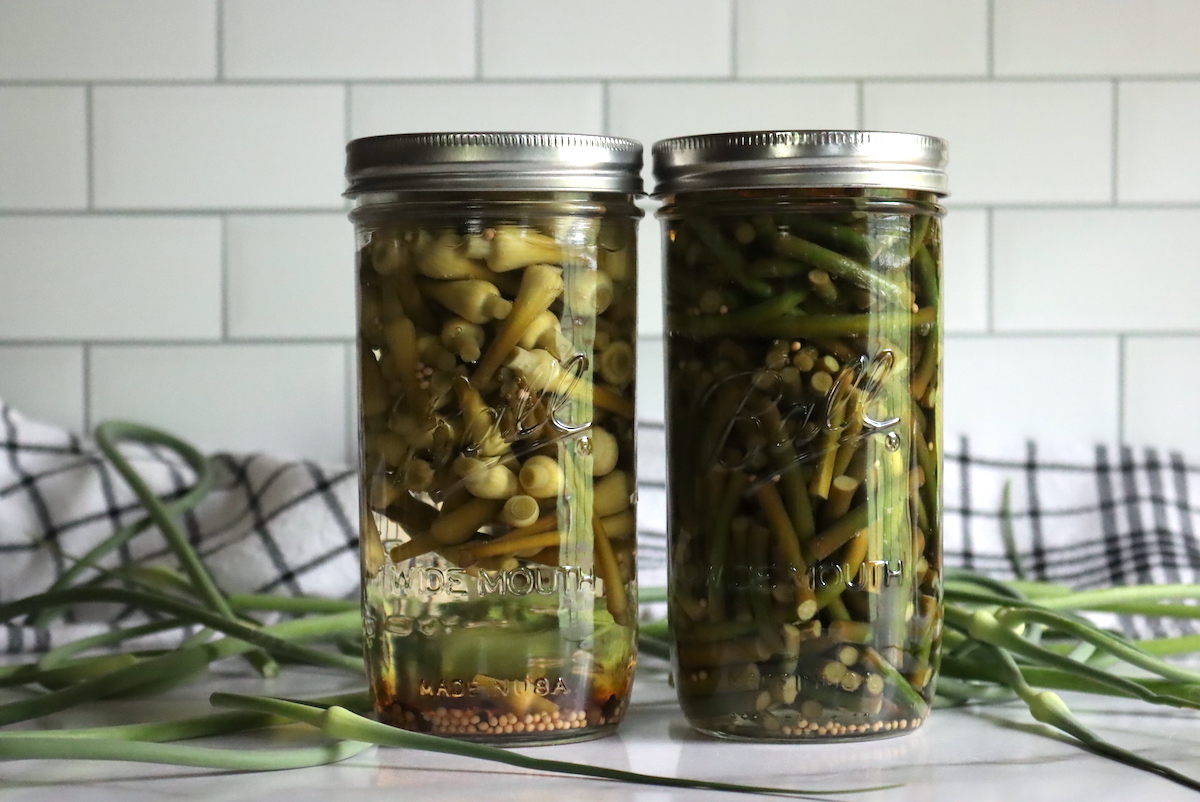
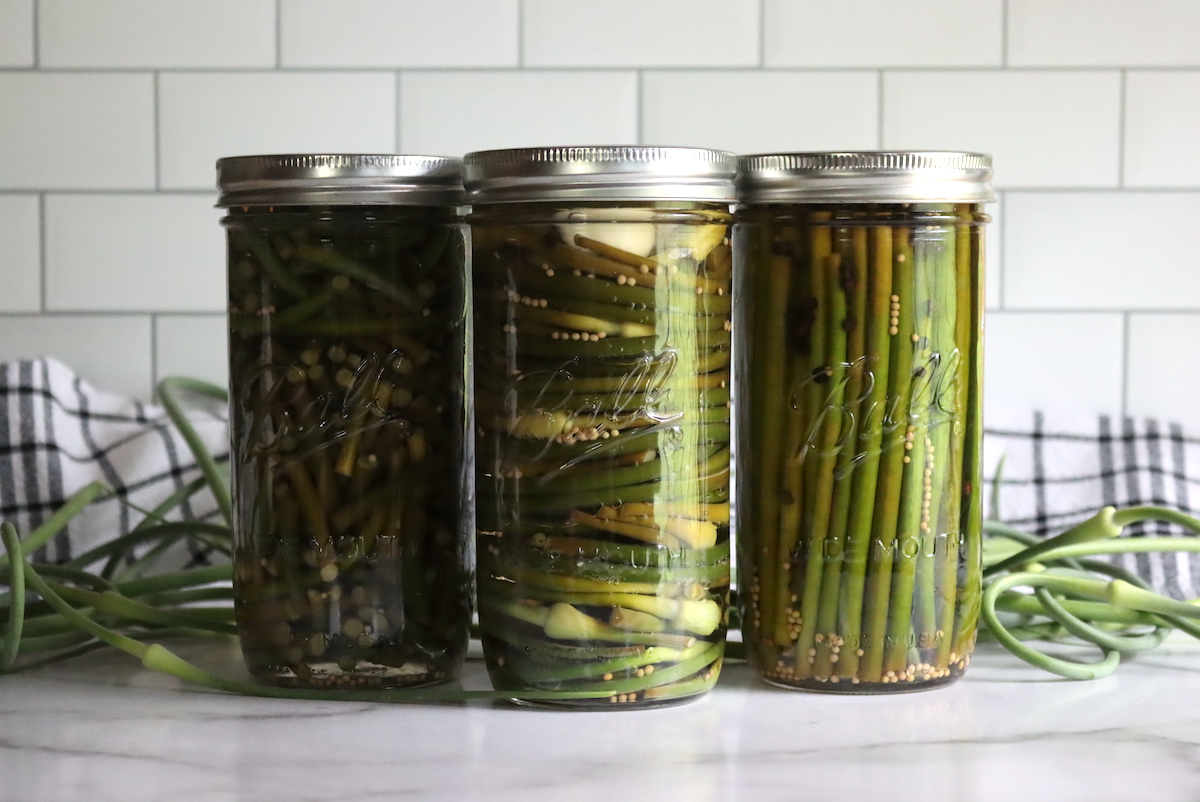
The simplest approach is to cut the scapes into short segments, around 1 to 3 inches long, depending on how you hope to use them. They pack into the jar quickly, and it does not much matter whether they are curled or straight. They are perfectly good next to a sandwich, and while they do not look fussy in the jar, they get the job done.
This is the quickest way to put up a bumper crop of scapes when you have more than you know what to do with. When I am working through a big harvest, this is almost always how I handle the bulk of it.
Curls
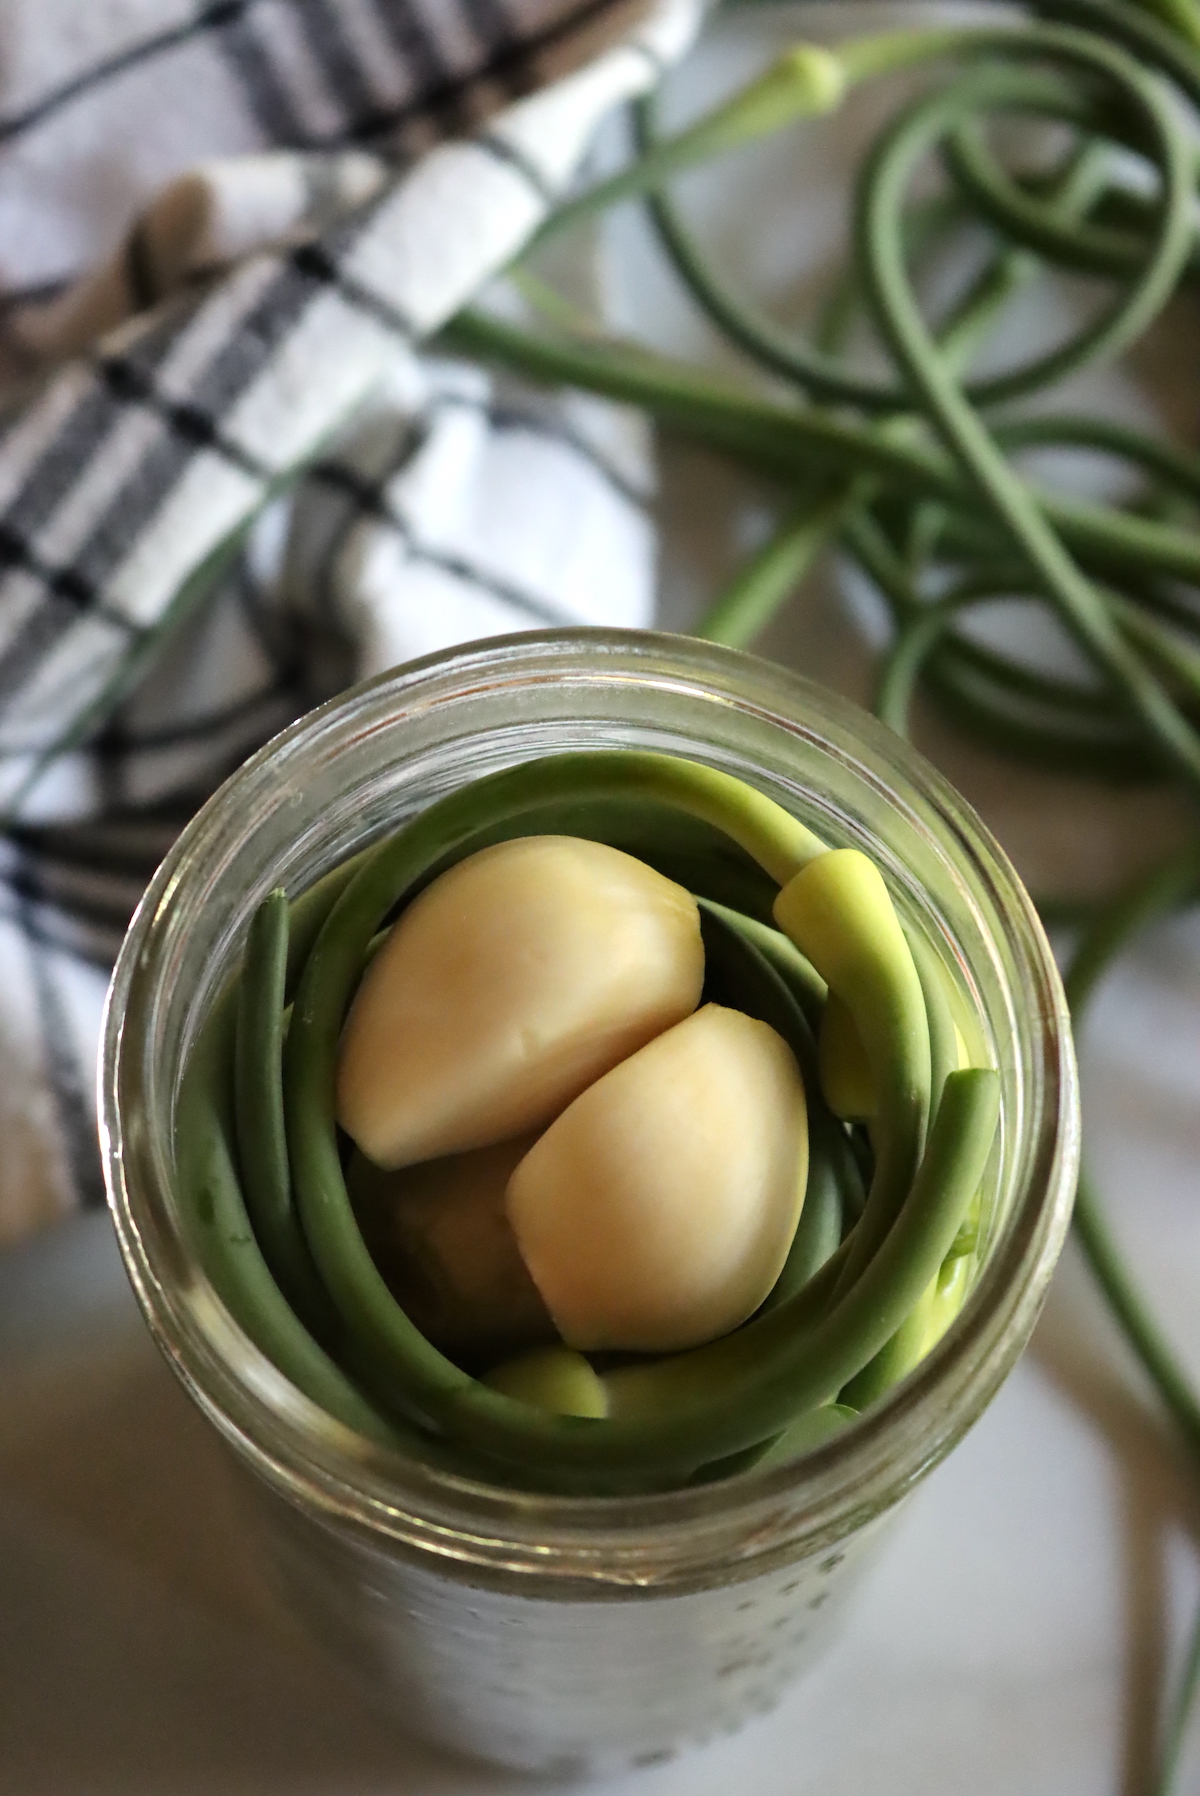
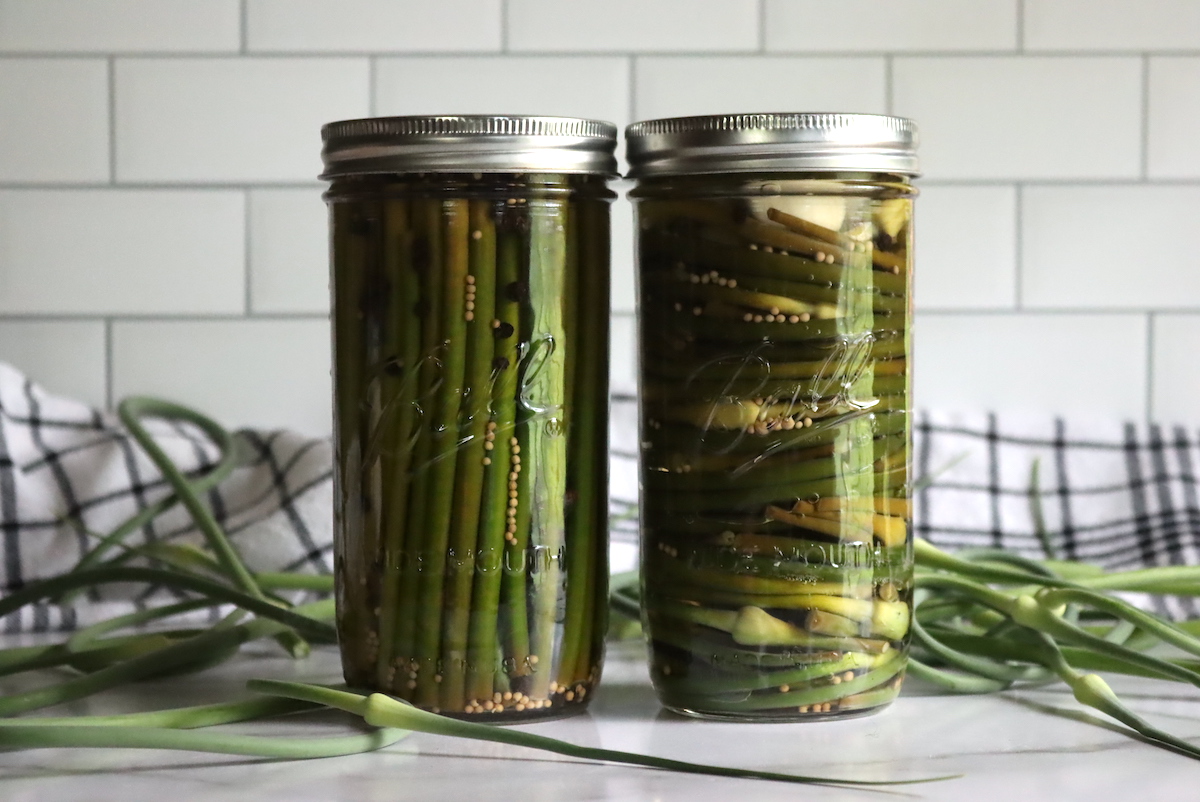
If you have extra curly scapes, you can wind them around the inside of the jar so they look especially neat, both on the shelf and on the plate. These are fun on a charcuterie board because they show off exactly what you preserved, like little garlic flavored curly-qs.
It is hard to fill the center of the jar when you coil the scapes around the edge, so I toss a few whole garlic cloves into the middle and it works out well. The cloves pickle right alongside the scapes and make a nice bonus bite.
Straight Sticks
We grow so many scapes that I let some of ours grow out a bit longer, which gives me a long straight section to pack upright into the jar. They look a little like pickled asparagus spears, only crisper and garlic flavored.
Sticks take more trimming to get even lengths, so they are more effort than short segments, but they make a tidy, attractive jar. Trim them to stand just below the jar rim so they stay fully submerged in the brine.
Flower Blossoms
I like to remove the actual blossom ends from the scapes and pickle them in their own jar. These make the most interesting pickle of the bunch, in my opinion, and I keep them for special occasions. Pickled garlic flower buds are a fun thing to set out at a gathering, and they are sure to turn a few heads.
You do not have to separate them out, and you can leave the buds attached and pickle them right along with the rest of the scapes. Just keep in mind that the flower buds hold a lot of air and will shrink as they pickle, so no matter how tightly you pack the jar, the buds tend to float and leave a little empty space at the bottom.
Ingredients for Pickled Garlic Scapes
This is a simple pickle, and the ingredient list is short. The exact amounts for each of the four brine variations live in the recipe card below, so here I want to walk through what each ingredient does and how you might adjust it. The brine ratio is the part that keeps these safe to can, so that is the one place you do not want to improvise.
- Garlic Scapes: Young, tender scapes with a tight curl make the crispest pickle. Plan on about 1/4 pound of prepared scapes per pint jar.
- Vinegar: White or apple cider vinegar at 5 percent acidity. The acidity is what makes these safe to can, so use the full amount and do not dilute it with extra water.
- Pickling Salt: Use pickling or canning salt in every variation, not table salt, since iodine and anti-caking agents cloud the brine and can darken the scapes. The salt is for flavor and crispness here, not safety, so you can reduce it to taste.
- Sugar: A small amount rounds out the basic and spicy brines, and a full cup gives the bread and butter version its sweet-and-sour character. The dill brine skips it entirely. Sugar is a flavor choice and can be adjusted without affecting safety.
- Pickling Spices: Mustard seed, dill seed, peppercorns, red pepper flakes, celery seed, and turmeric flavor the different variations. These are measured dry into each jar rather than boiled into the brine, and they can all be adjusted to taste. A jar of pickling spices is handy if you want to keep the common ones on hand.
Have your scapes cut, your jars packed, and your spices measured out before you bring the brine to a boil. Everything moves quickly once the brine is hot, so it pays to have the jars ready and waiting.
Brine Strength and Substitutions
The brine has to stay at the tested ratio of vinegar to water, because the acidity is what keeps these pickles safe on the shelf. The basic, dill, and spicy variations use a 1:1 ratio of 5 percent vinegar to water, the same ratio used for dilly beans, and the bread and butter version uses straight vinegar plus sugar. You can use white or apple cider vinegar as long as it is labeled 5 percent acidity, but do not cut the vinegar or add extra water. If you run a little short on brine while filling your last jar, top it off with a splash more vinegar rather than water, so you never lower the acidity.
The same goes for any extras you add to the jar. Whole garlic cloves and sliced onion pickle beautifully alongside the scapes and are a good way to fill out a jar that came up short, but for canning they need to be approved low-acid vegetables packed in this tested brine, with the scapes and add-ins together making up the solid pack against at least 50 percent brine. The salt, on the other hand, is for flavor and crunch rather than safety, so you can reduce it or leave it lighter if you prefer.
Brine Variations for Pickled Garlic Scapes
Regardless of the shape you choose, the method for pickled garlic scapes is the same. You make a simple brine, pour it boiling hot over the prepared scapes in the jars, and either refrigerate them or process them in a water bath canner. I have included four classic pickle brines below that all work well with scapes, so you can match the flavor to how you like to eat them.
Each brine below is scaled to pickle about 1/2 pound of garlic scapes, which is roughly 2 to 3 farmers market bunches and yields about 2 pints. You can cut a brine in half to fill a single pint, or multiply it if you have more scapes. The exact amounts are in the recipe card, and the short notes here describe what each one tastes like so you can pick.
Basic Pickled Garlic Scapes
The basic brine is a clean, savory pickle with just a touch of sugar to round off the sharpness of the vinegar. Mustard seed and black peppercorns go into each jar, which gives it a familiar deli-pickle backbone without leaning into any one strong flavor.
This is the one I make most often, since it goes with just about anything and lets the garlic flavor of the scapes come through. If you are not sure which variation to try first, this is a safe place to start.
Dill Pickled Garlic Scapes
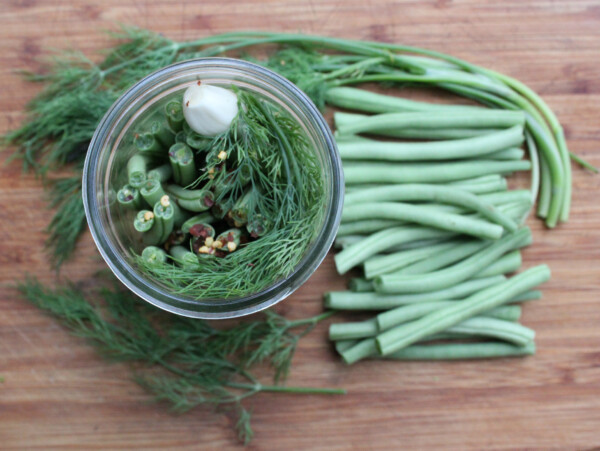
The dill brine skips the sugar and leans on dill seed and peppercorns, with the option to tuck a fresh dill frond into each jar for a brighter, more aromatic pickle. The result tastes a lot like a classic dill pickle, with the garlic scapes standing in for cucumbers.
If you already love dilly beans, this is the variation that will feel most familiar. Fresh dill is best added right before you fill the jars so it stays green and fragrant.
Bread and Butter Pickled Garlic Scapes
The bread and butter brine is the sweet-and-sour one, built on straight vinegar and a full cup of sugar, with mustard seed, celery seed, and a little turmeric for color and warmth. It turns the scapes into a sweet, tangy pickle that plays well on a sandwich or a cheese board.
This brine is a classic, and it’s made into regular bread and butter cucumber pickles, as well as bread and butter zucchini pickles and one of my favorites, bread and butter pickled onions.
Because this brine uses straight vinegar rather than a vinegar-and-water mix, it is the most acidic of the four and makes a slightly larger volume of brine. The turmeric will tint the scapes a soft golden color the longer they sit in the jar.
Spicy Pickled Garlic Scapes
The spicy brine starts from the same base as the basic version, then adds red pepper flakes and a heavier hand of black peppercorns to each jar for real heat. You control how hot they get by adjusting the pepper flakes between 1 and 2 teaspoons per pint.
These are the jars I reach for when I want a pickle with some kick alongside a rich meal. Start on the lower end of the pepper flakes if you are unsure, since the heat builds as the jars sit on the shelf.
How to Make Pickled Garlic Scapes
Once you have chosen a brine and prepped your scapes, the actual work goes quickly. The spices go dry into each jar, the salt and sugar dissolve into the boiling brine, and then you simply pour the hot brine over the packed scapes. From there you can refrigerate the jars or process them for the pantry.
The one point worth repeating, since it trips people up, is that the seeds, peppercorns, and pepper flakes are measured into the jars, not boiled into the brine. Only the water, vinegar, salt, and sugar go into the pot.
Prepare the Scapes and Jars
Start by preparing your jars and, if you are canning, your water bath canner. Wash the scapes, trim off any tough or dried ends, and cut them into whichever shape you have chosen, whether that is short segments, curls, straight sticks, or separated flower buds.
Pack the raw scapes snugly into each jar, leaving 1/2 inch of headspace at the top. Measure the dry spices for your chosen variation into each jar now, along with a fresh dill frond if you are making the dill version.
Make the Brine
Combine only the liquid brine ingredients for your chosen variation in a saucepan, which means the water, vinegar, salt, and sugar. Bring it to a boil over medium-high heat, stirring until the salt and sugar fully dissolve.
Keep the brine at a gentle boil until you are ready to fill the jars. It takes a little more than 1 cup of brine to fill a well-packed pint, so a single batch makes enough for about 2 pints with a little to spare.
Pack and Fill the Jars
Pour the boiling brine over the scapes and spices in each jar, keeping that 1/2 inch of headspace and making sure the scapes stay fully submerged. Slide a non-metallic tool down the side of the jar to release any trapped air bubbles, then add a little more brine if the level drops.
Wipe the rims clean, set the lids in place, and screw the bands on fingertip tight. At this point you can let refrigerator pickles cool and go straight into the fridge, or move on to the canning instructions below for shelf-stable jars.
Canning Pickled Garlic Scapes
Water bath canning these scapes is completely optional, and they make excellent quick refrigerator pickles. Packed in the fridge, they will keep for at least a month, and they only need a couple of days for the spices to infuse before they are good to eat.
That said, we preserve a lot of scapes each year and I do not have that much refrigerator space, so canning lets me keep them at room temperature right on the pantry shelf. If you have never canned before, read through my guide to water bath canning before you begin, and browse more water bath canning recipes while you are at it.
To can, prepare your water bath canner, jars, and lids. Pack the raw scapes and dry spices into the jars, pour the boiling brine over them to a 1/2 inch headspace, remove air bubbles, wipe the rims, and set the lids fingertip tight. A canning funnel with headspace markings makes that part faster and cleaner.
Process the jars in a boiling water bath canner for 10 minutes for pints, adjusting for altitude using the table below. When the time is up, turn off the heat, let the jars rest 5 minutes, then lift them out and cool undisturbed for 12 to 24 hours before checking the seals. Any jar that did not seal goes in the refrigerator for immediate use, and sealed jars keep their best quality on the shelf for about 12 months.
Altitude Adjustments
For water bath canning, processing times increase at higher elevations:
- 0 to 1,000 feet: Pints 10 minutes, quarts 15 minutes
- 1,001 to 6,000 feet: Pints 15 minutes, quarts 20 minutes
- Above 6,000 feet: Pints 20 minutes, quarts 25 minutes
Tips for Crisp Pickled Scapes
The single biggest factor in a crisp pickled scape is the scape itself. Start with young, tender scapes harvested while they are still in a tight curl, and pickle them as soon after cutting as you can. Older, straighter scapes still make a good pickle, but they will never be quite as crisp as the young ones.
Packing the scapes in raw, rather than precooking them, also helps them hold their snap. If you want a little extra insurance, you can add Pickle Crisp at 1/8 teaspoon per pint, and take care not to over-process the jars, since extra time in the canner softens any pickle.
Ways to Use Pickled Garlic Scapes
Pickled garlic scapes are good straight out of the jar, and that is honestly where most of ours go. They are a natural alongside a sandwich or a burger, chopped into potato or pasta salad, or set out as part of a relish tray or charcuterie board, where the curls and flower buds earn their keep.
The leftover brine is worth keeping too. A splash of it brightens a vinaigrette or a bowl of slaw, and the pickled scapes themselves, finely chopped, make a quick garlicky relish for grilled meats or grain bowls. They bring the same savory garlic note to a dish that fresh scapes would, with a pickled tang on top.
Yield Notes
Each brine variation is scaled to pickle about 1/2 pound of garlic scapes, which is roughly 2 to 3 farmers market bunches and yields about 2 pints. The exact jar count depends on how tightly you pack the scapes and which shape you chose, since short segments fill a jar more densely than coiled curls or airy flower buds.
To scale up or down, pack your jars with the raw prepared scapes first, then you will know how much brine to mix. Plan on a little more than 1 cup of brine per well-packed pint. If you come up short on scapes, fill the gap with whole garlic cloves or sliced onion rather than leaving the jar half empty, keeping at least 50 percent of the liquid as the tested brine.
A few questions come up again and again with this recipe, especially around the spices and the salt, so here are the answers in one place.
Pickled Garlic Scapes FAQs
The dry spices, which means the mustard seed, dill seed, peppercorns, red pepper flakes, celery seed, and turmeric, are measured into each jar, not boiled into the brine. Only the water, vinegar, salt, and sugar go into the pot to make the brine. For example, in the spicy variation you add 1 teaspoon of peppercorns to each pint jar, which comes to about 2 teaspoons for a 2-pint batch, and you do not add any peppercorns to the brine itself.
Use pickling or canning salt in all four variations, not just the spicy one. Plain pickling salt with no iodine and no anti-caking agents keeps the brine clear and the scapes from darkening. Since salt is for flavor and crispness rather than safety in a vinegar pickle, you can reduce it to taste without any concern.
No. The vinegar at 5 percent acidity is what makes these scapes safe to can, so the brine ratio cannot be cut and the vinegar cannot be diluted with extra water. If you are short on brine for the last jar, top it off with more vinegar rather than water. You can reduce the salt for flavor, but the acid stays exactly as written.
You can skip the canner entirely and keep these as refrigerator pickles. Let the filled jars cool, then store them in the fridge, where they will keep for at least a month. Give them at least 2 days for the spices to infuse before eating. Water bath processing is only needed if you want shelf-stable jars for the pantry.
Properly processed and sealed jars hold their quality for about 12 months in a cool, dark place, and stay safe to eat as long as the seal holds. Wait at least 2 weeks before opening a jar so the flavor has time to develop, and refrigerate after opening.
For more ideas in the same spirit, here are other vegetable pickles worth a spot in the canner.
Vegetable Pickling
If you tried these Pickled Garlic Scapes, or any other recipe on Creative Canning, leave a ⭐ star rating and let me know what you think in the 📝 comments below!
And make sure you stay in touch with me by following on social media!
Pickled Garlic Scapes
Equipment
- Canning Jars, Lids and Bands
Ingredients
- 1/2 lb garlic scapes, about 2 to 3 farmers market bunches
Basic Pickled Garlic Scapes
- 1 1/4 cups water
- 1 1/4 cups vinegar, white or cider, 5% acidity
- 1 1/2 Tbsp pickling salt
- 1 Tbsp sugar
- 1 tsp mustard seeds, 1/2 tsp per pint jar
- 1 tsp black peppercorns, 1/2 tsp per pint jar
Dill Pickled Garlic Scapes
- 1 1/4 cups water
- 1 1/4 cups vinegar, white or cider, 5% acidity
- 1 1/2 Tbsp pickling salt
- 1 tsp dill seeds, 1/2 tsp per pint jar
- 1 tsp black peppercorns, 1/2 tsp per pint jar
- A few fresh dill fronds, optional
Bread and Butter Pickled Garlic Scapes
- 2 cups white vinegar, 5% acidity
- 1 cup granulated sugar
- 1 Tbsp pickling salt
- 1 Tbsp mustard seeds, 1/2 Tbsp per pint jar
- 1/2 tsp celery seed, 1/4 tsp per pint jar
- 1/2 tsp ground turmeric, 1/4 tsp per pint jar
Spicy Pickled Garlic Scapes
- 1 1/4 cups water
- 1 1/4 cups vinegar, white or cider, 5% acidity
- 1 1/2 Tbsp pickling salt
- 1 Tbsp sugar
- 2 to 4 tsp red pepper flakes, 1 to 2 tsp per pint jar
- 2 tsp black peppercorns, 1 tsp per pint jar
Instructions
- Choose one brine variation from below. Each makes enough to fill about 2 pints, which pickles roughly 1/2 pound of scapes (about 1/4 pound per pint jar).
- Wash the scapes and cut them however you like: short segments, curls, long straight sticks, or separated flower buds. Pack them raw into the jars, leaving 1/2 inch headspace.
- Add the dry spices for your chosen variation directly to each jar, along with a fresh dill frond if making the dill version.
- If canning, prepare a water bath canner now.
- Combine only the liquid brine ingredients in a saucepan: the water, vinegar, salt, and sugar. Bring to a boil, stirring to dissolve the salt and sugar.
- Pour the boiling brine over the scapes and spices in each jar, keeping 1/2 inch headspace and the scapes submerged. Remove air bubbles, wipe the rims, and set lids fingertip tight.
- For refrigerator pickles, let the jars cool and store in the fridge. Give them at least 2 days for the spices to infuse; they keep at least a month.
- For canning, process in a boiling water bath, adjusting for altitude (see notes). Let jars rest 5 minutes, then cool undisturbed 12 to 24 hours and check seals. Refrigerate any unsealed jars. Sealed jars keep their best quality about 12 months.
Notes
Nutrition
Nutrition information is automatically calculated, so should only be used as an approximation.
And if you are after more ways to fill the canner with vinegar and spice, browse the rest of the pickling recipes.
Pickling
Find the perfect recipe
Searching for something else? Enter keywords to find the perfect recipe!

And can I do these in quarts instead of pints?
Yes, you can use quarts. Quarts just add 5 minutes to the pint canning time.
Do the jars have to be hot and sterile when you start, I assume?
Hot, yes, that can be helpful, but sterile, no. Anything that’s canned 10 minutes or longer doesn’t require sterilized jars. Hot or warm jars is helpful to prevent thermal shock to the jars, but not strictly required if they’re at least room temperature and on a towel not in contact with a cold counter.
Is the salt in every variation canning salt, or is it only used in the ‘Spicy Pickled Garlic Scapes’ variation?
Yes, the salt is in every variation.
I made a few test jars to see if my family would like them, they are a win!
WHICH variety of garlic do you grow that you get those HUGE cloves?!!!
We got our seed garlic from Fedco originally years ago, and we keep the biggest bulbs every year for seed. The variety is “German Extra Hardy”.
Here’s how they describe it: “Perhaps the most stalwart grower among the Porcelains, with big bulbs typically yielding four huge cloves; range is 3–5. White outer skin, rusty reddish-tan clove skins. Hardy plants, hearty flavor, excellent storage; a proven winner for both market growers and home gardeners. Also known as German White.”
Completely addictive and highly in demand by friends and family
So glad to hear it!
I liked your garlic scape pickles recipie because using weight of scapes.
Do you have garlic scape salt recipie?
I picked lots of scapes from my garden.
Straight parts used pickled garlic scapes with your recipie and curly part chopped and drid.
I like to make garlic scape salt.
Let me know your recipie.
I don’t personally have a garlic scape salt recipe, but I did a bit of research for you and this recipe looks good to me: https://sprigandspoon.com/garlic-scape-salt/
Hope this helps!
Dear Ashley, I am planning to can the spicy pickled garlic scapes. I am confused with the peppercorns. Do you add 4 tsp. while making the brine plus 1 tsp per jar? Can’t wait to try them. Thank you, Myra
All the dry spices are added to the jar, and then the jars are packed with scapes and the hot brine is poured over the top. Enjoy!
Can I leave the sugar out of the variations that include it without issue? I assume it’s for sweetness and not for preservation? The. Vinegar does the preserving?
Yes, in this recipe it’s the vinegar doing the preserving. You can reduce or eliminate any of the other ingredients (spices, sugar, salt, etc), but just make sure you don’t reduce the vinegar.