This post may contain affiliate links. Please see our disclosure policy.
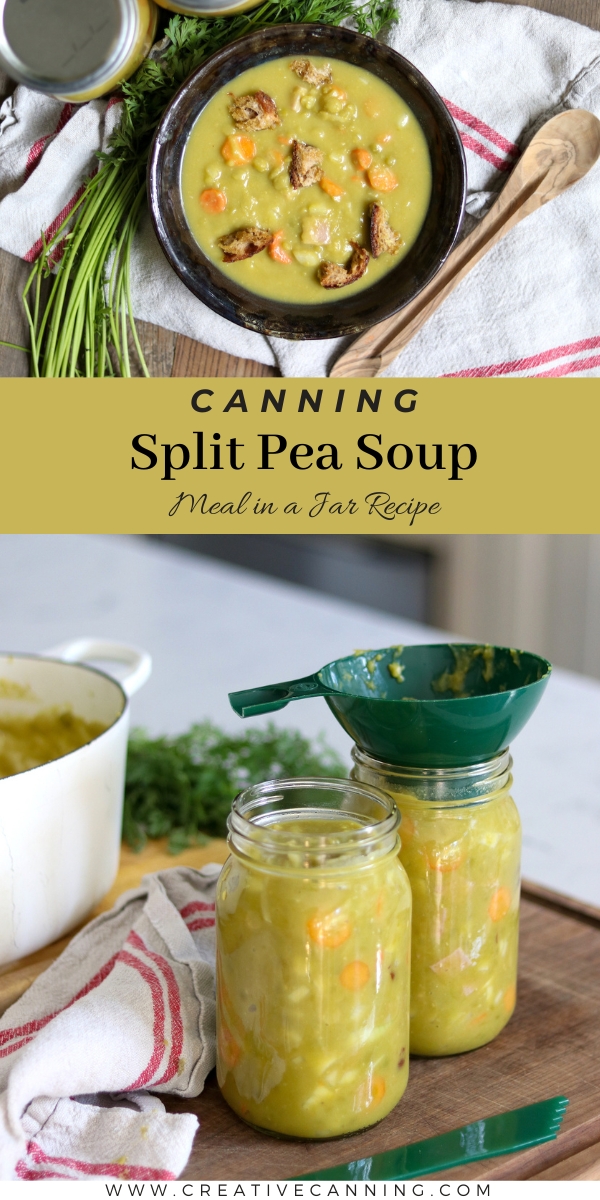
Canning split pea soup puts a hearty, home-cooked comfort meal right on your pantry shelf, so a warm bowl is ready to heat and eat any night you want one.
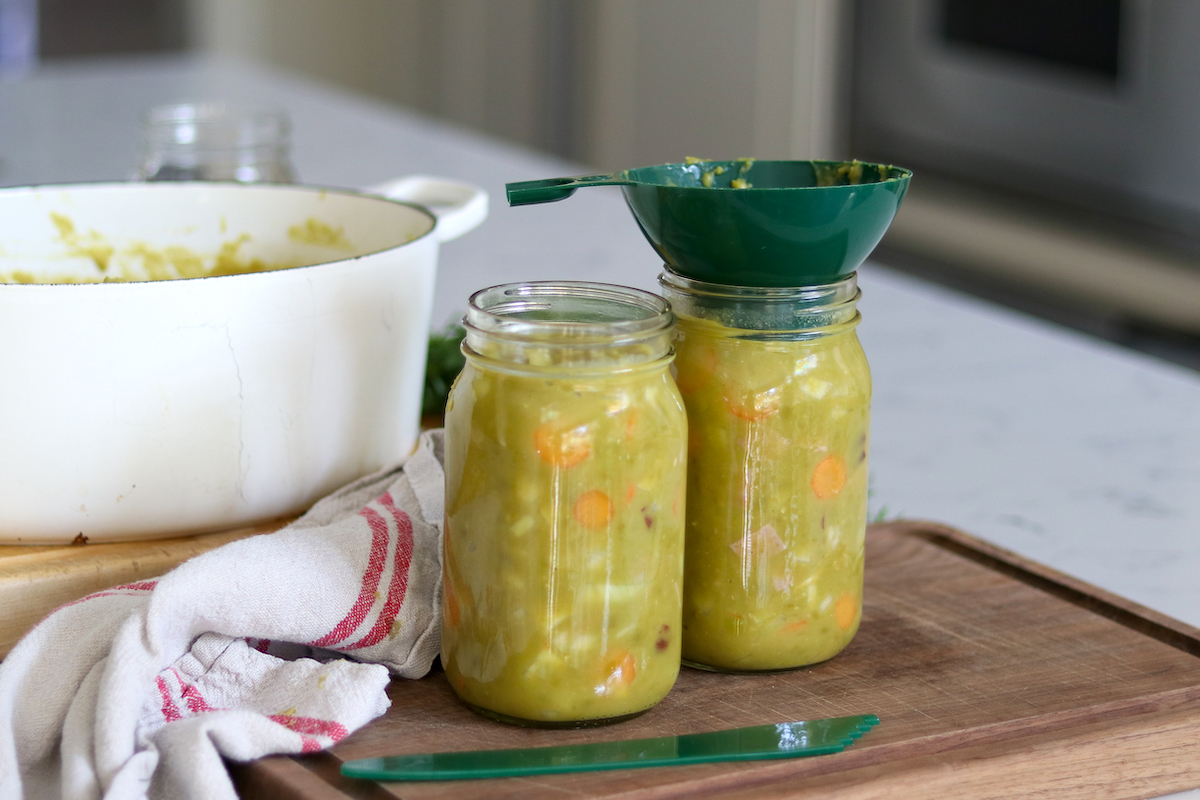
Table of Contents
- Notes from My Kitchen
- Quick Look at the Recipe
- Ingredients for Split Pea Soup
- Split Pea Soup Variations
- Do You Have to Soak Split Peas?
- How to Make Split Pea Soup
- Pressure Canning Split Pea Soup
- Altitude Adjustments
- Tips for Success
- Serving Home Canned Split Pea Soup
- Yield Notes
- Split Pea Soup FAQs
- Soup Canning Recipes
- Canning Split Pea Soup Recipe
- Meal in a Jar Canning Recipes
This recipe has been reviewed for safety and accuracy by a Master Food Preserver certified through the University of Cornell Cooperative Extension.
This split pea soup comes from the Ball Blue Book of Canning, where it is also known as Habitant Soup (the name Bernardin uses for it outside the US). It is a tested recipe, and since split pea soup is dense and low in acid, it is processed in a pressure canner the way every soup like this has to be. There is also a slightly different version in Angi Schneider’s Pressure Canning for Beginners and Beyond that leans on different seasonings, which is allowed since you can adjust the spices in a tested recipe.
The ham is optional here, so if you use vegetable broth and leave it out, this becomes a vegetarian soup canning recipe. Either way, the appeal is the same. Split pea soup takes more than an hour on the stove from scratch, but if you put up a batch earlier in the season, it is ready in the minutes it takes to warm a jar.
Notes from My Kitchen

I make this most often in the dead of a Vermont winter, the kind of night when I come in chilled to the bone after shoveling snow and want something warm in my hands within minutes. Having a few jars on the shelf means I am not waiting an hour for dried peas to soften. I leave mine a little chunky rather than blending it completely smooth, but that part is up to you.
A single batch from one pound of peas makes about 5 pints, which is a tidy amount, though I usually multiply it to fill the canner while I am at it. I salt mine on the light side and let everyone add more at the table, since the recipe gives no set amount and tastes vary a lot from one person to the next. Open a jar, thin it with a little water as it warms, and dinner is basically done.
Quick Look at the Recipe
- Recipe Name: Canning Split Pea Soup
- Recipe Type: Soup Canning Recipe (full-packed)
- Canning Method: Pressure Canning
- Prep Time: About 20 minutes
- Cook Time: About 1 hour 30 minutes
- Canning Time: Pints 75 minutes, Quarts 90 minutes
- Yield: About 5 pints or 2 quarts
- Jar Sizes: Pints or quarts
- Headspace: 1 inch
- Ingredients Overview: Split peas, water or broth, carrots, onion, optional ham, bay leaf, allspice, salt and pepper
- Safe Canning Recipe Source: Ball Blue Book of Canning
- Difficulty: Easy
- Similar Recipes: Split pea soup is a hearty, full-packed soup like beef stew and classic vegetable soup. If you cook a lot of legumes, work through the rest of the bean canning recipes, or keep it meatless with the vegetarian soup canning recipes.
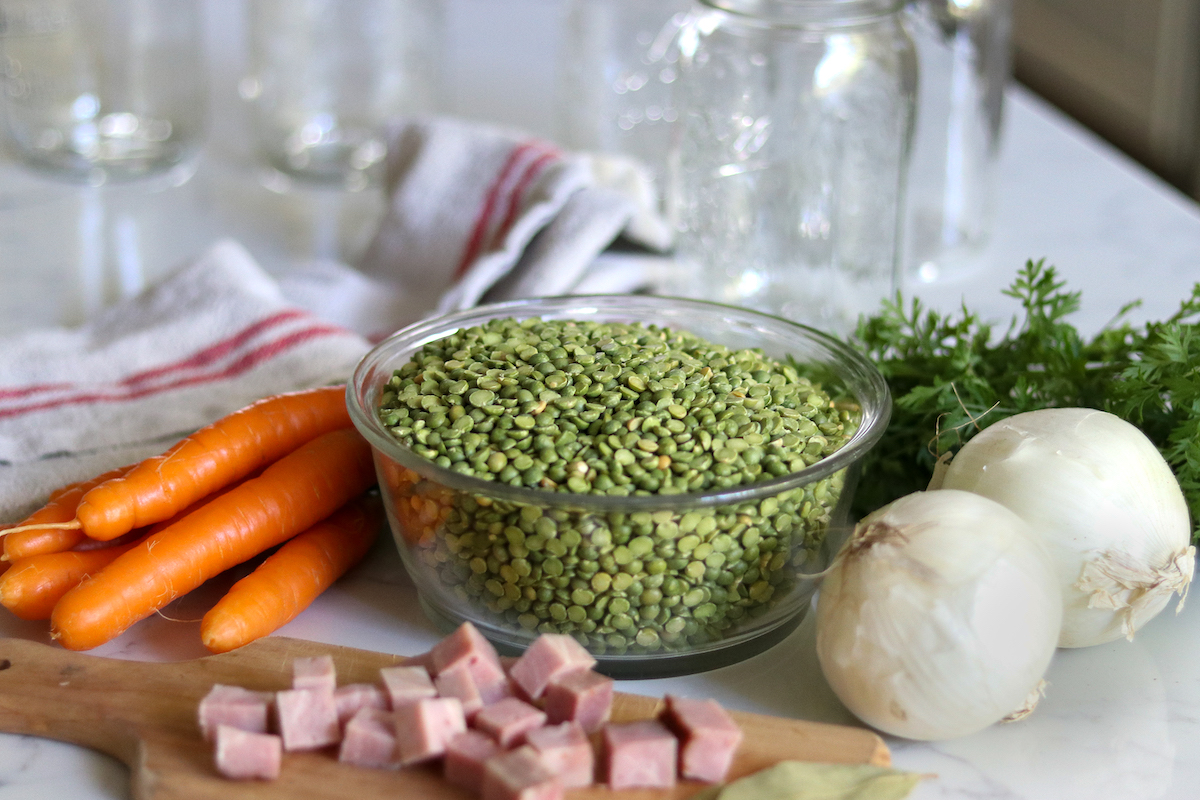
Ingredients for Split Pea Soup
This is a simple soup, mostly peas with a little carrot and onion for flavor and texture. The Ball recipe is sized to a single pound of split peas, since that is how they come from the store in 16-ounce packages, and it makes about 5 pints or 2 quarts. You will find the exact amounts in the recipe card below, but here is what each part does:
- Split peas: The body of the soup. Green or yellow both work. They do not need soaking, just a rinse and a quick pick-over, and they cook down dense, which is why the finished soup needs thinning.
- Water or broth: The peas cook in two quarts of liquid. Broth adds more flavor than water, and vegetable broth keeps the soup meatless.
- Carrots: For a little sweetness and texture. Peel them and slice them about a quarter-inch thick, the same as you would for canning carrots on their own.
- Onion: Peeled and chopped, for savory depth.
- Ham (optional): Diced cooked ham adds the classic smoky note. Leave it out and use vegetable broth for a vegetarian version.
- Bay leaf and allspice: The traditional seasonings. Both are flexible, and the bay leaf comes out before canning.
- Salt and pepper: To taste. There is no set amount, since salt is for flavor here and not for preservation.
The seasonings are where you have room to make this your own. You can skip the allspice or double it, swap in sage the way Angi Schneider does, or lean on thyme, garlic powder, and a splash of Worcestershire the way I tend to. Small amounts of salty or acidic condiments like Worcestershire, cider vinegar, or lemon juice are all fine to add, and a little acidity actually brings out the flavor of the peas.
Since the soup is fully cooked before it goes into jars, taste it and adjust the salt before you fill them. People land anywhere from about two teaspoons to two tablespoons of salt for a batch this size, so use your own taste as the guide. What you should not do is change the vegetable ratios. You can leave out the carrots, onion, or ham, since split peas are fine to can on their own, but do not add more vegetables than the recipe calls for.
Split Pea Soup Variations
This is a tested recipe from the Ball Blue Book, and the processing time and pressure are what make it safe. Split pea soup is low acid, so it has to be pressure canned and cannot be water bath canned or have its time shortened. Split peas are also dense, and the one pound of peas to two quarts of liquid ratio was tested together with the 75 and 90 minute times to handle that density, so keep that ratio as written and do not pack in extra peas.
Because the density matters, keep the soup thin enough to pour and ladle freely, adding water as it cooks if it starts to thicken. The Ball recipe lets you puree the peas smooth if you like, but a pureed soup still needs to stay pourable, not pasty, and it will thicken further in the jar. Adjust seasonings freely, but hold off on anything that thickens the pot, like flour or cornstarch, and stir in dairy at serving rather than before canning.
Since this is a thick legume soup, there are no guidelines for changes beyond seasonings. They’re just not tested. The USDA guidance for building your own soup canning recipe relies on soups with broth, rather than thick split pea types soups and there’s no tested ways to modify this recipe beyond removing the meat or changing the spices.
Do You Have to Soak Split Peas?
Split peas do not need soaking, either for the soup or for canning. They rehydrate well on their own during the hour they simmer, and because the soup is fully cooked before it goes into the jars, you do not have to worry about the peas swelling and expanding once they are sealed.
What I do suggest, and what the recipe calls for, is a good rinse before cooking. Measure the peas, give them a rinse in a colander, and pick them over to remove any discolored peas or bits of debris while you are at it.
How to Make Split Pea Soup
The soup comes together in two stages, with the peas cooking on their own first and the vegetables going in afterward. The whole thing is fully cooked before it ever reaches a jar, since this is a hot pack recipe.
Plan on about 90 minutes of simmering between the two stages. Toward the end of the first hour is a good time to start heating your pressure canner so it is ready when the soup is.
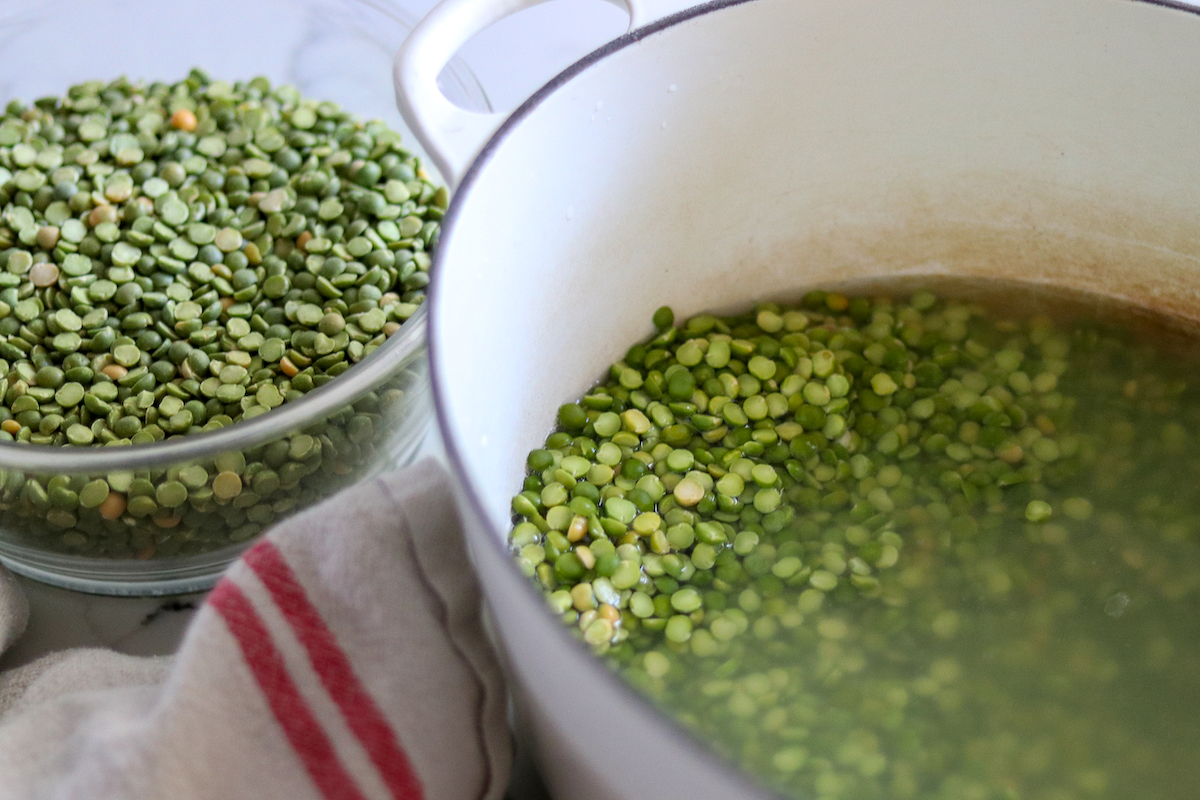
Cook the Split Peas
Rinse and pick over the split peas, then combine them with two quarts of water or broth in a heavy-bottomed pot. Bring it to a boil, then turn the heat to low and simmer gently, covered, for about an hour, until the peas are completely soft. Keep the heat low and add water as needed so the soup does not get too thick or scorch on the bottom.
Once the peas are cooked, you can leave the soup as is for a chunkier texture or puree it with an immersion blender for something smoother. If you puree it, keep it thin enough to pour easily, since a soup that is too thick will not heat through safely in the canner.
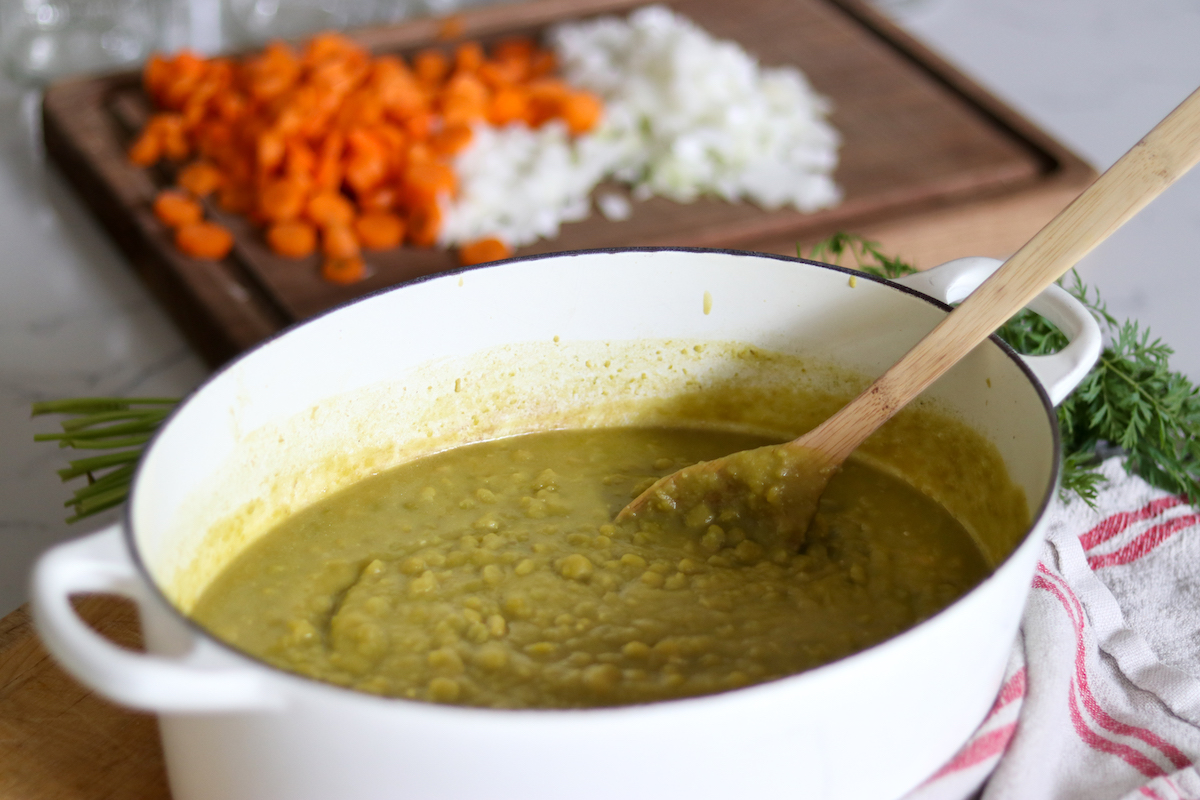
Add the Vegetables and Pack the Jars
Peel and slice the carrots, and peel and chop the onion, then add them to the pot along with the ham if you are using it and the bay leaf and allspice. Simmer for another 30 minutes until the vegetables are fully cooked, still adding a little water as needed to keep the soup pourable. Taste and adjust the salt and seasonings, then pull out the bay leaf.
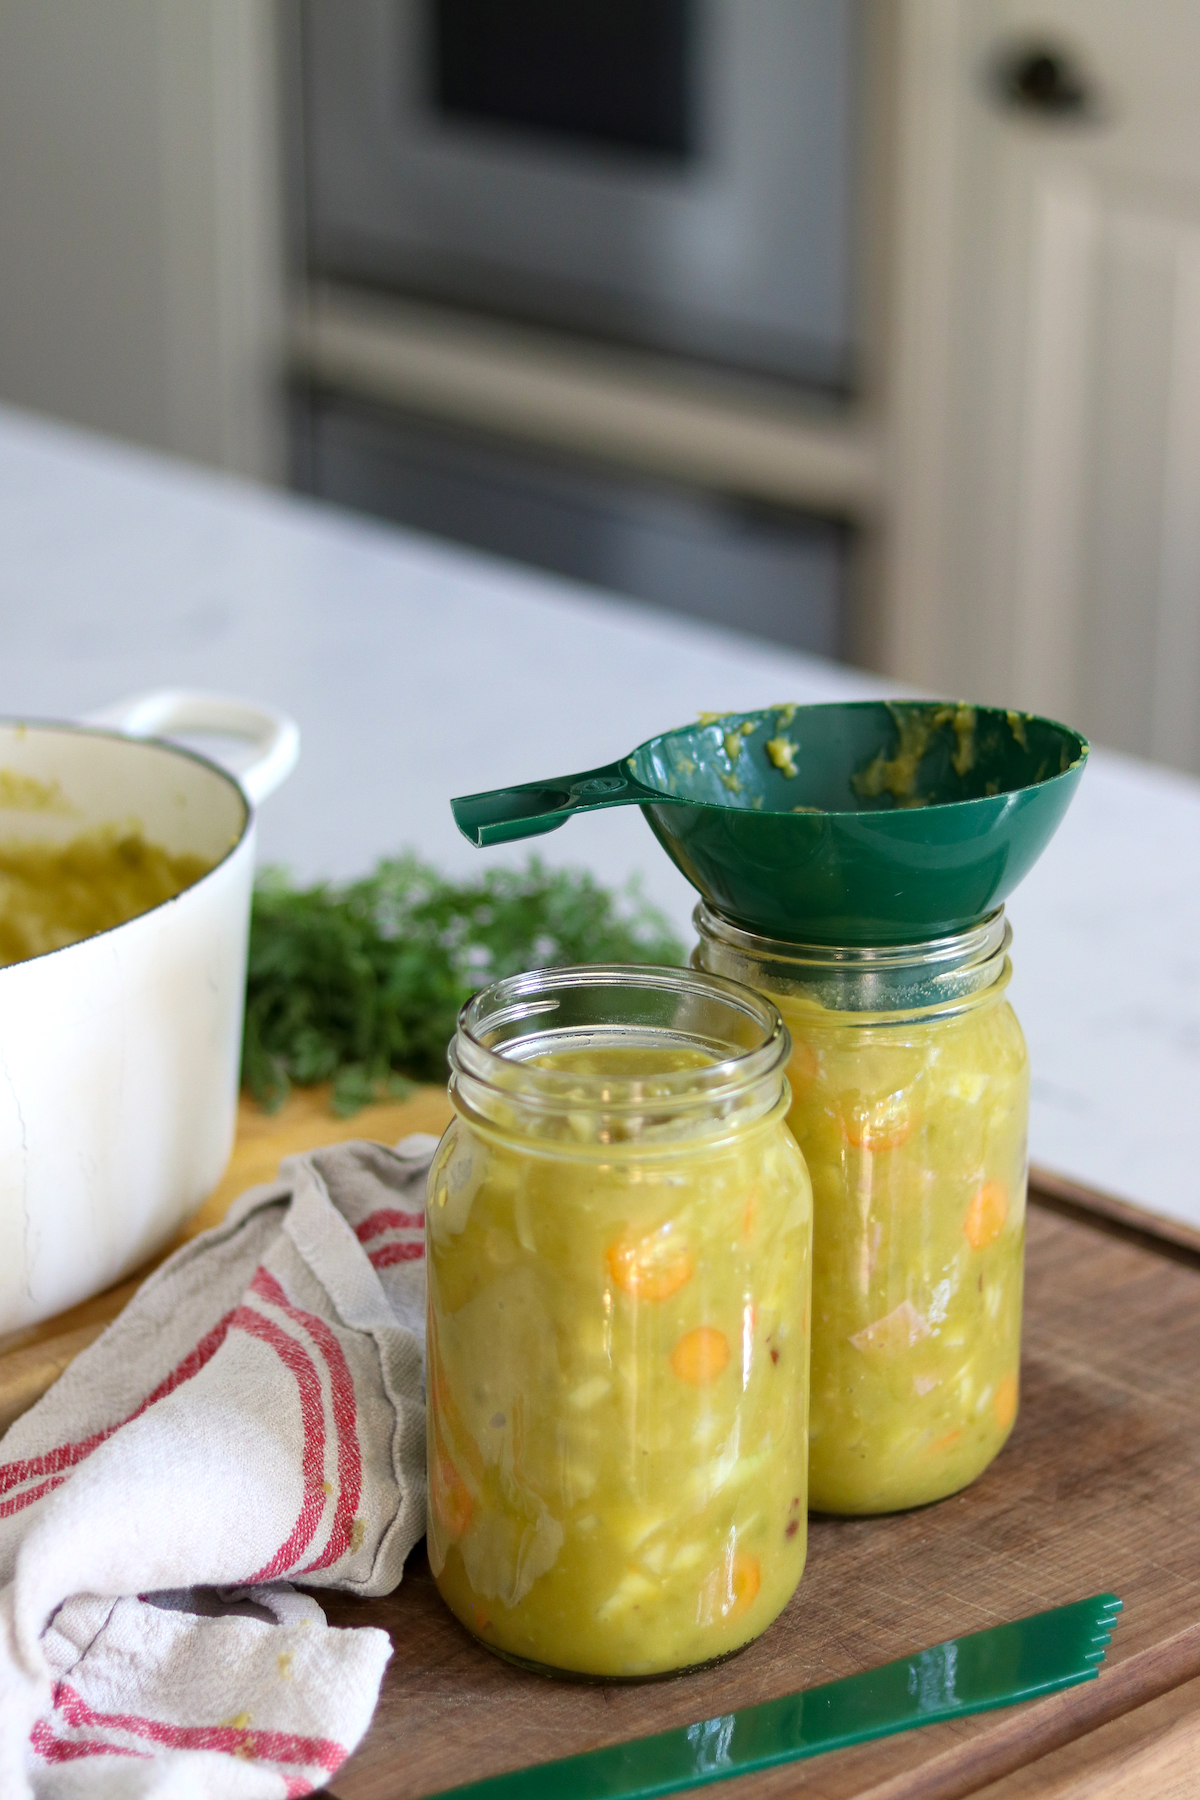
Ladle the hot soup into your prepared jars, leaving one inch of headspace. Remove air bubbles, wipe the rims clean, and set the lids and bands on fingertip tight.
Pressure Canning Split Pea Soup
A single batch is sized small, so if you want to fill the canner you can double, triple, or quadruple it, limited only by the size of your pot and your canner. Either way, pressure canning has a minimum of 2 quarts or 4 pints, so plan to run a reasonably full load.
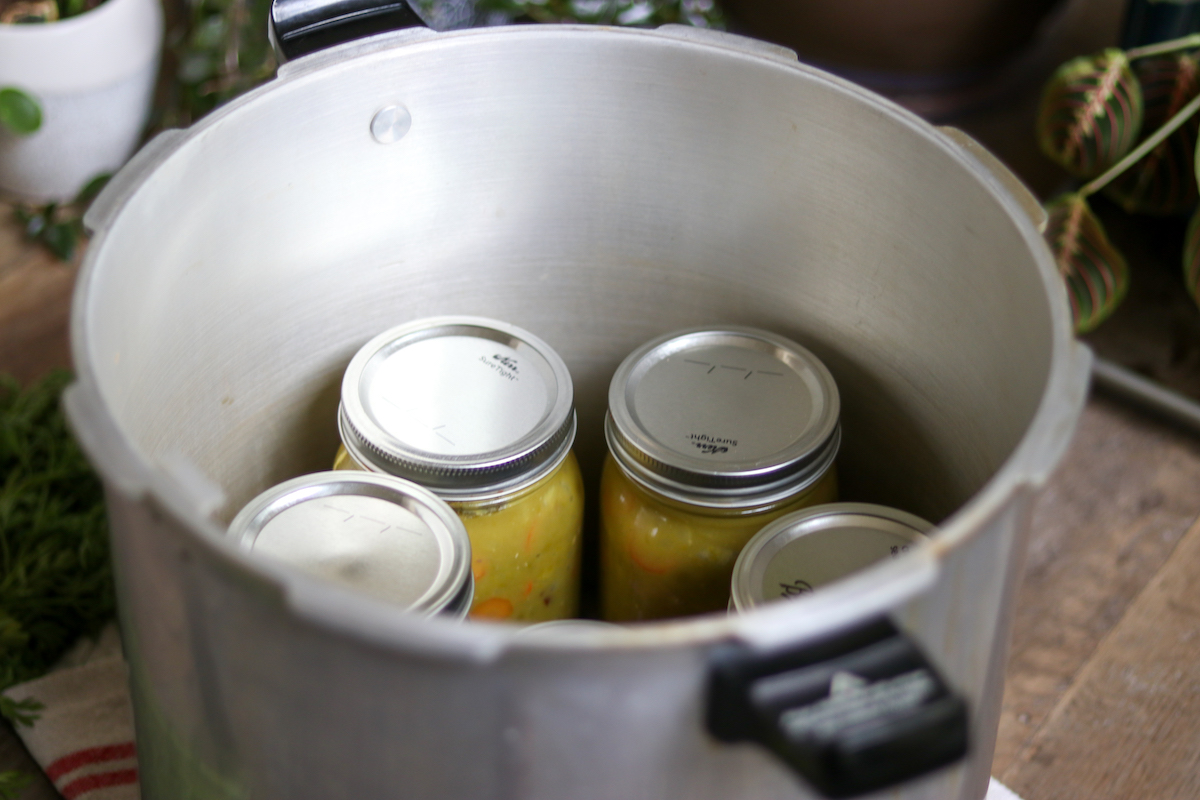
To can, prepare your pressure canner, jars, and lids. Load the filled jars into the canner and add two inches of simmering water. Lock the lid into place, turn the heat to medium-high, and vent steam for a full 10 minutes before adding the gauge or weight. Bring the canner up to 10 pounds pressure for a weighted gauge or 11 pounds for a dial gauge, adjusting for your altitude as shown below.
Process pint jars for 75 minutes or quart jars for 90 minutes. When the time is up, turn off the heat and let the canner return to zero pressure on its own, with no forced cooling. Remove the jars, let them cool undisturbed for 12 hours, then check the seals, label, and store.
Altitude Adjustments
With pressure canning, the processing times stay the same at higher altitudes, but the pressures change. Here are the altitude adjustments for pressure canning split pea soup:
For dial gauge pressure canners:
- 0 to 2,000 feet: 11 lbs pressure
- 2,001 to 4,000 feet: 12 lbs pressure
- 4,001 to 6,000 feet: 13 lbs pressure
- 6,001 to 8,000 feet: 14 lbs pressure
For weighted gauge pressure canners:
- 0 to 1,000 feet: 10 lbs pressure
- Above 1,000 feet: 15 lbs pressure
Tips for Success
Stir the soup as it cooks, especially during the first hour. Split peas settle and scorch on the bottom of the pot if you leave them alone, and a heavy-bottomed pot plus the occasional stir keeps that from happening.
Keep an eye on the consistency, since this is the part that matters most for safe canning. Aim for a soup you could ladle and pour without effort, a little thinner than you would want to eat, because it tightens up in the jar during processing. You can always thin it again when you reheat it.
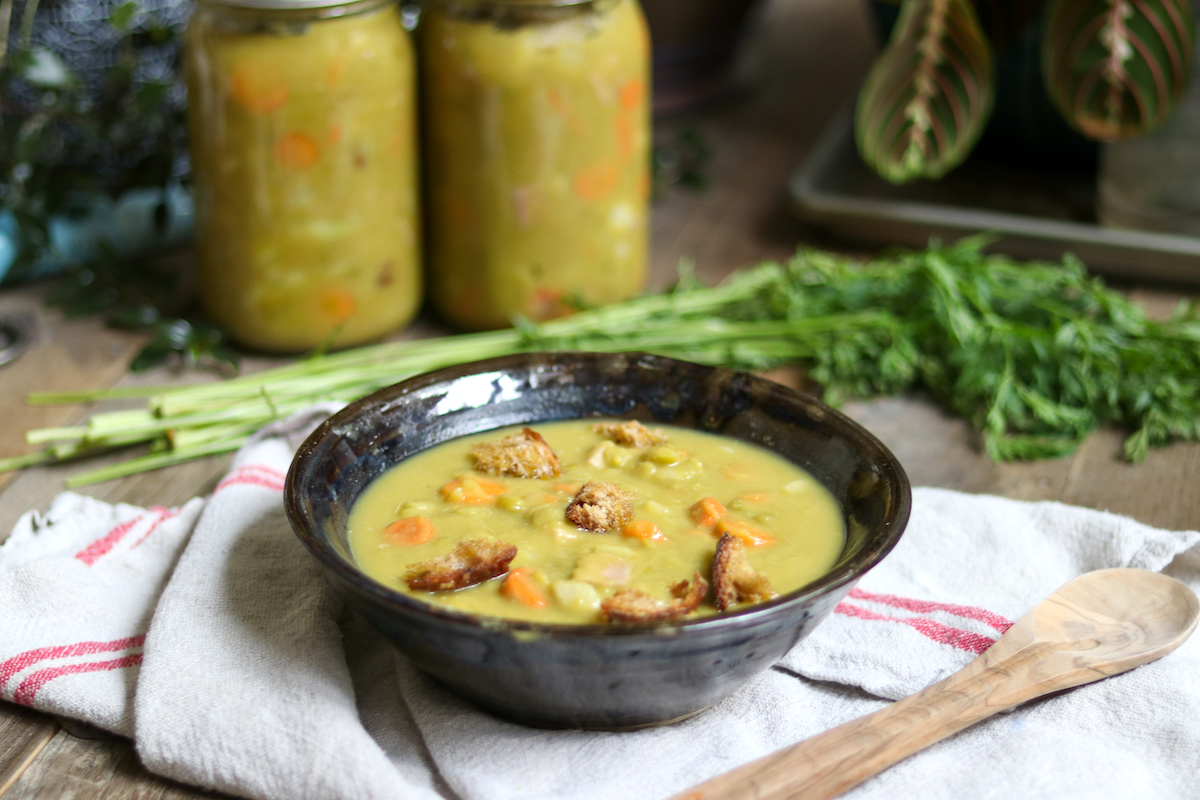
Serving Home Canned Split Pea Soup
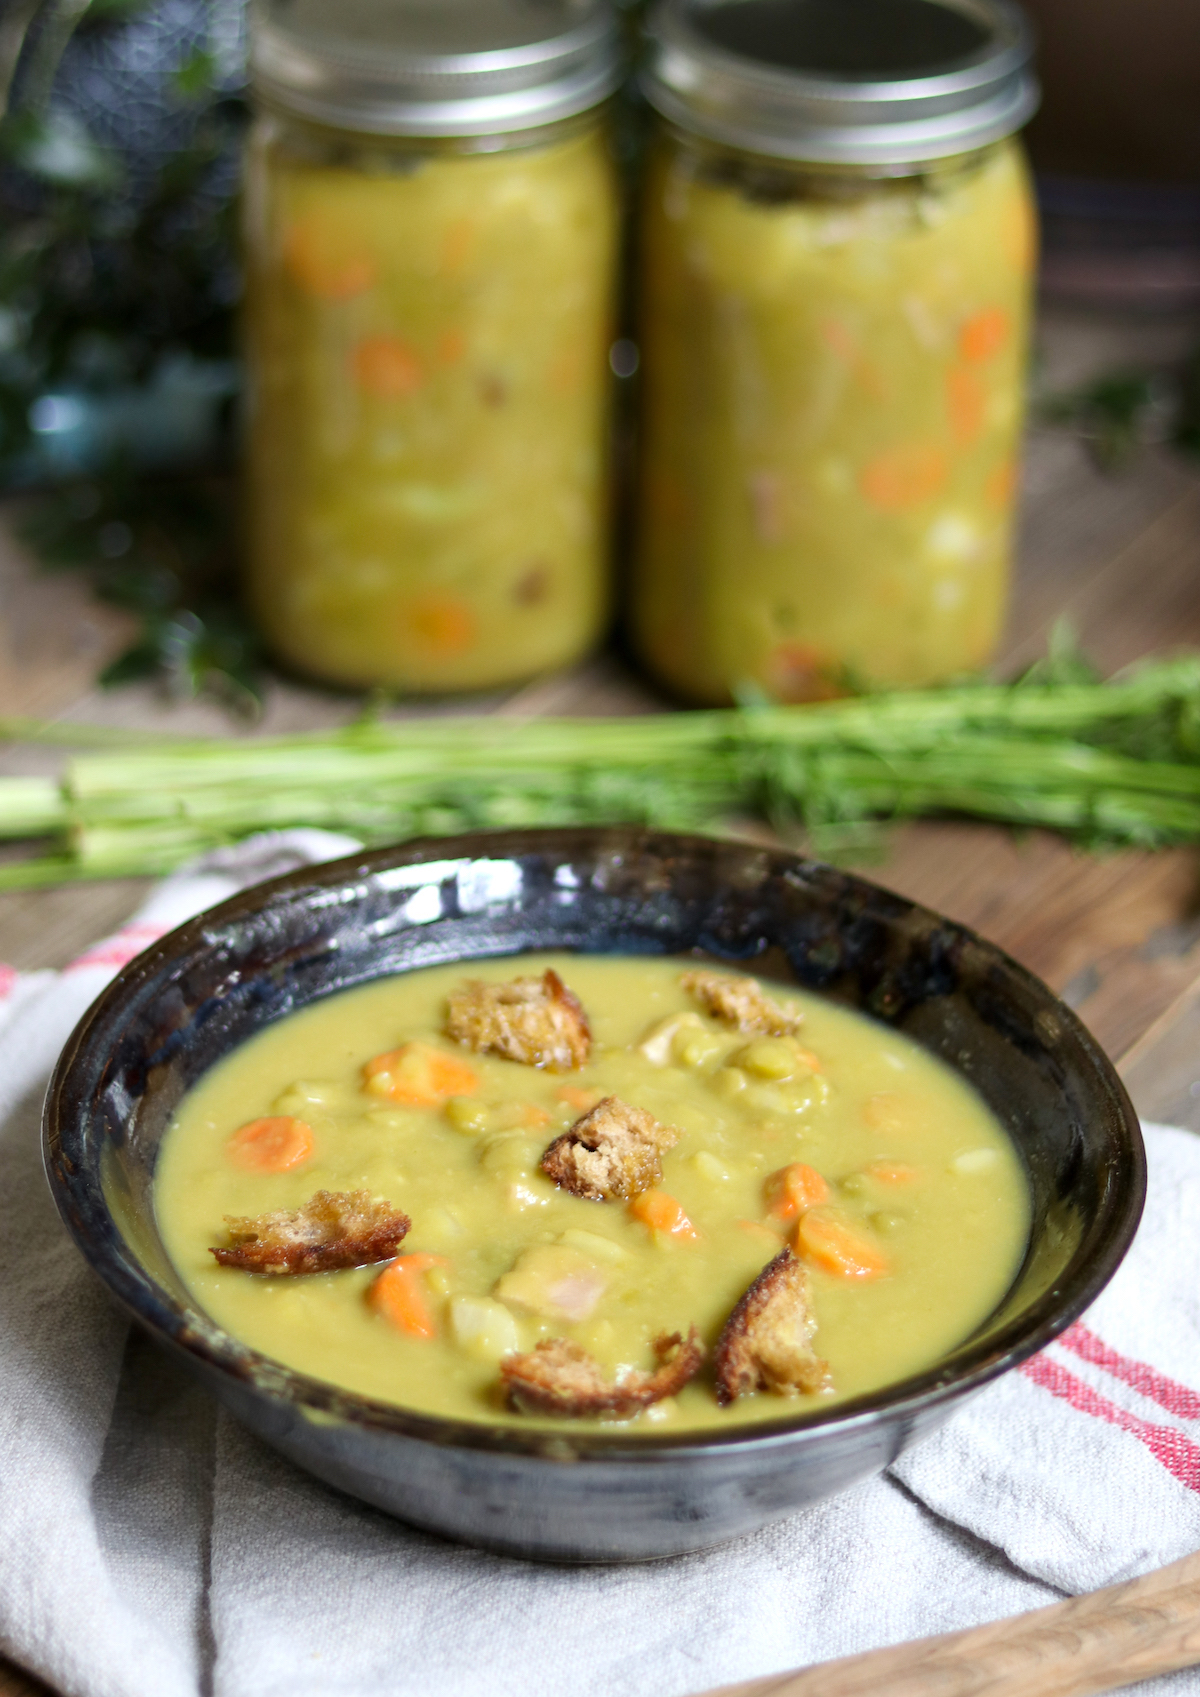
For the most part this is a heat-and-eat soup. Pour a jar into a pot, warm it through, and thin it with a little water or broth if it has set up thick in storage. Where some soups like home-canned chicken soup get served over rice or noodles, split pea soup does well on its own.
I like it with a well-buttered slice of whole grain bread, and it is also good with a handful of toasted croutons stirred in. A little extra black pepper or a dash of vinegar at the table wakes it up if it has mellowed on the shelf.
Yield Notes
A single batch from one pound of split peas makes about 5 pints, or 2 quarts plus a bit. The exact yield shifts with how much you thin the soup, so if you are canning in quarts, thin it a little more to round out a full 3 quarts.
The recipe scales up cleanly, so double, triple, or quadruple it to fill a larger canner, keeping the one pound of peas to two quarts of liquid ratio steady as you go. Whatever the batch size, keep the pressure canning minimum of 2 quarts or 4 pints in mind, and stir as it cooks so a bigger pot does not scorch.
Before you head to the recipe card, here are a few questions that come up often with canned split pea soup.
Split Pea Soup FAQs
No. Split Pea Soup contains low-acid ingredients, so it is not safe for water bath canning. You need to use a pressure canner to make safe, shelf-stable jars.
Yes. The ham is optional. Use vegetable broth in place of water or stock and leave the ham out, and you have a vegetarian split pea soup. Everything else about the recipe stays the same.
Yes. This recipe allows pureeing the peas for a smooth soup. Keep it thin enough to pour and ladle freely rather than pasty, since a soup that is too thick will not heat through safely in the canner, and remember it thickens further in the jar.
Properly processed and sealed jars keep for about 12 to 18 months in a cool, dark place, though they stay safe longer. Refrigerate after opening and use within 3 to 4 days.
There are so many soups worth putting up for the pantry. Try a few more of these soup canning recipes:
Soup Canning Recipes
If you tried this Split Pea Soup recipe, or any other recipe on Creative Canning, leave a ⭐ star rating and let me know what you think in the 📝 comments below!
And make sure you stay in touch with me by following on social media!
Canning Split Pea Soup
Equipment
- Canning Jars, Lids and Bands
Ingredients
- 1 lb split peas, dry
- 2 qt water or broth
- 1 1/2 cup carrots, sliced
- 1 cup onion, chopped
- 1 cup cooked ham, diced (optional)
- 1 whole bay leaf
- 1/4 tsp allspice
- 1/2 tsp black pepper
- 2 tsp salt, or adjust to taste
Instructions
- Rinse the split peas and pick out any debris. Combine them with the water or broth in a heavy-bottomed pot. Bring to a boil, then reduce to a low simmer, covered, for about 1 hour until the peas are soft. Add water as needed to keep it from getting too thick or scorching.
- (Optional) For a smooth soup, puree with an immersion blender or in a blender, then return it to the pot. Keep it thin enough to pour.
- Peel and slice the carrots, and peel and chop the onion. Add them to the pot along with the ham, bay leaf, and allspice.
- Prepare and preheat your pressure canner for hot pack canning.
- Simmer the soup for 30 more minutes until the vegetables are cooked, adding water as needed to keep it pourable.
- Adjust the seasonings and salt to taste, then remove the bay leaf.
- Ladle the hot soup into prepared jars, leaving 1 inch of headspace. Remove air bubbles, wipe the rims, and apply lids and bands to fingertip tight.
- Load the jars into the canner, lock the lid, and vent steam for 10 minutes. Bring to 10 lbs pressure for a weighted gauge canner or 11 lbs for a dial gauge, adjusting for altitude.
- Process pints for 75 minutes or quarts for 90 minutes.
- Turn off the heat and let the canner return to zero pressure naturally. Cool the jars 12 hours, then check the seals before storing.
Notes
- 0 to 2,000 feet in elevation – 11 lbs pressure
- 2,001 to 4,000 feet in elevation – 12 lbs pressure
- 4,001 to 6,000 feet in elevation – 13 lbs pressure
- 6,001 to 8,000 feet in elevation – 14 lbs pressure
- 0 to 1,000 feet in elevation – 10 lbs pressure
- Above 1,000 feet – 15 lbs pressure
Nutrition
Nutrition information is automatically calculated, so should only be used as an approximation.
Looking to keep your pressure canner busy? Browse a few more meal in a jar canning recipes:
Meal in a Jar Canning Recipes

Find the perfect recipe
Searching for something else? Enter keywords to find the perfect recipe!

Absolutely LOVE this recipe! Thank you!
Wonderful!
Made the 2x recipe. I did add 2C water to have a bit thinner, and also immersion blended.
Yield was 10 pints plus a small bowl for the cook 🙂
Spices for the double recipe that tasted good were 2tsp canning salt, 1/4tsp black pepper and 1/8tsp cayenne pepper. It didn’t make it spicy, just a very subtle hint of flavor. I thought the salt was just right – not too much, not too little.
If I did it again, I’d probably bump up the ham a little.
This is so good! I have canned this several times and reach for it often on the shelves.
So glad you like it!
Turned out GREAT!!!!!
Lovely, so glad you enjoyed it!
How many pint jars?
This recipe makes 5 pints of very thick soup. You can thin it out at serving, or thin it before you can it for a higher yield.
What is the processing time if made without meat?
The process time is the same with or without meat. Split peas (and other legumes) actually have a longer canning time than meat, so that’s what’s driving the time here.
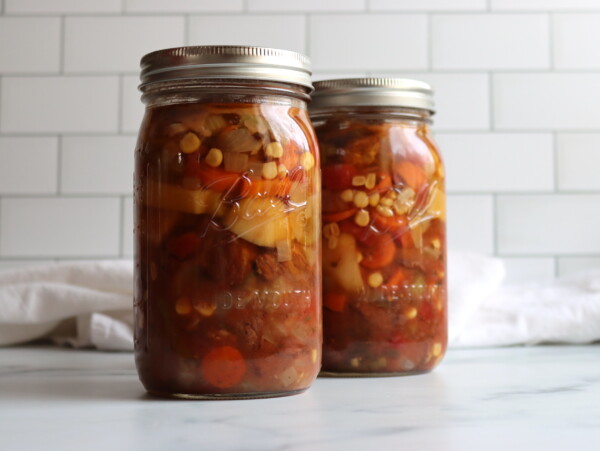
I followed the directions and canned my pea soup when it came out it was brown in the jars. Why is that?
Browning in jars is due to over pressure, meaning that the canner was hotter than is required for your elevation. Or, your particular batch of split peas was just extra sweet. It’s brown because the natural sugars in the peas caramelized. This happens a lot when canning corn, or potatoes, which also can have variable amounts of natural sugars in there too.
Perfectly fine to eat, and might even be tastier…but unfortunately not as pretty in the jar.
Could bacon be used instead of ham? If so should the bacon be fried/cooked before adding to recipe?
Yes, you could use an the same amount of bacon in place of the ham. Dice the bacon as purchased from the package and measure out a cup of it before you cook. You can fry the bacon or add it as is, up to you. Personally, I’d crisp it before adding it in, but measure it before you crisp it. Enjoy!
Hello, very informative recipe! I use one of the big pots with a rack for the boiling water method when canning. Would I still process for 75 – 90 mins? Thanks in advance.
This recipe cannot be canned in a water bath canner. Soups of any kind are low in acid, and they need a higher temperature for canning. You must use a pressure canner if canning this recipe.
I canned split pea soup. As I was taking the lid off the canner, some soup was ozzing out of the jars. I set them on the counter to cool off – all of them sealed. Now I don’t know what to think or do! They are sealed, but are they really? Are they safe??
That can happen sometimes, but so long as the jars are still sealed, they’re considered safe to store. You can read more on siphoning here: https://www.healthycanning.com/loss-of-liquid-during-home-canning/
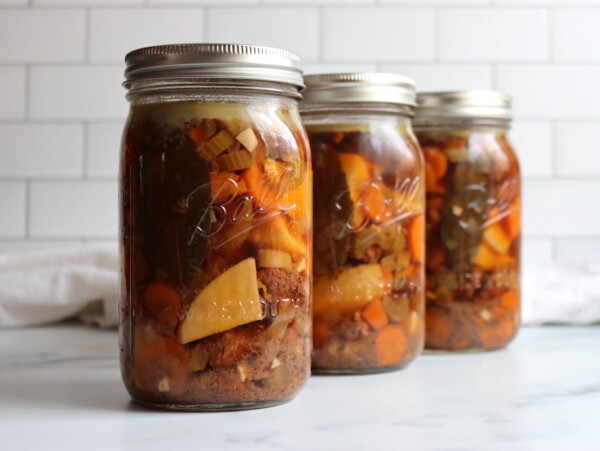
I canned the recipe times 3 for 9 qts and followed the recipe and canning time and pressure exactly. After the jars cooled the soup is a solid mass. The jars are sealed, are they safe to store and eat? PS: first time canning split pea with ham soup.
Yes, that’s normal. Depending on your split peas, the recipe can come out really thick, and that’s how it was traditionally made and canned. It’s thinned at serving, or heated and eaten as is for a really hearty meal.
I pressure canned 7 quarts of this split pea soup yesterday and after coming out of the pressure canner it is no longer green but more of a brown color, any idea why?
That can happen to veggies in the pressure canner. It’s most common with corn, potatoes and sweet potatoes, but it can happen to peas if they’re quite sweet or if the canner is run a bit hot. The sugars in the veggies are caramelizing at high temperature, so they brown. Flavor wise, it should be the same and it’s fine safety wise so long as the jars are sealed. If you’re using a weighted guage pressure canner, and you are just above the line for 10 pounds (thus have to use 15 pounds) the processing heat is higher and can cause that. Or, simply sweeter peas than average, which is hard to control in a bag of split peas from the grocery store.
Can I can pea soup without a pressure canner?
Nope. All soup recipes (or anything that has meat or vegetables) requires a pressure canner.