This post may contain affiliate links. Please see our disclosure policy.
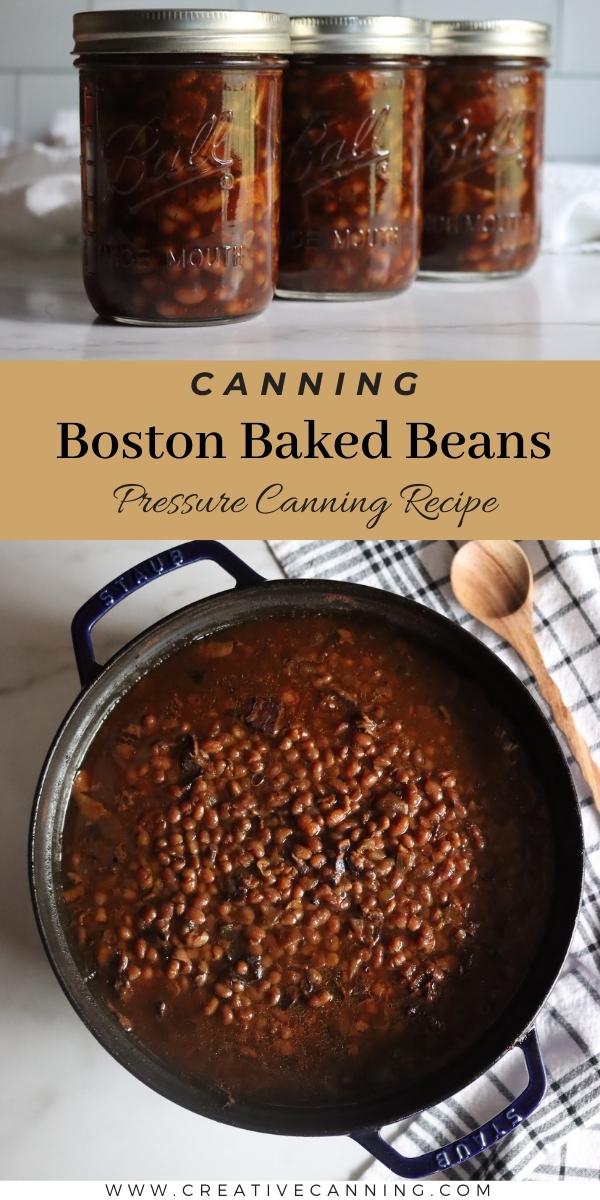
Canning baked beans at home means you always have a jar of homemade baked beans on hand for summer cookouts. This canning recipe for Boston baked beans uses a traditional molasses and brown sugar-based sauce, and the flavor comes through wonderfully in the finished jars.
Homemade Boston baked beans are a real treat, and they’re infinitely better than storebought. The problem is, the flavor develops after long slow cooking…and you just can’t make homemade baked beans for any casual weeknight meal. Beyond that, slow cooking baked beans for 4+ hours means heating up the house, which is fine in the winter months…but not ideal during the summer BBQ season, when you really crave baked beans beside ribs and potato salad.
Canning homemade baked beans are the answer, and it allows you to enjoy the incredible flavor of homemade baked beans at a moment’s notice. Do the work in the winter months, and you’ll appreciate the extra heat. Then, when summer rolls around you’ll have a quick and easy BBQ side dish on your pantry shelf, just waiting for the community potluck.
A big batch of baked beans takes no more effort than a small one, and canning stores the excess in a convenient, easy-use, shelf-stable way.
Be aware that you’ll need a pressure canner to put up baked beans, as they cannot be processed in a water bath canner or electric pressure cooker (instant pot). We use a 30-quart All American Brand Pressure canner, and it holds 14 quarts or 19 pints.
If you’re not familiar with pressure canning, please read my beginners guide to pressure canning before getting started, and also double-check that you have all the right home canning supplies on hand.
I’ve kept this recipe relatively small so you can make smaller batches (6 pints or 3 quarts) in smaller home canners, but it can be increased to fill larger canner capacities. Just be aware you’ll need a really big pot to cook multiple batches, as well as a large dutch oven (or several) to bake the beans before canning.
Ingredients for Canning Boston Baked Beans
There are lots of different regional variations for baked beans, but by far the most common is Boston baked beans. They’re simple in terms of ingredients, though the flavor is rich and complex, making it seem like a lot more goes into them.
They’re somewhat similar to the popular grocery store canned “Bush’s Baked Beans” but those are mostly flavored with sugar, while these have a more balanced taste.
This baked bean canning recipe is adapted from the Ball Blue Book Guide to Preserving, and here’s what you’ll need for a “batch” of 6 pints:
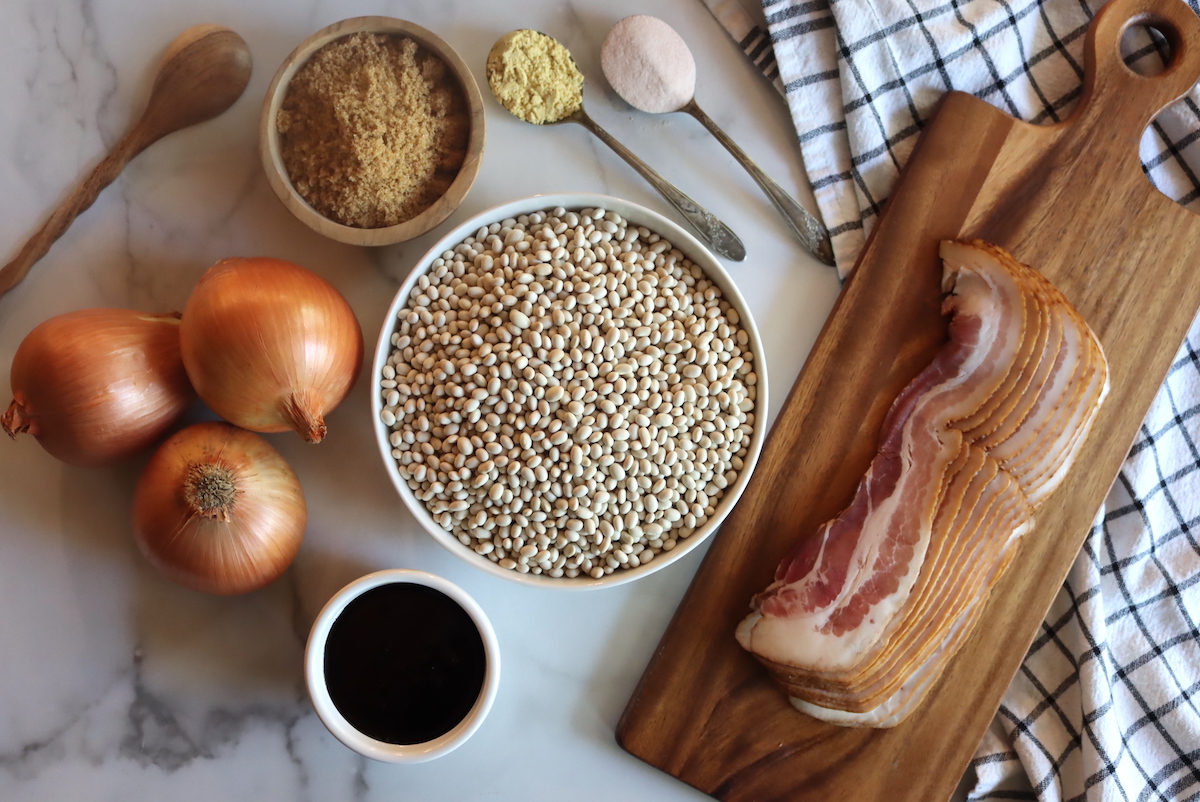
- 1 quart dried navy beans (4 cups, or about 2 lbs)
- 1/2 lb salt pork or uncured bacon, cut into 1/2 inch pieces
- 3 large onions, diced
- 2/3 cup brown sugar
- 2/3 cup molasses
- 2 tsp dry mustard powder
- 2 tsp salt
- 4 cups water (or unsalted stock/broth)
The recipe, as it stands, is just about perfect. My husband says, “She never met a recipe she didn’t want to change,” and I’ll be honest, I did try to change this recipe. I made it many times, playing around with spices, reducing salt/sugar/onions, and all the other ways you can safely change a pressure canning recipe.
My conclusion? It’s perfect the way it is.
If you’re like me, you’ll be tempted to add more spices, perhaps some garlic powder or paprika. Adding reasonable amounts of dry spices is perfectly fine for canning safety, just so long as you don’t go crazy and make a spice paste (it should still be soupy as it cooks).
I tried it…it’s less good. I’d suggest you try this recipe exactly as it is, and if you must, change the seasonings in the bowl when you serve it later. I promise, whatever you add won’t make it taste better. It’s darn perfect.
If you don’t happen to have dry mustard on hand, plain prepared yellow mustard will work too. Just use the fine ground plain stuff, like Frenches yellow mustard, not something whole grain.
For the onions, the measurements are kind of vague, at least for a canning recipe. “Large onion” could mean many things. I picked out some pretty big ones, and they were just a bit under a pound each when whole.
Once prepared, peeled, and diced, they were right around 2 to 2 1/2 cups or 300 to 350 grams each. That amounts to roughly 1 kg (2.2 pounds) of prepared onions, or roughly 6 to 7 1/2 cups of diced onion (from around 2 1/2 to 3 pounds as purchased).
Vegetarian Variation
If you’d like to make this recipe vegetarian, that’s simple enough. Just don’t add the bacon or salt pork.
I actually ended up making this variation by accident when I started canning baked beans…and then realized I didn’t have any bacon in the house. I had to tweak the recipe slightly, but it’s still quite satisfying.
It’s obviously less rich, since it’s missing the flavor of the meat. It’s also missing some of the salt that comes from the bacon, so you’ll want to increase the salt to 3 tsp per batch (from 2 tsp).
For more flavor, you might also want to replace the water with vegetable stock, and add about a teaspoon of liquid smoke to each batch.
Making Boston Baked Beans for Canning
Generally, when you’re canning beans you only cook them slightly before canning so they absorb water and puff up to their final size, and then let the pressure canner do the rest. You could do that with baked beans, and there are a number of baked bean canning recipes that have you simply quickly par-boil the beans and then pour on a sauce before pressure canning.
Though it’s simpler, I don’t suggest it.
Much of the flavor in baked beans comes from the long, slow cook in the sauce. It changes the flavor and the texture of the beans.
You’d think that a long cook would yield mushy beans, but the sugar and salt in the recipe actually cause the beans to firm up. Generally, when you’re making baked beans, you cook them to your desired level of tenderness before you put on the sauce because once you add it, they won’t get softer.
That’s actually tricky if you’re adding the sauce early on, as the beans will stay pretty tough (even through pressure canning). They’ll also come out dry that way.
The added sugar allows the beans to slow cook all day long without getting soft, and the flavor penetrates deep inside for incredible flavor.
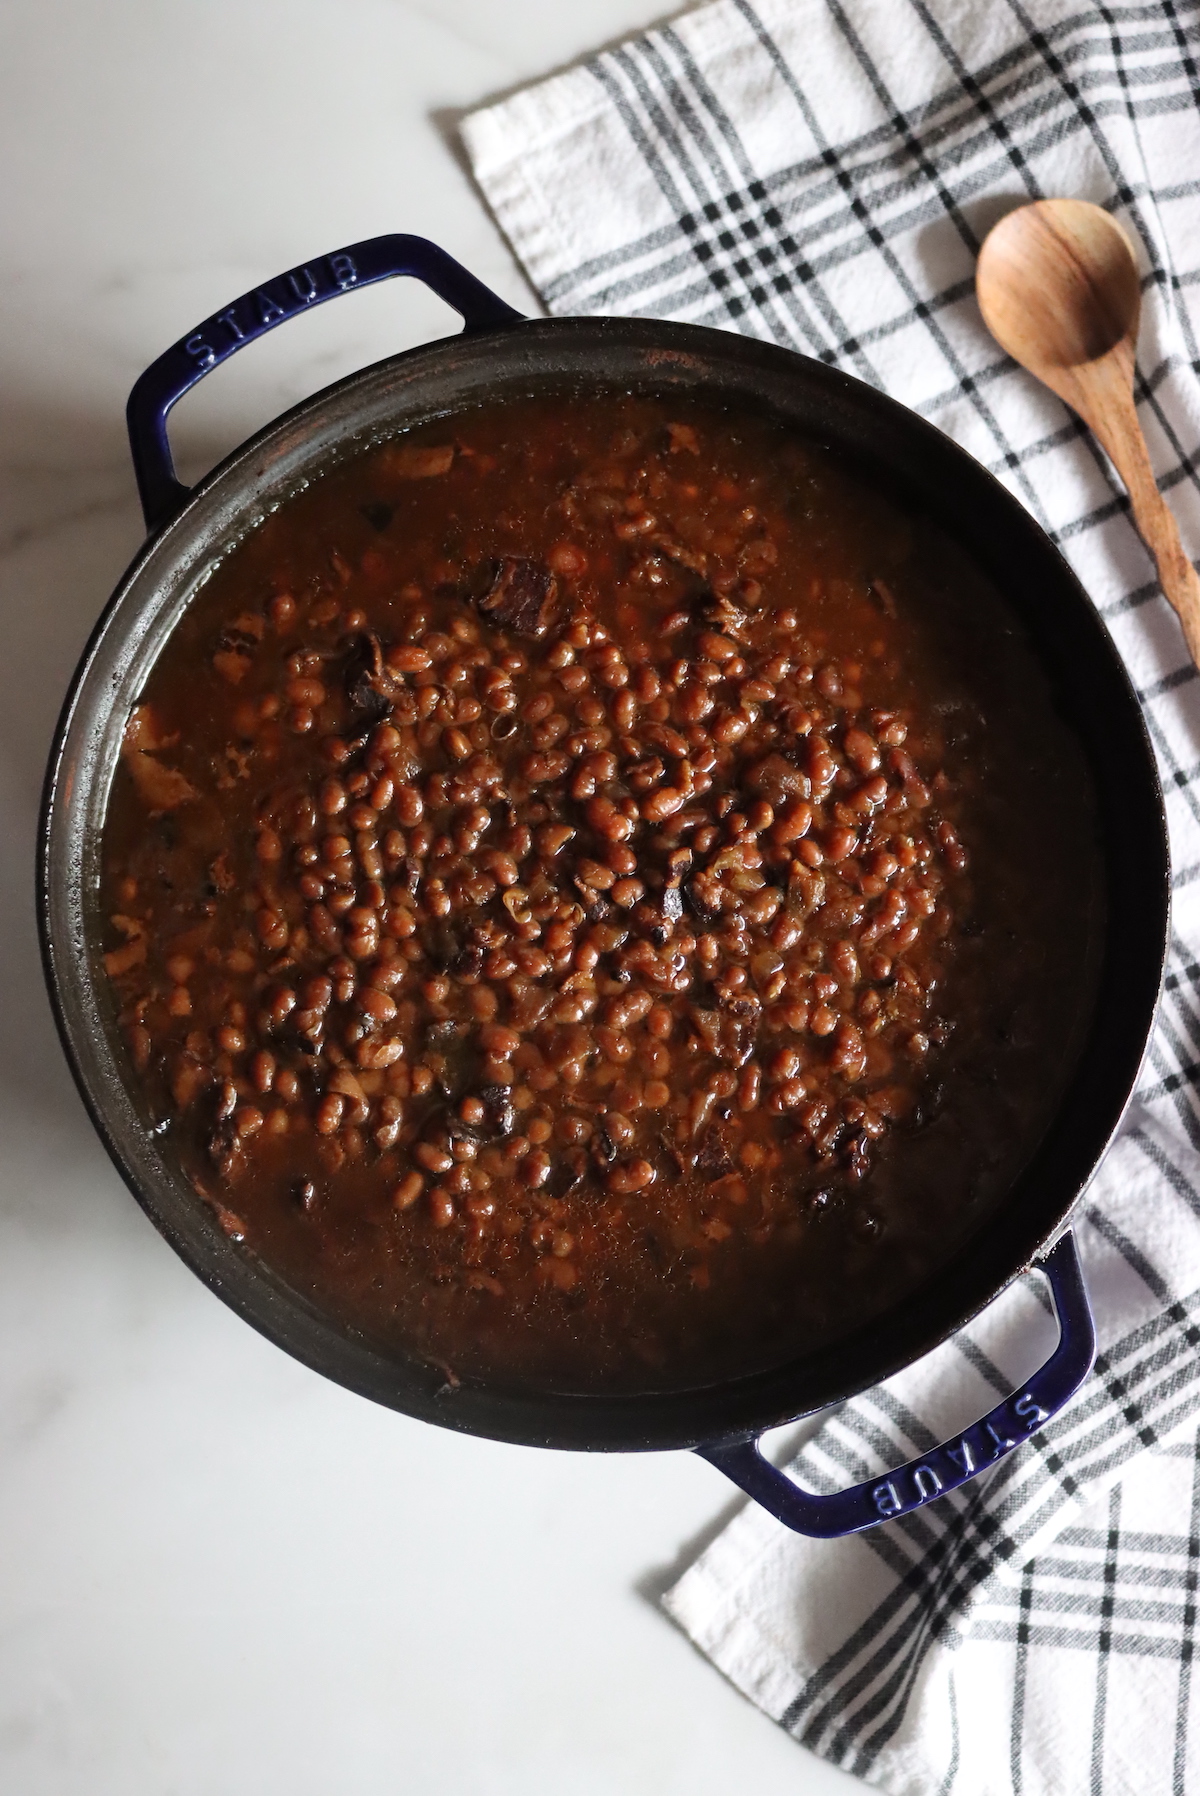
This baked bean canning recipe actually cooks the baked beans all the way to fully prepared for the table, then loads everything into the jar for pressure canning. It takes a bit longer, but it’s all pretty much hands-off time as the beans slow cook in the oven.
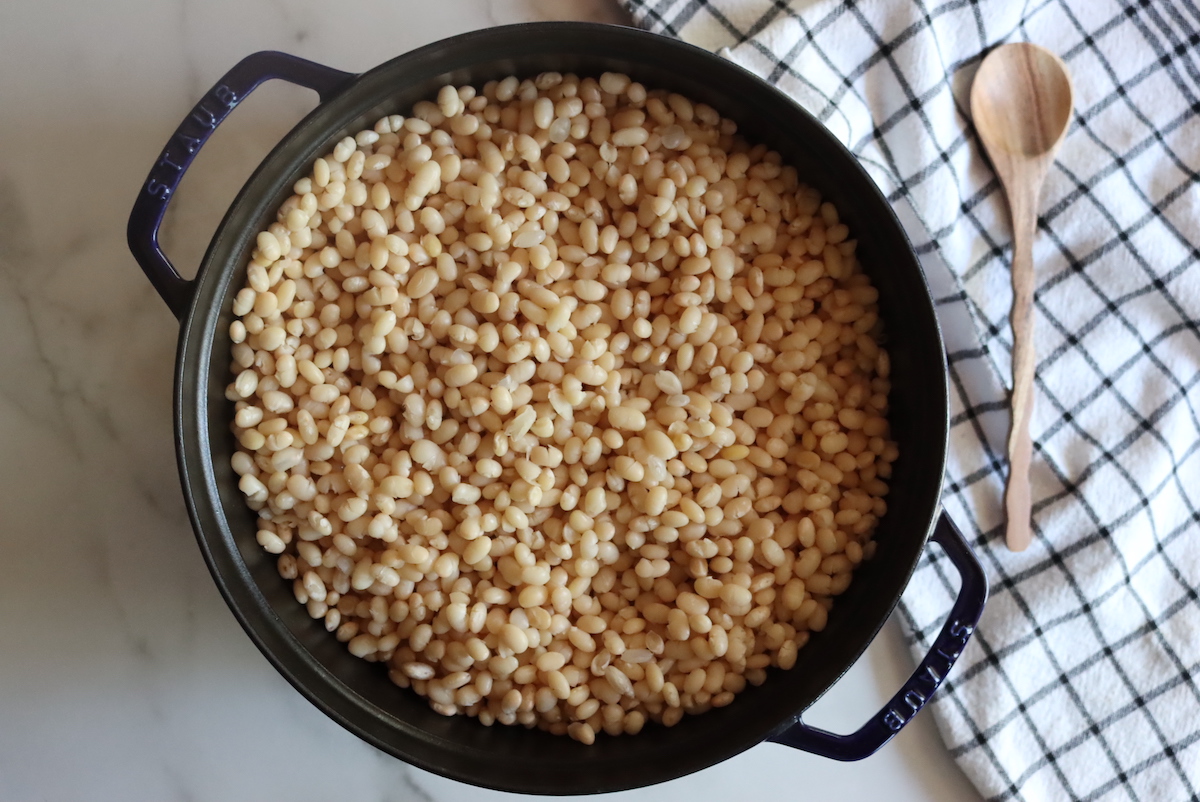
Start by soaking the beans overnight in cool water.
(Alternately, you can use the “quick soak” method which involves bringing them to a boil on the stove with plenty of water, cooking for 2 minutes, then turning off the heat and leaving them to quick soak for an hour. Drain the water and proceed as you would with overnight soaked beans.)
Place the soaked beans in a pot of water and bring to a boil on the stove. Reduce heat to a simmer, and cook until the beans start to split. The exact time will depend on your beans and how long they’ve been stored, but it’s usually around 45 minutes or so.
They should be tender enough to eat, with some of their skins just starting to split, but not falling apart.
Once cooked, turn off the heat and drain the beans completely before proceeding.
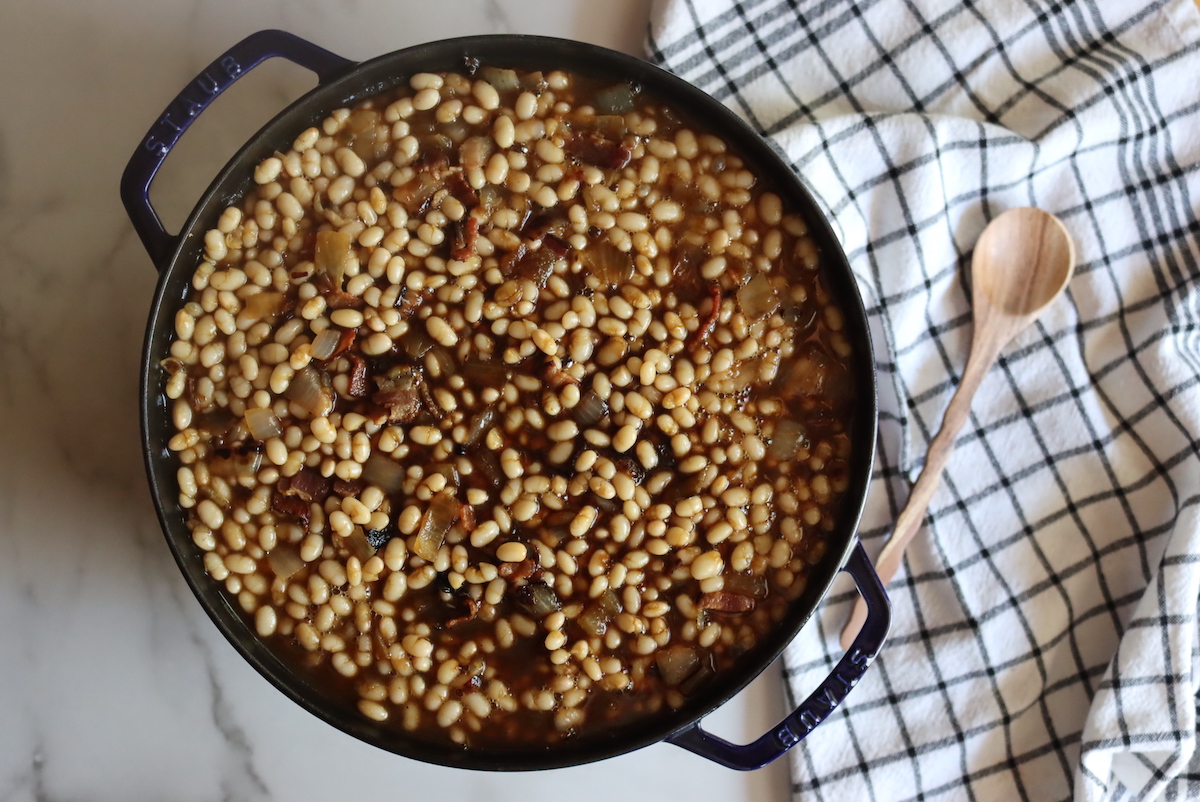
Next, prepare a sauce by mixing all the other ingredients together. Yes, all of them. That includes the diced onions, bacon, sugar, molasses, and other spices/salt, plus the water or stock. It should be pretty soupy but stir it all until the sugar dissolves completely, then pour it over the top of the beans and mix it in.
If you want, you can pre-cook the pork in a hot pan to brown it, and you can brown the onions. I could that browning the pork made little difference in the final flavor, and browning the onions actually detracted from their finished flavor/texture. Not what I would have expected, but it’s what happened.
I have a really big 7 quart enameled dutch oven, and a double batch of this baked bean canning recipe fits just right with not a bit to spare. For a single batch, I’d suggest using at least a 4-quart dutch oven so you have more headspace.
Whatever type of baking pan you use, it needs to be something with a really tight-fitting lid. Most dutch ovens will work, but lacking that, you can cover the top with foil and wrap it down tight. You want the liquid to stay in the pot and evaporate as little as possible.
You’re basically slow caramelizing everything in there, but if it runs dry it’ll burn quickly. My pot had a nice tight sealing lid, and I needed to add about a quart of liquid during the cooking process. If yours loses more liquid, be sure to add more to keep the mixture soupy and the beans under at least a small amount of liquid.
I’d suggest baking because the all-around heat makes sure it cooks evenly, but you can cook it on a very low burner on the stovetop too. It may burn on the bottom that way, so watch it.
A crockpot would also work.
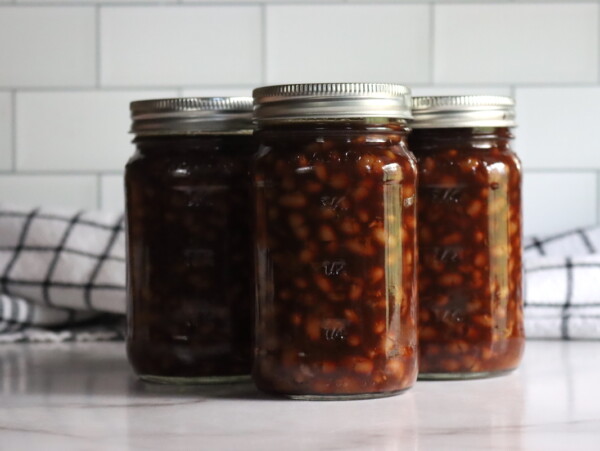
Either way, cook at around 300 degrees for about 4 hours, until the beans are a rich brown color and the flavors have come together.
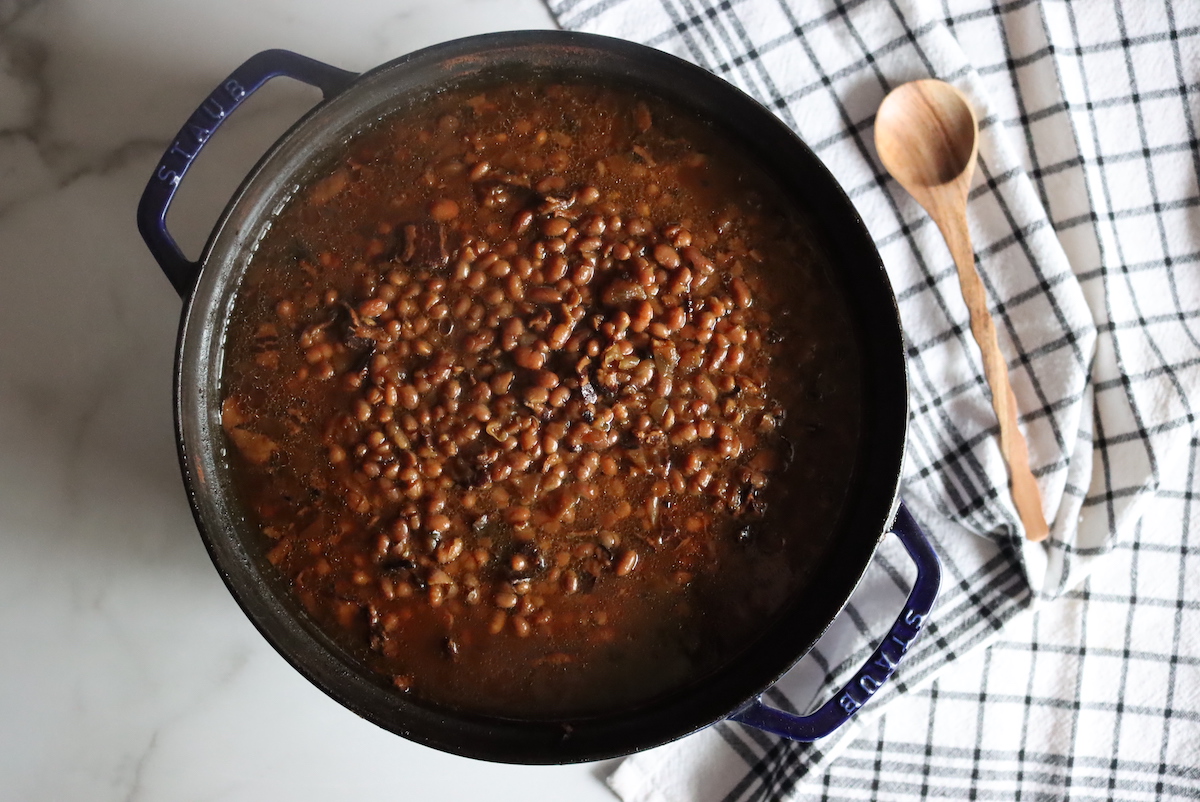
Once the beans are fully baked and flavorful, it’s time for canning. (You can also pull off some and serve them for dinner tonight, since they’re fully cooked and won’t change in flavor or “done-ness” after this point.
Canning Boston Baked Beans
Prepare your pressure canner for canning based on the manufacturer’s instructions. For most canner models, that means putting in the bottom rack and adding a few inches of water. Pre-heat it on the stove to just simmering, around 180 degrees F.
Bring a kettle of water to a boil on the stove (to fill any jars if you don’t have quite enough liquid in the bean pot).
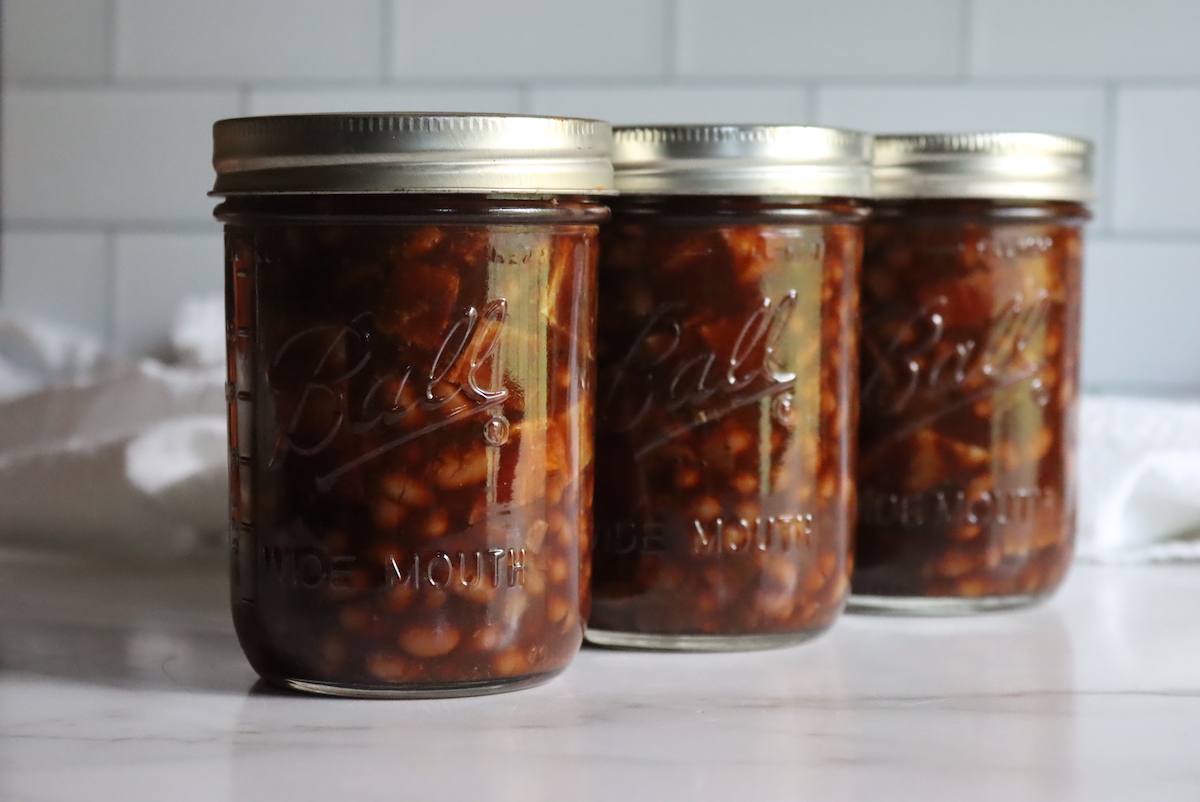
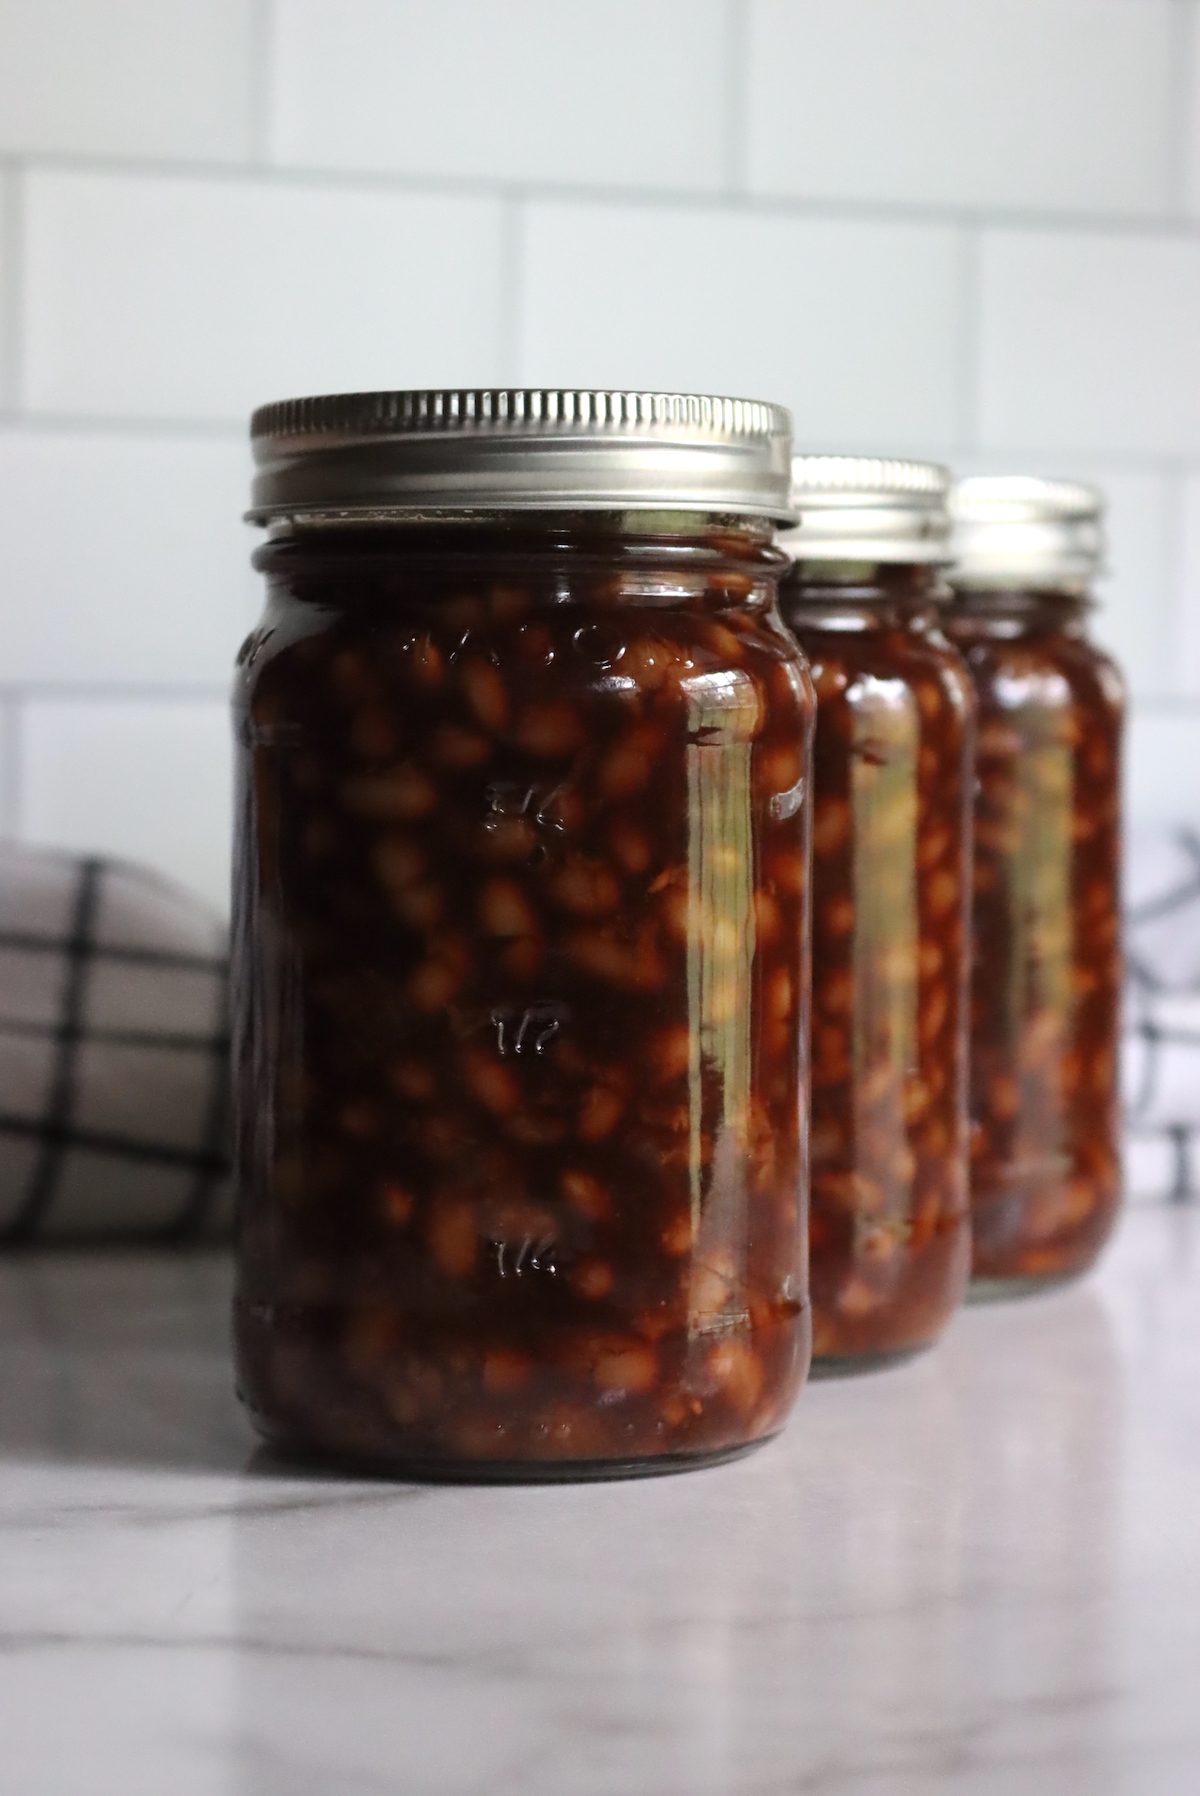
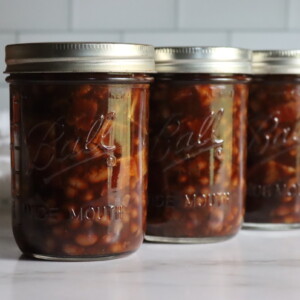
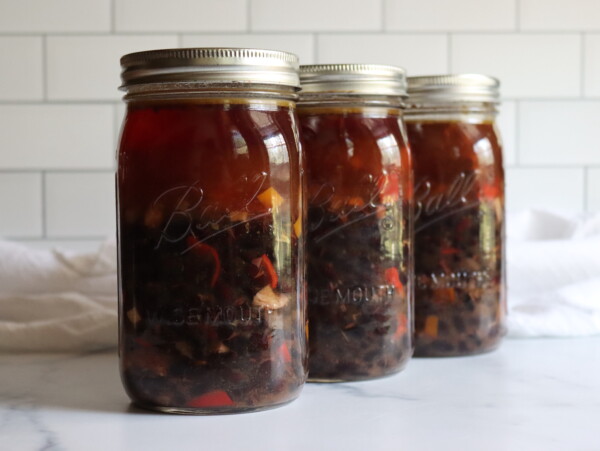
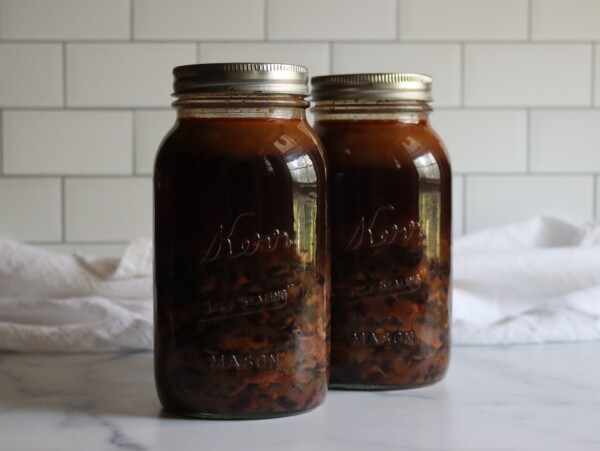
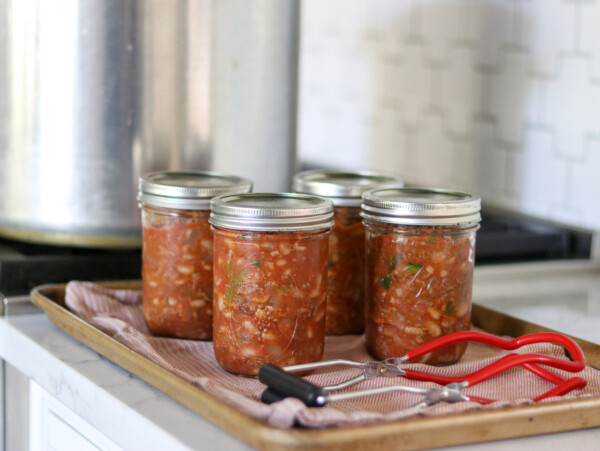
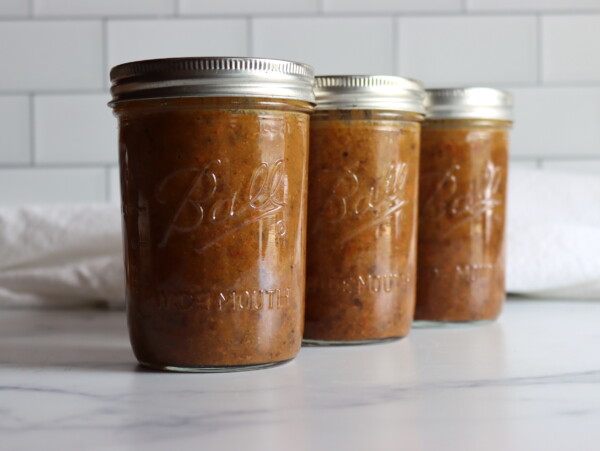
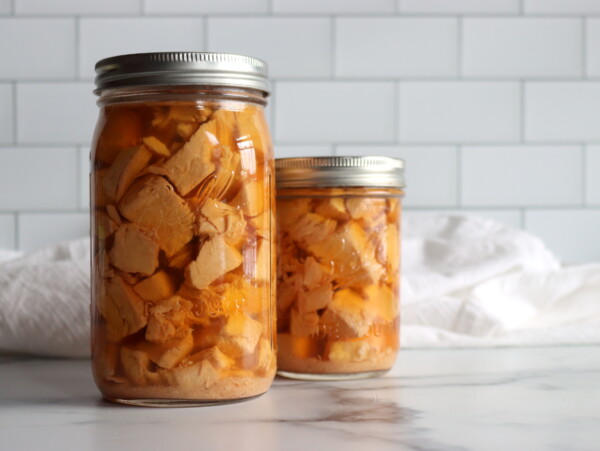
Prepare 6 pint jars (or 3 quart jars) per batch. Divide the beans evenly across all the jars using a slotted spoon, leaving 1-inch headspace. Top the jars with the canning sauce from the bean pot, still maintaining 1-inch headspace.
If you’re short on liquid, pour in a bit of water from the pre-heated kettle. The beans should be under the liquid line in the jars, but there should still be a 1-inch headspace at the top of each jar.
Wipe rims, apply canning lids and seal to finger tight with canning rings.
Load the jars into your pressure canner.
Put the lid on the canner and bring it up to temperature, but don’t seal it yet. Allow the steam to vent for 10 minutes before sealing up the canner and bringing it up to pressure.
Once at pressure, process the jars for 80 minutes for pints and 95 minutes for quarts.
(Those instructions come directly from the Ball Blue Book and many baked bean recipes process for less total time. This recipe has a thicker sauce than most, so I believe that’s the justification for the longer canning time. The beans are fabulous after canning, and the long slow cook in the sauce beforehand firms them up so they’re still perfect out of the canner even after all that time, I promise.)
After the canning time is complete, turn off the heat and allow the canner to cool completely before unloading the jars.
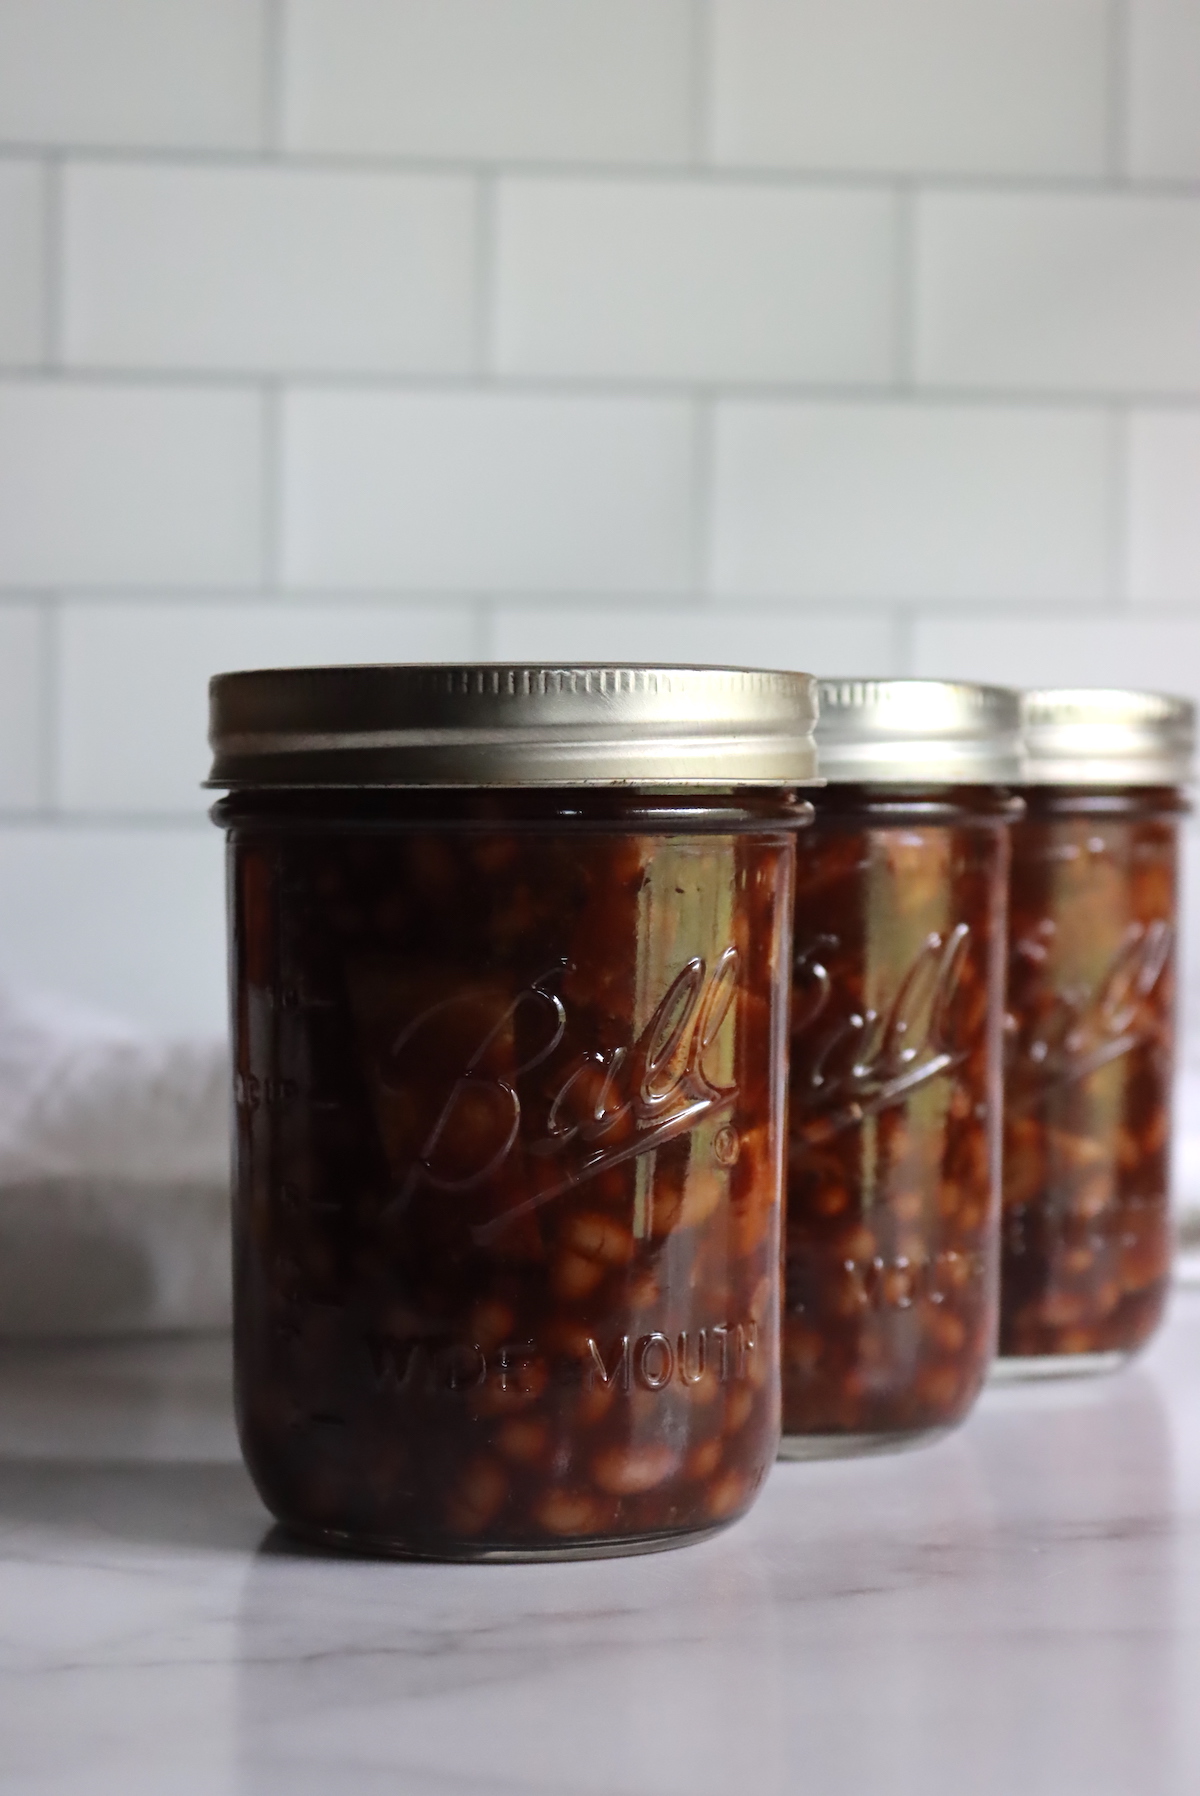
Once the jars are unloaded, check seals and store any unsealed jars in the refrigerator for immediate use (within 1 to 2 weeks). Properly canned and sealed jars will maintain their quality on the pantry shelf for 12-18 months.
Refrigerate after opening.
To serve, just heat the beans and serve (no need to re-bake at this point).
Canning Boston Baked Beans
Equipment
- Pressure Canner I use an All American Model 930
Ingredients
- 1 quart dried navy beans, 4 cups, or about 2 lbs
- 1/2 lb salt pork or uncured bacon, cut into 1/2 inch pieces
- 3 large onions, diced
- 2/3 cup brown sugar
- 2/3 cup molasses
- 2 tsp dry mustard powder
- 2 tsp salt
- 4 cups water, or unsalted stock/broth
Instructions
Making Baked Beans for Canning
- Soak the beans overnight in plenty of cool water. (Alternately, you can use the "quick soak" method which involves bringing them to a boil on the stove with plenty of water, cooking for 2 minutes, then turning off the heat and leaving them to quick soak for an hour. Drain the water and proceed as you would with overnight soaked beans.)
- Place the soaked beans in a pot of water and bring to a boil on the stove. Reduce heat to a simmer, and cook until the beans start to split. The exact time will depend on your beans and how long they've been stored, but it's usually around 45 minutes or so. They should be tender enough to eat, with some of their skins just starting to split, but not falling apart.
- Once cooked, turn off the heat and drain the beans completely before proceeding.
- Next, prepare a sauce by mixing all the other ingredients together. Stir until well mixed and the sugar is dissolved. It should be soupy, with chunks of bacon and onion.
- Pour the sauce over the top of the beans and stir to completely coat all the beans.
- Place the beans in a 4-quart dutch oven with a tight-fitting lid. Bake at 300 F for about 4 hours. Add water as necessary to keep the mixture soupy and the water level just covering the top layer of beans. (Usually, around 4 to 6 cups of water is necessary but more if you don't have a good sealing dutch oven.)
Canning Baked Beans
- Prepare your pressure canner for canning based on the manufacturer's instructions. For most canner models, that means putting in the bottom rack and adding a few inches of water. Pre-heat it on the stove to just simmering, around 180 degrees F.
- Bring a kettle of water to a boil on the stove (to fill any jars if you don't have quite enough liquid in the bean pot).
- Prepare 6 pint jars (or 3 quart jars) per batch. Divide the beans evenly across all the jars using a slotted spoon, leaving 1-inch headspace. Top the jars with the canning sauce from the bean pot, still maintaining 1-inch headspace.
- If you're short on liquid, pour in a bit of water from the pre-heated kettle. The beans should be under the liquid line in the jars, but there should still be a 1-inch headspace at the top of each jar.
- Wipe rims, apply canning lids and seal to finger tight with canning rings.
- Load the jars into your pressure canner.
- Put the lid on the canner and bring it up to temperature, but don't seal it yet. Allow the steam to vent for 10 minutes before sealing up the canner and bringing it up to pressure. (See notes for pressures based on altitude.)
- Once at pressure, process the jars for 80 minutes for pints and 95 minutes for quarts.
- After the canning time is complete, turn off the heat and allow the canner to cool completely before unloading the jars.
- Once the jars are unloaded, check seals and store any unsealed jars in the refrigerator for immediate use (within 1 to 2 weeks). Properly canned and sealed jars will maintain their quality on the pantry shelf for 12-18 months.
- Refrigerate after opening.
Notes
Canning Pressures for Baked Beans
The total canning time does not change with altitude when pressure canning, but the pressure level does change at higher elevations. It also changes depending on the type of canner you're using. Be sure you know whether you're working with a dial gauge canner (presto type) or a weighted gauge canner (all American type).Dial Gauge Canners:
- 0 to 2,000 feet in elevation use 11 pounds of pressure
- 2,001 to 4,000 feet in elevation use 12 pounds of pressure
- 4,001 to 6,000 feet in elevation use 13 pounds of pressure
- 6,001 to 8,000 feet in elevation use 14 pounds of pressure
Weighted Gauge Canners:
- 0 to 1,000 Feet in elevation use 10 pounds of pressure
- Above 1,000 Feet in elevation use 15 pounds of pressure
Vegetarian Baked Beans Variation
To make a vegetarian version, omit the bacon or salt pork. Increase salt to 3 tsp, and substitute unsalted vegetable broth for the water in the sauce. Optional, add 1/2 to 1 tsp of liquid smoke for a smokey flavor.Nutrition
Nutrition information is automatically calculated, so should only be used as an approximation.
Bean Canning Recipes
Baked beans aren’t the only beans you can put in a jar!
Soup Canning Recipes
Canning Black Bean Soup (Cuban Style)
Soup Canning Recipes
Chipotle Black Bean Soup
Bean Canning Recipes
Canning Vegetarian Baked Beans
Meat Canning Recipes
Canning Chili Con Carne
Pressure Canning Recipes
Looking for more pressure-canning recipes?
If I am making your bean recipe without the meat can I preserve the beans in glass jars without using a canner?
No, meat or not, this is a pressure canning recipe. Beans are not safe for preserving without a pressure canner.
Wow – this is basically my dad’s recipe. His has comments like “boil the beans only until you can blow on them and the skin separates from the bean”. His other note is “combine the brown sugar and mollases to equal 3/4 cup”. So not a technical recipe. 🙂 I’m glad to have found yours because I feel safer using a tried recipe with the same ingredients as my dad’s. I do have one question for you though – my famiy has always made baked beans in a bean pot (if you don’t know what these are – it’s a short, sort of fat cereamic pot with a tight fitting lid that’s meant specifically for baking beans – here’s one I found on Amazon: https://www.amazon.com/International-7621-Traditional-4-5-Quart-Ceramic/dp/B0026FDD10/ref=asc_df_B0026FDD10/?tag=hyprod-20&linkCode=df0&hvadid=198075681105&hvpos=&hvnetw=g&hvrand=3615378946391440247&hvpone=&hvptwo=&hvqmt=&hvdev=c&hvdvcmdl=&hvlocint=&hvlocphy=9006728&hvtargid=pla-348717689976&th=1 ). Would I be able to cook these in this pot and still can them?
Yup! You can definitely use a baked bean pot to make these, that should work wonderfully. Enjoy!
Can I can these using a Ninja Foodie pressure cooker?
No, those are not approved for pressure canning, as they don’t maintain the proper pressure for safe canning. They cook food fine, but they don’t keep it quite hot enough consistently for canning. This article on canning in an instant pot explains why: https://creativecanning.com/instant-pot-canning/
I know you’re asking about a different pressure cooker, but the same goes for that one too.
These are amazing!! I did both batches vegan, so no bacon and added 3 tsp salt & 1 tsp liquid smoke. Huge hit with my family!!! Thanks!
Wonderful! I’m so glad you enjoyed them!
Hi, can great northern beans be used instead of navy beans? I live on a small island and I am actually having a difficult time findinding Navy beans.
Yes, you can use great northern beans. Navy beans are generally used because they hold up better than great northern beans, but any bean will work in this recipe. The step where you pre-cook the beans at the beginning may need to be shortened, as great northern cook faster than most beans. This is an inexact step anyway, just watch them as they cook, and strain when they get just tender (but not falling apart). Original instructions below, but likely it’s shorter:
“Place the soaked beans in a pot of water and bring to a boil on the stove. Reduce heat to a simmer, and cook until the beans start to split. The exact time will depend on your beans and how long they’ve been stored, but it’s usually around 45 minutes or so.
They should be tender enough to eat, with some of their skins just starting to split, but not falling apart.
Once cooked, turn off the heat and drain the beans completely before proceeding.
I am wondering if you can add bell pepper and hamburger meat to the baked beans and process for the bean time. I make these beans with the hamburger meat, but I want to have some on hand because my husband likes them.
That’s a darn good question…and there’s no definitive answer because it hasn’t been tested specifically.
That said, it wouldn’t be all that different than a chili recipe, and this recipe processes for quite a bit longer than standard ground beef chili. (https://creativecanning.com/canning-chili-con-carne/)
I’d think that so long as you made sure there was enough liquid in the jars so that it doesn’t end up too think, that it should be just fine, but that’s a guess. I can’t say that with 100% confidence though, so you’ll have to use your best judgement and do it at your own risk, of course.
Why I can’t use water bath for them ?
All the ingredients are low acid (below a pH of 4.6). Vegetables, meats and other low acid foods must be pressure canned. You can only water bath can acidic fruits, jams and pickles.
How do I print the recipe?
On the recipe card near the end of the post, there’s a “print” button that’s right below this text:
“Canning baked beans is a simple way to enjoy homemade baked beans right off the pantry shelf (without heating up the kitchen).”
Can I make these to eat right away using the recipe you have but stopping at the canning part? Would love to try these, I miss my grams baked beans, and these are darn close. I remember helping her every Saturday picking through the beans lol
Yes! Canning these is optional, you can make them and store them in the refrigerator or freezer (or just use them up right away if you have enough people around to enjoy them).
My husband has diabetes, and can’t eat sugar. Can I adapt this recipe to use artificial sweeteners, like Truvia Brown Sugar substitute?
At least according to Pomona’s Pectin, Truvia is safe for canning. https://pomonapectin.com/ufaqs/can-i-use-truvia-or-similar-sweeteners-when-making-jam-or-jelly-with-pomonas-pectin/
So yes, as far as I know you could use that instead. One of the functions of the sugar is to change the texture of the beans as they cook, with toughens them up a bit and keeps them from falling apart. The sugar substitute may or may not do that? I haven’t used it, so I don’t know. I’d suggest trying a small batch for fresh eating to make sure you like it before canning a full batch.