Canning chicken is a simple way to preserve chicken right on your pantry shelf. No more worrying about the freezer going out, or paying for the electricity to keep your meat frozen. And the best part? It’s already cooked and ready to eat right out of the canning jar!
I absolutely love pressure-canning recipes that take the stress out of busy weeknights. Planning ahead and canning chicken means that you have meat ready to heat and eat at a moment’s notice. Simply pop open the jar and you’ve got the better part of a meal ready to go.
Even better, you have the peace of mind of knowing that your meat isn’t vulnerable to a power outage or freezer failure. It’s all safely stored without electricity right on your pantry shelf.
When canning chicken, you have a few decisions to make right off the bat. You can choose:
- Big Pieces or Tiny Cubes
- Raw Pack or Hot Pack
- Bone-in or Boneless
Each option has its pros and cons, and I’ll walk you through all the options.
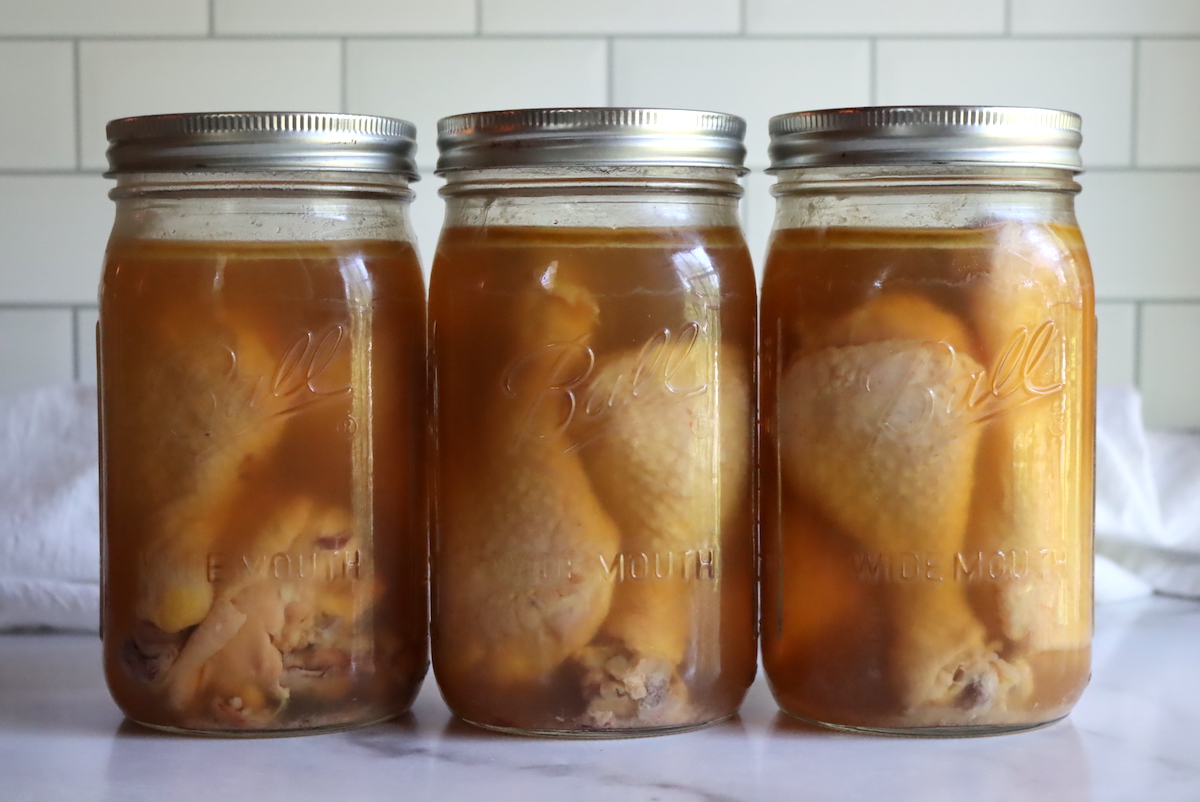
(I know, you’re skeptical about canning bone-in chicken. Why would you waste jar space with bones? There are actually good reasons for it, and it turns out wonderfully tender…and with the skin left on chicken legs, it even browns up nicely months later.)
Preparing Chicken for Pressure Canning
The first step to preparing chicken to pressure canning is deciding how you’re going to cut the chicken for canning. Technically, could actually can a whole chicken in a jar, provided it’s small enough to fit into a quart.
That’s a pretty small chicken, but if you happen to have a 2 pounder you can do it for a novelty. They even sell whole chicken in a can, believe it or not.
Still, that’s not the most practical method, and most likely you’re canning chicken pieces rather than canning whole chickens. I’m starting with whole chickens from a local farm, but you can also start with quartered chickens, or just breasts, legs, or thighs.
I know many people are only interested in canning chicken breasts or chicken thighs in boneless pieces, but I’m going to walk you through canning all the parts (both bone-in and boneless).
To break down a chicken, start by quartering it into leg and thigh pieces, wings, and boneless breasts. That should leave the bulk of the bones out as a whole (mostly meatless) carcass and a chicken neck (if included).
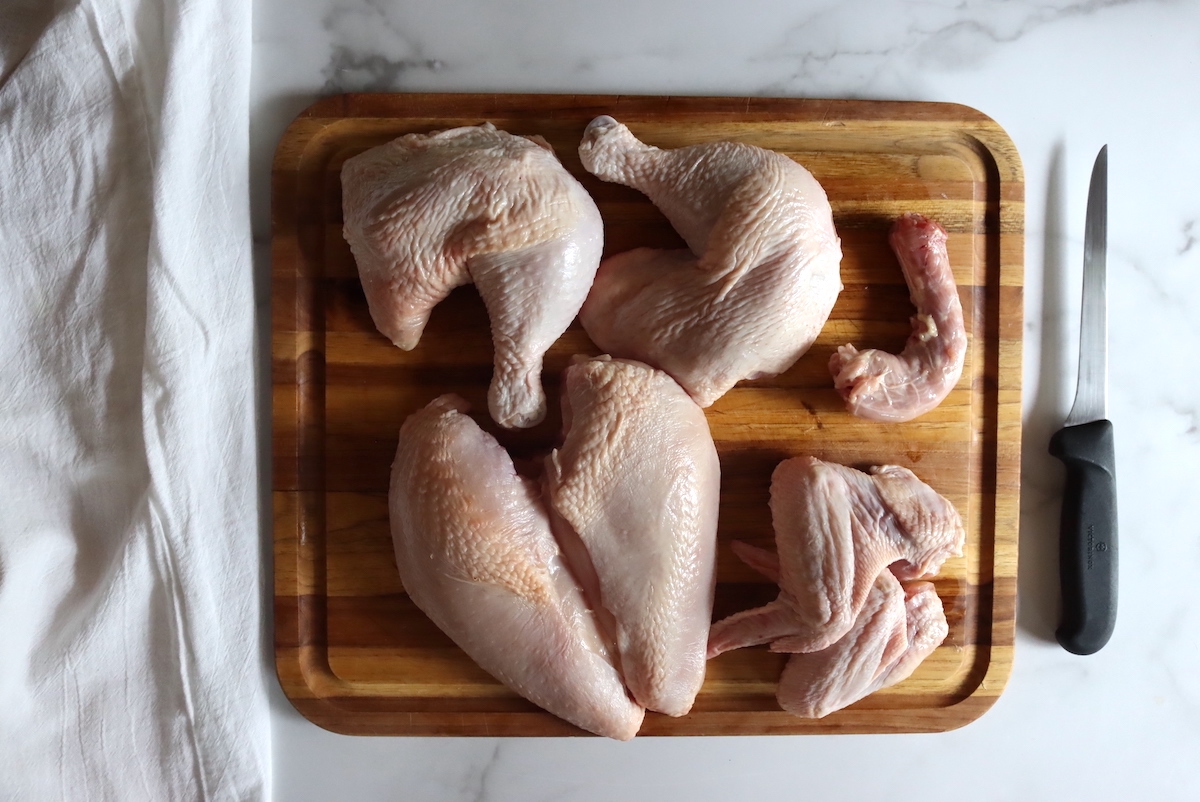
Quartering a whole chicken for canning. I’ve removed the carcass and saved it to make broth. You’ll likely want to break down the chicken further so that if fits better into jars.
The pieces above are small enough for canning as is, and it’s perfectly fine to leave them bone-in and skin on. In this state, it’s difficult to fit much into jars since they’re relatively large pieces.
You can fit about two whole chicken breasts into a quart jar, and two whole leg/thigh pieces if you really work at it. It’s much more space-efficient if you break the pieces down further, and it’s most likely how you’ll use the pieces in meals anyway.
I break the quartered chicken down into 2” chunks of breast meat, whole chicken tenders (found under the breast), boneless/skinless thighs, legs, and wings (without wing tips).
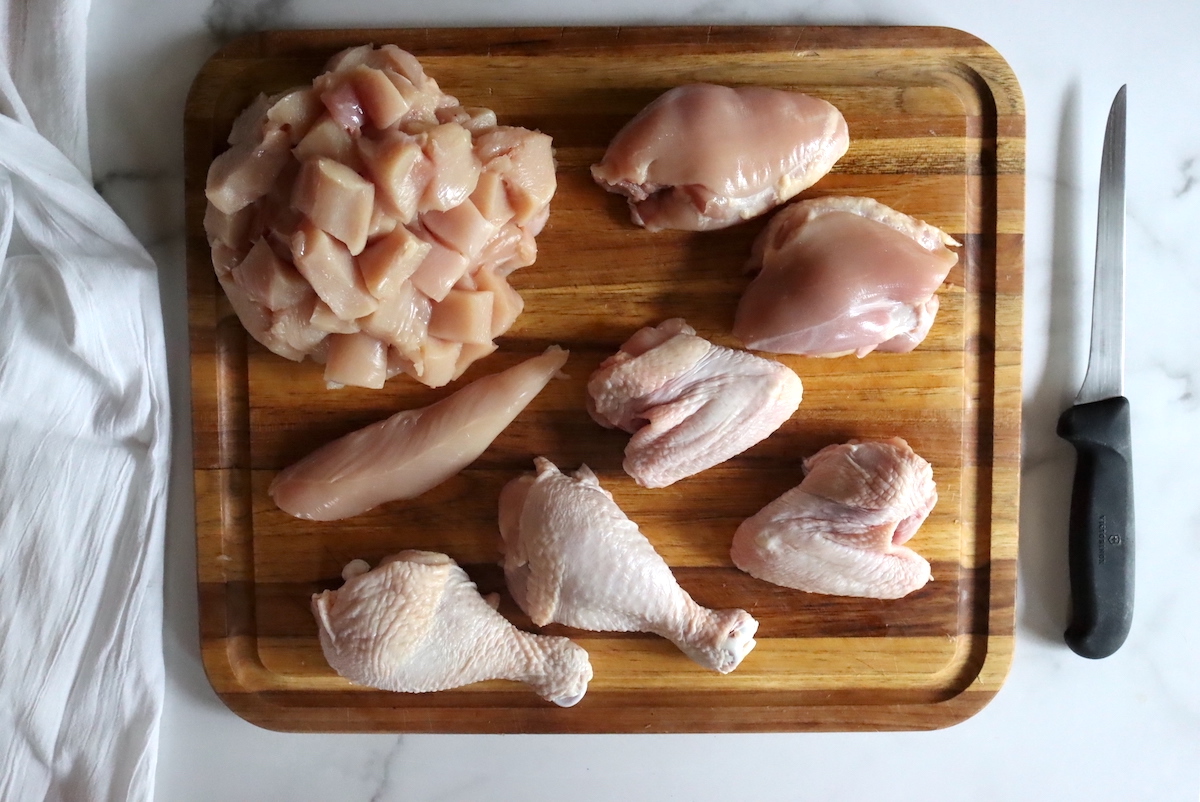
Breaking down a whole chicken for canning.
All the remaining pieces including the neck, skin, wing tips and the carcass will be roasted before going into the stock pot.
Canning chicken in chicken stock is much more flavorful than either water or no added liquid, so that’s the method I prefer (even if it means making the stock before you start canning chicken).
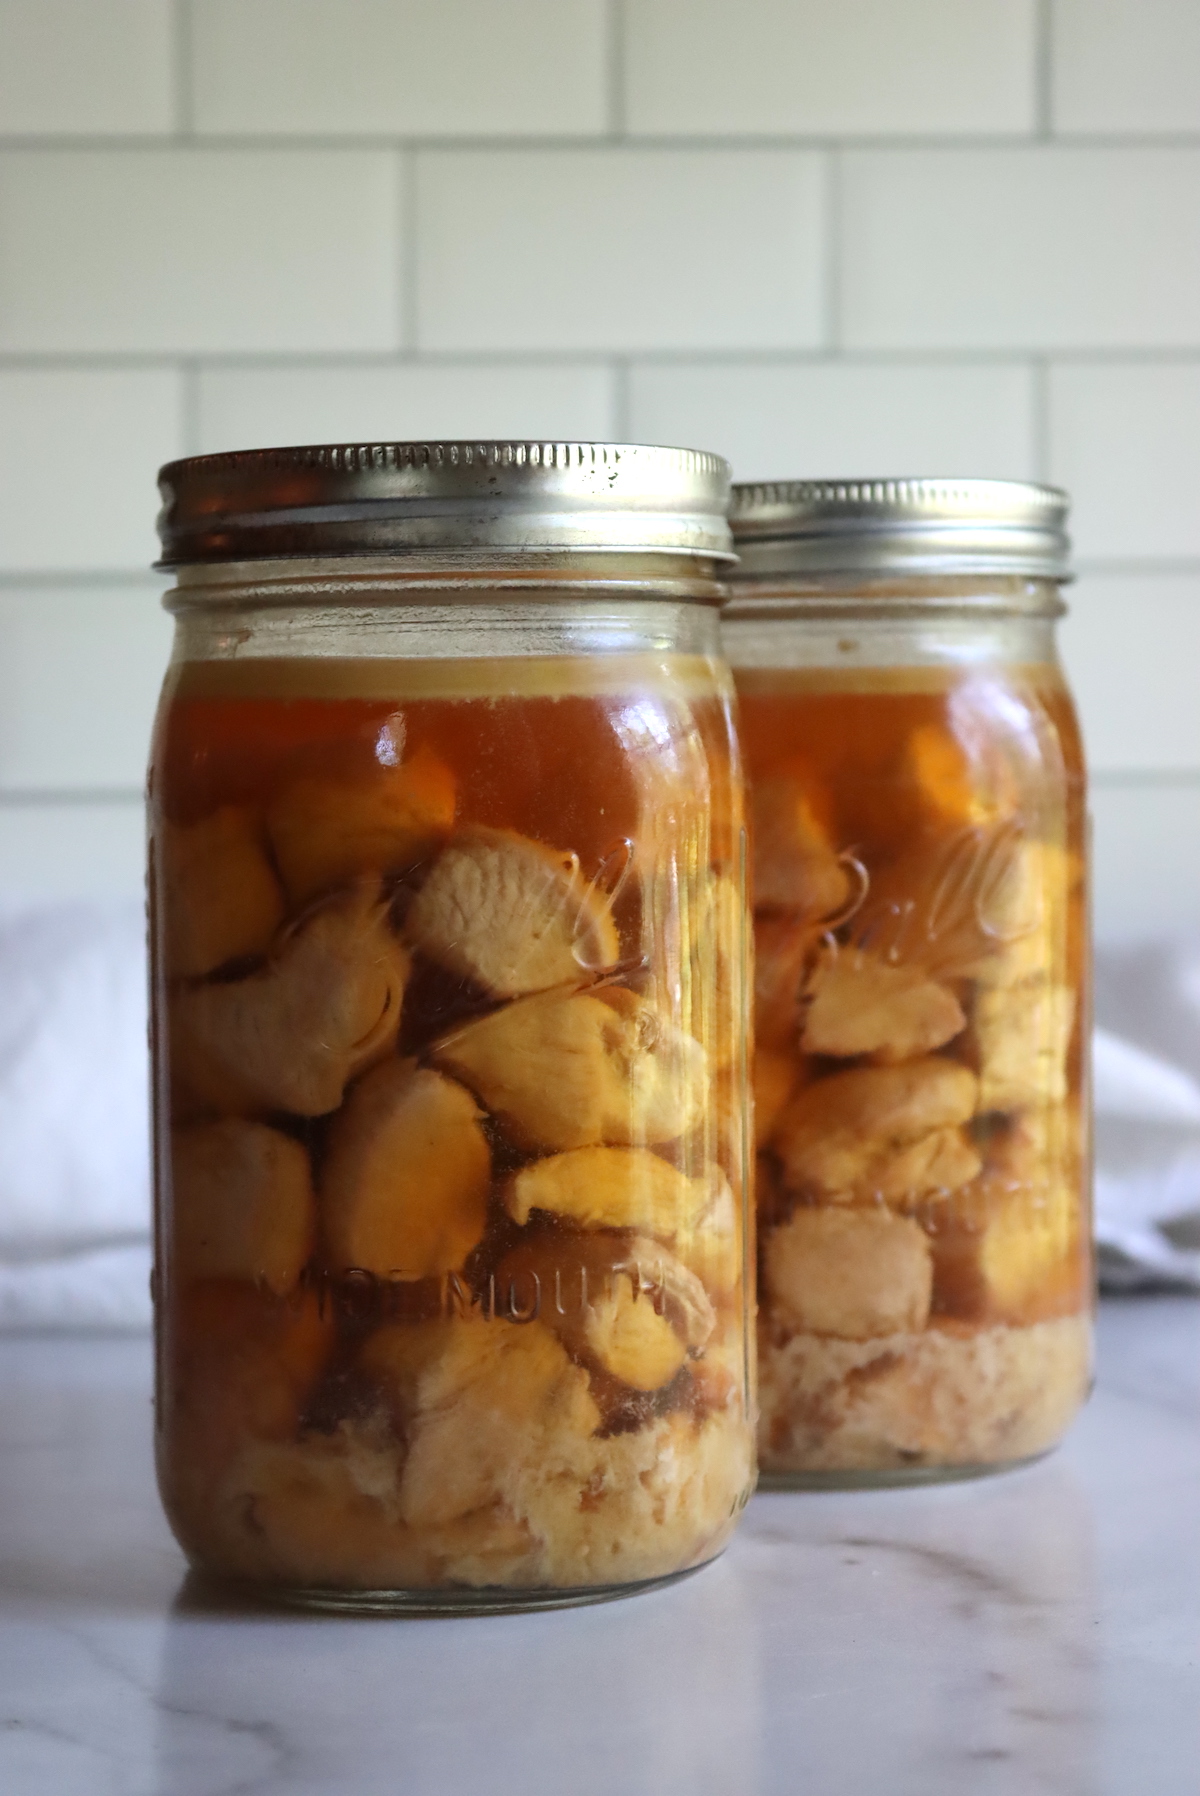
Canning Chicken Breast
Raw Pack vs. Hot Pack
The next choice you have is whether you’re canning chicken raw pack or hot pack.
Raw pack means you just place raw chicken into jars as is, with nothing else (no liquid). The jars are capped with canning lids and pressure canned. During canning, the chicken will cook completely and release liquid.
Modern lean chicken doesn’t release enough “juice” to fully submerge the meat when canned this way, which means it won’t store as well over the long term. It’s still safe to eat months later, but the chicken above the liquid line will begin to discolor and dry out over time.
It’s also much less flavorful than chicken that’s been browned first. The main benefit is it’s really incredibly simple, and you can load the canner really quickly that way. Quality will suffer from a raw pack, and I don’t recommend it.
It’s a good option if you’ve just found that your freezer broke and you need another way to preserve chicken without electricity fast. It’s good to know that you can raw pack if you absolutely have to.
Hot Pack means the chicken is browned or partially cooked before canning. Browning the meat adds flavor and helps seal in the flavor. The Maillard reaction on the outside during browning really improves both flavor and texture.
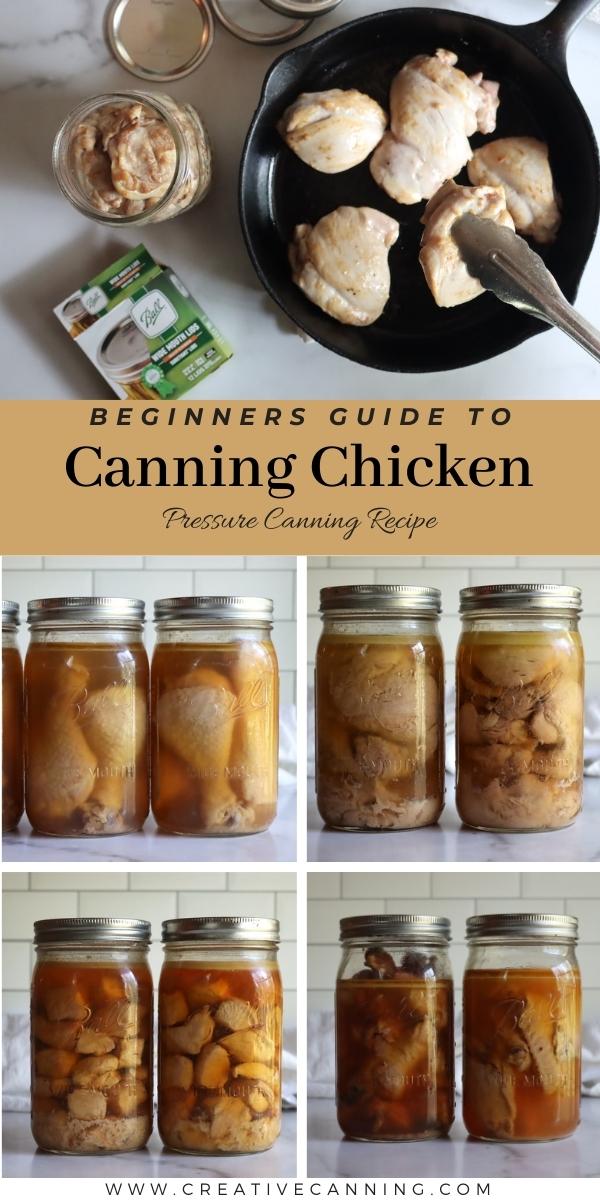
I brown boneless breasts and thighs in a small amount of oil before canning.
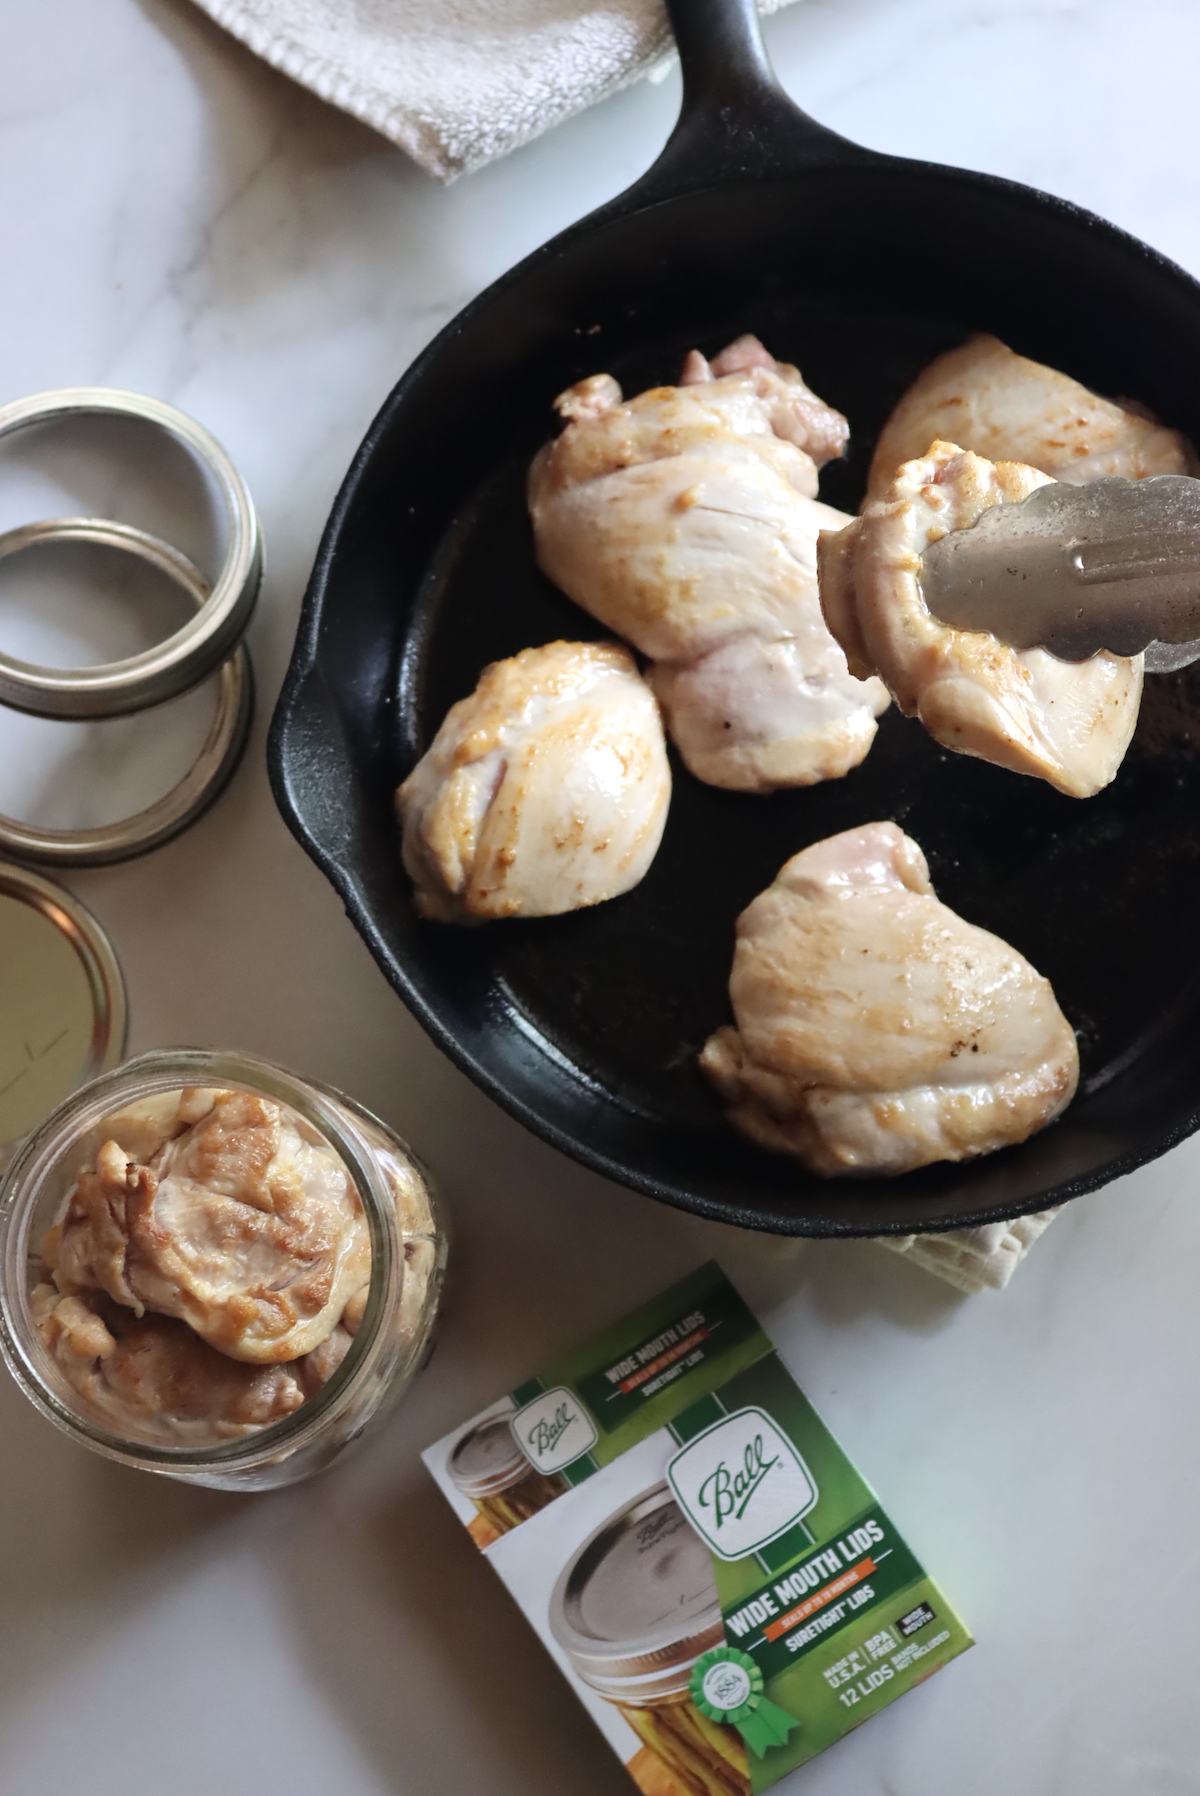
You can also partially (or fully) cook the chicken by roasting it in the oven.
This is a good option if you’re going to pick the whole chicken off the bone and can in jars as shredded chicken. It also works well with leftover baked chicken, or when you’re canning leftover turkey, which is canned in the same way.
When roasting, most instructions tell you to cook it until it’s about 2/3rds done. That just means cook it until it’s done enough to pick off the bone, but no need to fully cook it. It’s also fine fully cooked, or raw, so that’s a guideline rather than a rule.
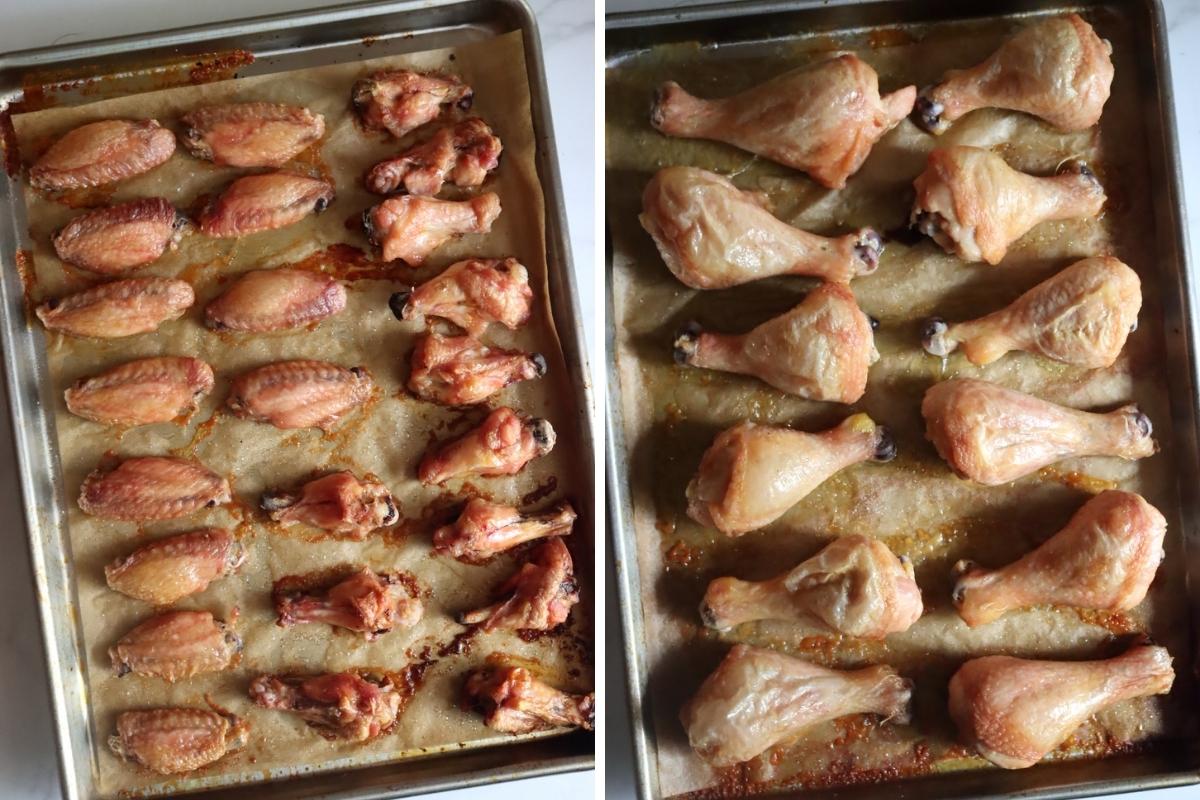
When canning bone-in wings and thighs, I roast them in the oven until the skin browns. This gives the finished canned chicken a really rich flavor.
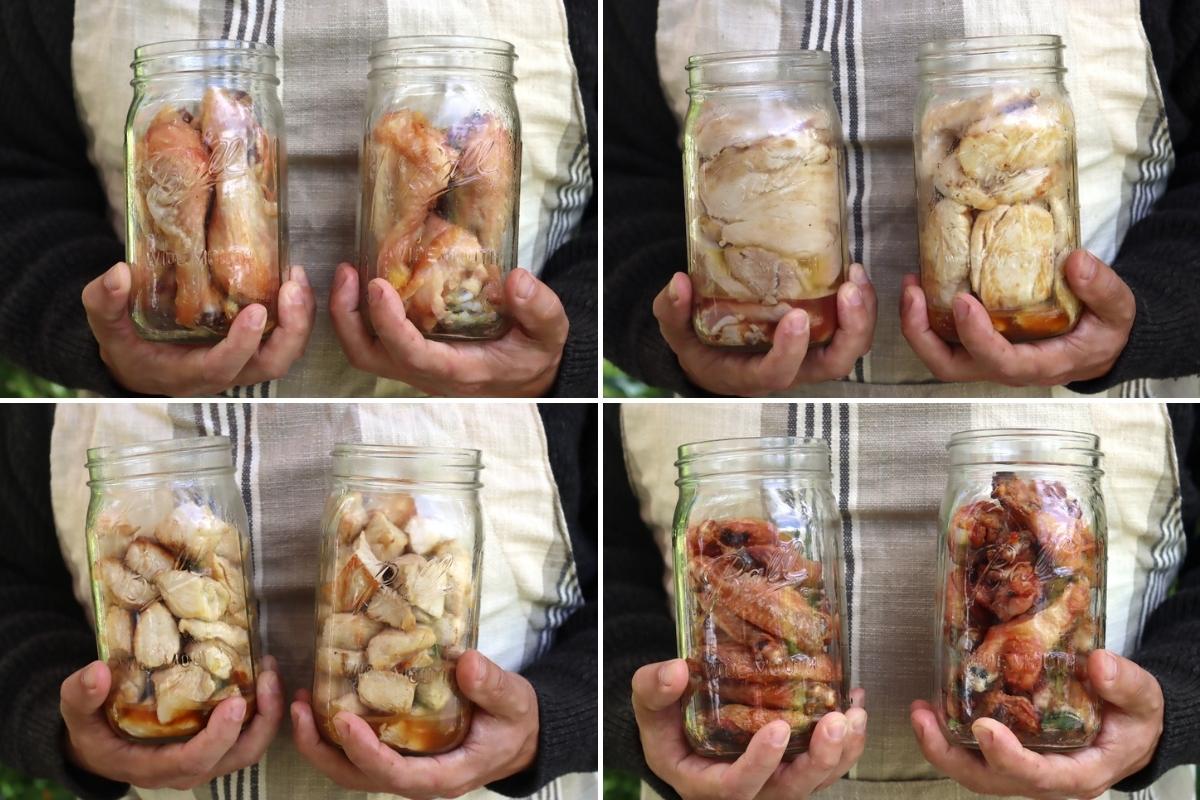
Pack the warm chicken into jars, leaving a generous 1 1/4 inch headspace.
You can mix different types of chicken, but for simplicity, I like to separate them out by type. I do individual jars of whole boneless thighs, legs, wings, and chunks of chicken breast each in their own jars.
The meat is then packed in water or stock. Once it’s partially cooked it can’t be canned without liquid anymore since it’s lost so much during browning or roasting. That’s not a bad thing, it really is much better with liquid in the jars, especially if that liquid is chicken broth.
I usually can chicken as a two-day process. I cut up whole chickens on the first day, and pack the raw meat into the refrigerator. The skin, wing tips, necks, and carcasses are roasted in the oven until browned.
Roasted meat and bones make the best stock, and if you use raw meat the stock will be cloudy and not nearly as rich in flavor.
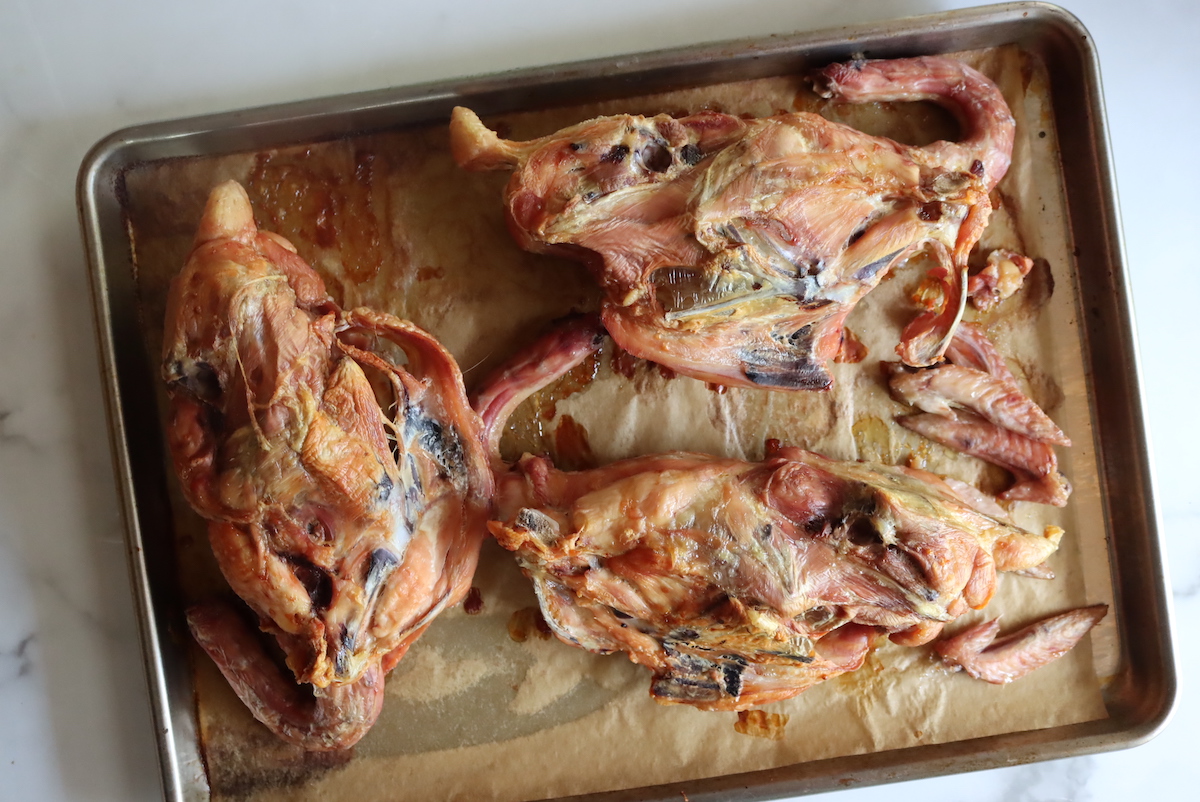
After roasting, I simmer it for 12+ hours to make rich chicken stock.
The next day, the meat is browned, packed into jars, and then covered with chicken stock (still maintaining 1 1/4 inch headspace).
Once you’ve got everything packed into jars and covered with broth, you’re finally ready to actually pressure can chicken.
Pressure Canning Chicken
As you’re browning the chicken and getting it loaded in canning jars, you should also be pre-heating your pressure canner. Follow the instructions for your particular brand of canner, but in most cases, preparing the canner means adding 2 to 3 inches of water to the bottom, inserting the bottom rack, and bringing it up to a gentle simmer.
If you’re not familiar with pressure canning, I’d strongly suggest reading my beginner’s guide to pressure canning before you get started.
Pack the browned chicken into canning jars (quarts or pints), leaving 1 1/4 inch headspace. If you’d like to add salt, the recommendation is 1 teaspoon per quart and 1/2 tsp per pint. Salt is optional, and not required for preservation. It does improve flavor obviously, and it also helps the meat retain good texture during canning. It’s perfectly fine to add salt at serving or skip it altogether.
Pour boiling chicken broth (or water) over the top of the meat, still leaving 1 1/4 inch headspace. Adjust the meat so it’s all under the liquid line and use a de-bubbler to remove any air pockets. Add more broth if necessary to maintain proper headspace.
Wipe the rims of the jars to remove any oil that may have spilled there, and then cap with 2-part canning lids and tighten to finger tight.
Load the jars into the prepared pressure canner using a jar lifter. Arrange according to the manufacturer’s instructions.
Close the canner lid but do not seal the vent (yet). Turn the heat up to high and bring the canner up to temperature. Allow the steam to vent for 10 minutes before sealing the canner and beginning to bring it up to pressure.
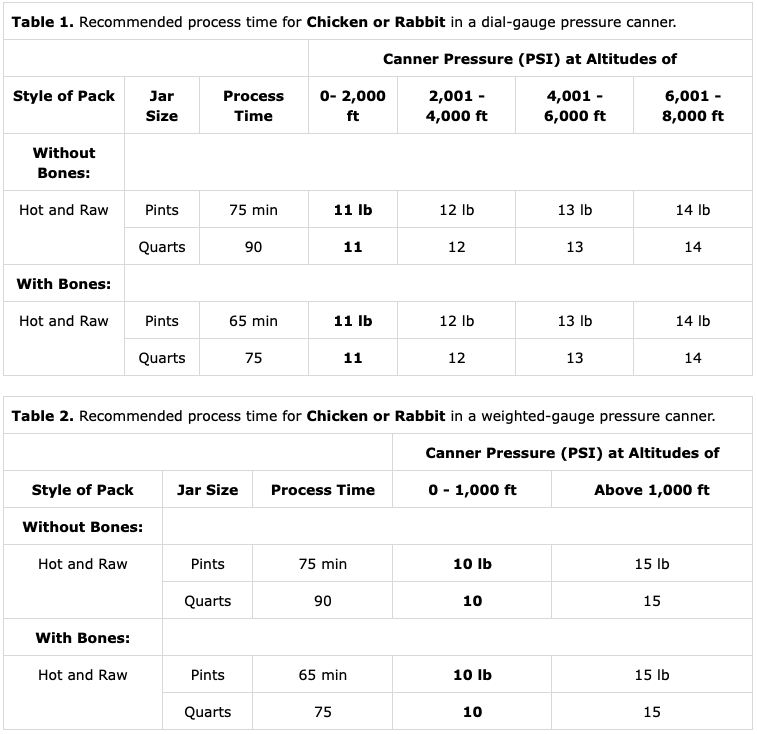
The pressure depends on your altitude and canner type, see the table below.
How Long Do You Pressure Can Chicken?
When using a pressure canner, the canning times remain the same regardless of altitude. The only thing that changes is the pressure in the canner.
In the case of canning chicken, there are a few different recommendations depending on the jar sizes and whether or not the meat contains bones.
Chicken bones conduct heat really well, and canning bone-in chicken actually reduces the total canning time (as compared to canning boneless chicken).
Times for pressure canning chicken are as follows:
For boneless chicken (raw or hot pack), process jars at pressure for 75 minutes for pints and 90 minutes for quarts.
For bone-in chicken (raw or hot pack), process jars for 65 minutes for pints and 75 minutes for quarts.
If you’re doing a mixed batch where some of the jars have bone-in chicken and others have boneless, you need to use the longer processing times for boneless chicken.
Once the canning time is completed, turn off the heat and allow the canner to cool completely before removing the jars. At this point, you should have sealed jars of pressure canned chicken ready for the pantry shelf.
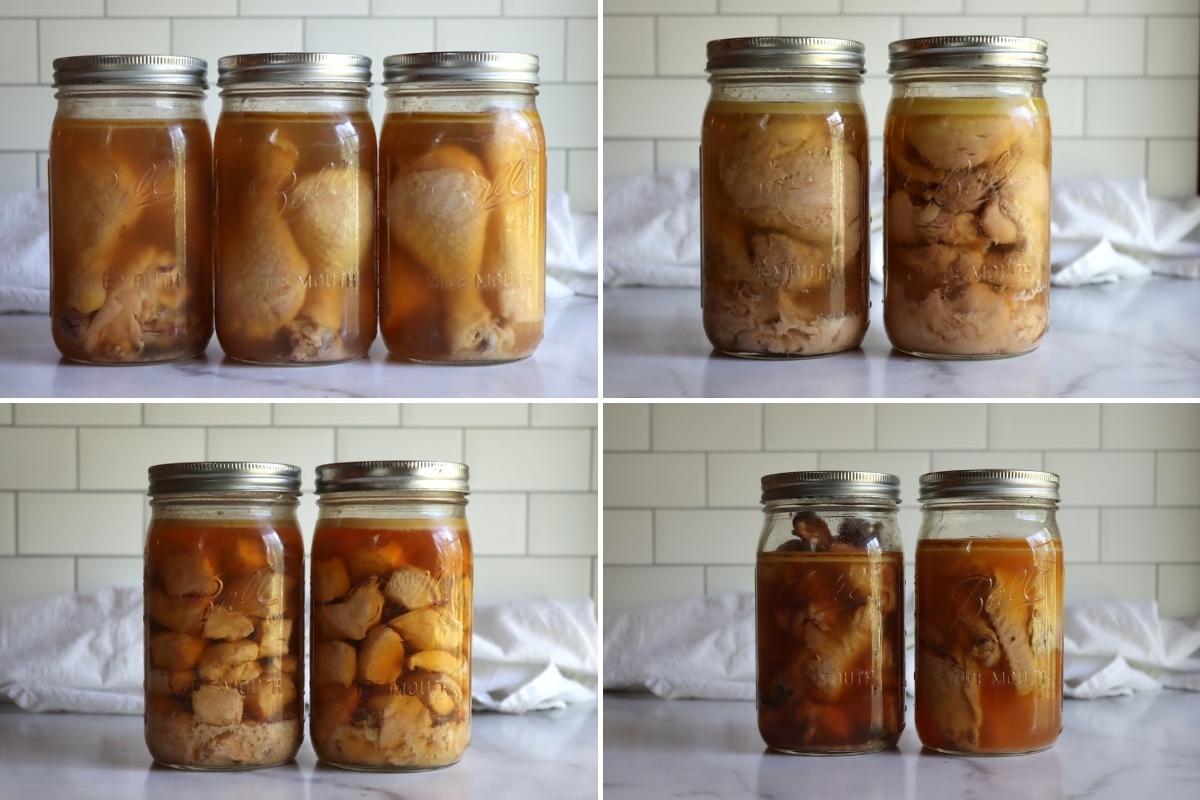
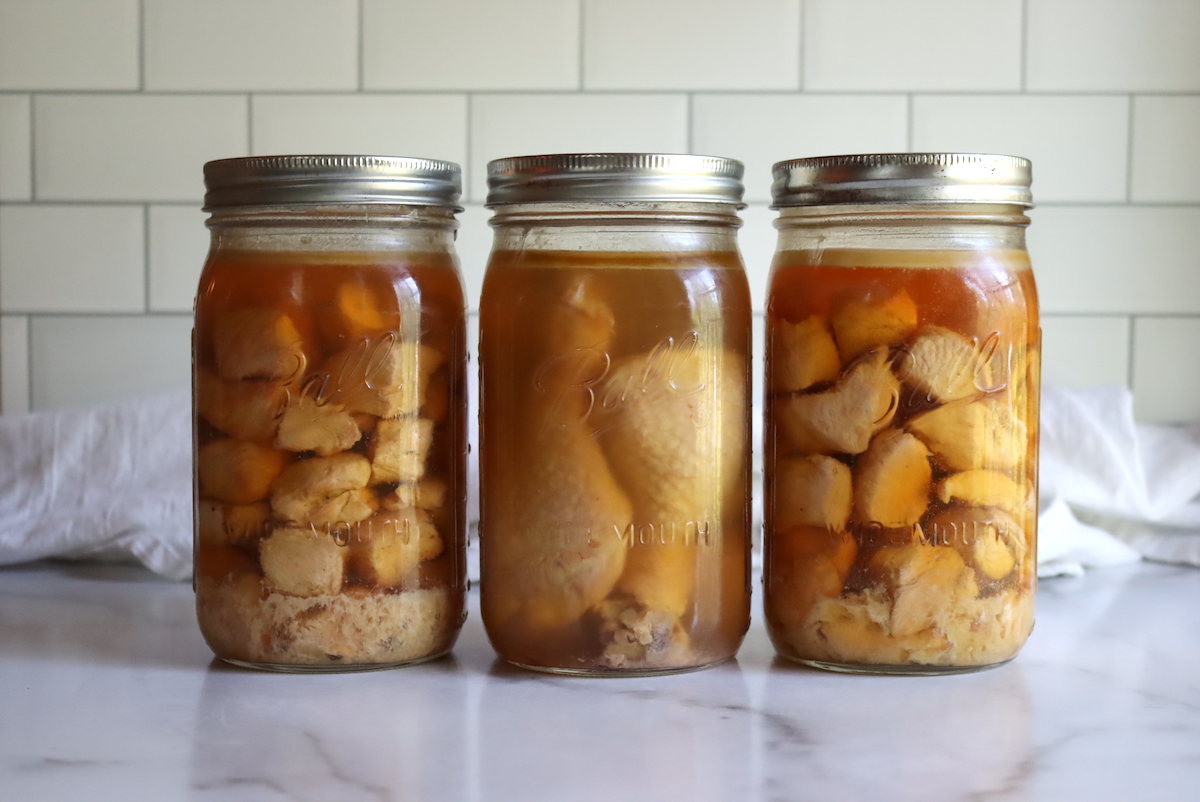
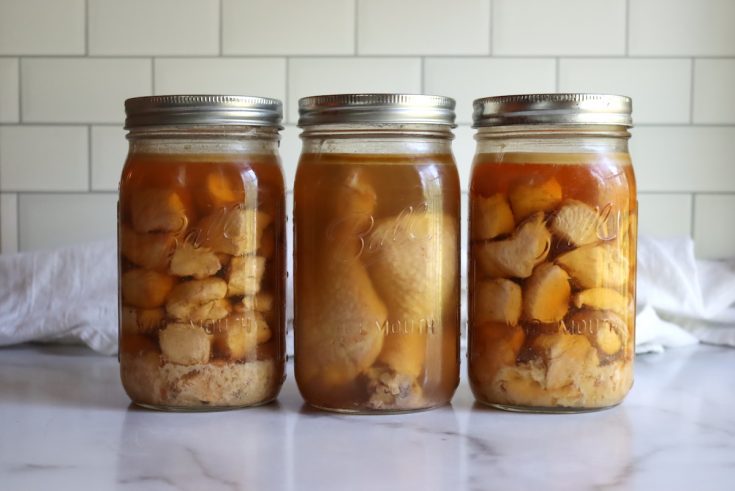
Pressure canned chicken. Clockwise from top left: Bone-in legs, boneless thighs, bone-in wings, and boneless breast chunks.
Chicken Canning FAQ
I’ve taken you through the process of canning chicken at home, covering all the various ways in which you can preserve chicken in a jar. If you still have questions, I’ve got answers!
What’s the Yield When Canning Chicken?
I use a 30-quart all-American brand pressure canner, which allows me to 14 quarts at once (most canners hold 7 quarts per batch). If I start with 6 whole chickens (5 to 6 lbs each), make exactly 14 quarts of home-canned chicken.
That includes:
- 7 Quarts of breast cubes and tenders
- 3 quarts of legs
- 2 quarts of boneless thighs
- 2 quarts of wings
I also usually end up with an extra 7 quarts of chicken broth leftover to can after the chicken’s done.
For a normal 7-quart canner batch, plan for 3 whole chickens (5 to 6 lbs each). That’s roughly 2 to 2 1/2 pounds of whole bone-in chicken per quart jar, but the carcass isn’t included here.
When working with already parted chicken, plan on 1 1/2 to 2 pounds of raw chicken per quart jar. The actual amount will depend on how it’s cut and packed, but that gives you a rough idea.
For pint jars, assume about 3/4 lb pound per jar as more space is taken up by the 1 1/4 headspace, at least proportionately.
How Long Does Canned Chicken Last?
Properly sealed jars of pressure canned chicken should maintain the quality on the pantry shelf for 12 to 18 months (hot pack). Raw pack chicken tends to lose quality in around 6 to 8 months. So long as the jars were properly canned and remain properly sealed, the contents will not “spoil” but over time the quality will begin to degrade.
Most sources recommend eating home-canned meat (regardless of the type) within 1 year for best quality. Know that it’s not about safety here, it’s about quality, and past that point, the jars do not “spoil” but they’re just not as good as they’d otherwise be.
Do You Have to Remove the Skin When Canning Chicken?
Removing the skin is optional when canning chicken, and it’s perfectly fine to leave the skin on during canning. That’s the best option when canning chicken legs and wings.
When it comes to breasts and thighs, I tend to remove the skin from breasts because they’re not ideal when canned whole. They’re just too big to reasonably pack into jars. If you’re canning half breasts or smaller breast pieces you might have success leaving the skin on and then browning it once it comes out of the jar.
Leaving skin on the thighs is a good option, since they pack whole into the jars without issue. I’ve canned the thighs skinless in this tutorial because I usually used canned chicken thighs as pulled chicken meat for burritos, and it’s best without skin for the purpose. They also do fine as the skin on thighs that you pull out of the jar and brown in a pan before serving.
How Does Pressure Canned Chicken Taste?
One of the nice things about pressure cooking (as well as pressure canning) is the meat is always incredibly tender when it comes out of the canner. Can a young chicken or an old rooster, it doesn’t matter, the meat will still be tender and delicious.
You get the best flavor when you brown the meat, use the recommended amount of salt, and can chicken in a well-made chicken broth. In that case, it tastes more or less exactly like a perfect rotisserie chicken.
In the case of skin on legs and wings, just remove the meat from the jars, drain well and brown quickly in a skillet with hot oil. Believe it or not, the skin will crisp beautifully and taste like a more tender version of roast chicken legs.
Can You Add Seasoning When Canning Chicken?
Reasonable amounts of dry spices and herbs are perfectly fine to add when canning chicken. Generally, the amounts you’d use in cooking chicken generally are safe for canning, but I’d suggest using less than you normally would. Flavors tend to intensify in the pressure canner, and during storage, so go light at first until you find the amount that your family likes.
The main things to avoid when seasoning canned chicken are creating spice pastes that really cover the meat in incredible amounts of dry spices (as is sometimes done in Thai or Indian cooking, or in dry rubs for American-style BBQ). Excessive amounts of seasoning can thicken the liquid in the jar and prevent heat penetration. You need to make sure the liquid stays a liquid in the jar, so avoid creating dry rubs or spice pastes.
Be aware that some species tend to get bitter during pressure canning, cumin and cinnamon are some common examples. Go light on the spicing until you’ve experimented and found a recipe that works for your family.
Personally, I like a simple sprinkling of garlic powder and onion powder, and maybe a little smoked paprika.
How do you use pressure canned chicken?
You can use pressure canned chicken in the same way you’d use any cooked chicken. For most recipes, I’d recommend draining the broth from the jar and reserving it for another use. Breast meat works well in stir-fries, casseroles or just shredded into a sandwich. Thighs are excellent either re-fried whole or pulled into burrito meat.
Bone-in legs and wings can be browned in hot oil in a pan and served as it. Believe it or not, buffalo wings actually work quite well with canned wings. Simply brown them in hot oil to crisp the skin and then toss in your buffalo wing sauce before serving.
Be aware that chicken bones become quite soft when pressure canned, and they’ll tend to break easily. Be careful when eating canned bone-in chicken, and I don’t recommend serving canned bone-in chicken to children.
Canning Chicken
Home-canned chicken allows you to preserve chicken right on the pantry shelf and makes for quick meals later on.
Ingredients
- Chicken
- Chicken Broth
- Salt (optional)
Instructions
- Start by preparing the chicken. If starting with whole birds, part the birds into whatever pieces you desire and save the carcasses for making broth. Roast the carcasses and make a chicken broth for canning, or start with prepared chicken broth and pre-cut chicken pieces. Chicken may be canned boneless or bone-in, with or without skin, and in large pieces or small chunks, based on your preference.
- Preheat your pressure canner and prepare your jars/lids/rings.
- Brown the chicken in a bit of oil on all sides and then pack into prepared canning jars, leaving 1 1/4 inch headspace.
- Add salt, if desired. The recommended amount is 1 tsp per quart or 1/2 tsp per pint. Adjust to your tastes, or omit.
- Cover the chicken in boiling chicken broth (or water), still maintaining 1 1/4 inch headspace. Adjust pieces to be below the liquid line and de bubble jars. Adjust headspace if necessary.
- Wipe jar rims to remove any oil and seal jar to finger tight with 2 part canning lids.
- Load the canning jars into the pressure canner, packing it according to the manufacturer's directions.
- Close the lid on the pressure canner, but don't start bringing it up to pressure yet. Turn up the heat and allow the canner to vent steam for a full 10 minutes to ensure that the chamber is completely full of steam before sealing the canner completely and bringing it up to pressure.
- Canning pressure depends on altitude and the type of canner used. See notes below for specifics.
- Once at the specified pressure, start the timer. Canning times are as follows: For Boneless chicken (raw or hot pack), process jars at pressure for 75 minutes for pints and 90 minutes for quarts. For bone-in chicken (raw or hot pack), process jars for 65 minutes for pints and 75 minutes for quarts.
- Once the canning time is complete, turn off the heat and allow the canner to cool completely before removing the jars.
- Check seals, and store any unsealed jars in the refrigerator for immediate use.
Properly canned and sealed jars will maintain peak quality on the pantry shelf for 12 to 18 months after canning. Remove bands for storage. Refrigerate after opening.
Notes
Whole roasted chicken or leftover chicken - Instead of browning individual chicken pieces, you can also roast the chicken whole in an oven until it's done enough to pick from the bones. Pick the chicken and pack it into jars and then proceed as you otherwise would.
Salt - The salt is optional, and not required for preservation. It improves flavor and texture when canning chicken.
Water or Broth - Water or chicken broth are both acceptable canning liquids, but I'd recommend chicken broth for the best flavor.
Raw Pack v. Hot Pack - I've given instructions for hot pack because it results in much higher quality canned chicken, and it stores better. If you'd like to do raw pack, simply pack the chicken into jars without liquid leaving 1 1/4 inch headspace. Seal jars and process as you would hot pack chicken. No liquid is added to the raw pack since the chicken will release its own juices during canning.
Canning Pressures - The proper canning pressure to use varies based on your elevation and the type of canner you're using:
For Dial Gauge Pressure Canners (presto brand, etc):
- For 0 to 2,000 feet in elevation, use 11 pounds of pressure
- For 2,001 to 4,000 feet in elevation, use 12 pounds of pressure
- For 4,001 to 6,000 feet in elevation, use 13 pounds of pressure
- For 6,001 to 8,000 feet in elevation, use 14 pounds of pressure
- Above 8,000 feet in elevation, use 15 pounds of pressure
For Weighted Gauge Pressure Canners (All American Brand, etc):
- For 0 to 1,000 feet in elevation, use 10 pounds of pressure
- Above 1,000 feet in elevation, use 15 pounds of pressure
Chicken Canning Recipes
I’ve just taken you through pressure canning whole chicken, or simply chicken breasts, thighs, legs, or wings. All of this plain canned chicken is incredibly versatile, and it’ll help you put a meal on the table quickly.
Meal in a jar canning recipes are less versatile, but they have a whole ready-prepared meal to heat and eat. These chicken canning recipes add other ingredients to round out the meal:
- Chicken and Gravy Dinner in a Jar
- Chicken Pot Pie Filling
- White Bean Chicken Chili
- Chicken Chili Verde
Meat Canning Recipes
Looking for more meat canning recipes?
H
Can frozen chicken be used?
Ashley Adamant
Yes, just defrost it before you start.
Nyeer Carswell
Thank you so much for this information!! I wish I had this years ago when the house was full of people, now it is only my husband and I. Still I think I’ll try canning meat since I already enjoy canning vegetables.
Thank you again! I enjoy reading your posts.
Nyeer
Rhonda
Can Better than Bouillon be used to make the broth? I see that it has whey in it but wouldn’t the amount be minuscule? Thank!!!
Ashley Adamant
Yes, you can use any type of bullion in to make the broth for this recipe. As you say, the whey in that would be so minuscule that it wouldn’t impact anything here. Bullion tends to be salty though, so you’ll need to adjust the amount of salt added (or likely, just leave it out and rely on the bullion for salt)
Julie B Brownewell
Why can’t you waterbath baked chicken?
Ashley Adamant
That’s a great question, and I really do need to write a whole article on just that topic because it’s asked a lot. When you put something in a jar, you’re creating an anarobic environment (without oxygen) and then storing it at room temperature. That’s what botulism needs to survive. Baking and water bath canning doesn’t destroy botulism spores, but generally, it doesn’t matter when you just cook and eat the chicken because you’re not storing it on the pantry shelf at room temperature in a sealed jar (you’re keeping it in the fridge).
The sealed jar is the trick here, and room temperature. Boiling does kill most things, but not everything. With acidic things, like pickles and jam, the acid in there prevents botulism. With baked chicken in your fridge (even if you store it in a sealed jar) the refrigerator temperatures prevent botulism. The problem with water bath canning meats and veg is that it’s then sealed, room temp and low acid…which are the conditions in which botulism thrives.
Does that make sense?
Tom Mcpadden
I’m at sea level and only have a 15 psi weight
Should I adjust cooking time?
Ashley Adamant
No, even at higher pressures the canning time is still the same. In the case of chicken, a higher pressure will not impact quality so just go with what you have.
Lexie
I have been canning chicken for years but I had never thought of browning it first. I’m excited to try that next! I love canning in pint jars with either a decent splash of barbecue sauce and finished with water or a quarter of a fermented lemon and a few peppercorns and having enough for one empty nest meal or dinner and leftovers for tomorrow. These are very popular with my husband and me as well as my grown son who occasionally gets away with shopping at mom’s.
Ashley Adamant
Nice! You can definitely season it like that, sounds good! Enjoy.
Jenn
When leaving the bone in…can the bones be eaten? Do they have to be removed?
Ashley Adamant
The bones doe need to be removed before eating.
TJR
When browning the chicken breast or thighs on the stove top how long and what temp should you do each side.
Ashley Adamant
It’s completely up to you and your tastes. The browning is optional, and how long it takes to brown will depend on how much water is in the chicken, your stove, etc. In general, it takes just a few minutes on high to get a good brown on my stove. Either way, it not required for canning, and raw, barely browned or really dark browning are all fine for canning.
TJR
I’m fairly new to pressure canning. at what temperature should and for how long should the chicken be cooked in the pan?
Ashley Adamant
Cooking the chicken before canning is optional, and you can cook it however you like (or not). Either way, it will be fully cooked during the canning process.
Kim
Instead of canning wings in broth, could you use some soy sauce, ginger and garlic for Asian flavored wings?
Ashley Adamant
Yes, definitely! That would be amazing. I just did that with pork belly actually, canning it in soy sauce, rice wine, ginger and garlic. We use it on top of homemade ramen (and the liquid is added to ramen broth). You could do that with chicken wings for sure, and it’d be amazing.
With chicken, if drained and fried in a hot pan with oil after canning, the chicken skin crisps really well, and then you could cook the liquid into a sauce for them too. OMG…I think I’m adding this to my “to make” list.