This post may contain affiliate links. Please see our disclosure policy.
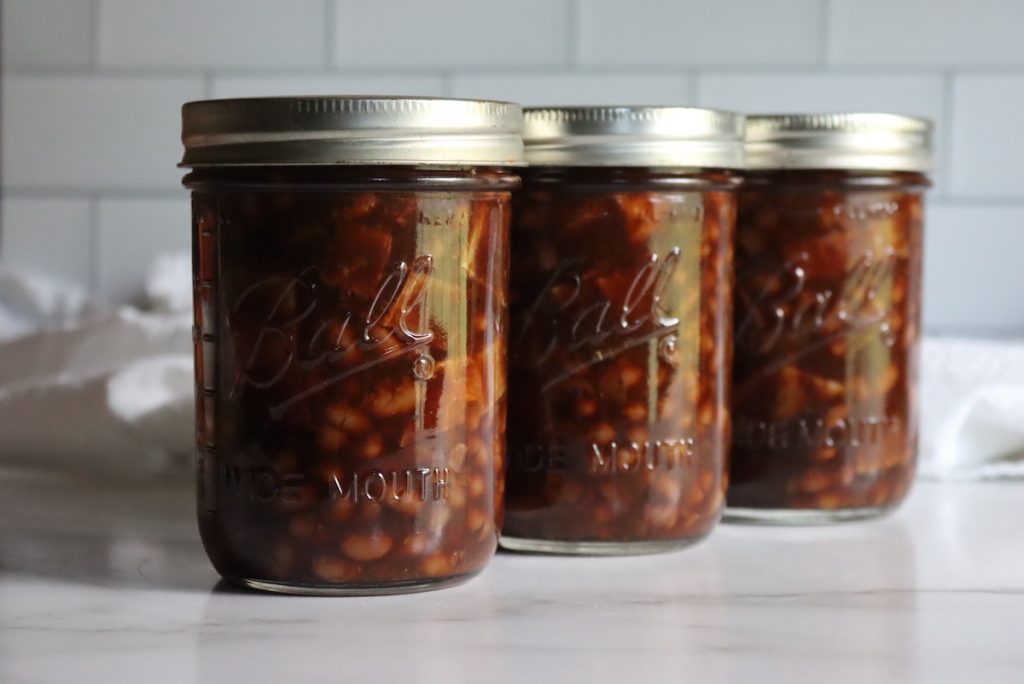
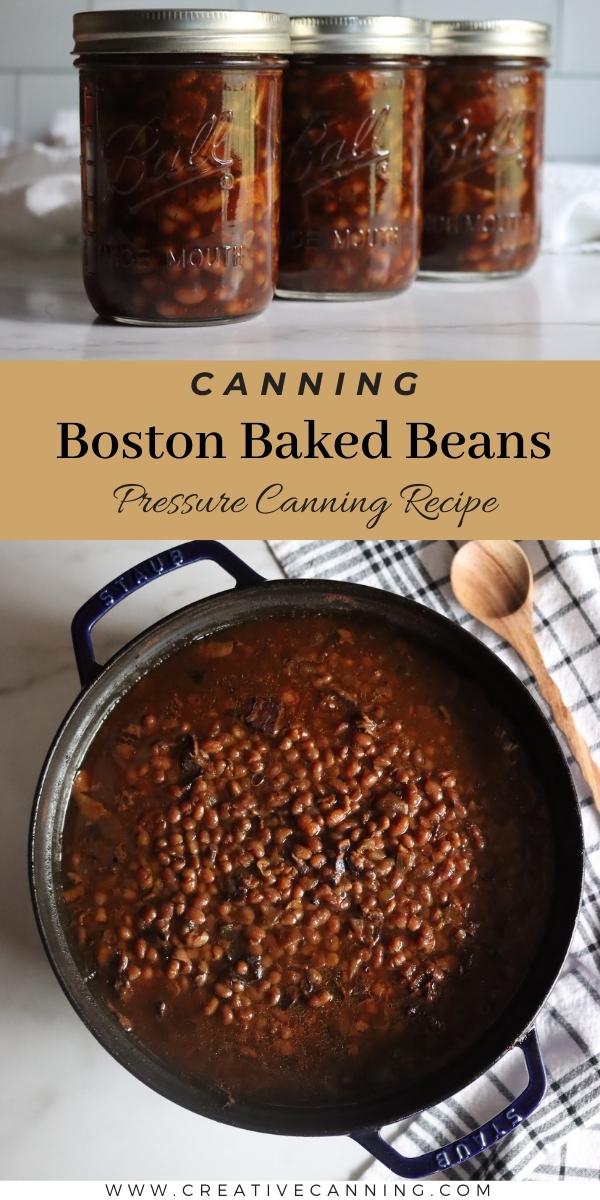
Canning baked beans at home means you always have a jar of homemade baked beans on hand for summer cookouts. This canning recipe for Boston baked beans uses a traditional molasses and brown sugar-based sauce, and the flavor comes through wonderfully in the finished jars.
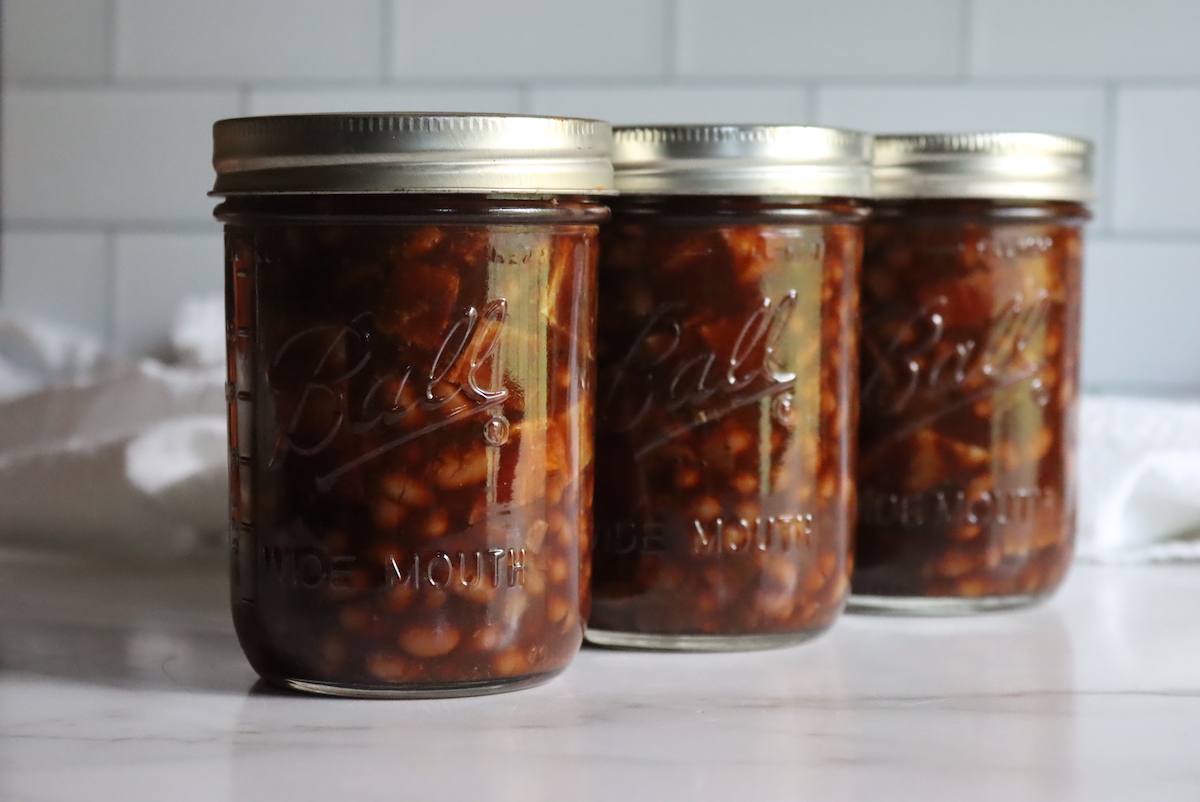
Table of Contents
- Notes from My Kitchen
- Quick Look at the Recipe
- Ingredients for Canning Boston Baked Beans
- Safe Substitutions for Canning Boston Baked Beans
- Vegetarian Variation
- Making Boston Baked Beans for Canning
- Canning Boston Baked Beans
- Altitude Adjustments
- Yield Notes
- Serving Ideas
- Boston Baked Beans FAQs
- More Baked Bean Recipes
- Canning Boston Baked Beans Recipe
- Bean Canning Recipes
This recipe has been reviewed for safety and accuracy by a Master Food Preserver certified through the University of Cornell Cooperative Extension.
Homemade Boston baked beans are a real treat, and they’re infinitely better than store-bought. The problem is, the flavor develops after long, slow cooking…and you just can’t make homemade baked beans for any casual weeknight meal. Beyond that, slow-cooking baked beans for 4+ hours means heating up the house, which is fine in the winter months… but not ideal during the summer BBQ season, when you really crave baked beans alongside ribs and potato salad.
Canning homemade baked beans is the answer, allowing you to enjoy their incredible flavor at a moment’s notice. Do the work in the winter months, and you’ll appreciate the extra heat. Then, when summer rolls around, you’ll have a quick and easy BBQ side dish on your pantry shelf, just waiting for the community potluck.
A big batch of baked beans takes no more effort than a small one, and canning stores the excess in a convenient, easy-to-use, shelf-stable way.
Notes from My Kitchen

I put up most of my baked beans in the winter, when running the oven for four hours warms the whole house instead of working against it. By the time BBQ season arrives, I have a shelf full of jars ready to heat and serve, which is a relief when the last thing I want in July is a hot kitchen.
These travel well to potlucks, since a couple of jars feed a crowd and I can grab them right off the pantry shelf. If you have never canned a meal in a jar before, baked beans are a satisfying place to start, since you end up with a finished dish rather than a single ingredient to cook later.
Be aware that you’ll need a pressure canner to put up baked beans, as they cannot be processed in a water bath canner or electric pressure cooker (instant pot). We use a 30-quart All American Brand Pressure canner, and it holds 14 quarts or 19 pints.
If you’re not familiar with pressure canning, please read my beginners guide to pressure canning before getting started, and also double-check that you have all the right home canning supplies on hand.
This recipe makes a generous batch, around 10 to 12 pints (or 5 to 6 quarts), so make sure you have plenty of jars clean and ready before you start. The Ball Blue Book lists a smaller yield, but in practice, a full batch fills closer to a dozen pints, and this simple Blue Book error leaves many readers short on jars. You can scale it up to fill a larger canner, just know that even a single batch needs a really big pot to cook the beans and a large dutch oven to bake them before canning.
Quick Look at the Recipe
- Recipe Name: Boston Baked Beans
- Recipe Type: Bean Canning Recipes
- Canning Method: Pressure Canning
- Prep Time: 30 minutes (plus overnight soak)
- Cook Time: About 4 hours 45 minutes (simmer plus slow bake)
- Canning Time: 80 minutes (pints) or 95 minutes (quarts)
- Yield: About 10 to 12 pints (5 to 6 quarts)
- Jar Sizes: Pints or quarts
- Headspace: 1 inch
- Pressure: 10 to 15 lbs, adjusted for altitude and canner type
- Ingredients Overview: Navy beans, salt pork (or ham or bacon), onions, brown sugar, molasses, dry mustard, salt
- Safe Canning Recipe Source: Ball Blue Book Guide to Preserving
- Difficulty: Intermediate
- Similar Recipes: For a meatless version, try canning vegetarian baked beans. For more options, see my baked bean canning recipes and other bean canning recipes.
Ingredients for Canning Boston Baked Beans
There are lots of different regional variations for baked beans, but by far the most common is Boston baked beans. They’re simple in terms of ingredients, though the flavor is rich and complex, making it seem like a lot more goes into them.
They’re somewhat similar to the popular grocery store canned “Bush’s Baked Beans” but those are mostly flavored with sugar, while these have a more balanced taste.
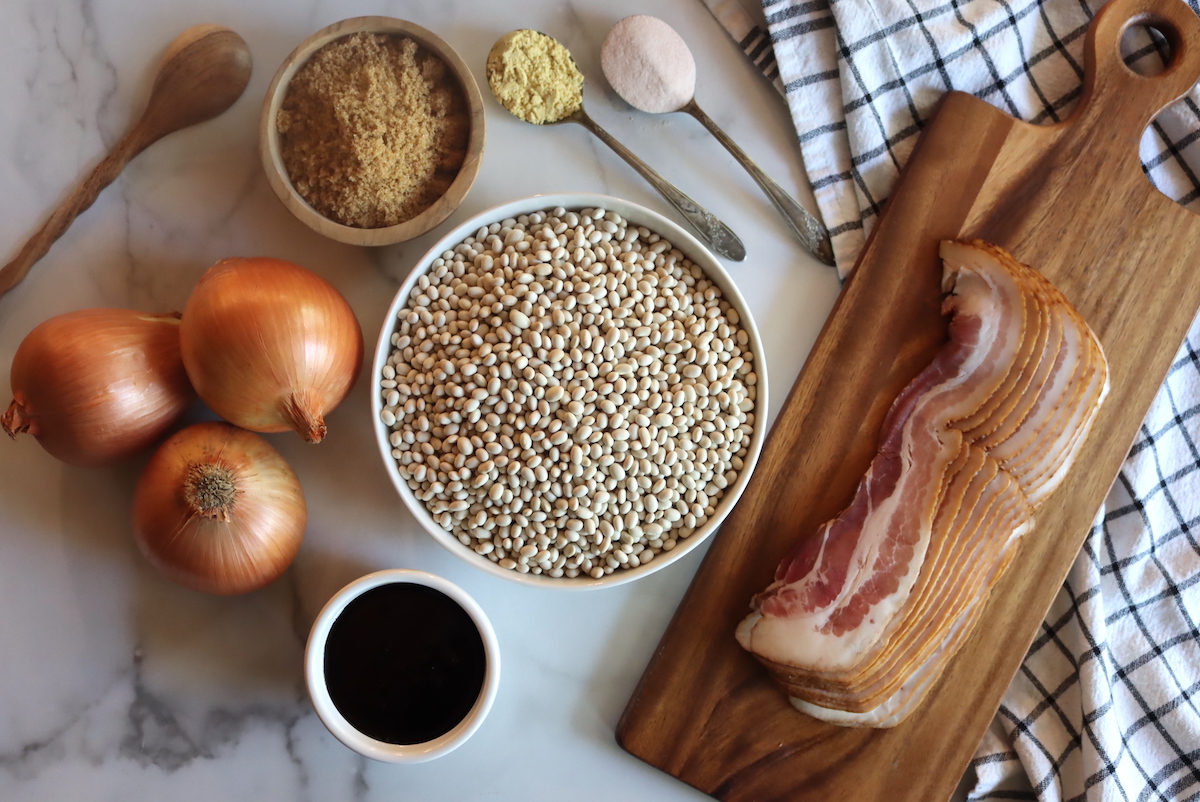
This baked bean canning recipe is adapted from the Ball Blue Book Guide to Preserving, and here’s what you’ll need for a batch (which makes about 10 to 12 pints):
- 1 quart dried navy beans (4 cups, or about 2 lbs)
- 1/2 lb salt pork, ham, or bacon, cut into 1/2 inch pieces
- 3 large onions, diced
- 2/3 cup brown sugar
- 2/3 cup molasses
- 2 tsp dry mustard powder
- 2 tsp salt
- 4 cups water (or unsalted stock/broth)
The recipe, as it stands, is just about perfect. My husband says, “She never met a recipe she didn’t want to change,” and I’ll be honest, I did try to change this recipe. I made it many times, playing around with spices, reducing salt/sugar/onions, and all the other ways you can safely change a pressure canning recipe.
My conclusion? It’s perfect the way it is.
Safe Substitutions for Canning Boston Baked Beans
I’ve made this recipe many times, trying to improve it by adjusting the spices, salt, sugar, and onions, and I keep landing back on making it as written. That said, there are a handful of changes you can make safely, as long as you swap like for like and don’t add to the total amount of solids or thicken the sauce.
Here are the tweaks that hold up, including the ones readers ask about most:
- Peppers in place of the onions. The recipe’s “3 large onions” is vague (mine ran just under a pound each, dicing to roughly 6 to 7 1/2 cups total). You can trade an equal volume of diced peppers, sweet or hot, for up to about half the onions, keeping the combined amount the same. Keep them diced rather than pureed, and keep the mixture soupy.
- Salt pork, ham, or bacon. Any of the three works at the same 1/2 pound, cut into 1/2 inch pieces. Don’t increase the quantity, and be sure to dice it small. Swap by weight rather than adding extra meat. For a meatless batch, see the Vegetarian Variation below or my canning vegetarian baked beans.
- Bean Types. The recipe specifically calls for “Navy Beans,” but you’re always allowed to substitute other dry bean types in canning recipes. Some readers use pinto beans or red kidney beans, others use great northern beans. Other types of beans may give a different texture/flavor than you expect, so keep that in mind.
- Dry mustard. If you don’t have dry mustard on hand, fine-ground prepared yellow mustard, like Frenches yellow mustard, works in its place.
- Extra spices. Reasonable amounts of dry spices like garlic powder or paprika are fine for canning safety, as long as you don’t go so heavy that you turn the sauce into a paste (it should still be soupy as it cooks). I tried it, and it didn’t improve things, so I’d season in the bowl at the table instead.
- Sugar, molasses, and salt. You can reduce any of these safely, since they’re there for flavor and texture, not for canning safety. The sugar firms the beans during the long bake, though, so cutting it gives softer, mushier beans and thinner flavor. I don’t recommend reducing the sugar or molasses.
- What to avoid. Don’t add flour, cornstarch, or other thickeners, dairy, pasta, rice, or extra beans, and don’t puree the vegetables, shorten the processing time, or lower the pressure. For a different base entirely, start from another tested recipe in my baked bean canning recipes.
Vegetarian Variation
Making this vegetarian is simple enough. Leave out the salt pork, ham, or bacon, and bump the salt up to 3 tsp per batch (from 2 tsp) to make up for what the meat would have added. It’s less rich without the meat, but still quite satisfying (I first made it this way by accident, after realizing I had no bacon in the house).
For more flavor, replace the water with vegetable stock and add about a teaspoon of liquid smoke per batch. That’s really all there is to canning vegetarian baked beans.
Making Boston Baked Beans for Canning
Generally, when you’re canning beans, you only cook them slightly before canning so they absorb water and puff up to their final size, and then let the pressure canner do the rest. You could do that with baked beans, and there are a number of baked bean canning recipes that have you simply quickly par-boil the beans and then pour on a sauce before pressure canning.
Though it’s simpler, I don’t suggest it.
Much of the flavor in baked beans comes from the long, slow cooking in the sauce. It changes the flavor and the texture of the beans.
You’d think that a long cook would yield mushy beans, but the sugar and salt in the recipe actually help firm them up. Generally, when you’re making baked beans, you cook them to your desired level of tenderness before you put on the sauce, because once you add it, they won’t get softer.
That’s actually tricky if you add the sauce early on, as the beans will stay pretty tough (even with pressure canning). They’ll also come out dry that way.
The added sugar allows the beans to slow-cook all day long without getting soft, and the flavor penetrates deep for incredible flavor.
This baked bean canning recipe actually cooks the baked beans all the way to fully prepared for the table, then loads everything into the jar for pressure canning. It takes a bit longer, but it’s all pretty much hands-off time as the beans slow cook in the oven.
Soak the Beans
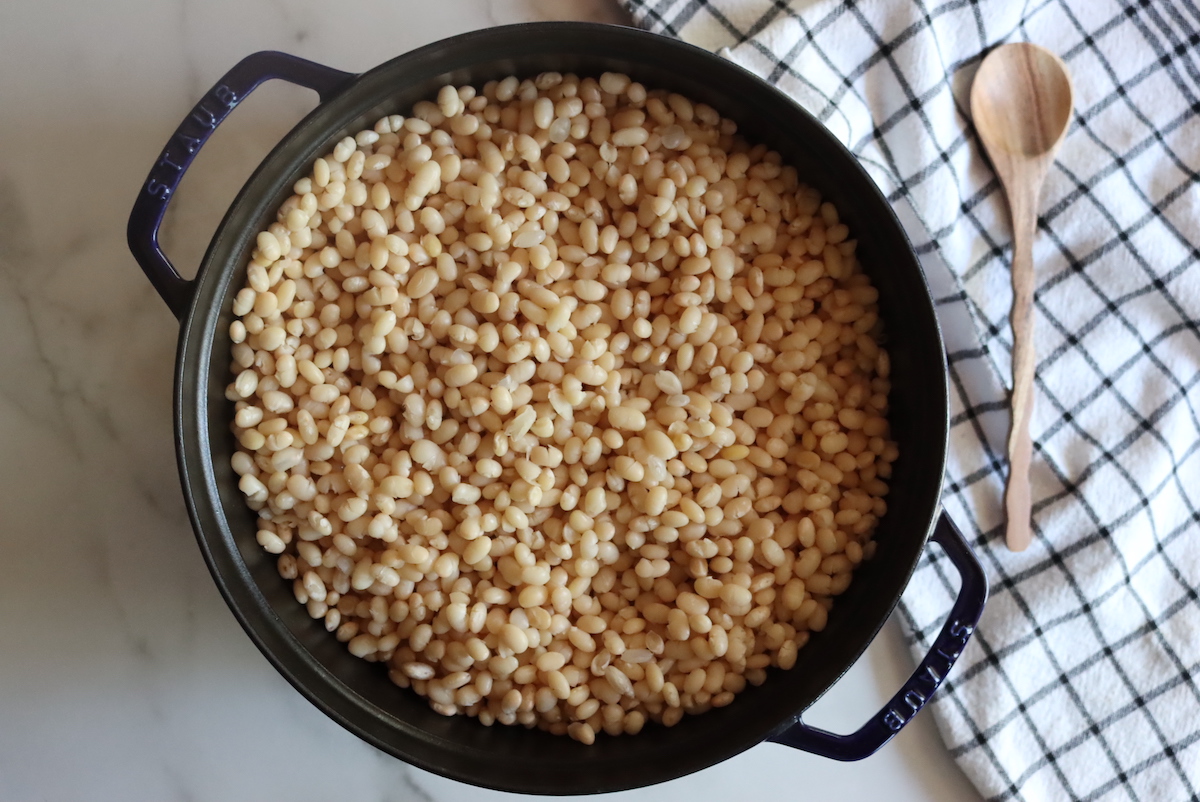
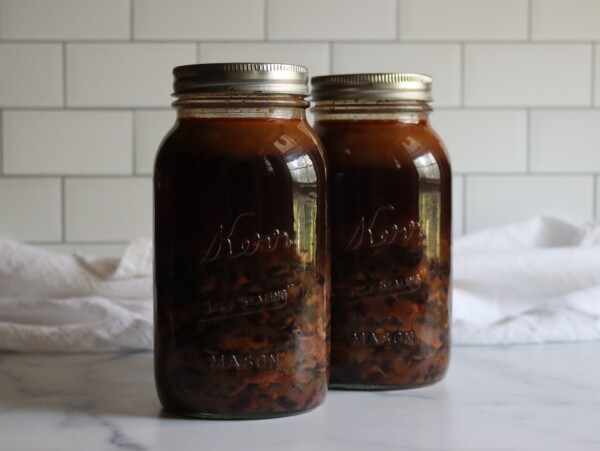
Start by soaking the beans overnight in cool water.
(Alternately, you can use the “quick soak” method, which involves bringing them to a boil on the stove with plenty of water, cooking for 2 minutes, then turning off the heat and leaving them to quick soak for an hour. Drain the water and proceed as you would with overnight soaked beans.)
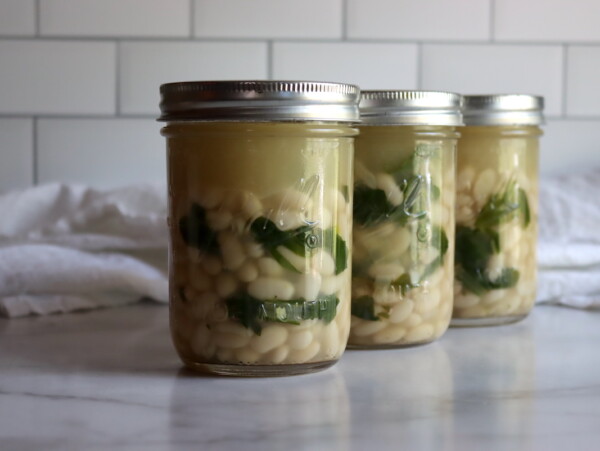
Cook the Beans
Place the soaked beans in a pot of water and bring to a boil on the stove. Reduce heat to a simmer, and cook until the beans start to split. The exact time will depend on your beans and how long they’ve been stored, but it’s usually around 45 minutes or so.
They should be tender enough to eat, with some of their skins just starting to split, but not falling apart.
Once cooked, turn off the heat and drain the beans completely before proceeding.
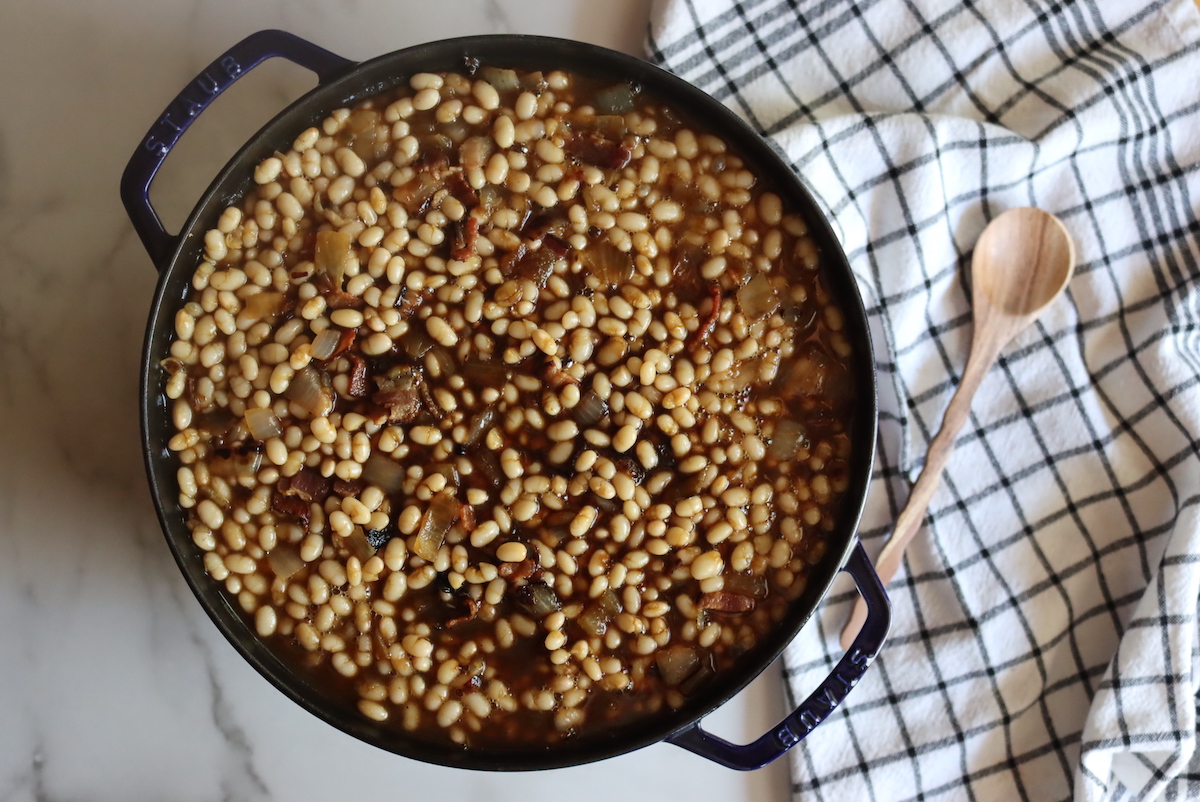
Make the Sauce
Next, prepare a sauce by mixing all the other ingredients together. Yes, all of them. That includes the diced onions, the meat, sugar, molasses, and other spices/salt, plus the water or stock. It should be pretty soupy but stir it all until the sugar dissolves completely, then pour it over the top of the beans and mix it in.
If you want, you can pre-cook the pork in a hot pan to brown it, and you can brown the onions. I found that browning the pork made little difference in the final flavor, and browning the onions actually detracted from their finished flavor/texture. Not what I would have expected, but it’s what happened.
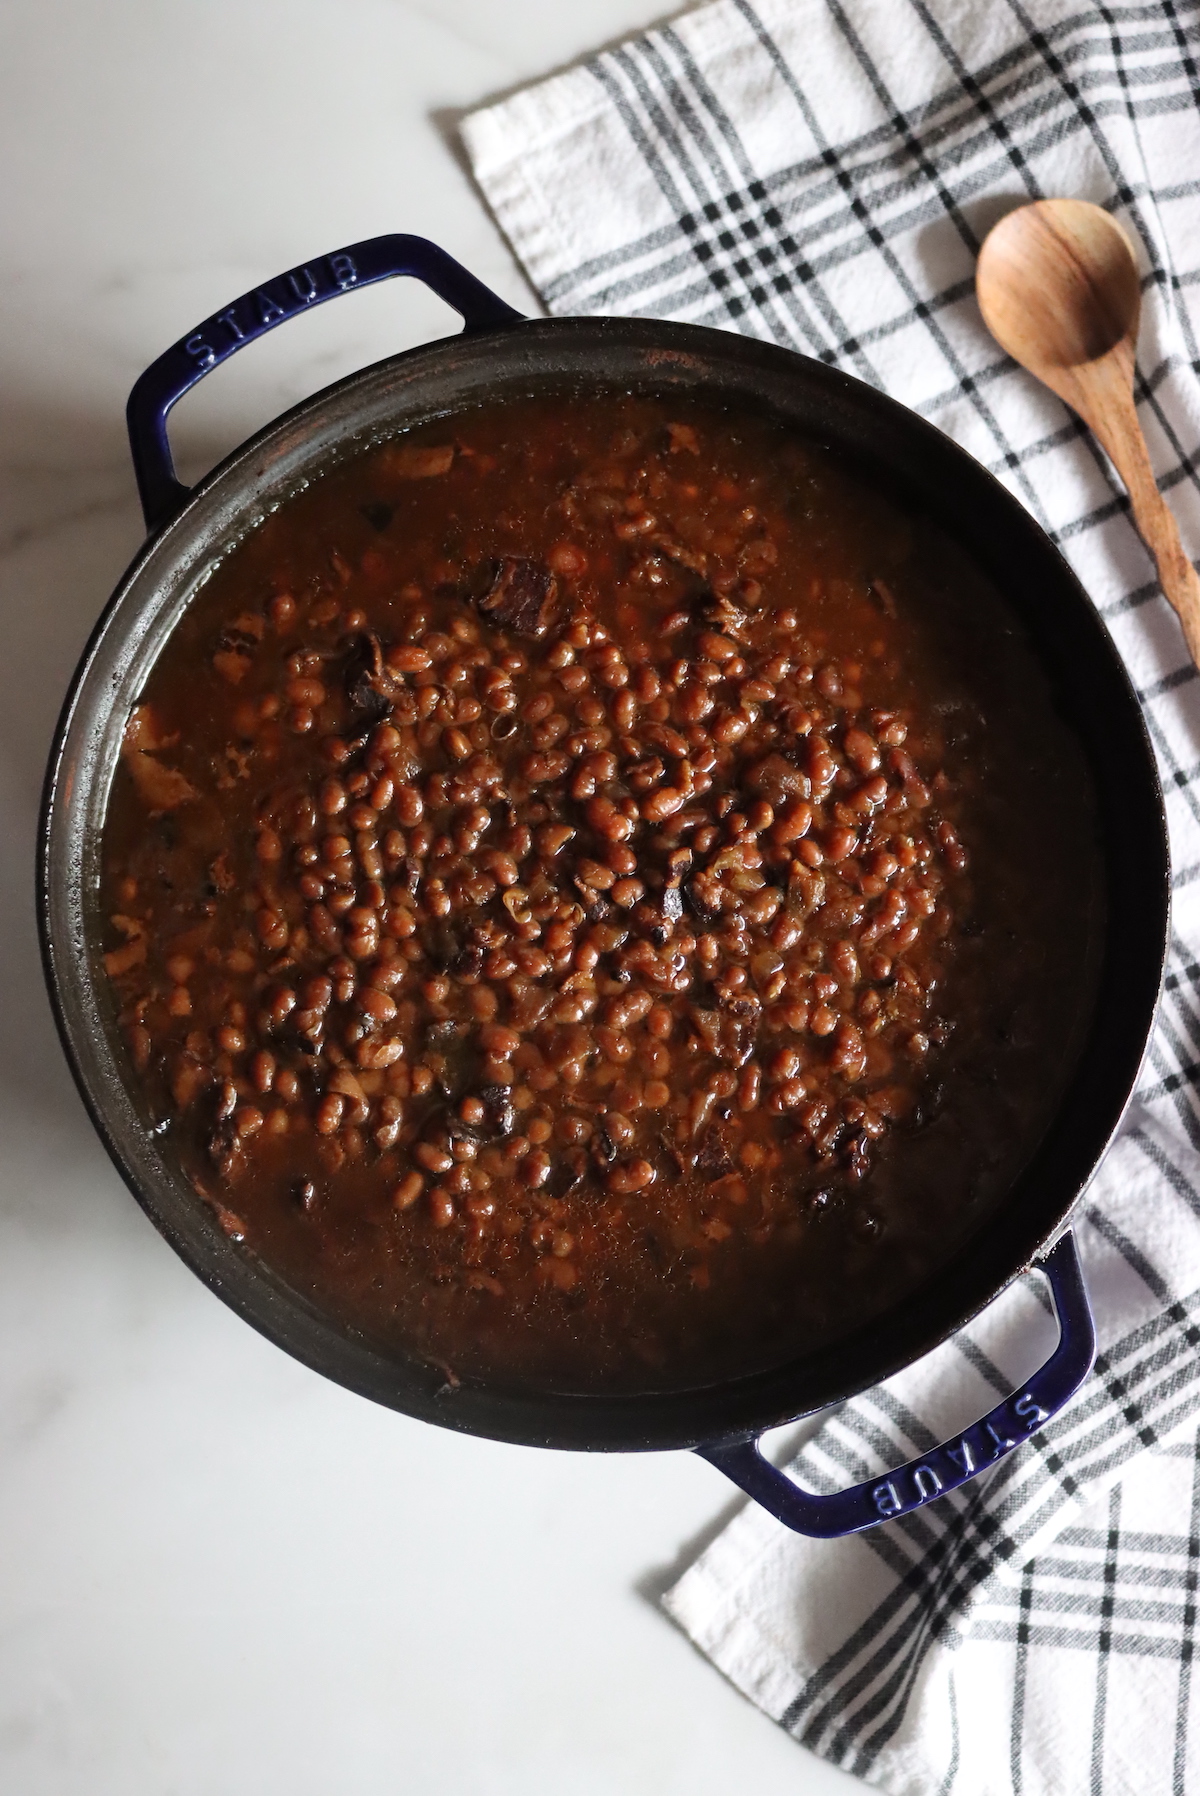
Bake the Beans
I have a really big 7 to 8 quart enameled dutch oven, and a single batch of this baked bean canning recipe fills it nearly to the top. For a single batch, plan on at least a 7-quart dutch oven so the beans have room to bubble during the long bake, or split the batch between two smaller pots.
Whatever type of baking pan you use, it needs to be something with a really tight-fitting lid. Most Dutch ovens will work, but lacking that, you can cover the top with foil and wrap it tightly. You want the liquid to stay in the pot and evaporate as little as possible.
You’re basically slow caramelizing everything in there, but if it runs dry it’ll burn quickly. My pot had a nice, tight-sealing lid, and I needed to add about a quart of liquid during the cooking process. If yours loses more liquid, be sure to add more to keep the mixture soupy and the beans under at least a small amount of liquid.
I’d suggest baking because the all-around heat makes sure it cooks evenly, but you can cook it on a very low burner on the stovetop, too. It may burn on the bottom that way, so watch it.
A crockpot would also work.
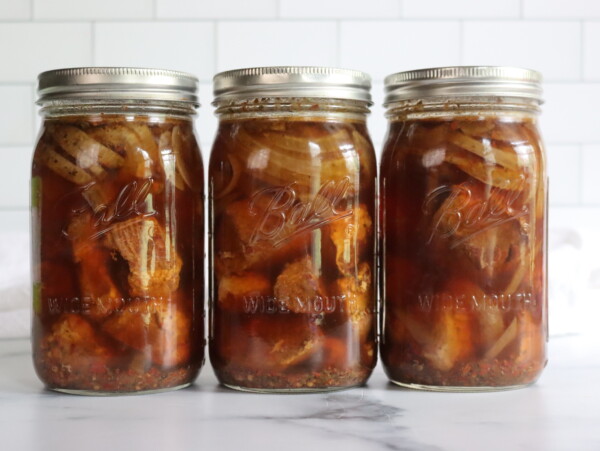
Either way, cook at around 300 degrees for about 4 hours, until the beans are a rich brown color and the flavors have come together.
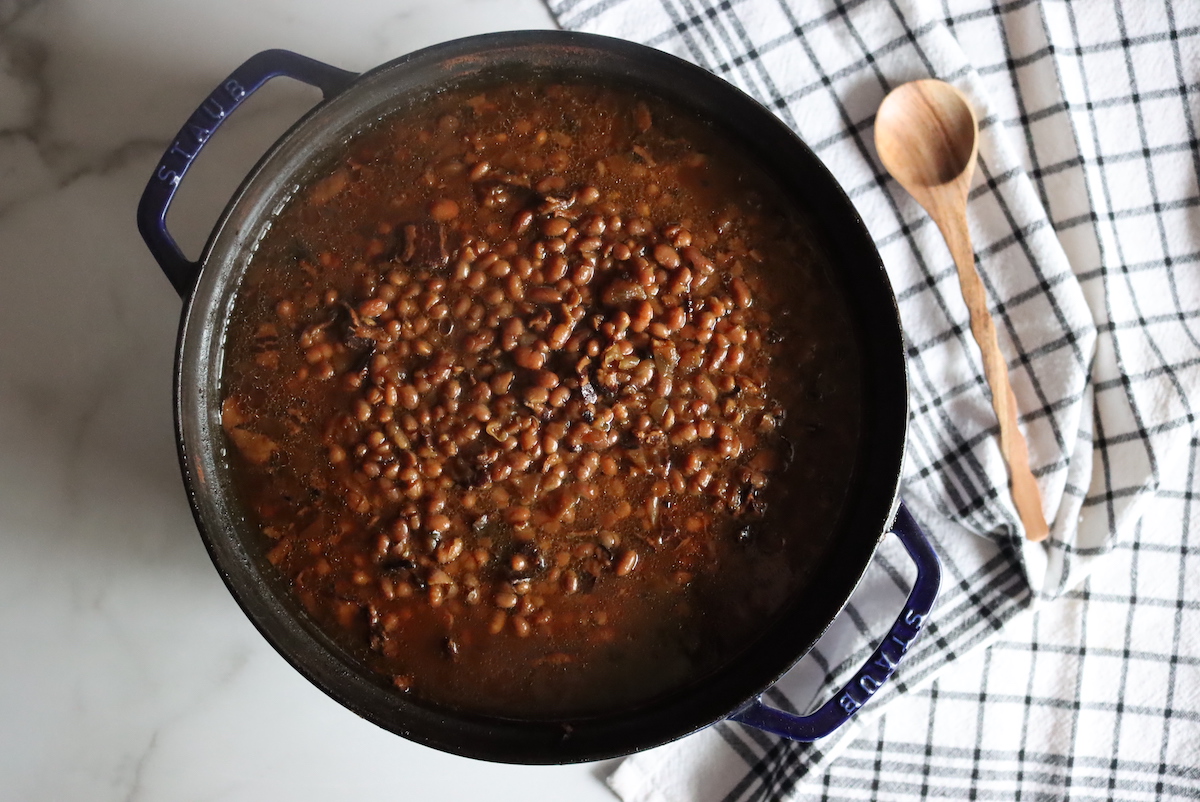
Once the beans are fully baked and flavorful, it’s time for canning. (You can also pull off some and serve them for dinner tonight, since they’re fully cooked and won’t change in flavor or “done-ness” after this point.)
Canning Boston Baked Beans
Prepare your pressure canner for canning based on the manufacturer’s instructions. For most canner models, that means putting in the bottom rack and adding a few inches of water. Pre-heat it on the stove to just simmering, around 180 degrees F.
Bring a kettle of water to a boil on the stove (to fill any jars if you don’t have quite enough liquid in the bean pot).
Prepare about 12 pint jars (or 6 quart jars) per batch, and keep a couple of extras clean and warm just in case. Exact yield shifts a little depending on how soupy you keep the beans. Divide the beans evenly across the jars using a slotted spoon, leaving 1-inch headspace. Top the jars with the canning sauce from the bean pot, still maintaining 1-inch headspace.
If you’re short on liquid, pour in a bit of water from the pre-heated kettle. The beans should be under the liquid line in the jars, but there should still be a 1-inch headspace at the top of each jar.
Wipe rims, apply canning lids, and seal to finger tight with canning rings.
Load the jars into your pressure canner.
Lock the canner lid into place, but leave the steam vent open for now. On a weighted gauge canner, that means leaving the weight off the vent pipe, and on a dial gauge canner, it means leaving the petcock open. Turn the heat to medium-high, and once steam is puffing out of the open vent in a steady stream, let it vent like that for a full 10 minutes. This drives the air out of the canner so it can reach an accurate pressure.
After the 10 minutes of venting, set the weight on the vent pipe (or close the petcock on a dial gauge canner) to seal it off, and let the canner build pressure from there.
Once at pressure, process the jars for 80 minutes for pints and 95 minutes for quarts.
(Those instructions come directly from the Ball Blue Book, and many baked bean recipes process for less total time. This recipe has a thicker sauce than most, so I believe that’s the justification for the longer canning time. The beans are fabulous after canning, and the long slow cook in the sauce beforehand firms them up so they’re still perfect out of the canner even after all that time, I promise.)
After the canning time is complete, turn off the heat and allow the canner to cool completely before unloading the jars.
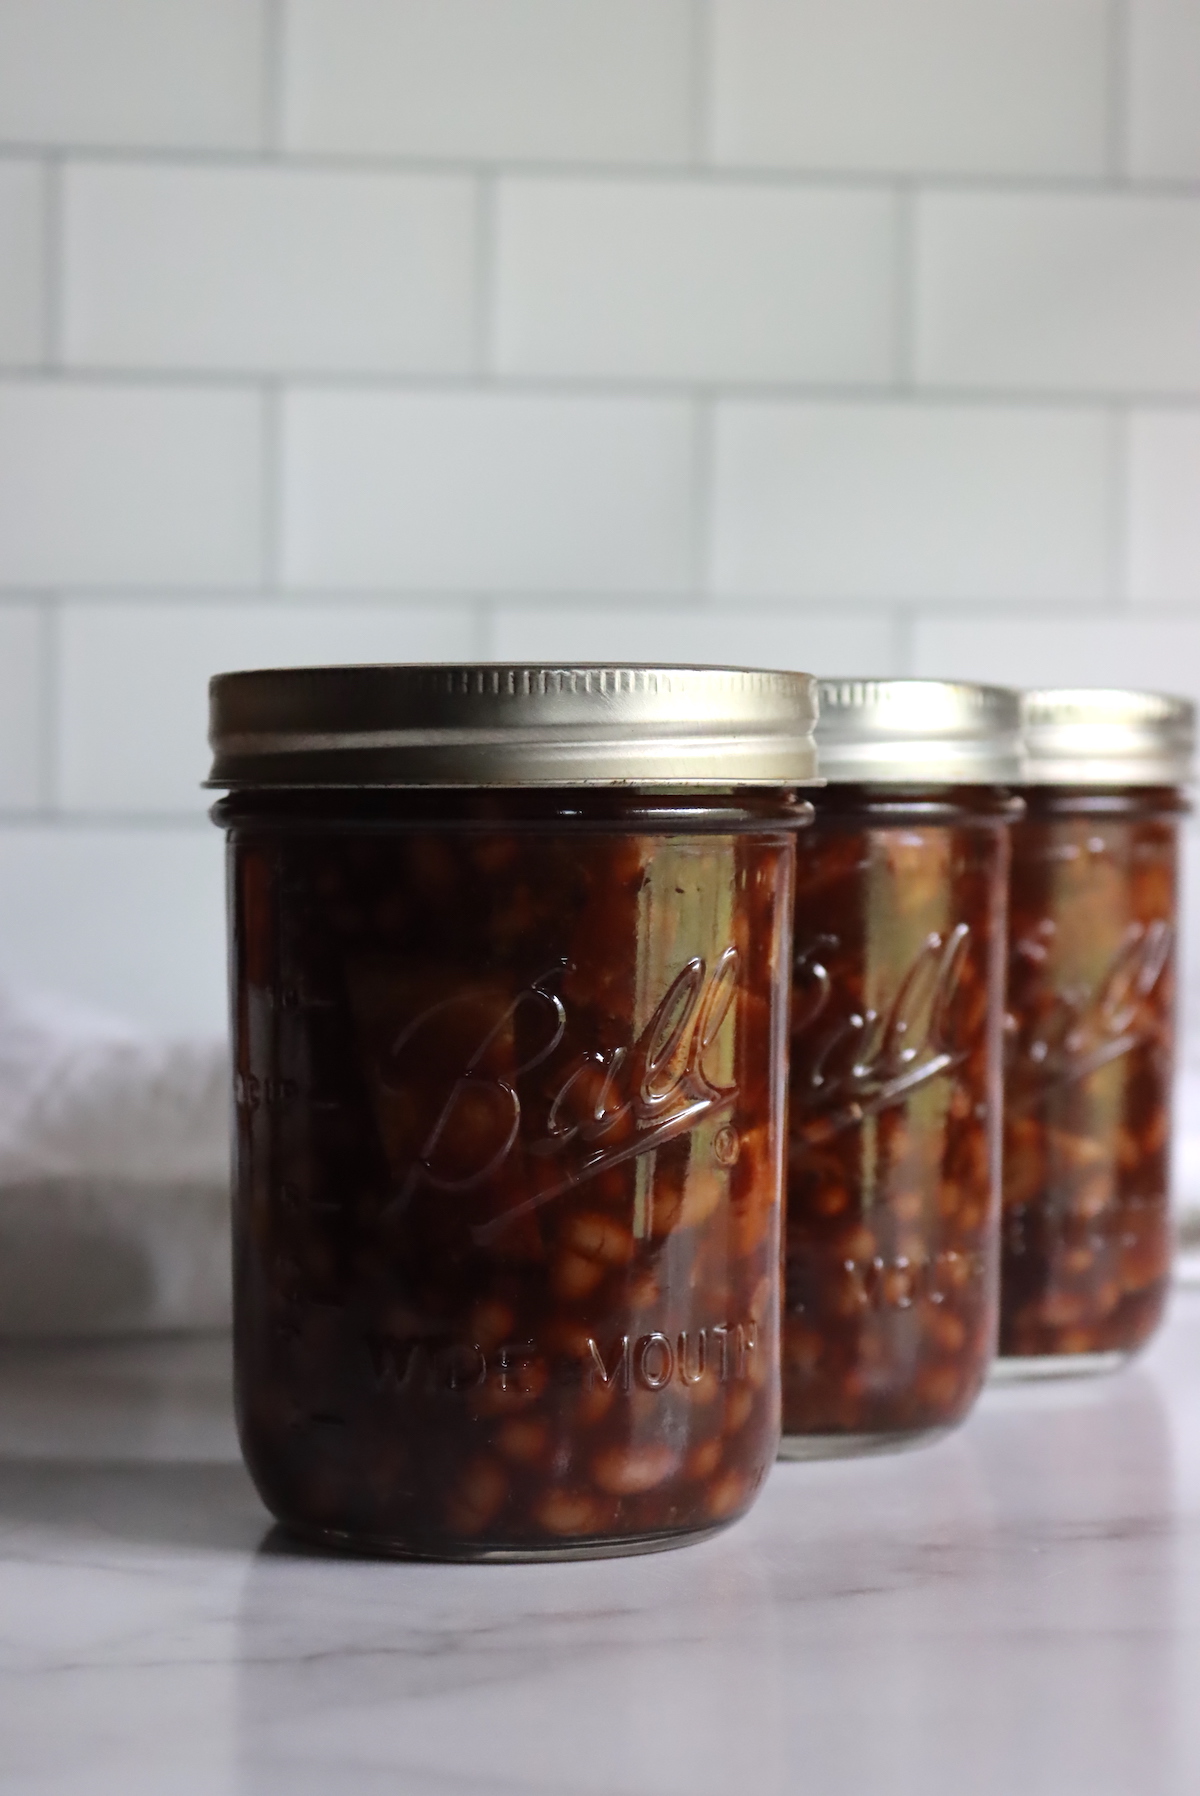
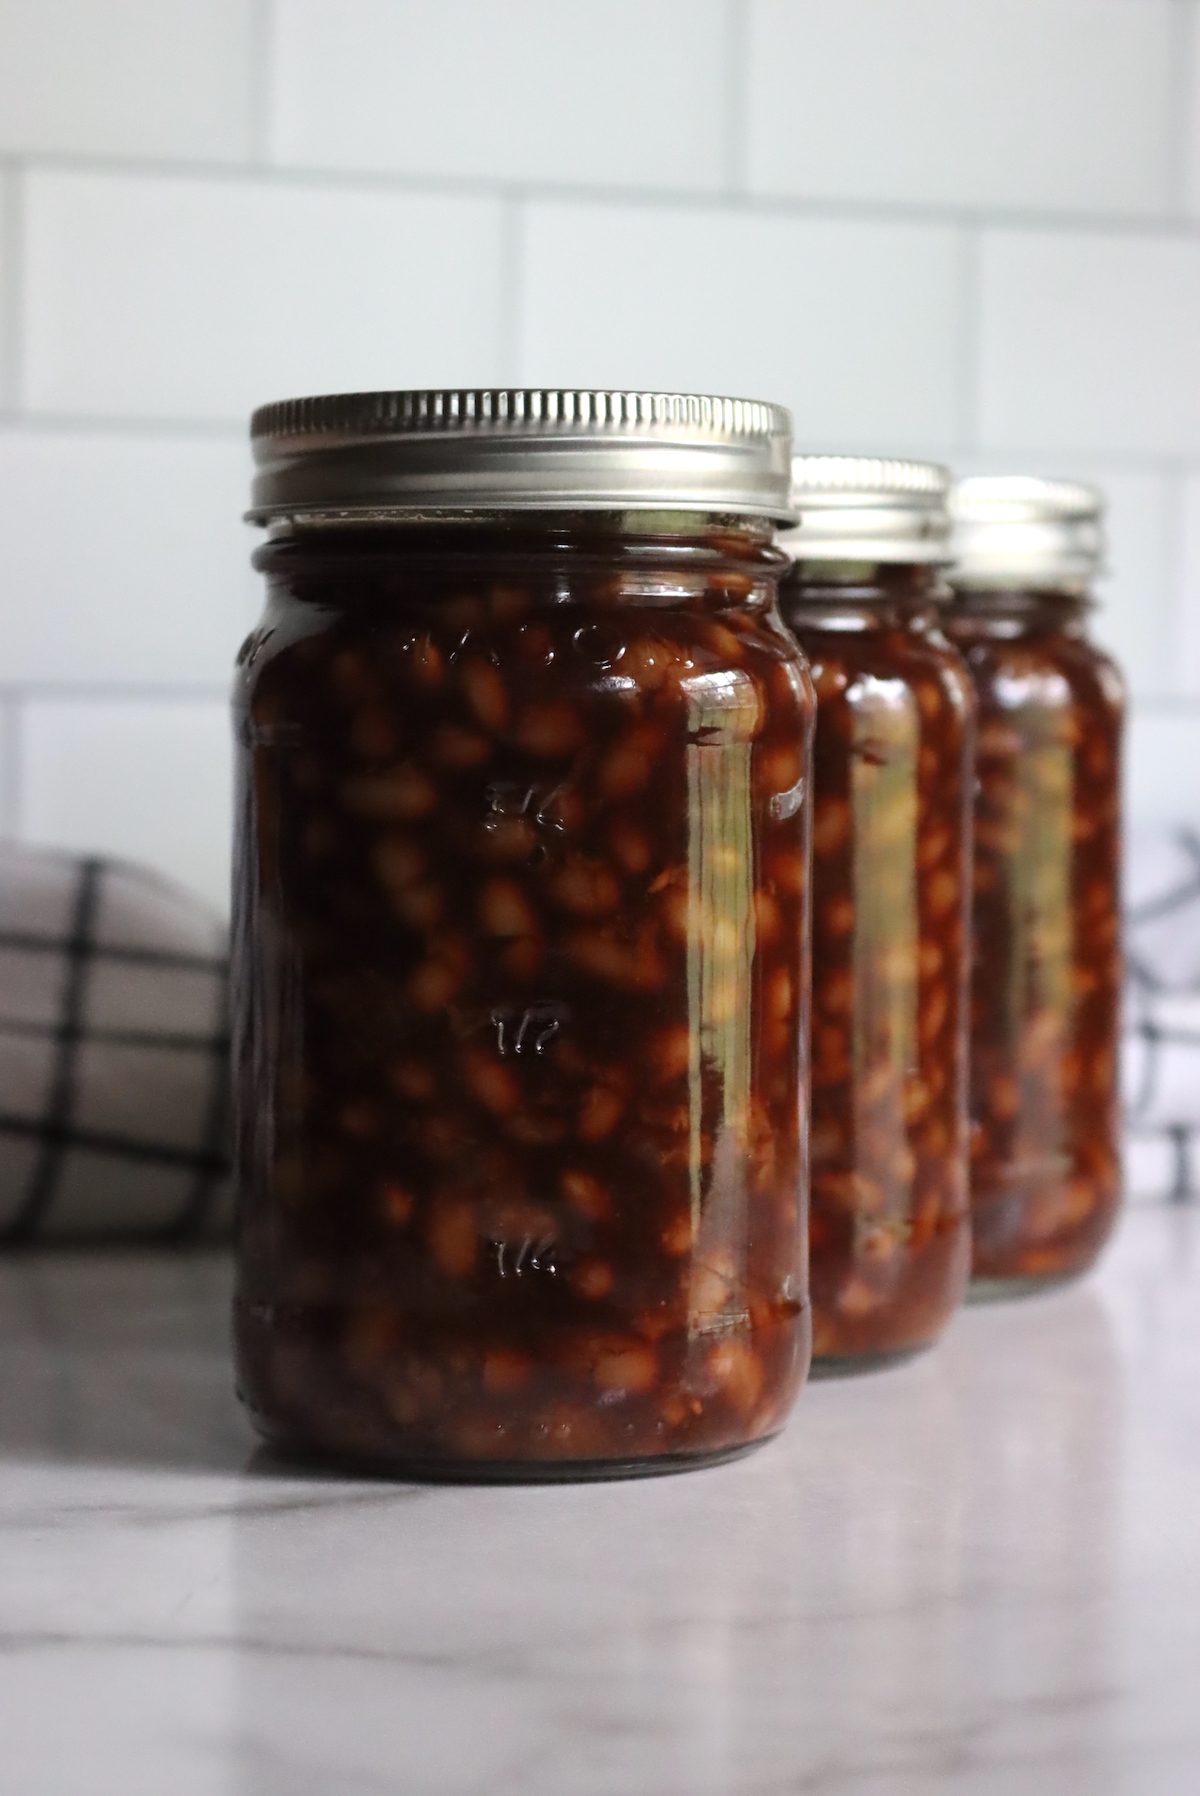
Once the jars are unloaded, check seals and store any unsealed jars in the refrigerator for immediate use (within 1 to 2 weeks). Properly canned and sealed jars will maintain their quality on the pantry shelf for 12-18 months.
Refrigerate after opening.
To serve, just heat the beans and serve (no need to re-bake at this point).
Altitude Adjustments
With pressure canning, the processing time stays the same at higher altitudes, but the pressure changes. Here are the altitude adjustments for canning baked beans:
For dial gauge pressure canners:
- 0 to 2,000 feet: 11 lbs pressure
- 2,001 to 4,000 feet: 12 lbs pressure
- 4,001 to 6,000 feet: 13 lbs pressure
- 6,001 to 8,000 feet: 14 lbs pressure
For weighted gauge pressure canners:
- 0 to 1,000 feet: 10 lbs pressure
- Above 1,000 feet: 15 lbs pressure
Yield Notes
A single batch starts with 1 quart (about 2 pounds) of dried navy beans, which more than doubles once soaked and cooked, and that’s before you add the onions, sauce, and meat. A full batch fills around 10 to 12 pints (5 to 6 quarts), so have at least a dozen pint jars clean and ready, plus a couple of spares.
The recipe is a bit vague on measurements, but 3 large onions come to about 6 to 7 1/2 cups diced.
Pints and quarts both work, so use whatever jar size suits how you’ll serve them. Just be sure to match the canning time to your jar size.
Serving Ideas
Baked beans are a classic cookout side, and a warm jar holds its own next to ribs, pulled pork, burgers, or hot dogs. They also travel well to potlucks, since they keep their texture on a buffet table and reheat easily in a slow cooker.
They make a hearty breakfast too, served English-style with eggs and toast, and a single jar stretches into a quick weeknight meal spooned over a baked potato or alongside cornbread. Since the beans are already fully cooked, all you need to do is heat and serve.
Boston Baked Beans FAQs
A full batch makes about 10 to 12 pints, or 5 to 6 quarts. The Ball Blue Book lists a smaller yield, so have at least a dozen pint jars clean and ready, plus a couple of spares. The exact count shifts a little with onion size and how soupy you keep the beans.
Yes, as long as you swap them in for part of the onions rather than adding them on top. Trade an equal volume of diced peppers, sweet or hot, for up to about half the onions, keeping the combined amount the same. Keep them diced rather than pureed so the recipe stays canning safe.
No. Baked beans are a low-acid food and must be pressure canned. A water bath canner cannot reach a safe temperature for low-acid foods, and electric pressure cookers like the Instant Pot are not recommended for pressure canning.
You can, since the sugar and molasses are there for flavor and texture rather than canning safety. They do firm the beans during the long bake, though, so cutting them tends to give softer, milder beans. I don’t recommend reducing them.
Yes. Salt pork, ham, and bacon all work at the same half pound, so use whichever you have. For a meatless batch, leave the meat out and increase the salt to 3 teaspoons to make up for the flavor.
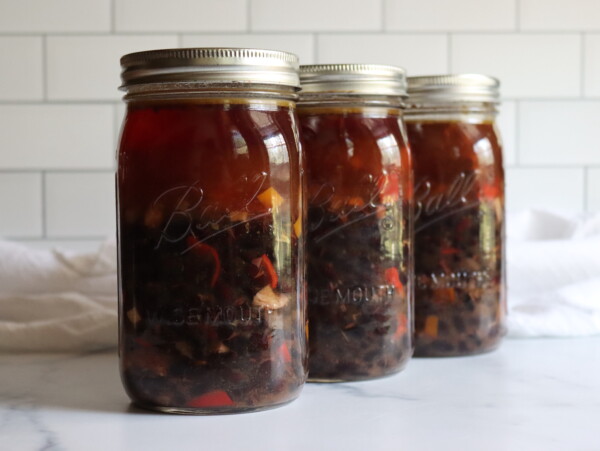
More Baked Bean Recipes
If you love these, my full roundup has more ways to put up beans for the pantry shelf:
6+ Baked Bean Canning Recipes
Canning baked beans is a delicious way to preserve a home-cooked meal right on the pantry shelf. Everyone likes their…
If you tried this Boston Baked Beans Canning Recipe, or any other recipe on Creative Canning, leave a ⭐ star rating and let me know what you think in the 📝 comments below!
And make sure you stay in touch with me by following on social media!
Canning Boston Baked Beans
Equipment
- Pressure Canner I use an All American Model 930
- Canning Jars, Lids and Bands
Ingredients
- 1 Quart dried navy beans, 4 cups, or about 2 lbs
- 1/2 lb salt pork, or bacon, or ham, cut into 1/2 inch pieces. Dice small, and don't add extra.
- 3 large onions, diced, see notes
- 2/3 cup brown sugar
- 2/3 cup molasses
- 2 tsp dry mustard powder
- 2 tsp salt, canning or pickling salt
- 4 cups water, or unsalted stock/broth, more as needed to keep it soupy during cooking
Instructions
Making Baked Beans for Canning
- Soak the beans overnight in plenty of cool water. (Alternately, you can use the "quick soak" method which involves bringing them to a boil on the stove with plenty of water, cooking for 2 minutes, then turning off the heat and leaving them to quick soak for an hour. Drain the water and proceed as you would with overnight soaked beans.)
- Place the soaked beans in a pot of water and bring to a boil on the stove. Reduce heat to a simmer, and cook until the beans start to split. The exact time will depend on your beans and how long they've been stored, but it's usually around 45 minutes or so. They should be tender enough to eat, with some of their skins just starting to split, but not falling apart.
- Once cooked, turn off the heat and drain the beans completely before proceeding.
- Next, prepare a sauce by mixing all the other ingredients together. Stir until well mixed and the sugar is dissolved. It should be soupy, with chunks of bacon and onion.
- Pour the sauce over the top of the beans and stir to completely coat all the beans.
- Place the beans in a 8-quart dutch oven with a tight-fitting lid. Bake at 300 F for about 4 hours. Add water as necessary to keep the mixture soupy and the water level just covering the top layer of beans. (Usually, around 4 to 6 cups of water is necessary but more if you don't have a good sealing dutch oven.)
Canning Baked Beans
- Prepare your pressure canner for canning based on the manufacturer's instructions. For most canner models, that means putting in the bottom rack and adding a few inches of water. Pre-heat it on the stove to just simmering, around 180 degrees F.
- Bring a kettle of water to a boil on the stove (to fill any jars if you don't have quite enough liquid in the bean pot).
- Prepare pint or quart jars. Divide the beans evenly across all the jars using a slotted spoon, leaving 1-inch headspace. Top the jars with the canning sauce from the bean pot, still maintaining 1-inch headspace.
- If you're short on liquid, pour in a bit of water from the pre-heated kettle. The beans should be under the liquid line in the jars, but there should still be a 1-inch headspace at the top of each jar.
- Wipe rims, apply canning lids and seal to finger tight with canning rings.
- Load the jars into your pressure canner.
- Put the lid on the canner and bring it up to temperature, but don't seal it yet. Allow the steam to vent for 10 minutes before sealing up the canner and bringing it up to pressure. (See notes for pressures based on altitude.)
- Once at pressure, process the jars for 80 minutes for pints and 95 minutes for quarts.
- After the canning time is complete, turn off the heat and allow the canner to cool completely before unloading the jars.
- Once the jars are unloaded, check seals and store any unsealed jars in the refrigerator for immediate use (within 1 to 2 weeks). Properly canned and sealed jars will maintain their quality on the pantry shelf for 12-18 months.
- Refrigerate after opening.
Notes
- 0 to 2,000 feet: 11 pounds of pressure
- 2,001 to 4,000 feet: 12 pounds of pressure
- 4,001 to 6,000 feet: 13 pounds of pressure
- 6,001 to 8,000 feet: 14 pounds of pressure
- 0 to 1,000 feet: 10 pounds of pressure
- Above 1,000 feet: 15 pounds of pressure
- Peppers for onions: trade an equal volume of diced peppers (sweet or hot) for up to about half the onions, keeping the combined amount the same. Keep them diced, not pureed.
- Meat: salt pork, ham, or bacon all work at the same 1/2 pound. Swap by weight, don’t add extra, and be sure to dice small into 1/2 inch pieces.
- Dry mustard: fine-ground prepared yellow mustard can stand in for the dry mustard powder.
- Spices: reasonable amounts of dry spices like garlic powder or paprika are fine, as long as the mix stays soupy and doesn’t turn to paste.
- Sugar and molasses: safe to reduce, but they firm and flavor the beans during the bake, so cutting them gives softer, milder beans. Not recommended.
- Avoid: no flour, cornstarch, or other thickeners, no dairy, no pasta, rice, or extra beans, and don’t puree the vegetables, shorten the time, or lower the pressure.
Nutrition
Nutrition information is automatically calculated, so should only be used as an approximation.
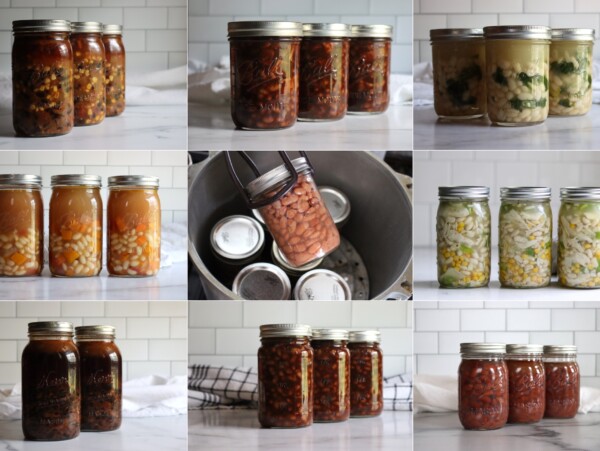
Bean Canning Recipes
Baked beans aren’t the only beans you can put in a jar!
Find the perfect recipe
Searching for something else? Enter keywords to find the perfect recipe!
I’m in the middle of making a double batch of the baked beans. Two dutch ovens full of beans are in the oven now. As I was cleaning up the kitchen, I noticed something. I thought I’d purchased two 8-ounce packages of uncured bacon. I added both to the sauce. It turns out one of the bacon packages was 8-ounces and the other was 12. I accidentally added 4 ounces of extra bacon to the beans. Will the extra bacon render the beans unsafe for canning?
No, that’s fine. It doesn’t have to be that exact for this recipe, and a little bit of extra isn’t going to make a difference. Enjoy your beans =)
Thank you! That’s a relief.
Can I add extra pork belly to this and still be safe to store on shelf long term?
No, you have to stick to no more than 1/2 pound per batch. There’s a little bit of wiggle room on the meat, but I wouldn’t intentionally add extra.
Can you cook those in a water bath? Do you have to use a pressure cooker? I don’t have a pressure cooker but I do have stuff for a water bath
This one can only be pressure canned since it’s low acid. Waterbath only works for jams, jellies, pickles and relishes, which are acidic.
Hello, I’m from the UK and have never had Boston beans before or canned anything, but just bought a canner! Do these beans come out of the jar runny and need thickening? Or can you serve them straight up? Thanks so much!
These come out very thick out of the jar, and shouldn’t need thickening. Occasionally, they get so thick in canning you need to add a bit of water to heat them on the stove. They’re a good bit different from UK style tomato beans, with more of a sweet, smokey flavor. Enjoy!
Can you use northern beans?
Yes, northern beans will work but might end up a bit softer after cooking/canning.
I made a batch of this and I LOVE it. Thank you for sharing this is now in my canning recipe box
Fabulous! I’m glad I made it into your recipe box =)
I made these last September. I followed the recipe exactly, and I used salt pork instead of bacon. I just opened a jar, and I have to tell you this, “These are the best baked beans ever. They are better than any canned baked beans you can buy in the store.” Even though they are time consuming to make and can, I will definitely make these again. Why? They are absolutely delicious, and I can hardly wait to give some away as gifts.
I’m so glad you like them!
This is an excellent recipe!
I grew up with Maine and Vermont-style beans, made with molasses and maple sugar. So now baked beans with maple syrup is my ultimate comfort food. If I switch out most of the brown sugar for maple sugar in this recipe, should I change the processing time?
Switching in maple syrup is a great variation, and that’s perfectly fine in terms of canning safety. No need to adjust the canning time at all. You might want to use slightly less maple, as maple is sweeter than brown sugar by taste, but that’s up to you and your taste buds. Enjoy!
Tasted great. Easy recipe for making baked beans for canning. The boys loved them.
Lovely!
Do you ever use pinto beans for baked bean recipes?
Yes, you can use any type of beans here. Pinto beans have a different flavor, but I think they’d still be delicious. I used to work at a restaurant that used a 3 bean mix for their baked beans (equal parts Pinto, Kidney and Navy) and it was quite good.
Hello, would it be alright to use ham instead of the salt pork/bacon? Thank you for your thorough and helpful site 🙂
You can use finely diced ham in place of the salt pork, yes. Enjoy!
We are in the process of getting ready to do a large batch of these, but considering a few additions. When you were testing, did you try adding tomato paste and Worcestershire sauce? How much would you suggest if we were to add those? We also were wondering if these would benefit from the tang of a little vinegar.
Thanks in advance.
I think it’d definitely benefit from a splash of vinegar. For Worcestershire sauce, you’ll have to play with it and test it as you cook. Personally, I love Worcestershire and I pour in 1/4 to 1/2 cup in recipes often enough…but my husband doesn’t love it as I do, and sticks to teaspoons and tablespoons…so it’s tricky. That’s kind of a personal taste thing.
For the tomato paste, you’ll have to watch that it doesn’t get too thick, and I’d whisk a tablespoon into a cup of broth at the start and see how you like that. It’d add a bit of umami flavor, without thickening things up or going crazy with the tomato. Too much tomato can make it taste more like a sugar-y chili, so watch that. And of course, watch density for canning safety.
Hi Ashley! Thanks so much for this recipe – it’s delicious! I just have a question more about the pressure canning process. My jars are losing liquid when I process them. What am I doing wrong? And are they still ok to store if the jars are completely sealed but the beans are no longer submerged under the liquid in their jars?
Yes, so long as the jars are sealed they are safe to store. What’s happening there is called siphoning and there can be a number of different causes. If I had to guess, for this recipe I’d say it’s probably taking them out of the canner too quickly while they’re still blazing hot. Try allowing them to cool more in the canner before you open it.
Other things that can cause that in pressure canning are too little headspace, putting too much water in the pressure canner, to fast a swing in temperature when you load it up (ie. putting slightly cool jars into a very hot canner) and half a dozen other things. I just wrote up a guide to preventing siphoning for you here with more specifics. Hope this helps! https://creativecanning.com/canning-liquid-loss-siphoning/
Thank you so much for your help with this, Ashley!!!! I really appreciate it. 😊And I’m so glad to know I don’t have to scrap them after all that work!
You’re quite welcome, glad to help!
I’ve used this recipe before and love it. I’d like to know what kind of salt. I found many ppl don’t say sea salt ,kosher or table salt in their recipes. By weight tsp differ
Generally, I specify canning salt in my recipes but it looks like I missed that note in here and I’ll go back and correct it. That said, I think people’s tastes on baked beans vary so much in terms of salt that you’re going to want to taste the beans before they go into the jars and make sure it’s right for you. I’m using guidance from the NCHFP here, and they tend to use a good middle ground that pleases most people when it comes to salt in food, but I’d still recommend tasting and adjusting before you can it.
(The salt is for flavor, not preservation, so you can change it as you see fit.)
I made this as written except I used a 900 g bag of beans to be closer to 2lbs instead of 950g. It was a perfect fit for my 5qt Dutch oven. There was no way it would fit in a 4qt IMO. Absolutely delicious! Can’t wait to get some bread baked to go with them. 💕
Delicious! I doubled it and it made exactly 8 quarts. My picky husband loves them!
Wonderful!
This recipe is spot on! I had to use slow cooker for 6 hours and more salt, but it’s perfect!
Sounds great!
Made these several times and they are always a hit. People keep asking for more.
Wonderful!
I made the recipe x4, beans are in the oven but looks watery, will it get thicker? Not sure if I should keep going? If I add more sugar will it thicken or will the sauce thicken in my canner? Any help is appreciated, bean have been I. My oven 3.5 hours
It will thicken in the oven, and should already be thickening if it’s been in the oven that long. It’ll thicken further in the jars as the beans will absorb more liquid during the canning process (and release starch too). And then it’ll thicken still further when you reheat it.
I’ve got seven pints in the canner right now. Tastes amazing so far. Would u believe I only had to use 1 onion…it was a huge vidalia onion. I measured it and it yielded 3½ cups chopped!! I went with it cause we like alot of onion in baked beans.
Thanks for sharing
Thought this wouldn’t have enough flavor compared to my usual not canned recipe – boy was I wrong. These are delish!
So glad you liked it!
I made a big double batch of beans, and split it up to see if I liked your recipe or mine better. I didn’t want to completely discount your trial and error with your beans, so I had to make sure I made one batch true to the recipe. I typically make more of a bbq sauce base for my beans, as I like a smokey and savoury side dish rather than the classic baked beans in molasses. I did however follow all the directions and only added things for the second batch rather than completely redoing the recipe. Both are incredible! A perfect molasses baked beans recipe on your behalf, and great smokey bbq beans with my additions. All the info you gave on cooking process and reasons to keep the sugar&salt measurements how they are were incredibly helpful. I also made mine in my crockpot on high for the same 3 hours as you bake them in the oven, since I don’t have a big enough Dutch oven or roaster to fit all the ingredients. Thank you for sharing all the recipes you do, as I also make your chili con carne recipe yesterday!
The additonal ingredients in my batch were:
1/2 Tbsp each chipotle and ancho chili powders
1 Tbsp paprika
1 tsp liquid smoke
1 Tbsp tomato paste
6 garlic cloves, minced
2 tsp Worcestershire sauce
All of those additions sound amazing! Especially the chipotle/ancho, which would take it in a different (but delicious) direction. Did the smokey pepper flavors come through in the finished beans?
Does it have to be unsalted broth? I just have regular broth
You can use regular salted broth from the store, that’s fine. I’d reduce the salt by about 1/2 tsp in the recipe, but otherwise, it’s perfectly fine. Enjoy!
Cloves. Ground cloves are the small recipe adjustment you seek. But this is close to perfect!
Rather than use the oven to bake them can I use a crock pot or just the stove?
Yes, a crock pot will work just fine. On the stove, you’ll have to really watch it and keep it very low so it doesn’t scorch on the bottom. Best of luck!
How long would you need to cook them in the crockpot? At what temperature?
I haven’t made this one in a crock pot, but other readers have sent me notes that they put it in a crock pot on high for 3 hours. My crock pot actually takes a few hours to get up to temp, as I have an older one, and if I were doing it, I’d get everything simmering on the stovetop and pre-heat the crockpot in the meantime. Then I’d put it in the crockpot on high with a lid on for 3 hours. Best of luck, let me know how it goes!
How long in the crockpot and high or low?
It should take 3 to 4 hours in the crockpot on high, but some crockpots take longer to come up to temperature, in which case it could take as long as 5 to 6 hours.
I am making this recipe to can and I sprouted my beans before measuring them unfortunately. Do you know how many cups of soaked beans should be used per batch?
Thank you!
That is a really tricky question…normally, 1 cup of dry beans equals 3 cups of cooked, however, just soaked not cooked is probably going to be slightly less. If I had to guess, I’d say 1 cup dry equals 2 1/2 cups soaked? Maybe 2 cups. It’s just so hard to say.
Would this recipe work triples or more but using a large roaster oven?
Yup, you can increase this recipe, provided you have something large enough to cook it in (and can it in). Watch for burning on the bottom in a batch that large. Enjoy!
I have never pressure canned. Do you think I could freeze the cooked recipe vs canning?
Yes, of course! This recipe works fine as a freezer recipe as well. Just make sure you use freezer safe containers.
I have a batch on the stove now, where I will have to cook it, as I doubled the batch. I made a batch two weeks ago, and my family raved, I mean like compliments without me needing to drag it out of them! I see pinto and navy beans last time as I was short beans. Still perfect. I will now have 14 quarts and several pints in my larder for the summer. And will do more next winter. I am just very pleased with this recipe.
I am so glad your family loves it!
Question: Since you good cook on the stove before the Pressure Canning, are the beans over mushy. I pressure can a lot of bean varieties and also in soups. My aging father doesn’t like mushy beans. I have learned to quick soak or overnight soak beans at different time amounts to prevent mushy beans along with pressure canning ham or pork so it is not over cooked. I have never yet tried to make baked beans using Navy Beans or Pinto beans. Does cutting the cooking time down from 4 hours in a crockpot or oven affect the brown sugar and molasse with the beans soaking in the flavor and developing the sweet flavor. Would the beans sitting on the pantry shelf for three months do the same thing without overcooking the Navy Beans? Thank you.
The beans stay firm because of all the sugar in the recipe, it toughens them up and prevents them from falling apart even after cooking all day. That’s true of any baked bean recipe, canned or otherwise.
What kind of molasses do you use?
I use blackstrap, but any type works, choose what you like.
These were good but we thought they were a little bland. I added more brown sugar when I heated them up. Can I double the brown sugar and molasses or will it mess up the canning process? I’m also going to try beef broth next time instead of plain water. Thanks!
Yes, you can use beef broth, and you can add more sugar. Those are both fine substitutions.
Just wondering what your thoughts are to using a ham broth?
This should be perfectly fine with ham broth, and there are plenty of tested bean canning recipes that use ham broth. The prohibition against canning ham in general is about the density of the ham, as some “hams” are dry cured to be more like prosciutto and it’s hard for heat to penetrate chunks of that. But the broth doesn’t have density issues and is perfectly fine to use in pressure canning recipes. Enjoy!
I am in the middle of making this recipe, so I can’t comment yet on the flavor of the beans. It smells delicious though. But I want to complement Ashley on the directions. Excellent! Usually cooking blogs put in a bunch of unnecessary stuff, saying the same things over and over to increase key word density (I am guessing). Although this post is long, I have read every word and every question I have is answered and there’s nothing that reads like keyword stuffing. Thanks so much Ashley for a very informative post!
Thank you so much Lucy! I’m so glad it was helpful to you!
Is pint and half pint processing time the same?
Yes. If you’re canning in half pints, you’d use the canning times for pint jars.
If I am making your bean recipe without the meat can I preserve the beans in glass jars without using a canner?
No, meat or not, this is a pressure canning recipe. Beans are not safe for preserving without a pressure canner.
Wow – this is basically my dad’s recipe. His has comments like “boil the beans only until you can blow on them and the skin separates from the bean”. His other note is “combine the brown sugar and mollases to equal 3/4 cup”. So not a technical recipe. 🙂 I’m glad to have found yours because I feel safer using a tried recipe with the same ingredients as my dad’s. I do have one question for you though – my famiy has always made baked beans in a bean pot (if you don’t know what these are – it’s a short, sort of fat cereamic pot with a tight fitting lid that’s meant specifically for baking beans – here’s one I found on Amazon: https://www.amazon.com/International-7621-Traditional-4-5-Quart-Ceramic/dp/B0026FDD10/ref=asc_df_B0026FDD10/?tag=hyprod-20&linkCode=df0&hvadid=198075681105&hvpos=&hvnetw=g&hvrand=3615378946391440247&hvpone=&hvptwo=&hvqmt=&hvdev=c&hvdvcmdl=&hvlocint=&hvlocphy=9006728&hvtargid=pla-348717689976&th=1 ). Would I be able to cook these in this pot and still can them?
Yup! You can definitely use a baked bean pot to make these, that should work wonderfully. Enjoy!
Can I can these using a Ninja Foodie pressure cooker?
No, those are not approved for pressure canning, as they don’t maintain the proper pressure for safe canning. They cook food fine, but they don’t keep it quite hot enough consistently for canning. This article on canning in an instant pot explains why: https://creativecanning.com/instant-pot-canning/
I know you’re asking about a different pressure cooker, but the same goes for that one too.
I have been going through the comments to find out info on making the baked beans in an Instant Pot. Not for canning but to make and serve for the upcoming 250 year celebration of America!! Any thoughts on how well this recipe would do in the IP? It looks so delicious:)
This is a really classic recipe, and I think it’d do great in the instant pot. It makes quite a bit of beans though, and depending on your instant pot size it might not fit. I’d do a half batch, since in the instant pot you can only fill the pot 1/2 way with beans to prevent the vent pipe from clogging (that’s for all starchy things in the instant pot). Not canning of course, but delicious none the less. Best of luck with it!
These are amazing!! I did both batches vegan, so no bacon and added 3 tsp salt & 1 tsp liquid smoke. Huge hit with my family!!! Thanks!
Wonderful! I’m so glad you enjoyed them!
Hi, can great northern beans be used instead of navy beans? I live on a small island and I am actually having a difficult time findinding Navy beans.
Yes, you can use great northern beans. Navy beans are generally used because they hold up better than great northern beans, but any bean will work in this recipe. The step where you pre-cook the beans at the beginning may need to be shortened, as great northern cook faster than most beans. This is an inexact step anyway, just watch them as they cook, and strain when they get just tender (but not falling apart). Original instructions below, but likely it’s shorter:
“Place the soaked beans in a pot of water and bring to a boil on the stove. Reduce heat to a simmer, and cook until the beans start to split. The exact time will depend on your beans and how long they’ve been stored, but it’s usually around 45 minutes or so.
They should be tender enough to eat, with some of their skins just starting to split, but not falling apart.
Once cooked, turn off the heat and drain the beans completely before proceeding.
I am wondering if you can add bell pepper and hamburger meat to the baked beans and process for the bean time. I make these beans with the hamburger meat, but I want to have some on hand because my husband likes them.
That’s a darn good question…and there’s no definitive answer because it hasn’t been tested specifically.
That said, it wouldn’t be all that different than a chili recipe, and this recipe processes for quite a bit longer than standard ground beef chili. (https://creativecanning.com/canning-chili-con-carne/)
I’d think that so long as you made sure there was enough liquid in the jars so that it doesn’t end up too think, that it should be just fine, but that’s a guess. I can’t say that with 100% confidence though, so you’ll have to use your best judgement and do it at your own risk, of course.
Why I can’t use water bath for them ?
All the ingredients are low acid (below a pH of 4.6). Vegetables, meats and other low acid foods must be pressure canned. You can only water bath can acidic fruits, jams and pickles.
How do I print the recipe?
On the recipe card near the end of the post, there’s a “print” button that’s right below this text:
“Canning baked beans is a simple way to enjoy homemade baked beans right off the pantry shelf (without heating up the kitchen).”
Can I make these to eat right away using the recipe you have but stopping at the canning part? Would love to try these, I miss my grams baked beans, and these are darn close. I remember helping her every Saturday picking through the beans lol
Yes! Canning these is optional, you can make them and store them in the refrigerator or freezer (or just use them up right away if you have enough people around to enjoy them).
My husband has diabetes, and can’t eat sugar. Can I adapt this recipe to use artificial sweeteners, like Truvia Brown Sugar substitute?
At least according to Pomona’s Pectin, Truvia is safe for canning. https://pomonapectin.com/ufaqs/can-i-use-truvia-or-similar-sweeteners-when-making-jam-or-jelly-with-pomonas-pectin/
So yes, as far as I know you could use that instead. One of the functions of the sugar is to change the texture of the beans as they cook, with toughens them up a bit and keeps them from falling apart. The sugar substitute may or may not do that? I haven’t used it, so I don’t know. I’d suggest trying a small batch for fresh eating to make sure you like it before canning a full batch.
Okay I made these today using the quick soak method and a slow cooker on high for the last 4 hours. I made a recipe and a half which yielded 10 pints. I only had 2/3 cup of molasses so I had to sub maple syrup for the last third. I noted that the beans were still too firm in the slow cooker so I added a half a teaspoon of baking soda and that did the trick. Near the end I wanted more spice so I added the following: one Adobe chili and sauce pureed, 1/3 cup spicy bbq sauce, an additional tablespoon of dry mustard, 2 Tblsp cider vinegar. They are so delicious I hid the leftovers in the fridge! Thanks for this fantastic recipe! I’ll try it your way next year with enough molasses because I bet that’s awesome too!