This post may contain affiliate links. Please see our disclosure policy.
Pressure Canning food is one of the best ways to preserve vegetables, meats, soups, and premade meals in jars right on your pantry shelf. While water bath canning is limited to jams and pickles, pressure canning allows you to put up so much more!
Home canning has always been popular with gardeners and homesteaders, but it’s seen a huge resurgence since the uncertainty in 2020. There’s something satisfying about preserving your own food, and looking at neat lines of home-canned produce on your pantry shelves.
Most people start with water bath canning, which allows you to put up acidic foods like jams, jellies, and pickles. Most of those foods are toppings and condiments, rather than real meals.
Pressure canning operates at higher temperatures, and allows you to safely put up low-acid foods like meats, vegetables, soups, chili, and meal-in-a-jar recipes.
While it can be intimidating at first, learning how to pressure can is well worth it. It opens up whole new possibilities for home canning, and will allow you to really start putting up meaningful amounts of nutritious home-preserved food.
What Foods Need to be Pressure Canned?
Pressure canning is for low-acid foods like meats, vegetables, soups, and legumes.
Acidic fruits are usually fine for water bath canning, provided their pH is below 4.6. Anything above that line must be pressure canned to ensure that it’s shelf stable.
Good examples of low-acid foods that must be pressure-canned include:
- Meat (all types) ~ Chicken, Beef, Pork, etc.
- Legumes ~ Beans, Split Peas, and Lentils
- Broth and Stock
- Soups and Stews
- Meal-in-a-Jar Recipes like chili and curries
- Some Tomato Products, like pasta sauce, depending on the recipe.
What Foods Cannot Be Pressure Canned?
While pressure canning allows you to put up far more types of food than water bath canning, it does have its limitations. Some foods are just not approved for home canning, no matter how they’re processed.
Those include:
- Milk, Cream, Butter, and Other Dairy Products
- Coconut Milk
- Flour, Corn Starch, and most thickeners (Canning Clear Jel is the only Exception)
- Rice, Pasta and Other Starchy Foods
- Eggs, including pickled eggs
Supplies for Pressure Canning
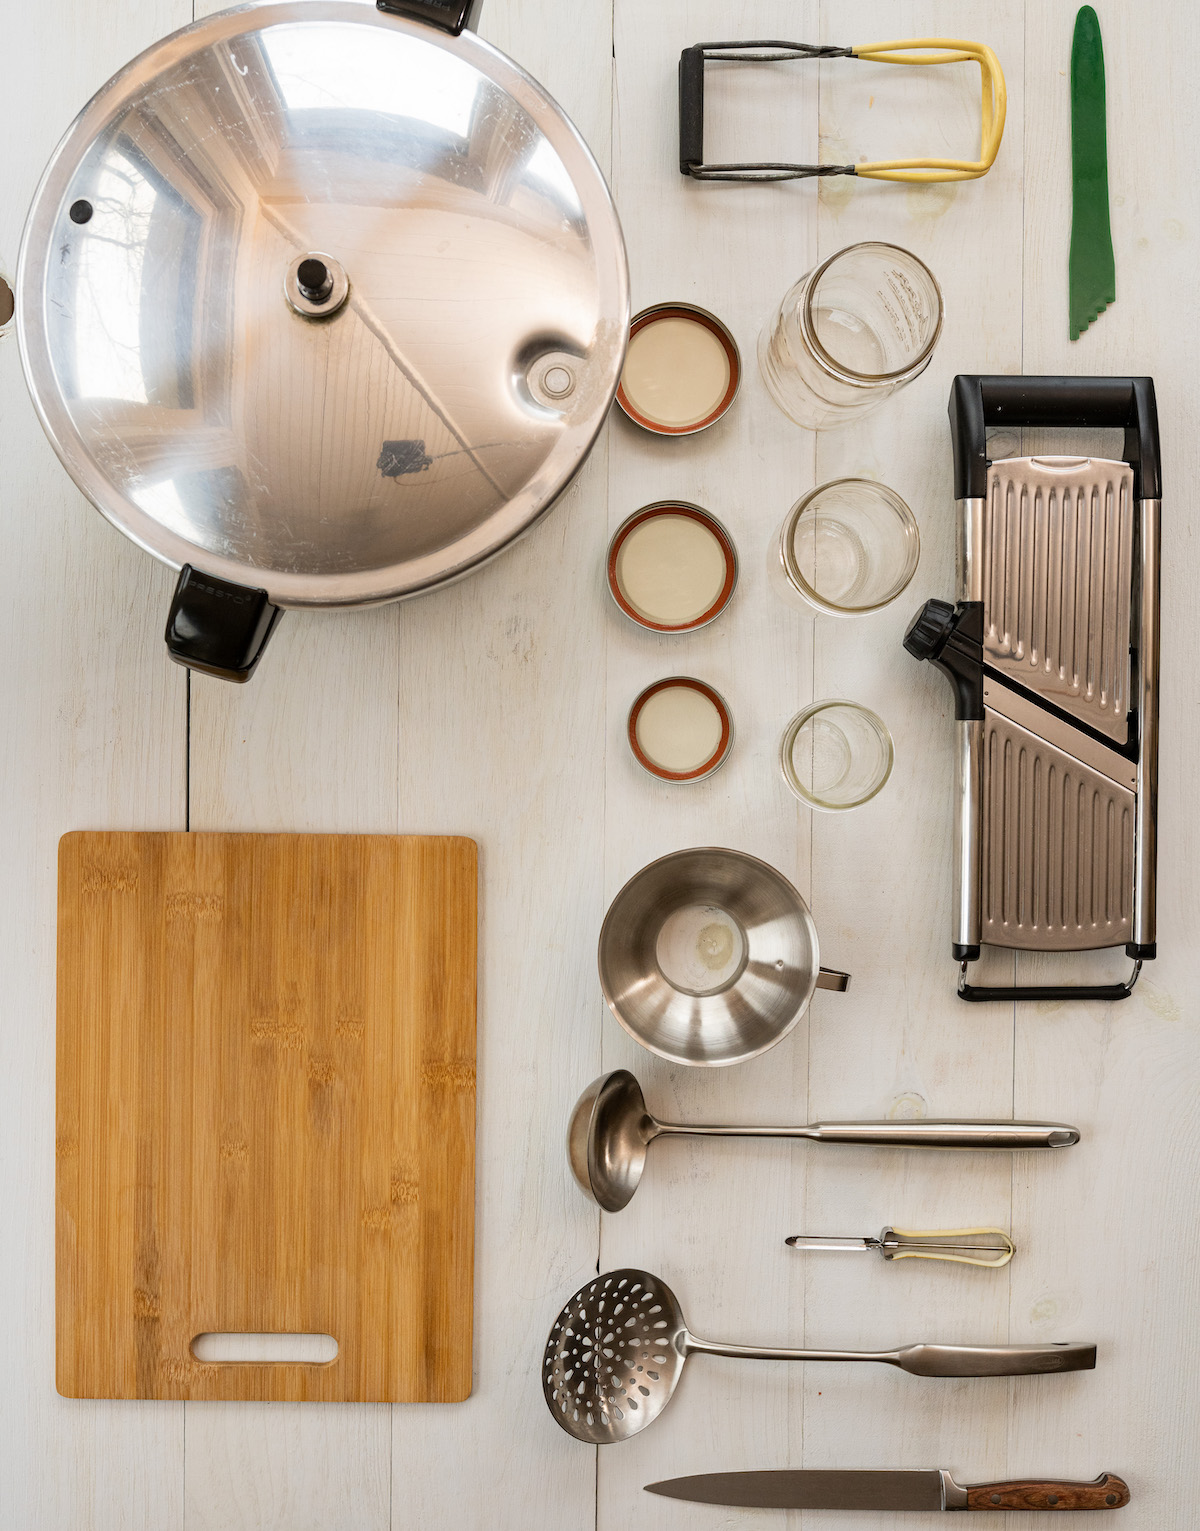
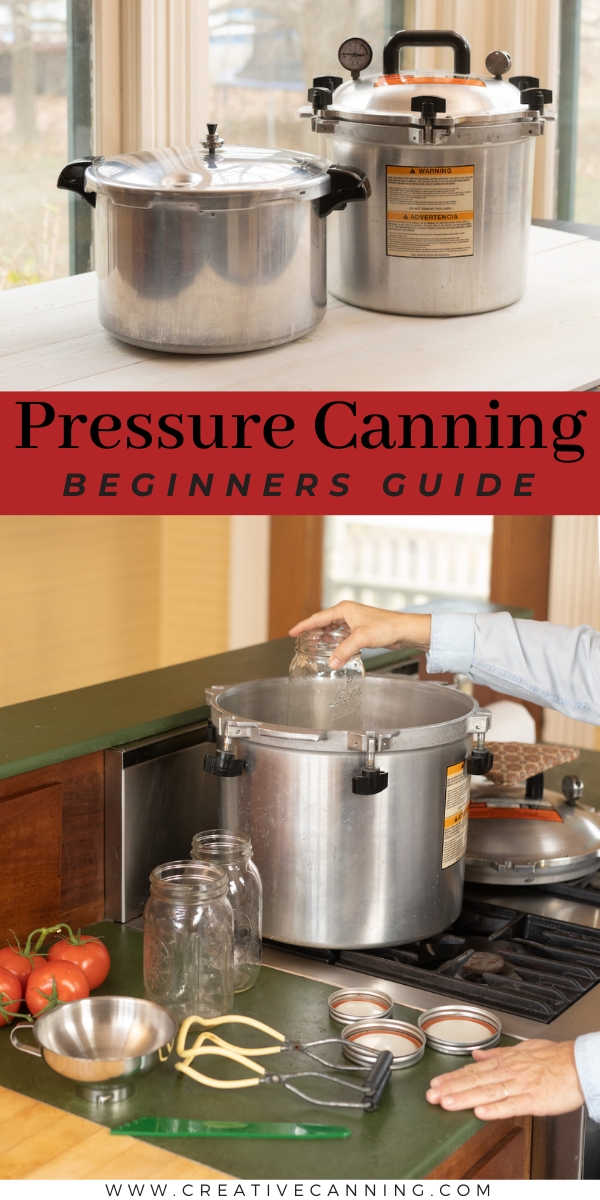
Most of the supplies you’ll need for pressure canning are exactly the same as water bath canning. The only “new” item to add to your list is an actual pressure canner. Basic canning supplies include:
- Canning Jars
- Canning Lids and Rings
- Jar Lifter
- Canning Funnel
- Headspace Measure
- Various ladles, slotted spoons, and knives from your kitchen
When choosing a pressure canner, there are two main types of pressure canners:
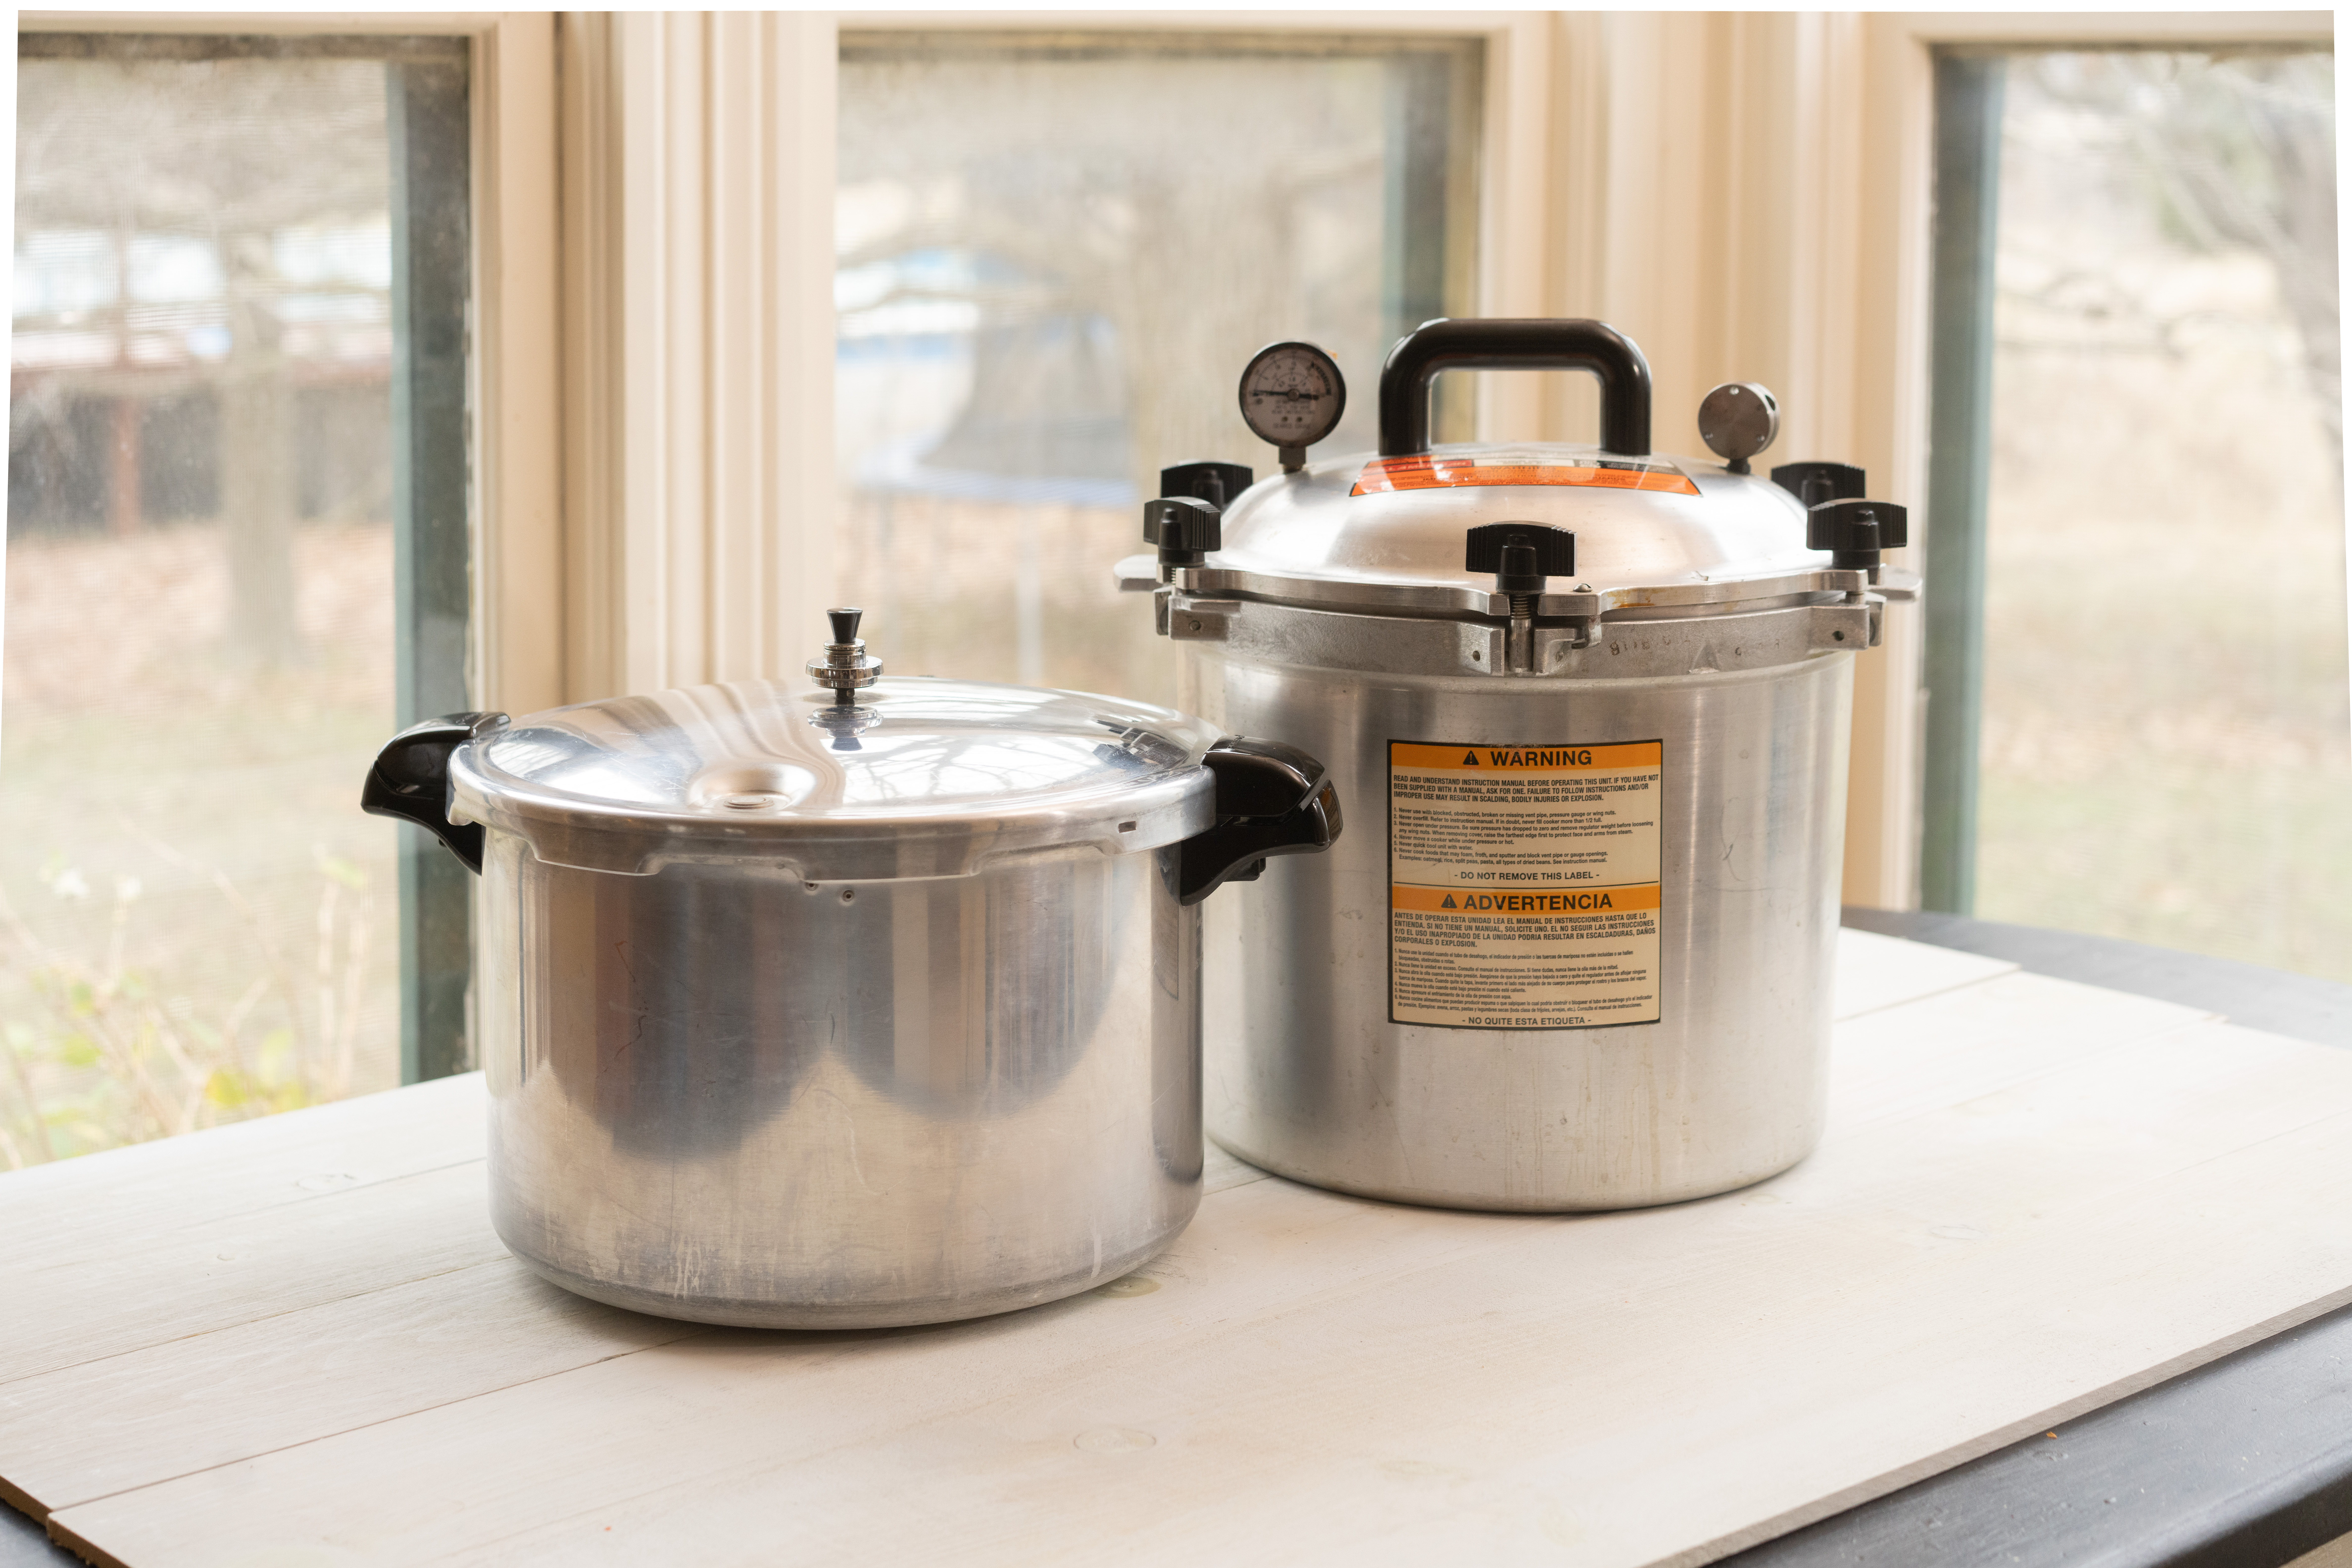
- Dial Gauge Pressure Canners ~ These can adjust pressure down to a single pound, but you have to constantly fiddle with the stove to keep them at the right pressure. They’re much less expensive, but a lot more work every time you use them. The most popular type comes from Presto pressure canners. Expect to spend somewhere between $100 and $200, depending on the model, and you’ll need to replace the lid gasket on a regular basis as part of maintenance.
- Weighted Gauge Pressure Canners ~ These types allow you to choose between 5, 10, and 15 pounds of pressure, and then they use a weighted valve to keep the canner at that pressure during processing. They are much more convenient when you’re actually canning, but they’re much more expensive at the beginning. The most common type comes from All-American Brand Pressure Canners, and those feature a metal-to-metal seal, so there’s no gasket to replace each year. Expect to spend somewhere between $250 and $500, depending on size.
At this point, you understand the basics of what can and cannot be pressure canned at home, and I’ve taken you through all the supplies you’ll need for home pressure canning.
The actual process isn’t all that complicated, and once you’ve done it a few times it’ll seem simple. Still, the first time is always overwhelming.
We pressure can batches at least once a week in my home, and some weeks, it runs almost every day. That’s especially true over the winter months, when we’re trying to put up meal-in-a-jar canner recipes so that we have easy heat and eat meals for the busy summer garden season.
Still, I remember my first batch, sitting there nervously listening to the canner…wondering if it was safe.
To help walk you through the process, I have a true pressure canning expert. The following pressure canning tutorial comes from Angi Schneider, the author of Pressure Canning for Beginners and Beyond (my favorite pressure canning cookbook).
This is an excerpt directly from her book, used with permission.
Reprinted with permission from Pressure Canning for Beginners and Beyond by Angi Schneider. Page Street Publishing Co. 2021. Photo credit: Dennis Burnett. It has been edited slightly for format and length to fit the web.
How to Pressure Can
Now that you understand what can and cannot be pressure canned, and have gone over the basic supplies for pressure canning, let’s go step by step through the pressure-canning process. The basic steps are as follows:
- Read the Recipe
- Wash the Canner, Jars, and Lids
- Add Water to the Canner
- Heat the Water in the Canner
- Prepare the Food
- Pack the Jars (Hot or Raw Pack)
- Leave the Correct Correct Headspace
- Remove the Air Bubbles
- Recheck the Headspace
- Wipe the Rims
- Add the Lids
- Put the Jars Into the Canner
- Close the Canner
- Heat the Canner
- Vent the Canner
- Process Jars for the Correct Time
- Cool the Canner
- Remove the Lid
- Remove the Jars and Let them Cool
- Check the Seals
- Label and Store
I’ll walk you through each step in detail.
Read the Recipe
Reading the recipe before you even prepare the canner is always a good idea.
You want to make sure you allow enough time to do things like soak legumes, trim fat from meat, or wash and peel vegetables. Some of these things, like soaking legumes, will be done before you prepare the canner.
Each recipe in this book is written with the order that I do these things in mind. Some of them shouldn’t be changed; for instance, hot-packed recipes shouldn’t be allowed to cool off before filling the jars.
Some things can be changed; for example, you can wash and cut all the green beans first and then prepare the canner and jars. In time, you’ll develop a flow that works for you.
Wash the Canner, Jars, and Lids
Wash the canner and its rack in hot, soapy water. You also want to wash the canning jars and lids in hot, soapy water.
While washing the jars, check each jar for any nicks or cracks.
The jars will need to stay hot while you prepare the food for canning, but they don’t need to be sterilized. I put them in the canner since the canner is going to be heated up anyway. Other people use their dishwashers. I’ve also seen people use ice chests full of hot water to keep their jars hot.
And although it’s not recommended, some people will put the jars in the oven and turn the oven on. Because oven air is dry heat, there is the risk of the jar shattering when you fill it with hot liquids. This is why an oven is not recommended for keeping the jars hot.
While washing the lids, make sure none of them have scratches or are dented or misshapen. Ball®, which also owns Kerr®, recommends that their lids simply be washed and used at room temperature. Bernardin® recommends that their lids be kept in a pot of hot but not boiling water and used hot. Since these recommendations can change, it’s best to refer to the instructions on the box the lids came in.
Add Water to the Canner
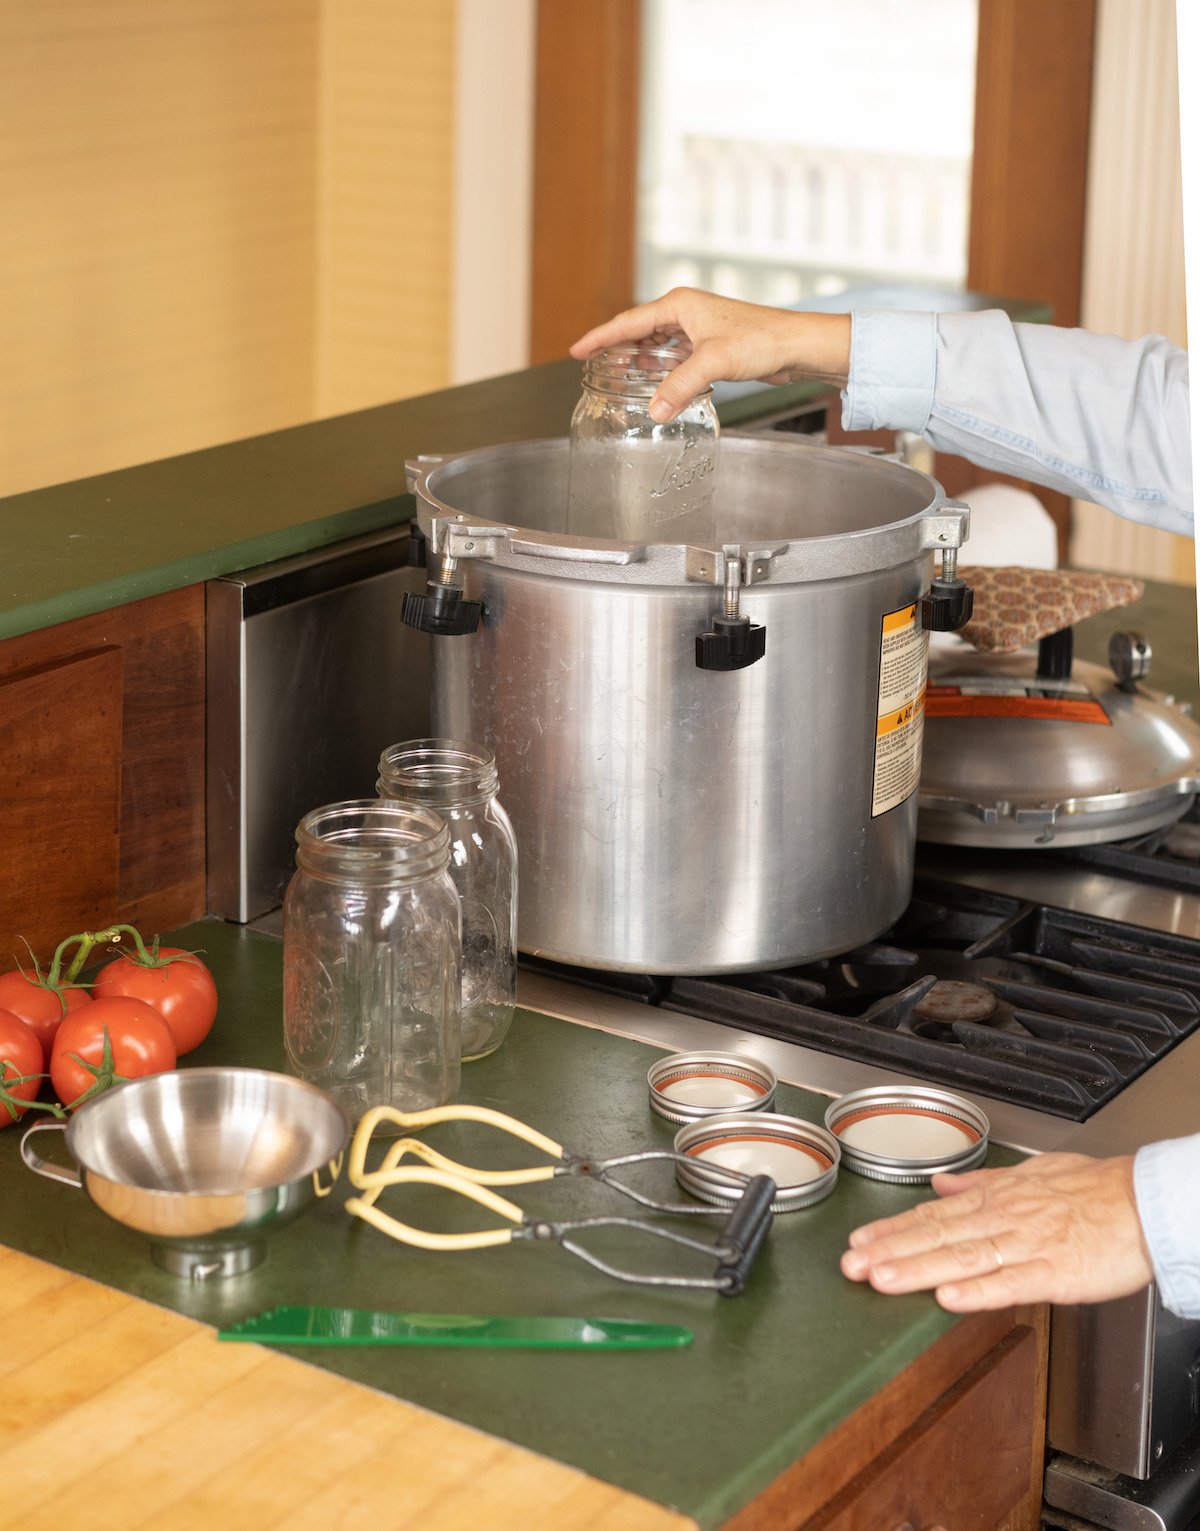
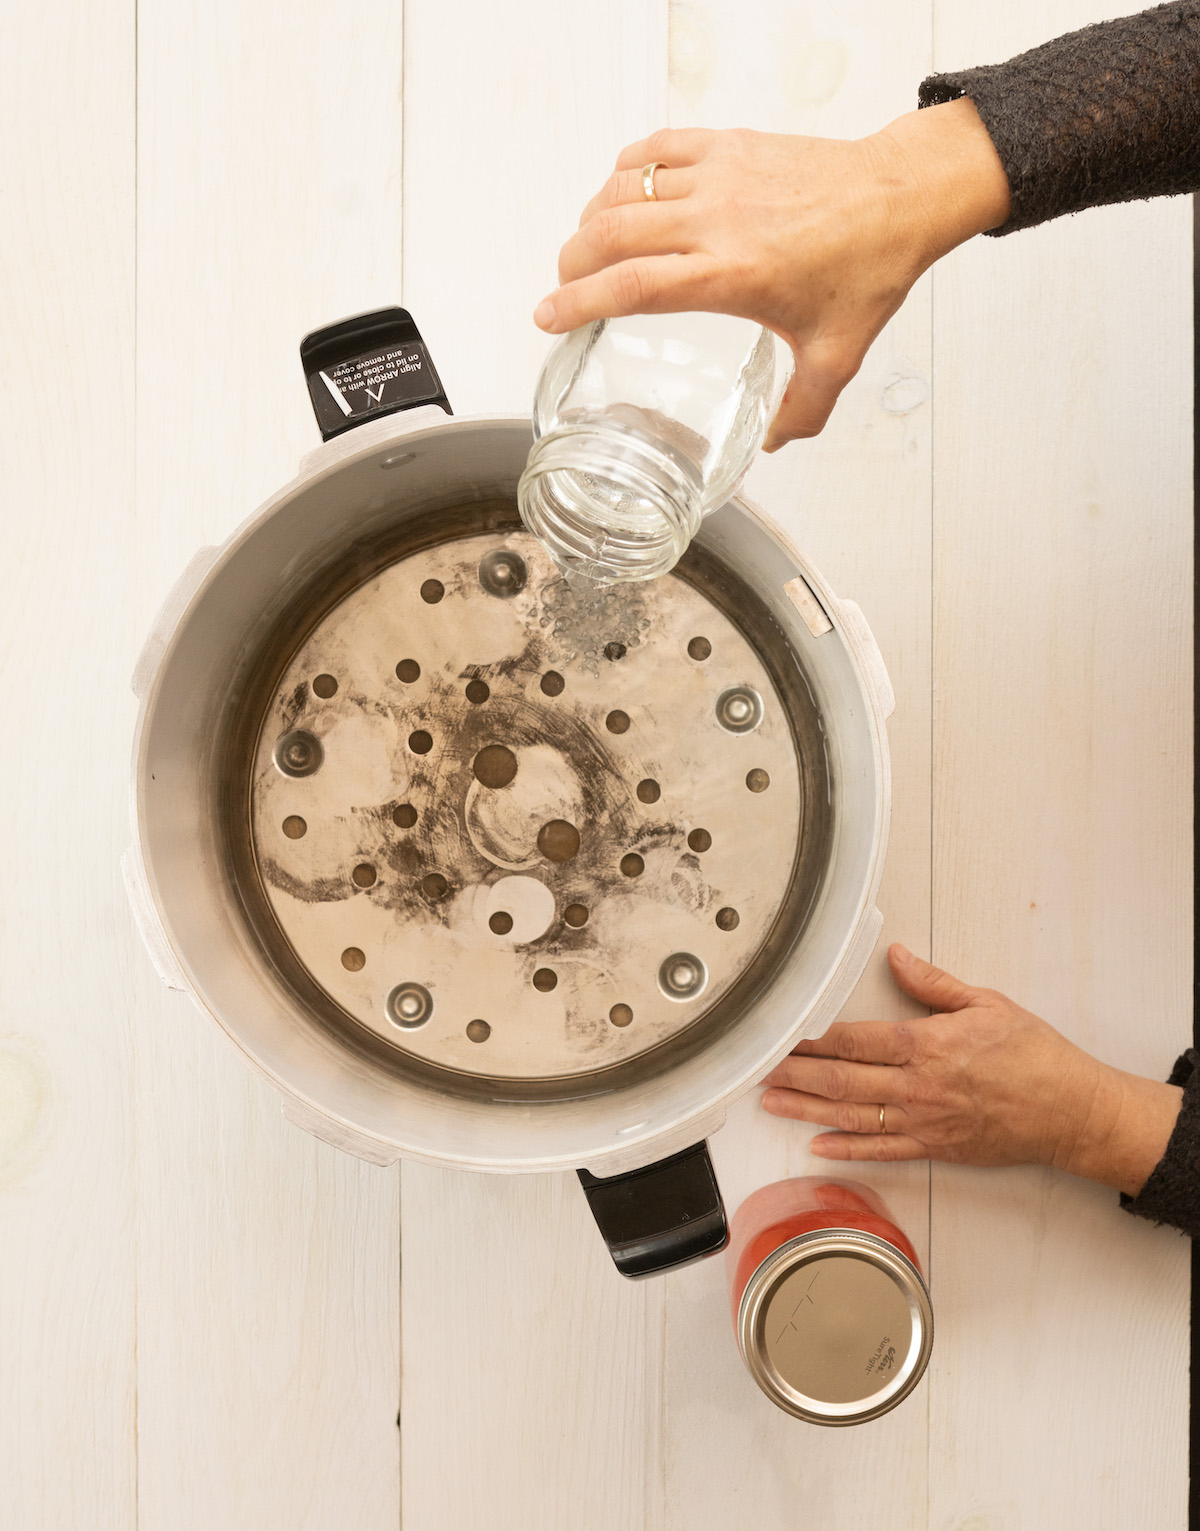
Refer to the user’s manual that came with your canner to determine how much water is needed. If you don’t have a user’s manual for your canner, the USDA recommends that the canner be filled with 2 to 3 inches (5 to 7.5 cm) of water.
You can use plain old tap water in the pressure canner. If you have hard water, add a little bit of white vinegar to the water to reduce calcium deposits on the jars. About 2 tablespoons (30 ml) is all that is needed. I don’t actually measure this out, I just pour a bit in with the water.
Heat the Water in the Canner
All canners can be used on a regular electric stovetop, the kind with coils, and on indoor gas stovetops that don’t use more than 12,000 BTUs.
Not all canners can be used on flat stovetops, such as glass or induction stoves. Also, not all canners can be used on outdoor stovetops. If you want to use a pressure canner outdoors, the stove must have a way to adjust the heat. Using outdoor turkey fryers to pressure can is not recommended since the heat can go well above 12,000 BTUs, and there is no way to control it. You’ll need to refer to the user’s manual to determine what heat sources you can use with your pressure canner.
Once the canner has been washed and has water in it, put the rack into the canner. Put the canner on the stove and turn the heat on to medium to heat the water. If the food will be raw packed, the water should be about 140°F (60°C). If the food will be hot packed, the water should be about 180°F (82°C). The water shouldn’t be boiling.
Prepare the Food
Before food can be put into the jars it needs to be prepared. There are instructions for preparing each food item in the specific chapters. These instructions are not just for quality’s sake, they are also for safety reasons. Be sure to follow them.
I also like to fill a teakettle with water and heat it up, just in case I need to top off any jars with water before sealing them.
Preparing your workspace. Lay a kitchen towel on the counter. Remove the jars from the canner or wherever you had them to keep them hot and put them on the towel. Don’t dry them off. Put the clean lids, canning funnel, and bubble remover tool near the towel. Also, dampen a clean washcloth and lay it near the towel.
Hot Pack the Jars
When a recipe calls for hot packing the jar, all the ingredients will be heated up to a boil and then allowed to simmer for a short time. The recipe will tell you how long they need to simmer. The hot mixture is then put into the prepared jars. I like to use a slotted spoon and distribute the solids among the jars first so I can be sure they all have about the same amount of solids. Then, I ladle the hot liquid into the jars. Most of the recipes in this book are hot-packed.
Raw Pack the Jars
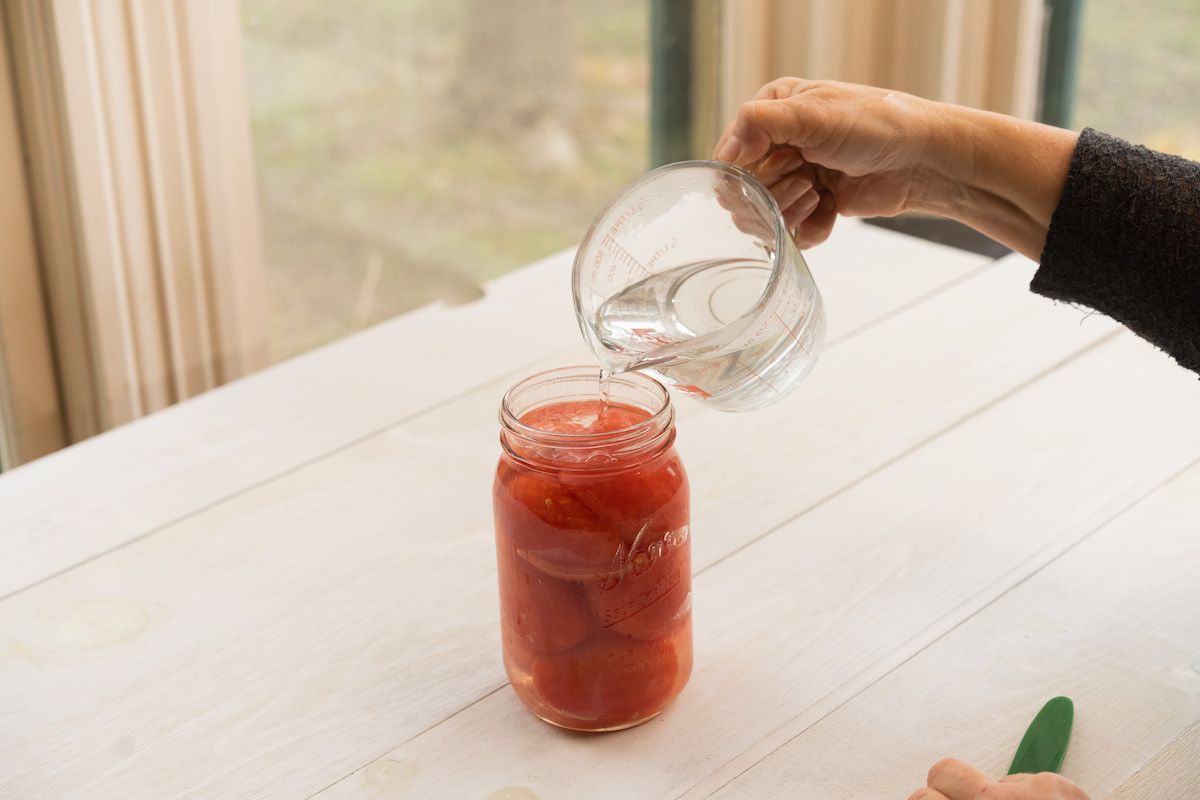
When a recipe calls for raw packing the jars, the vegetables or meat are put into the jars raw. Then, hot water or broth is poured over them. You’ll have more bubbles to remove with raw packing, so take your time. Vegetables that have been raw packed are more likely to float in the jar than those that are hot packed. It’s perfectly fine and safe if that happens, you just won’t win a blue ribbon at the County Fair.
Leave the Correct Headspace
Headspace is the empty space between the highest level of food and the rim of the jar. Each food has its own recommended headspace. The recipe will tell you how much headspace to leave.
It’s important that you leave the correct headspace to ensure safety and get good results. If you don’t leave enough headspace, the food in the jars can expand and seep out while being processed. This could lead to jars not sealing or jars not having enough liquid to cover the solids. If you leave too much headspace, the jars might not pressurize correctly, which could lead to jars not sealing. Also, if there’s too much headspace, the recommended processing time might not be long enough to drive out all the air in the jar.
Remove the Air Bubbles
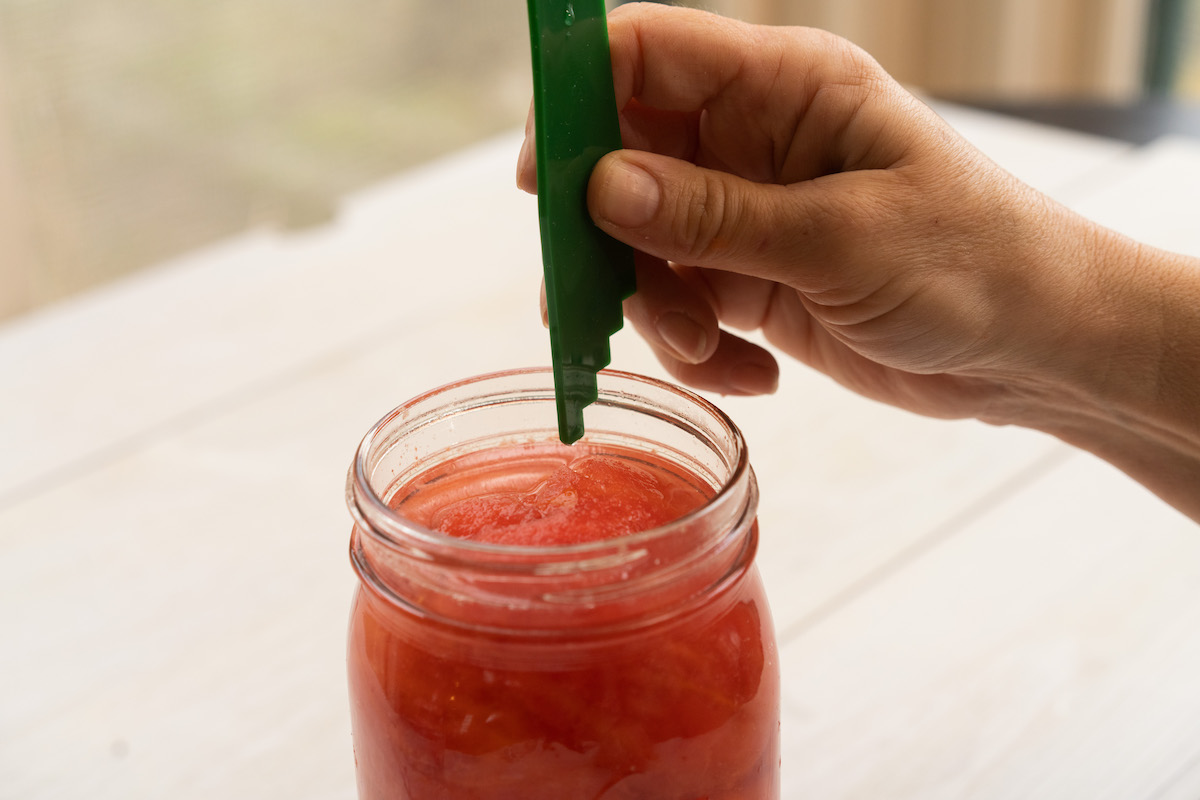
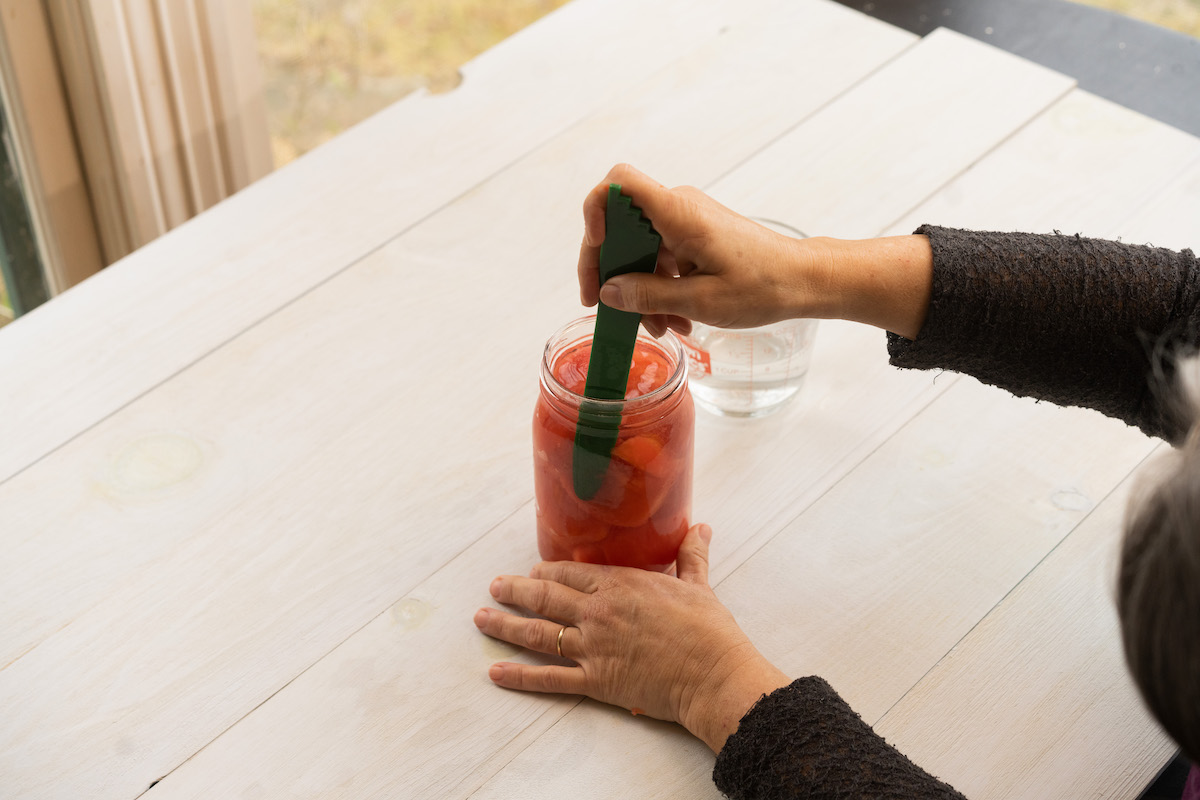
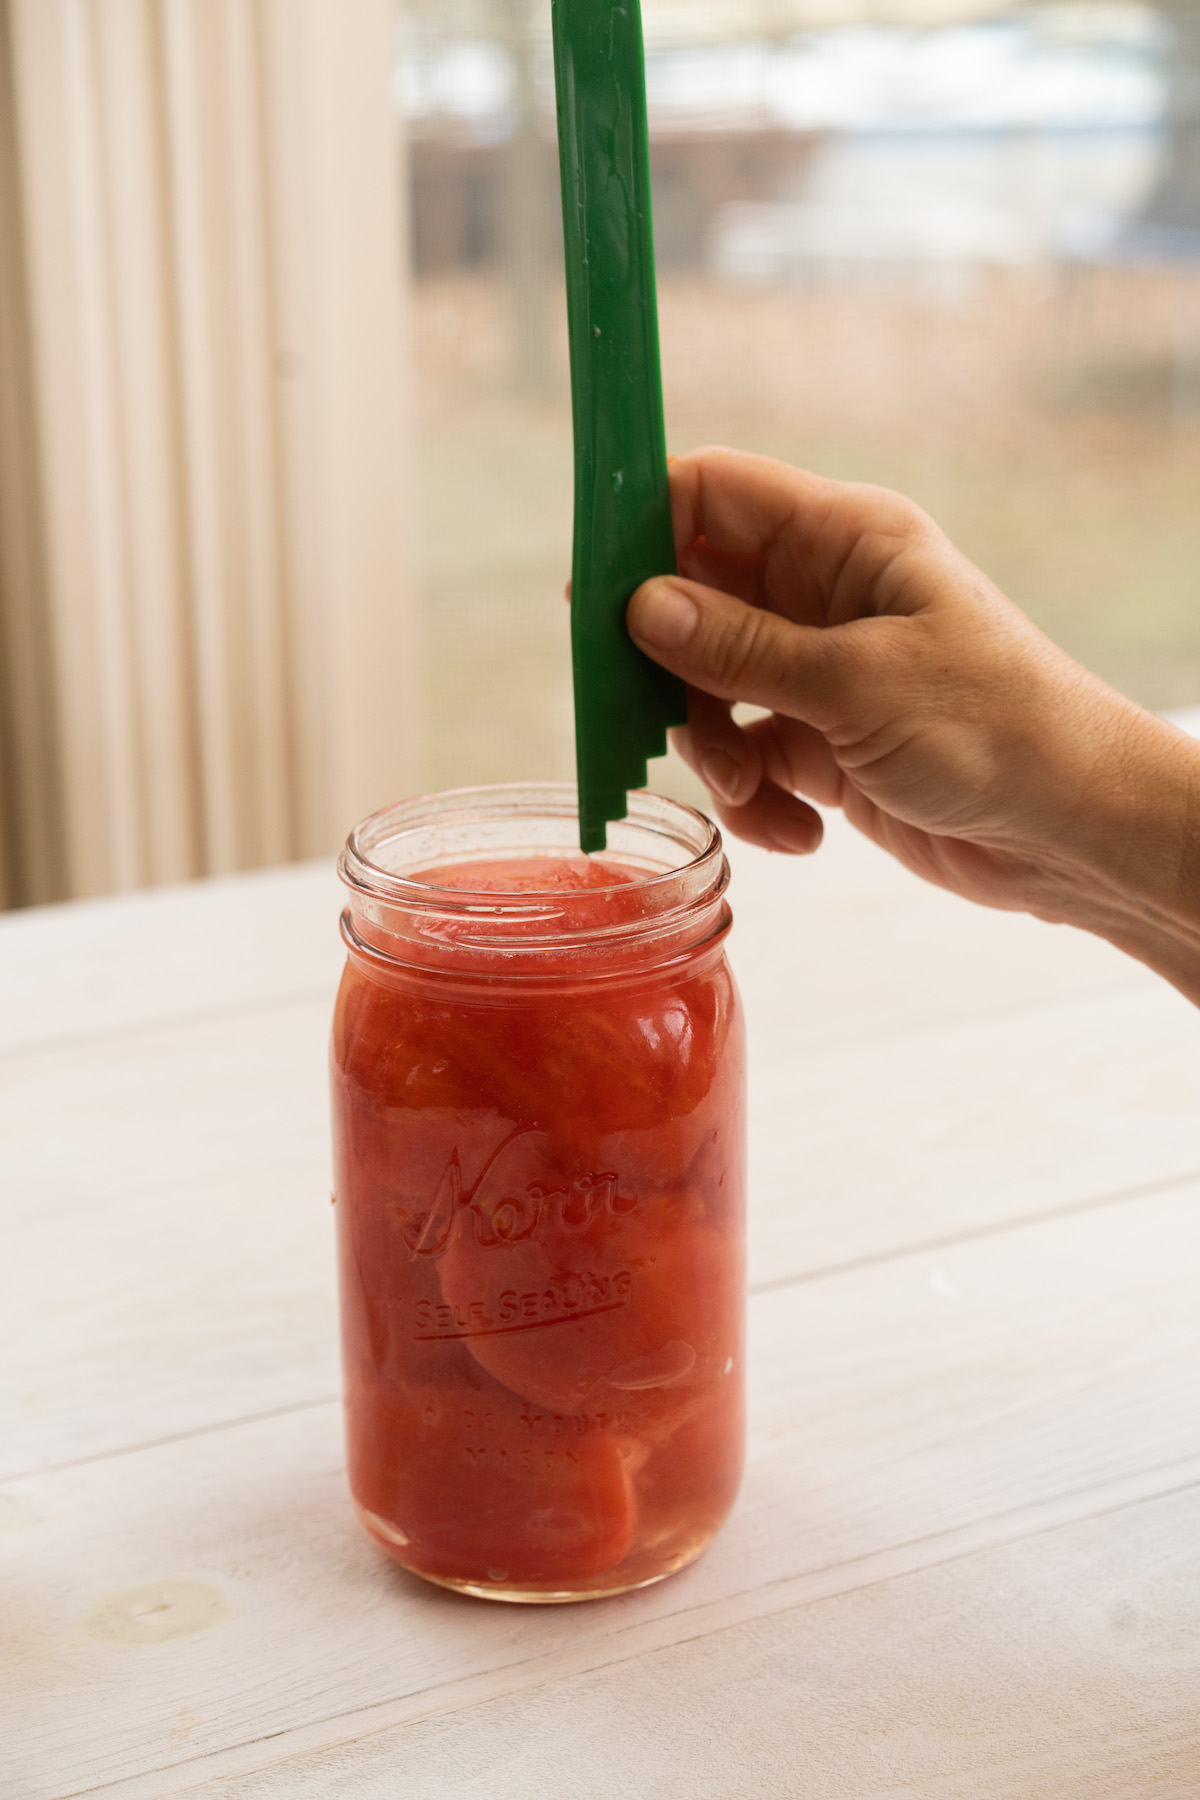
To remove bubbles, slip a bubble removal tool between the jar and the food and gently press the food into the middle of the jar just a bit. You’ll see bubbles escaping.
Do this all around the jar until no more bubbles escape. If you don’t have a bubble removal tool, you can use a chopstick or silicone spatula to remove the bubbles.
Metal can scratch the jar and lead to breakage, so stick with plastic or wooden tools when debubbling.
Recheck the headspace
After the air bubbles are removed, recheck the headspace.
If the jar had a lot of trapped air, there might be more headspace than is recommended.
Top off any jars that need a little more liquid to achieve the correct headspace; you can use hot water if necessary.
Wipe the Rims
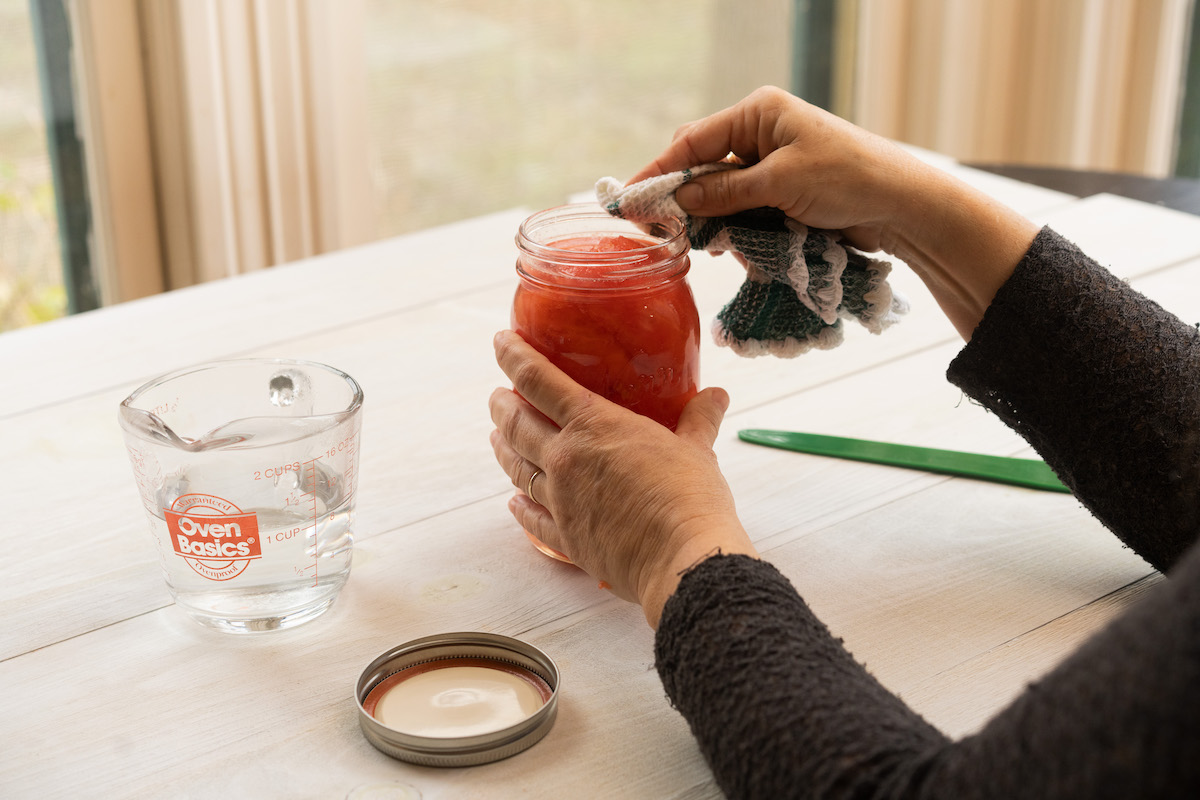
Using a clean, damp cloth, wipe the rims of the jars to clean off any food that might be on them.
If the food has grease in it, you can put a little white vinegar on the cloth to clean the jars.
Add the lids
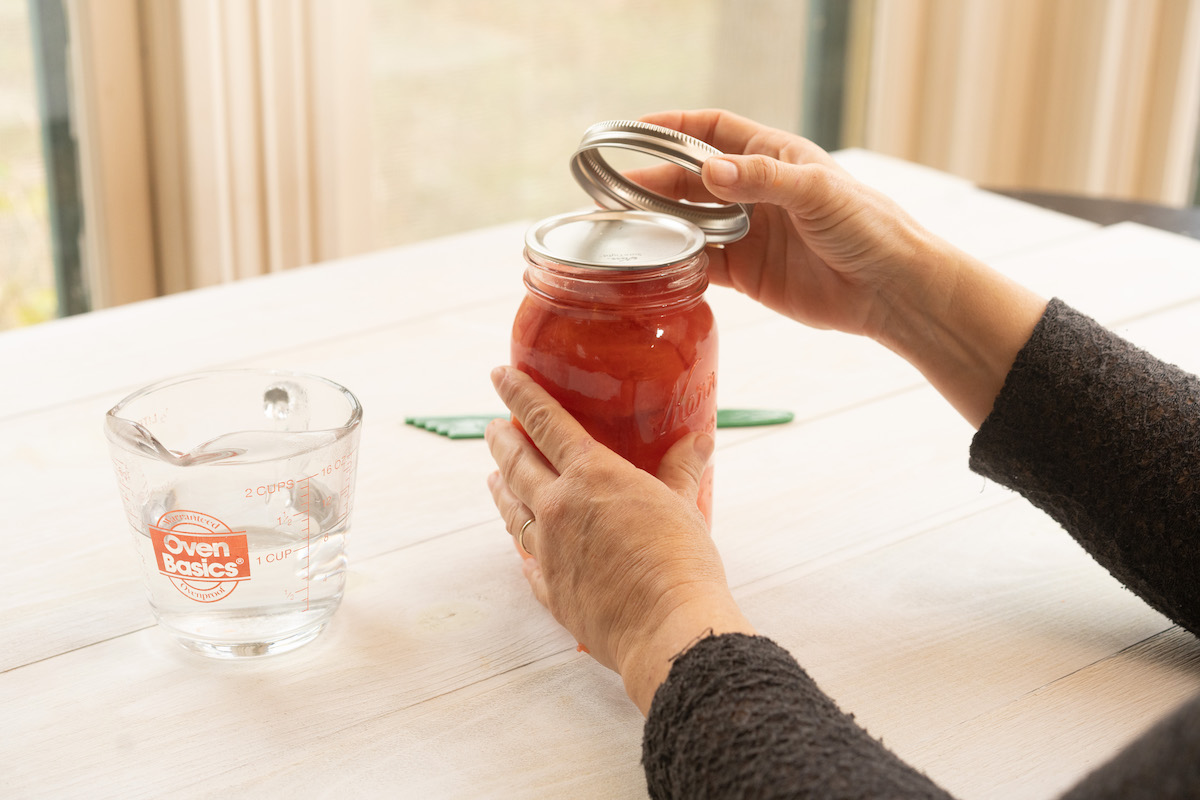
Put the lid on the jar and then screw the band on. It should be put on “finger-tight,” similar to how you would put the lid on a mayonnaise jar.
If the band is too tight, the air will not be able to escape. If the lids are too tight, the lid may buckle. Not tight enough, and you may experience siphoning (liquid loss).
This sounds tricky, but there’s a big range that’s “just right,” so don’t worry about it too much. Aim for “finger tight,” and you’ll be fine.
Put the Jars into the Canner
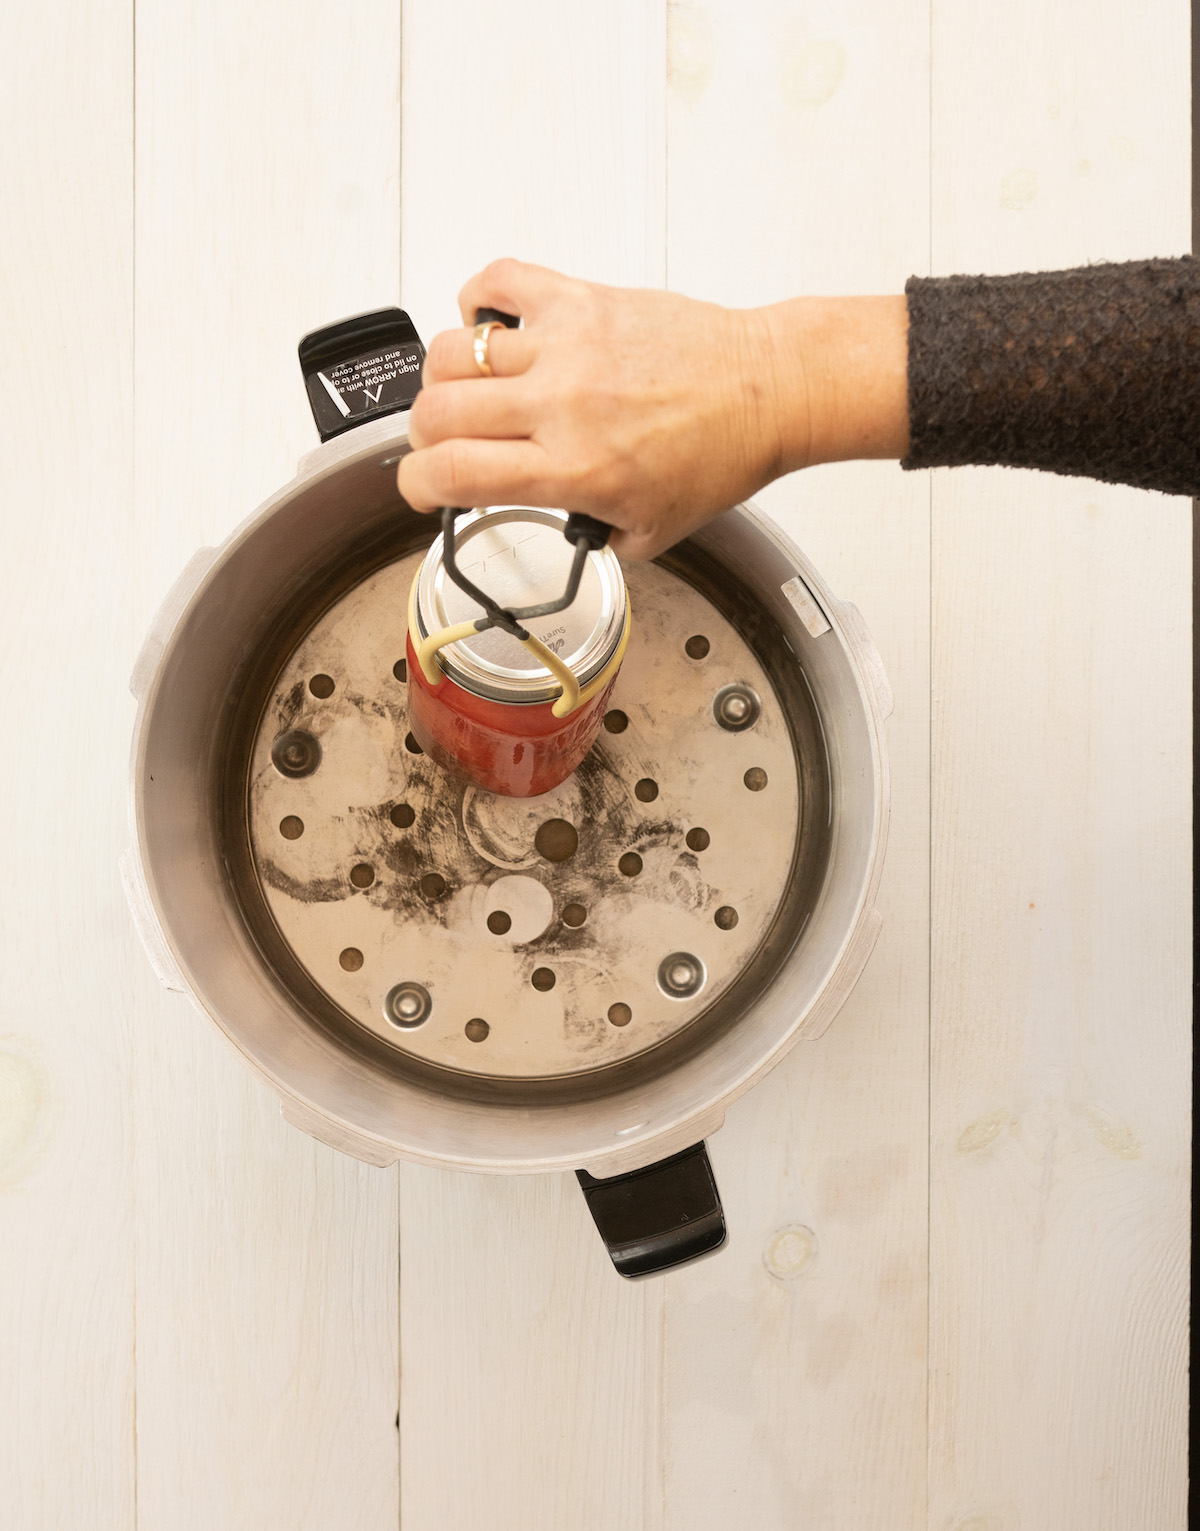
The jars are now ready for the canner. Make sure the rack is in the canner. Using a jar lifter, gently place the jars into the hot canner. Most canners will hold a single layer of nine 1-pint (500-ml) jars or seven 1-quart (1-L) jars. Some canners are tall enough that two layers can be processed at a time. If your canner can accommodate two layers, you’ll have an extra rack to use to separate the layers.
In order to properly pressurize a canner, you must have the equivalent of two properly filled 1-quart (1-L) jars. If you are canning 1-pint (500-ml) jars, you’ll need four properly filled jars. If you’re canning half-pint (250-ml) jars, you’ll need eight properly filled jars.
If, for whatever reason, you don’t have enough properly filled jars, you can use jars filled with water as a stand-in. Just fill the hot jar with hot water, leaving the correct headspace, and top it with a lid. When the canning is done, you can open the jar and pour out the water, or you can store the water as bottled water. If you’re not going to store the water, just reuse an old lid so you don’t waste lids.
Close the canner
Put the lid on the canner and lock it in place—refer to the user’s manual for locking instructions.
Most canners, like the Presto®, have a gasket that creates the seal. Over time, that gasket will dry-rot and need to be replaced. It should be inspected each time you use the canner and replaced as soon as you notice a crack. I keep an extra gasket on hand so I can replace it immediately when needed.
The All-American® canner does not have a gasket; instead, it has a metal-to-metal seal and must be lubricated with olive oil or petroleum jelly. This needs to be done every time you use the canner.
Heat the canner
Turn up the heat under the canner to high. This will cause the water to boil and steam to build up inside the canner.
Vent the canner
When the steam starts building up in the pressure canner, it will begin to come out of the vent. This is called venting or exhausting the canner. As a general rule, the pressure canner needs to vent for 10 minutes before you put the weight gauge or counterweight on the canner to start pressurizing it. The user’s manual that came with your canner may have a different time; if it does, use the time listed in the manual.
Process jars for the correct time
Processing time does not begin until the canner is fully pressurized. That means it first needs to vent for 10 minutes. Then, the weighted gauge or counterweight gets put on the canner to stop the venting and allow pressure to build.
For dial gauge canners, the canner is fully pressurized when the dial reaches the correct psi for your altitude. For weighted gauge canners, the canner is fully pressurized when the weight starts jiggling.
Once the correct pressure has been reached, the heat can be turned down to medium-high or medium. This will take a bit of trial and error the first few times you use your pressure canner. Turn the heat down to medium-high, wait just a minute and then check the pressure. If it’s still at the correct pressure and steam is not gushing out of the canner, you can leave the heat at this setting.
If the pressure has fallen, turn the heat up a little, and in a minute or two it should be back at the correct pressure. You can leave the heat at this setting.
If the pressure is correct, but steam is gushing out of the canner, and the weight or counterweight is jiggling nonstop, the heat can be reduced more. Turn it down just a bit, wait a minute and then check the pressure. If the pressure is still correct, you can leave the heat at this setting.
Write down the stove setting that was used to maintain the pressure so that you’ll be able to refer back to it.
While the canner will automatically release any excess pressure, you run the risk of having all the water evaporate if you keep the heat on high. This is especially true if you are canning something that takes 90 minutes or longer to process.
Once the canner maintains the correct pressure, you can begin timing. You’ll want to set a timer for this and not try to rely on your memory.
If, at any time, the pressure goes below the recommended amount, you will need to bring the canner back up to pressure and restart the timing. This is why it’s important to have a consistent source of heat.
Cool the canner
Once the timer goes off, it’s time for the canner to cool down and depressurize. If you’re using a gas stove, just turn off the heat and let it be. If you’re using an electric stove, turn off the heat and remove the canner from the burner, if you can. Some canners are super heavy when full, so this might not be possible.
It should take 30 to 60 minutes for the canner to completely depressurize and come to 0 psi. Don’t try to be creative and force the canner to cool faster. If you do things like put cold wet kitchen towels on it or put it outside in the cold, you run the risk of damaging the canner and ruining the food you just spent time canning. Truly, it’s not worth it.
If you have a dial gauge canner, the dial will go to 0. If the canner has a vent-lock piston, it will drop to its normal position.
If you are using a weighted gauge canner, allow the canner to rest for the amount of time stated in the user’s manual. After that time, barely lift the weight, and if any air comes out, put it back down. If no air comes out, it’s depressurized.
Once the pressure canner has completely depressurized, lay a clean kitchen towel on the counter to set the jars on. Remove the weight from the vent pipe or open the petcock and let the canner sit for 10 minutes before opening the lid. This keeps the liquid in the jars from surging and the lids from being compromised.
Remove the lid
When you remove the canner’s lid, remove it so that the opening is away from your face to avoid the blast of steam. Let the jars sit in the canner for another 5 minutes before removing them.
Remove the jars and let them cool
Using a jar lifter, remove the jars from the canner and place them on the prepared kitchen towel to cool. Leave at least 1 inch (2.5 cm) of space between the jars. Let them cool for 12 to 24 hours. It’s important to place the jars on a towel and not directly on the counter to avoid the risk of the jars breaking from thermal shock.
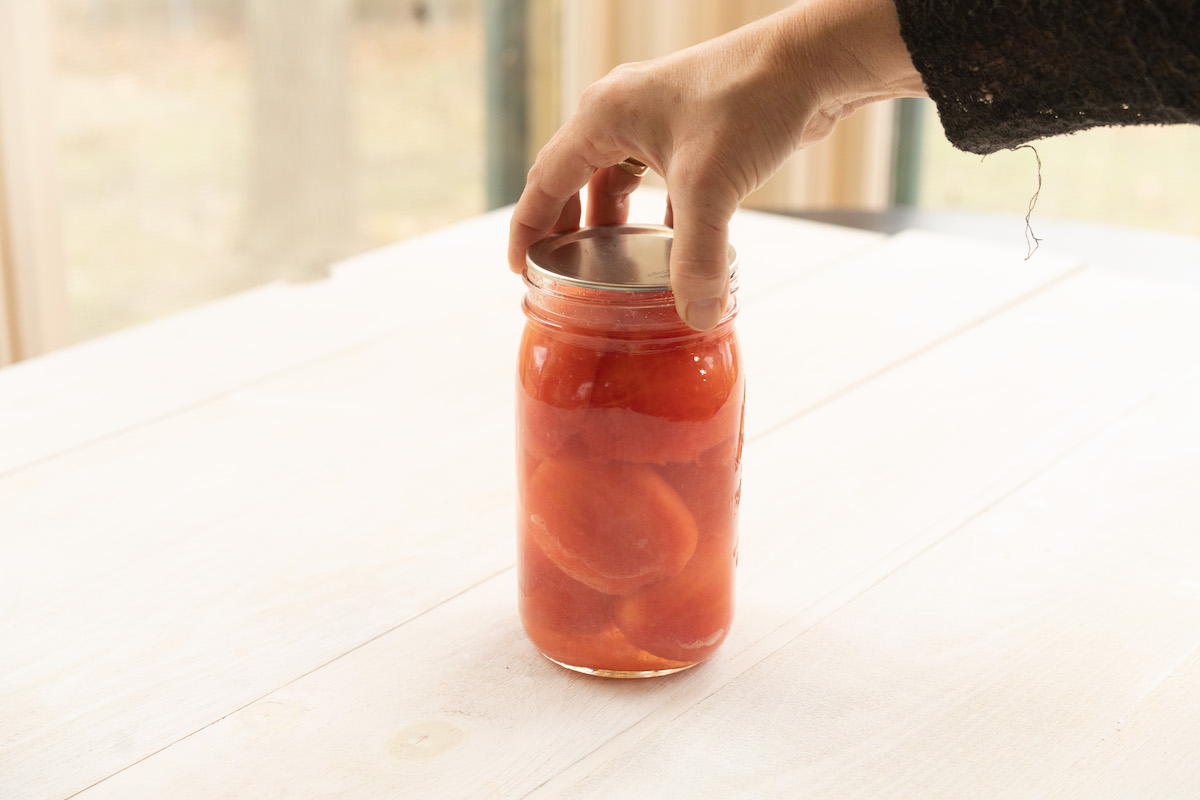
Check the Seals
After the jars have cooled, it’s time to check the seals. Remove the bands and check the seal by gently pressing on the top of the lid. There should be no movement; the lid should be completely still. Next, gently try to remove the lid with your fingers. Every once in a while, a lid will come off because the jar didn’t have a good seal. If a jar fails to seal, just put it in the refrigerator to use within a week.
Label and Store
The sealed jars are now ready to be stored away. Wipe the jars with a clean washcloth and wash and dry the bands. The jars can be stored with or without the bands. My preference is to store them without bands so I can use the bands for other canning purposes. If you choose to store the jars with the bands, be sure they are completely dry, or they might corrode onto the jars.
All jars should be labeled with the contents and date before being stored. You can write directly on the metal lids with a permanent marker, buy cute sticker labels or just use a piece of masking tape. For jars with reusable lids, I use masking tape.
Store the jars in a cool, dry place.
The USDA recommends that home-canned food should be used within one year for the best quality.
Changing Pressure Canning Recipes
If you want to create an uproar in a group of canners, just mention that you tweak, make substitutions or alter canning recipes to fit your family’s tastes.
One group will be horrified that you are not following tested recipes exactly as they are written. Surely, someone is going to die.
Another group will be ecstatic that you’ve finally broken free from thinking that you can only use tested recipes. Goodness, no one ever died from Grandma’s canning.
I don’t think either one of those responses is helpful. The first response creates fear, and the second response encourages irresponsibility.
We should always start with tested recipes and processes. Within those processes, there are safety guidelines that allow for recipe tweaking. The following guidelines for altering pressure-canned recipes are taken from various USDA publications.
Acid
Bottled lemon juice and bottled lime juice can be used interchangeably. If lemon or lime juice is used to acidify the food, like tomatoes, it must be bottled juice. If the lemon or lime juice is used for flavoring, like in the Lemongrass Chicken Soup in my book, fresh lemon or lime juice can be used.
Any vinegar that is 5 percent acidity can be substituted for white vinegar. If the vinegar is used as a seasoning and not to acidify the recipe, any vinegar can be used. In this book, vinegar is used for flavor in the recipes, not for acidifying them.
Vinegar can be substituted for wine in recipes since the wine is for flavor, not for safety. Use a vinegar and water ratio of 1:1 to make up for the wine. So if a recipe calls for 1 cup (240 ml) red wine, you can use 1/2 (120 ml) cup red wine vinegar and 1/2 (120 ml) cup water.
You can safely add more acid to any recipe. For instance, I like the zing that citric acid gives the Italian-Style Tomatoes, so I add it to the recipe as that would make it more acidic.
However, citric acid cannot be left out of recipes that call for it for safety reasons, like the Tomato and Vegetable Juice, because that would make it less acidic.
Salt
In canning, salt is used for flavor and to help retain color, not to preserve the food. Therefore, more or less salt can be used than the pressure-canned recipe calls for. Just remember that you can always add more salt when serving, but you can’t take it away. So, go easy.
If you use salt in your canning, you are not limited to “canning” salt. You can use any pure salt, just look at the ingredients list. If it just lists salt, it can be used. If it lists other ingredients such as iodine or anti-caking agents, it shouldn’t be used for canning.
Sugar
Like salt, sugar is used for flavor and to retain color, not to preserve the food. Therefore, more or less sugar can be used than the pressure-canned recipe calls for.
Since sugar is for flavor, you can substitute it with maple syrup, honey, or brown sugar in pressure-canned recipes.
Herbs and seasonings
Any dried herb can be safely added to any recipe. If a recipe calls for fresh herbs, dried herbs can be substituted. However, if a recipe calls for dried herbs, fresh herbs cannot be substituted. Sage is often discouraged in canning recipes because it can become bitter.
You can safely use one clove of garlic per jar.
You can always add more seasoning when you serve the food, so go easy on the herbs and seasonings.
Peppers & Onions
Canned chilies can be used in place of fresh. You can substitute one variety of peppers for another, say sweet peppers for hot peppers, as long as the quantity is the same.
Red, yellow or white bulb onions can be substituted for each other.
While most of these tweaks and substitutions are for ingredients that are used in small amounts, you can make substitutions with main ingredients too. Each chapter has recommended substitutions that can be made within that group.
Author Bio
Pressure Canning Recipes
Now that you understand the basics of how to use a pressure canner, you can try your hand at these pressure canning recipes:
- Canning Chicken Soup
- Canning Split Pea Soup
- Canning Thai Red Curry Duck
- Canning Beef
- Canning Chicken
Ashley, up until now I have water bath canned. Just to get the hang of it.
I have recently been able to procure a pressure canner! I am so excited!
I read your words of knowledge, and follow your recipes. I think this will be a great use to me.
I appreciate that you share your recipes on FB, and I follow you there (as Joe Munroe).
I share with others, but most are not where I am in my “shelf stable” foods. And that’s ok.
I just wanted to say thank you for all you do for others, and what finding you on line has meant to me!
PS: Nice hair cut !
Jo-Anne
Thanks so much Jo-Anne! I’m so glad you’re enjoying the recipes =)
This was super duper helpful! I just followed your recipe for chicken broth and it was my first time pressure canning! I think it went well. This article was super helpful in understanding the process and the ins and outs of all of it. IT seems way less intimidating now! THANK YOU!
Wonderful, so glad it was helpful to you!
Hi! I’m new to canning. I’m trying to find a made in the USA canning funnel that is food grade. Most importantly, I want one that couldn’t possibly have lead in it. Any suggestions? Thanks!
I have seen some ceramic canning funnels for sale online on occasion. Maybe try searching for those?