This post may contain affiliate links. Please see our disclosure policy.
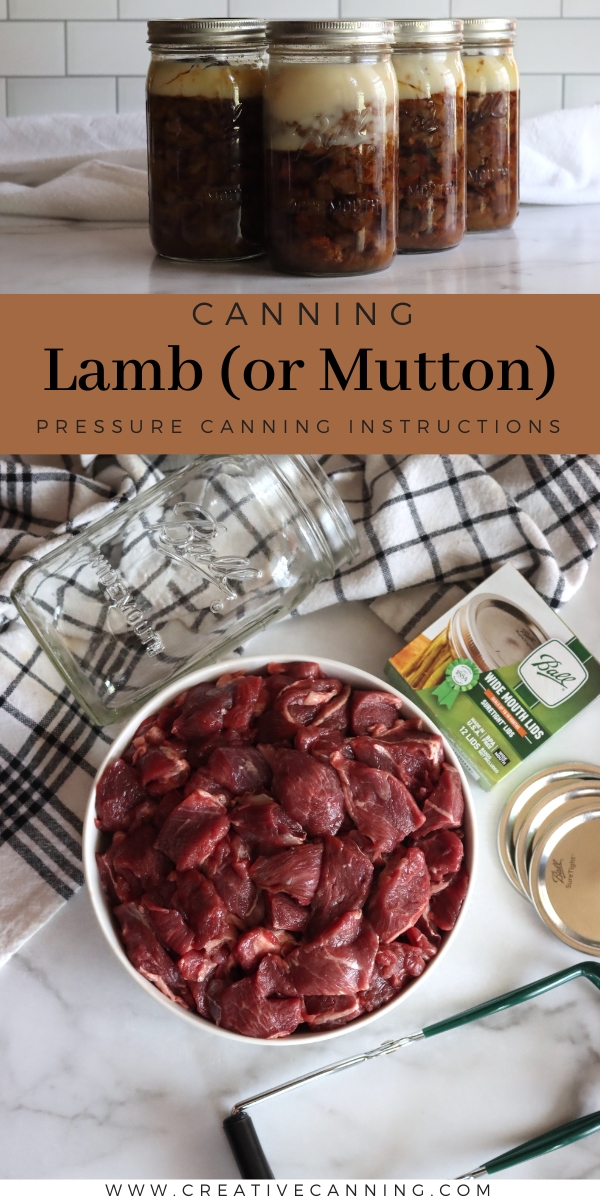
Canning lamb and mutton is a great way to add variety to your canning pantry while putting up shelf-stable meals at the same time.
My family loves both lamb and mutton, and they’re both wonderful when pressure-canned. Lamb is great in shepherd pie, stew, or just served with gravy over mashed potatoes.
Mutton, which is more flavorful, but tougher, especially benefits from pressure canning. We make a lot of curries, and those recipes often prefer slow-cooked mutton shoulder to lamb anyway.
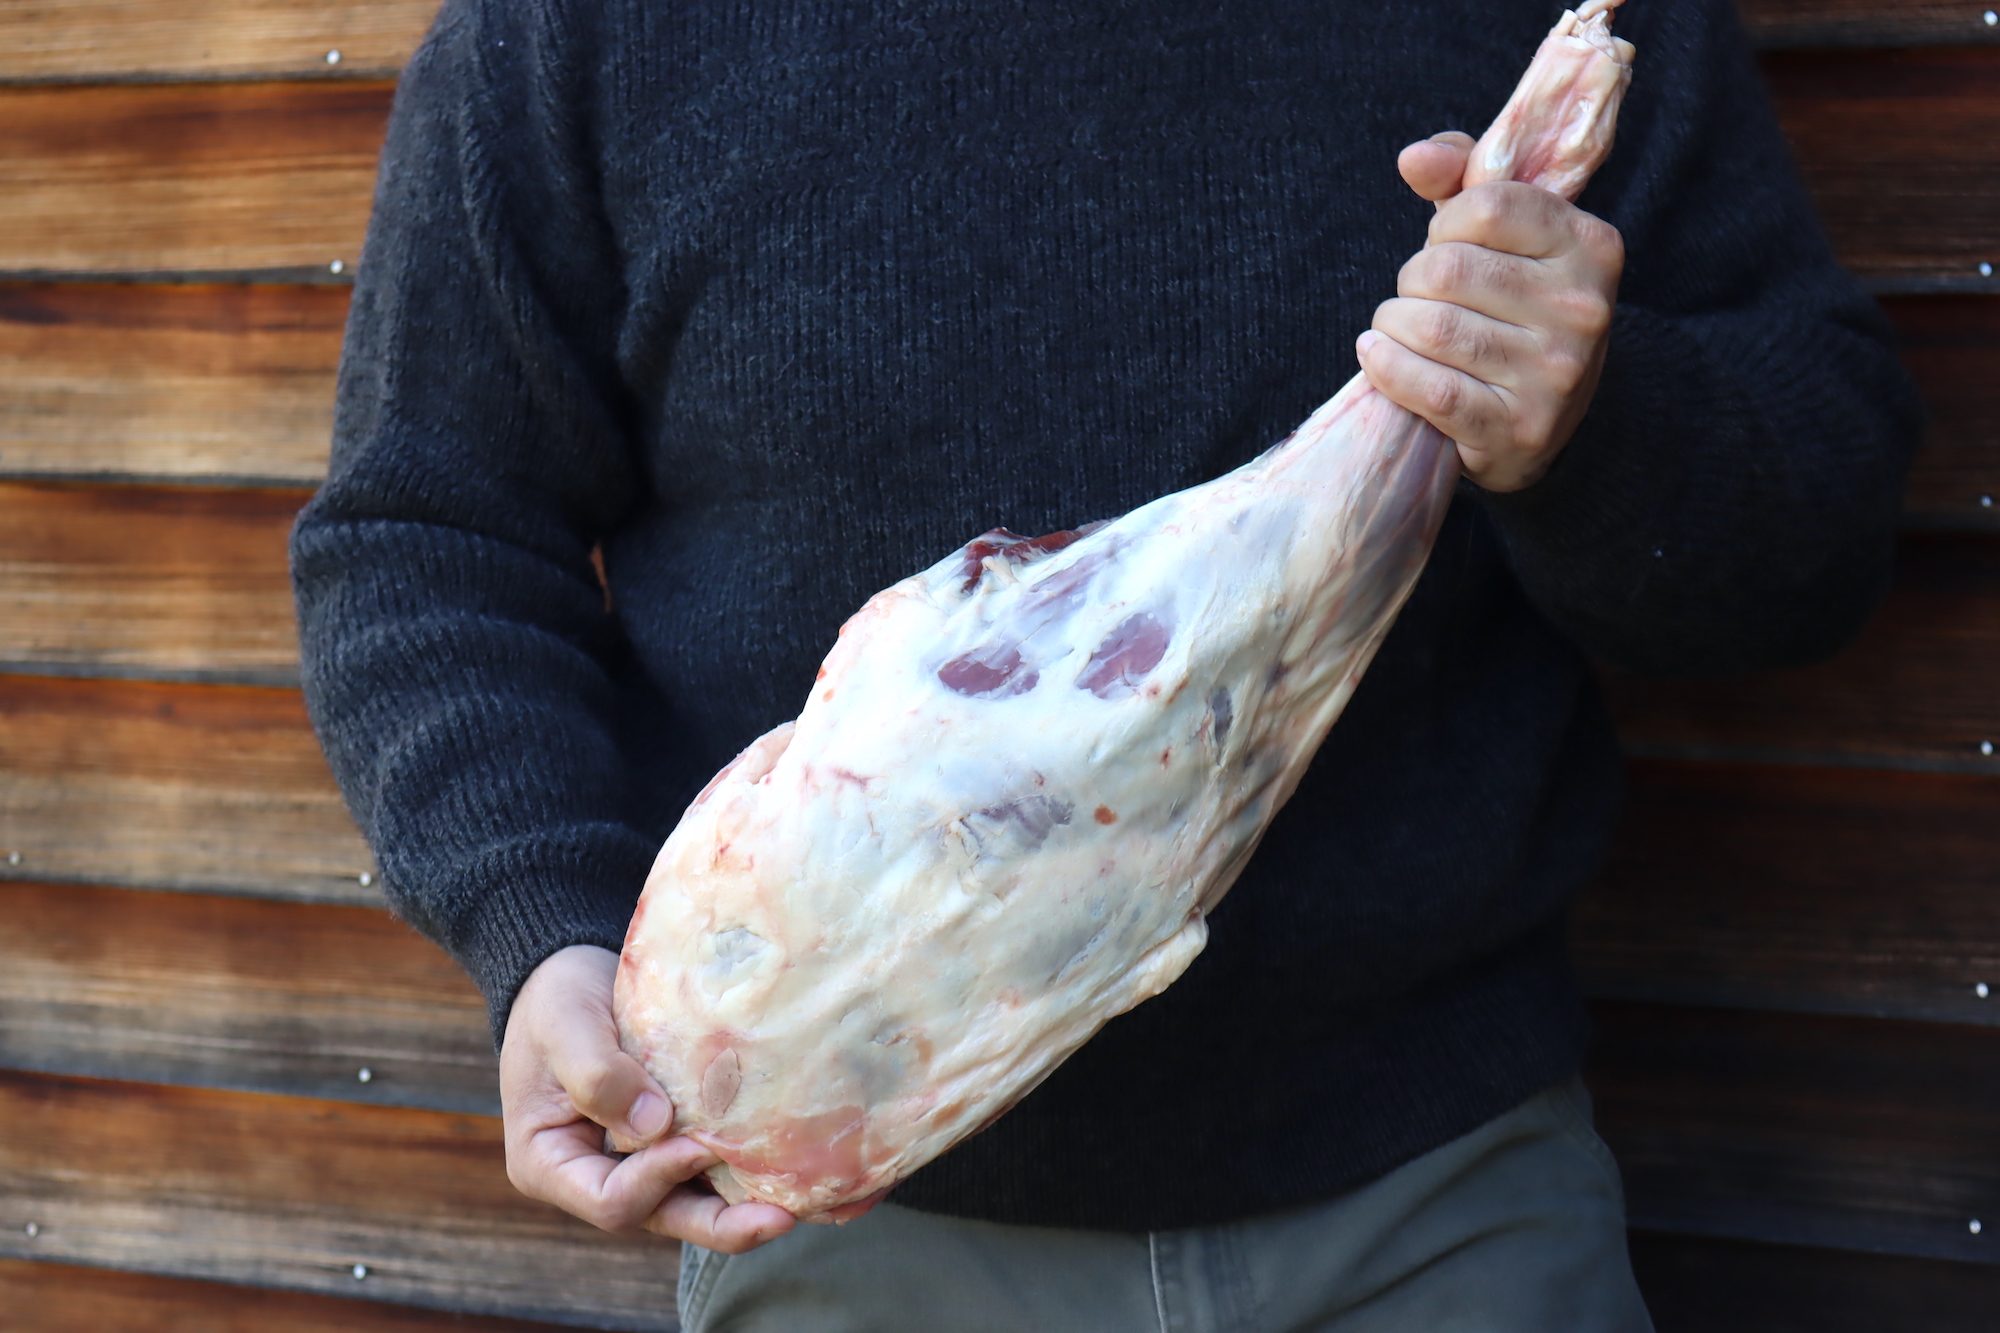
When a local sheep farm offered to give us the meat from some of their retiring breeding yews (10+ years old), we knew just how to preserve it. Pressure-canned mutton comes out tender and succulent, and we can store plenty of it without taking up freezer space.
We turned quite a bit of it into home canned Mutton Vindaloo Curry, but there was still plenty left for home-canned meat in a jar.
Canning lamb and mutton is not only a delicious way to preserve your meat but also a great way to ensure that it lasts for a long time. Whether you’re storing it for emergencies, camping trips or even a cozy night in, it’s always handy to have canned lamb and mutton in your pantry.
But what makes canned lamb and mutton so delectable? Well, for starters, it’s tender, juicy, and packed full of flavor. This meat goes perfectly with almost any meal or dish, whether you’re making a stew, curry, or simply adding it to your favorite sandwich. You’ll be amazed at how versatile canned lamb and mutton can be!
Not to mention, canning your own lamb and mutton saves you money! You will be able to stock up on meat when it’s on sale and preserve it for future use. This means you’ll never have to worry about wasting any food or spending too much money on expensive cuts of meat.
So what’s the difference between lamb and mutton? Before we dive into our in-depth guide on how to process these meats, we’ll give you a quick breakdown. Lamb is simply sheep meat that’s under a year old, while mutton is the meat of mature sheep (usually two to three years old).
No matter what kind of meat you have on hand and want to can, this recipe is for you! Here’s how to do it.
Ingredients for Lamb and Mutton
This is a tested canning recipe from So Easy to Preserve by the University of Georgia Cooperative Extension.
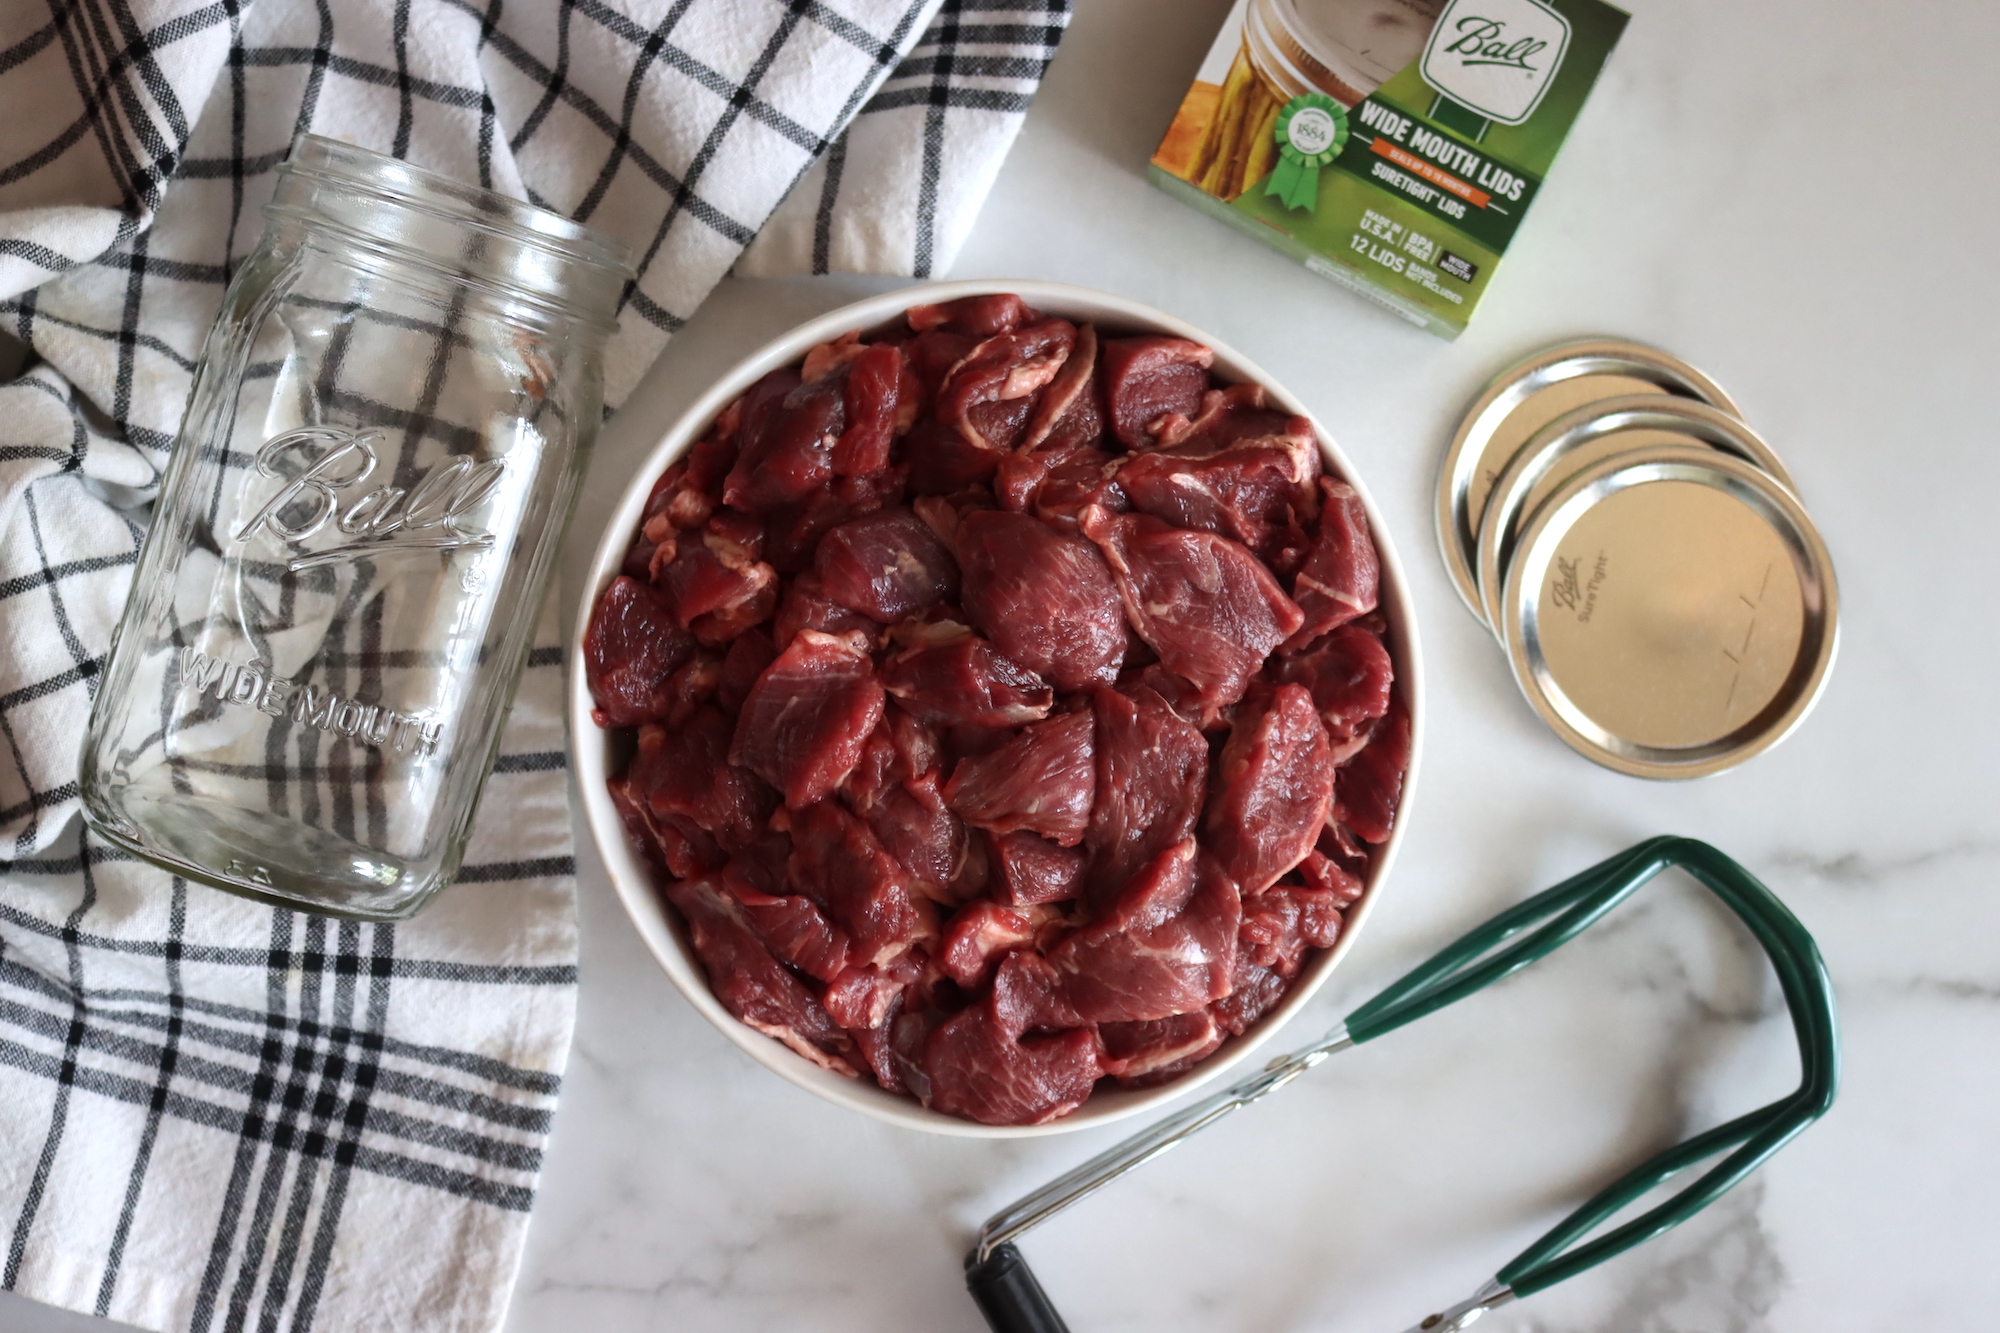
The ingredients for canning lamb and mutton are quite simple. To make a canner batch of seven quarts, you’ll need the following:
- High-quality and chilled lamb or mutton
- Salt (optional)
- Broth or tomato juice (optional)
You can make this recipe with any quantity of meat you have available. However, it will take about two pounds of meat to fill one-quart jar (so 14 pounds total) for this particular recipe. You can adjust quantities as needed.

Canning Lamb and Mutton
First and foremost, always start with high-quality chilled meat. This will yield the best possible finished product.
You can get the meat from the grocery store, which is already cleaned and chilled, or if you’re processing at home make sure you get it all the way cleaned, processed and chilled before beginning.
Next, remove any excess fat and soak any meat that might be particularly strong-flavored in brine water with a tablespoon of salt per quart for an hour. Rinse it thoroughly, and remove any large bones that could interfere with the canning process.
Soaking is mostly necessary for ram meat, but some people find it nice with mutton as well. I didn’t think it necessary. Try cooking up a small piece of your meat as is to test, and if it’s too gamey for you, opt for a soak. If you like it as is, skip it.
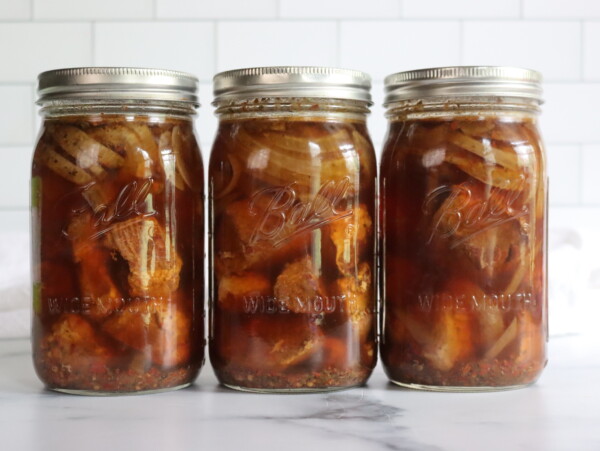
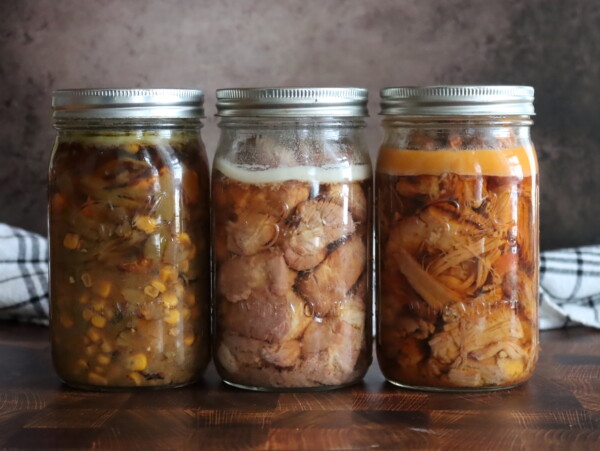
Now, let’s talk about the two canning methods: hot pack and raw pack.
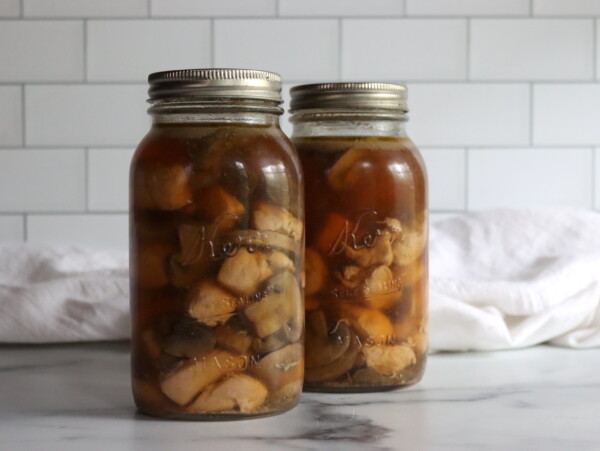
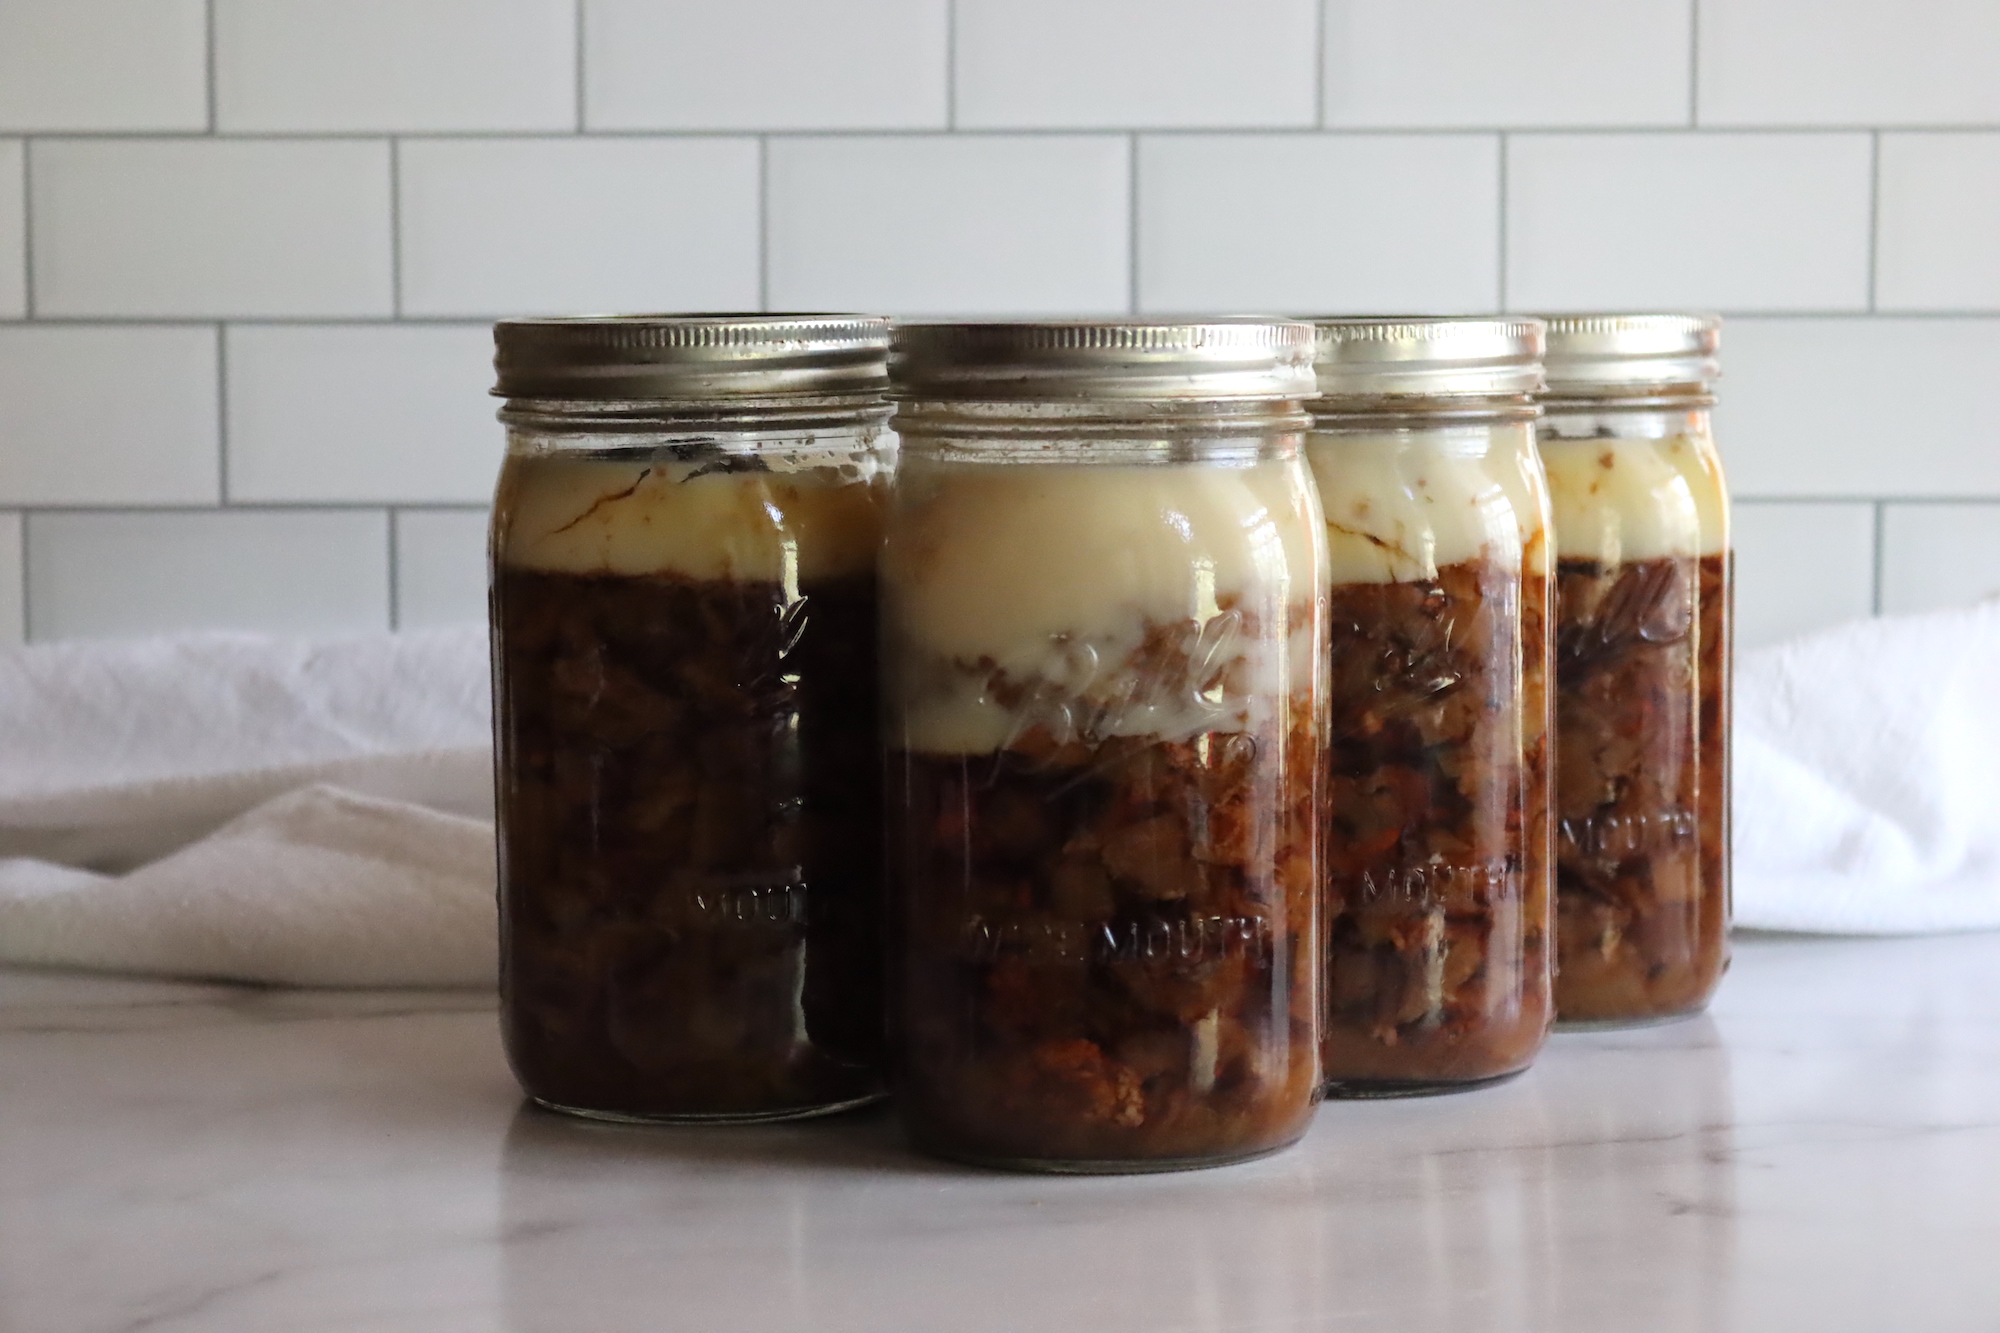
The hot pack is generally recommended, as it ensures you’ll get the best liquid cover and top quality during storage (though raw pack is admittedly quicker). In this method, you’ll precook the meat until it’s rare to medium rare – you can do this by simply browning it in a little bit of fat. If you want, add a teaspoon of salt per quart to the jar.
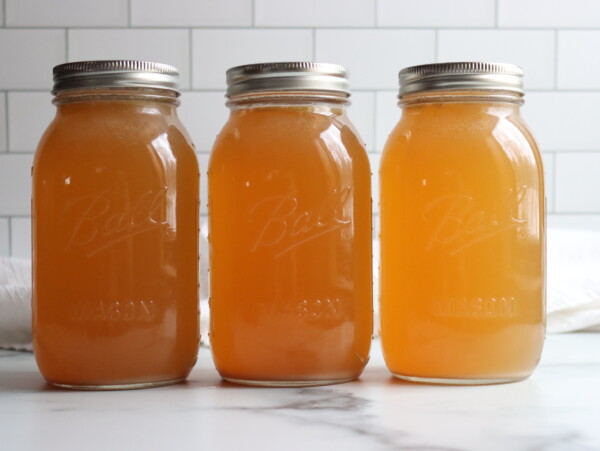
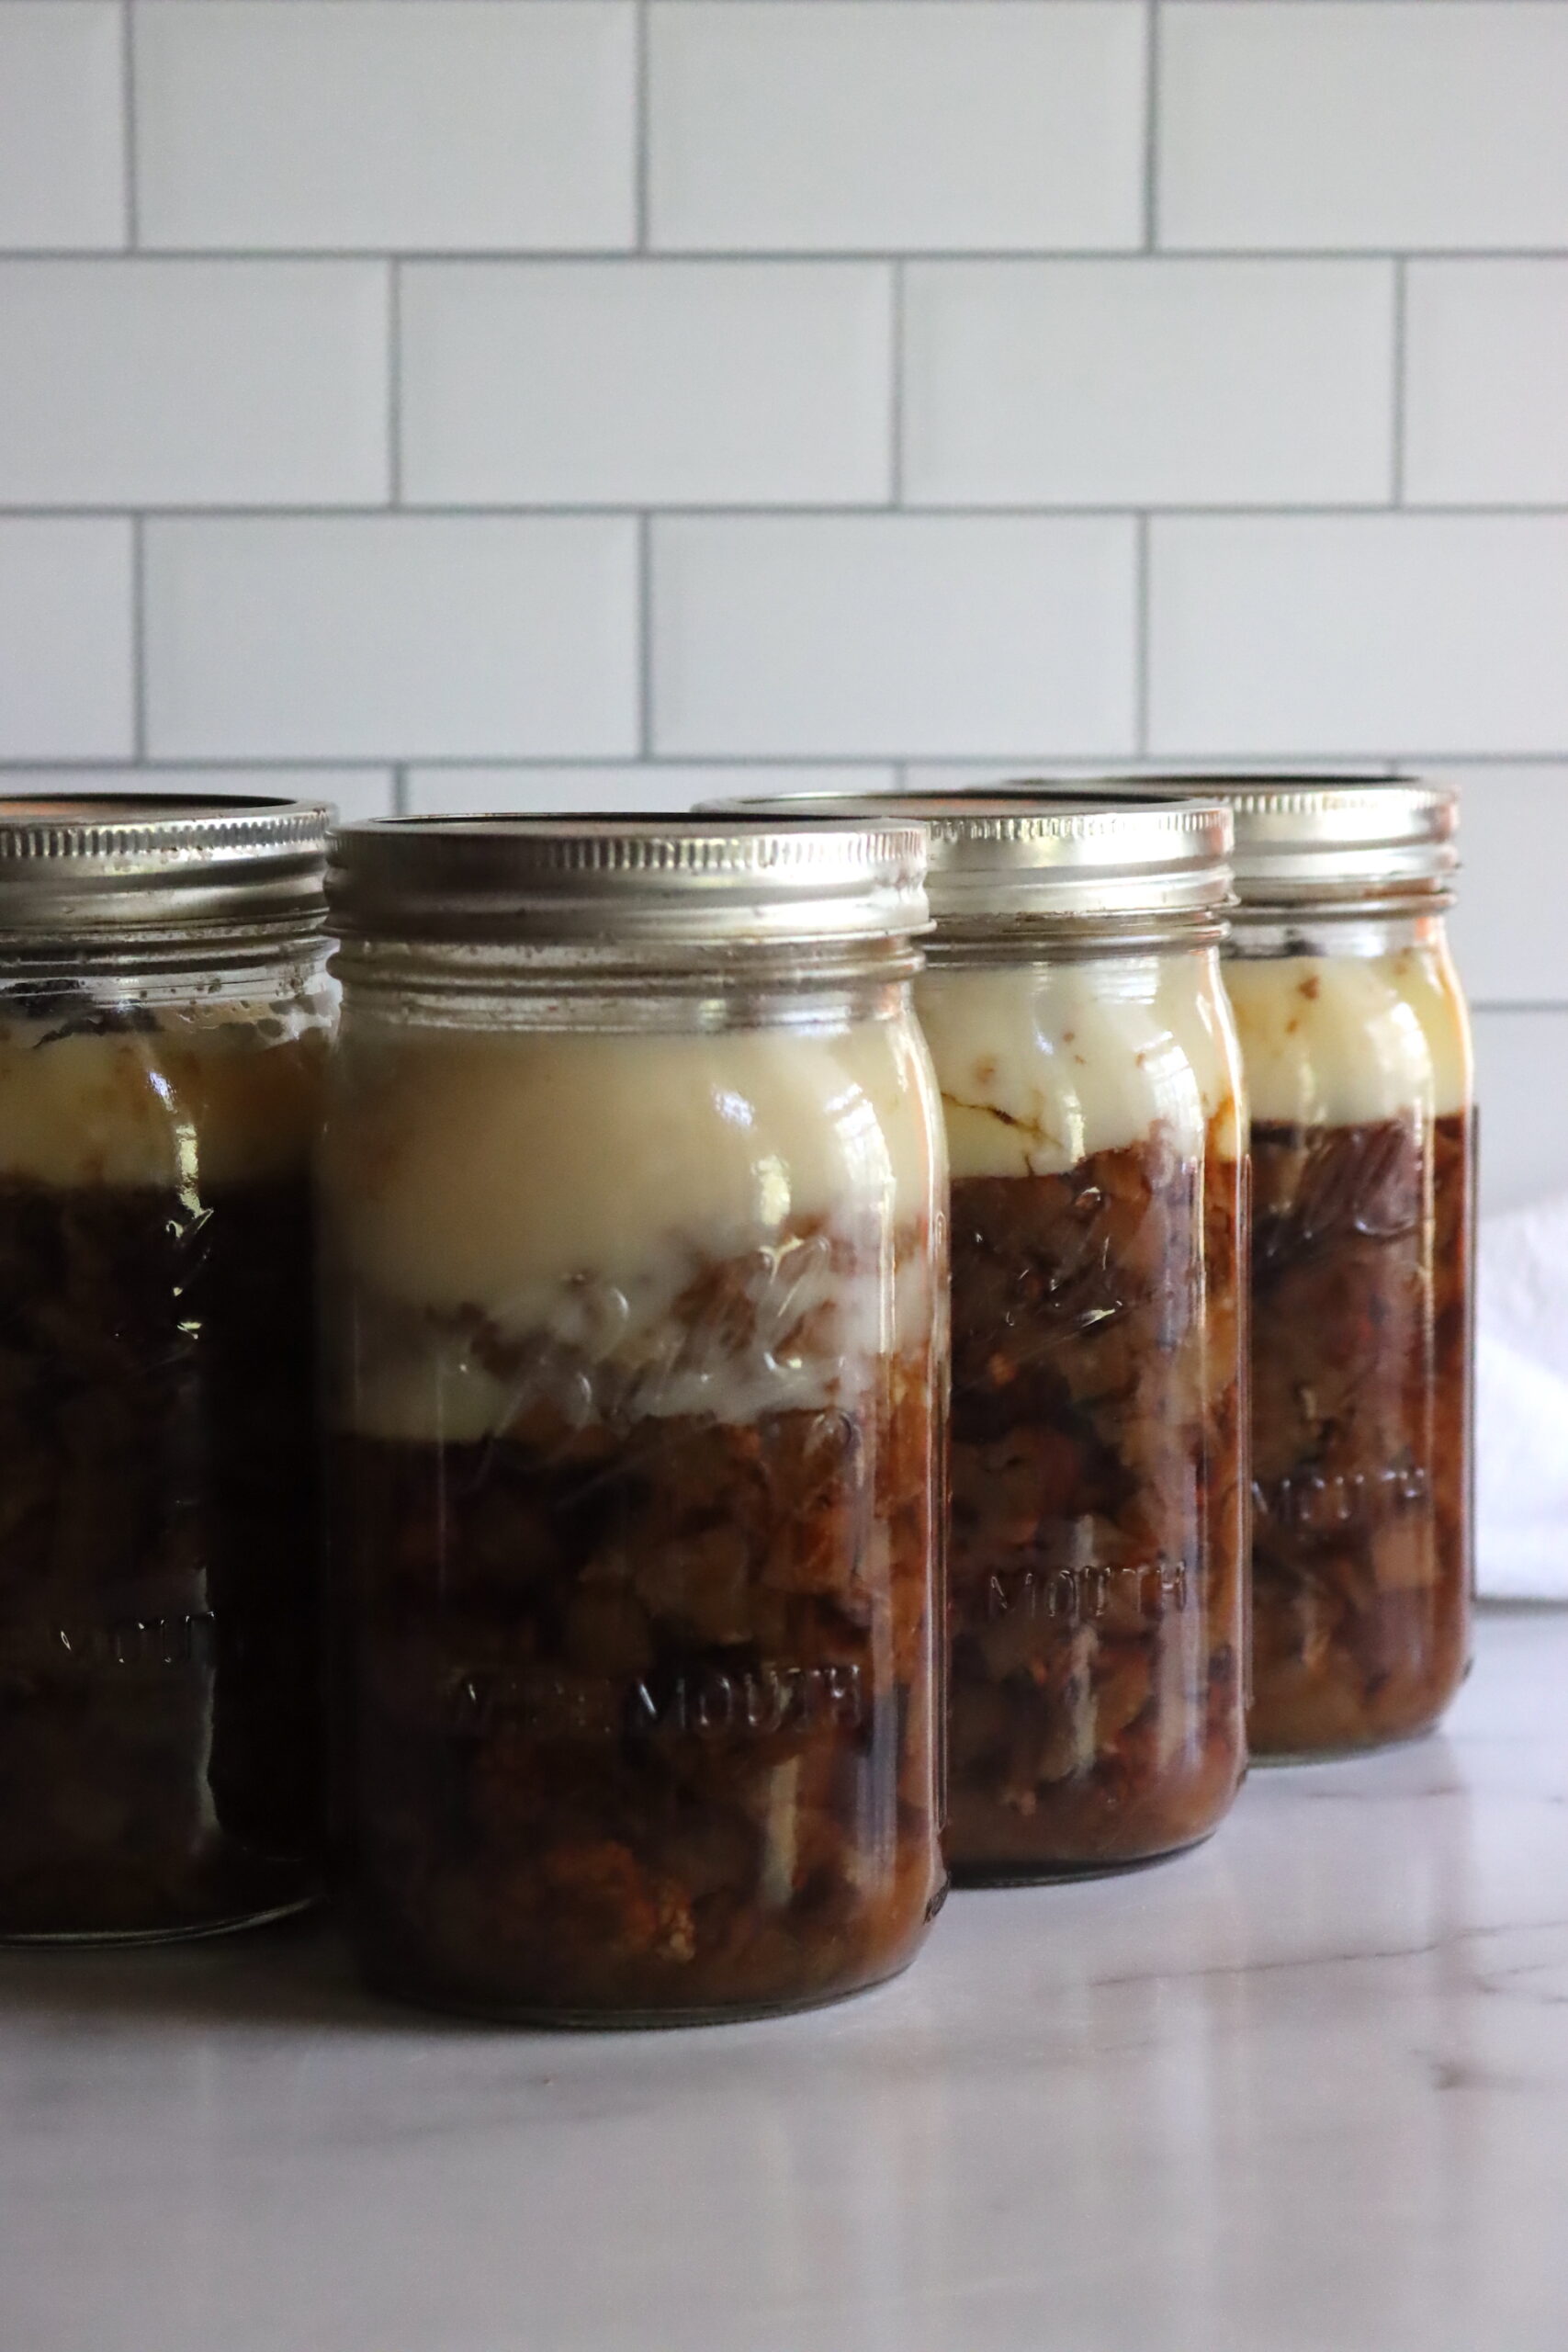
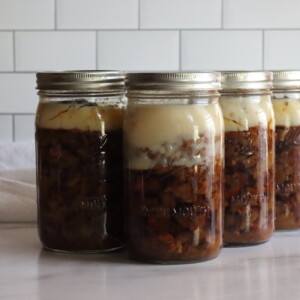
Fill the jars with the pre-cooked meat and add boiling broth, hot water, or hot tomato juice (the latter is best for strong-flavored meats) – leaving an inch of headspace.
On the other hand, for raw pack, fill the jars with the meat, leaving an inch of headspace, and do not add any liquid. You can add two teaspoons of salt per quart jar, if you’d like.
Next, you’ll put your sanitized lids on the jars. Apply the bands, then tighten them until they’re fingertip-tight. Load the jars into the canner and lock the lid. Turn the burner on high heat.
Let the canner release steam for 10 minutes, then put the weight on. Allow it to build pressure to 11 lbs of pressure (for a dial-gauge canner) or 10 lbs (for a weighted gauge). Process pints for 75 minutes and quarts for 90 minutes.
When the time has finished, turn off the heat and leave the canner where it is. Let it return to zero pressure, then wait another ten minutes and remove the lid. Let the jars sit in the canner for thirty minutes, then remove and set them on a towel at room temperature to cool for 24 hours.
Check the seals on the jars, label, and store.
Altitude Adjustments for Canning Lamb or Mutton
With pressure canning, the processing times stay the same at higher altitudes, but the pressures change. Here are the altitude adjustments for pressure canning:
For dial gauge pressure canners:
- 0 to 2,000 feet in elevation – 11 lbs pressure
- 2,001 to 4,000 feet in elevation – 12 lbs pressure
- 4,001 to 6,000 feet in elevation – 13 lbs pressure
- 6,001 to 8,000 feet in elevation – 14 lbs pressure
For weighted gauge pressure canners:
- 0 to 1,000 feet in elevation – 10 lbs pressure
- Above 1,000 feet – 15 lbs pressure
Serving Lamb and Mutton
The beauty of canned meats like lamb and mutton is that they’re ready to go whenever you are! Just pop open the jar, heat it up and serve it with some delicious sides like roasted vegetables or a creamy mashed potato.
Another great serving suggestion is to add some canned meat to your favorite soup or stew recipe. It adds a delicious depth of flavor and protein.
If you’re feeling a bit more adventurous, why not jazz up your canned meat with some additional ingredients?
For example, add some canned lamb to a simple tomato sauce and serve it over your favorite pasta for a quick and easy meal. Or why not make a delicious shepherd’s pie with canned mutton as the star ingredient?
In terms of flavor pairings, lamb and mutton go great with bold flavors like rosemary, garlic, and mint. A simple marinade of olive oil, lemon juice, garlic, and rosemary would be a delicious addition to canned lamb.
Mutton pairs well with warming spices like cinnamon, cloves, and cumin. Add these seasonings to your canned mutton and you’ll have a rich and flavorful meal. Don’t forget a glass of dry red wine to go with your dinner!
Canning Lamb (and Mutton)
Ingredients
- High-quality and chilled lamb or mutton
- Salt, optional
- Broth or tomato juice, optional
Instructions
- Remove any excess fat and soak any meat that might be particularly strong-flavored in brine water with one tablespoon of salt for every quart for an hour. Rinse it thoroughly, and remove any large bones that could interfere with the canning process.
- For the hot pack method, precook the meat until it's rare to medium rare – you can do this by simply browning it in a little bit of fat. If you want, add a teaspoon of salt per quart to the jar.
- Fill the jars with the precooked meat and add boiling broth, hot water, or hot tomato juice (the latter is best for strong-flavored meats) – leaving an inch of headspace.
- For the raw pack method, add two teaspoons of salt for every quart, if desired. Fill the jars with the meat, leaving 1-inch headspace, and do not add any liquid, leaving 1-inch headspace, and do not add any liquid.
- Put your sanitized lids on the jars. Apply the bands, then tighten until they're fingertip-tight.
- Load the jars into the canner and lock the lid.
- Turn the burner on high heat.
- Let the canner release steam for 10 minutes, then put the weight on.
- Allow it to build pressure to 11 lbs of pressure (for a dial-gauge canner) or 10 lbs (for a weighted gauge). Process pints for 75 minutes and quarts for 90 minutes. (Adjust for altitude, see below)
- When the time has finished, turn off the heat and leave the canner where it is. Let it return to zero pressure, then wait another ten minutes and remove the lid.
- Let the jars sit in the canner for thirty minutes, then remove and set them on a towel at room temperature to cool for 24 hours.
- Check the seals on the jars, label, and store.
Notes
Altitude Adjustments for Canning Lamb or Mutton
With pressure canning, the processing times stay the same at higher altitudes, but the pressures change. Here are the altitude adjustments for pressure canning:For dial gauge pressure canners:
- 0 to 2,000 feet in elevation – 11 lbs pressure
- 2,001 to 4,000 feet in elevation – 12 lbs pressure
- 4,001 to 6,000 feet in elevation – 13 lbs pressure
- 6,001 to 8,000 feet in elevation – 14 lbs pressure
For weighted gauge pressure canners:
- 0 to 1,000 feet in elevation – 10 lbs pressure
- Above 1,000 feet – 15 lbs pressure
Meat Canning Recipes
Keep your pantry stocked with these meat canning recipes:
Beef Canning Recipes
Lamb can be used in place of beef in any canning recipe, so you can substitute it in any of these beef canning recipes for a unique flavor:
- Canning Beef Stew
- Canning Ground Beef
- Canning Sloppy Joe Filling
- Canning Chili con Carne
- Canning Beef Pot Pie Filling