This post may contain affiliate links. Please see our disclosure policy.
Chili con carne is a classic recipe for ground beef chili with beans, and it’s simple to preserve right on your pantry shelf with pressure canning!
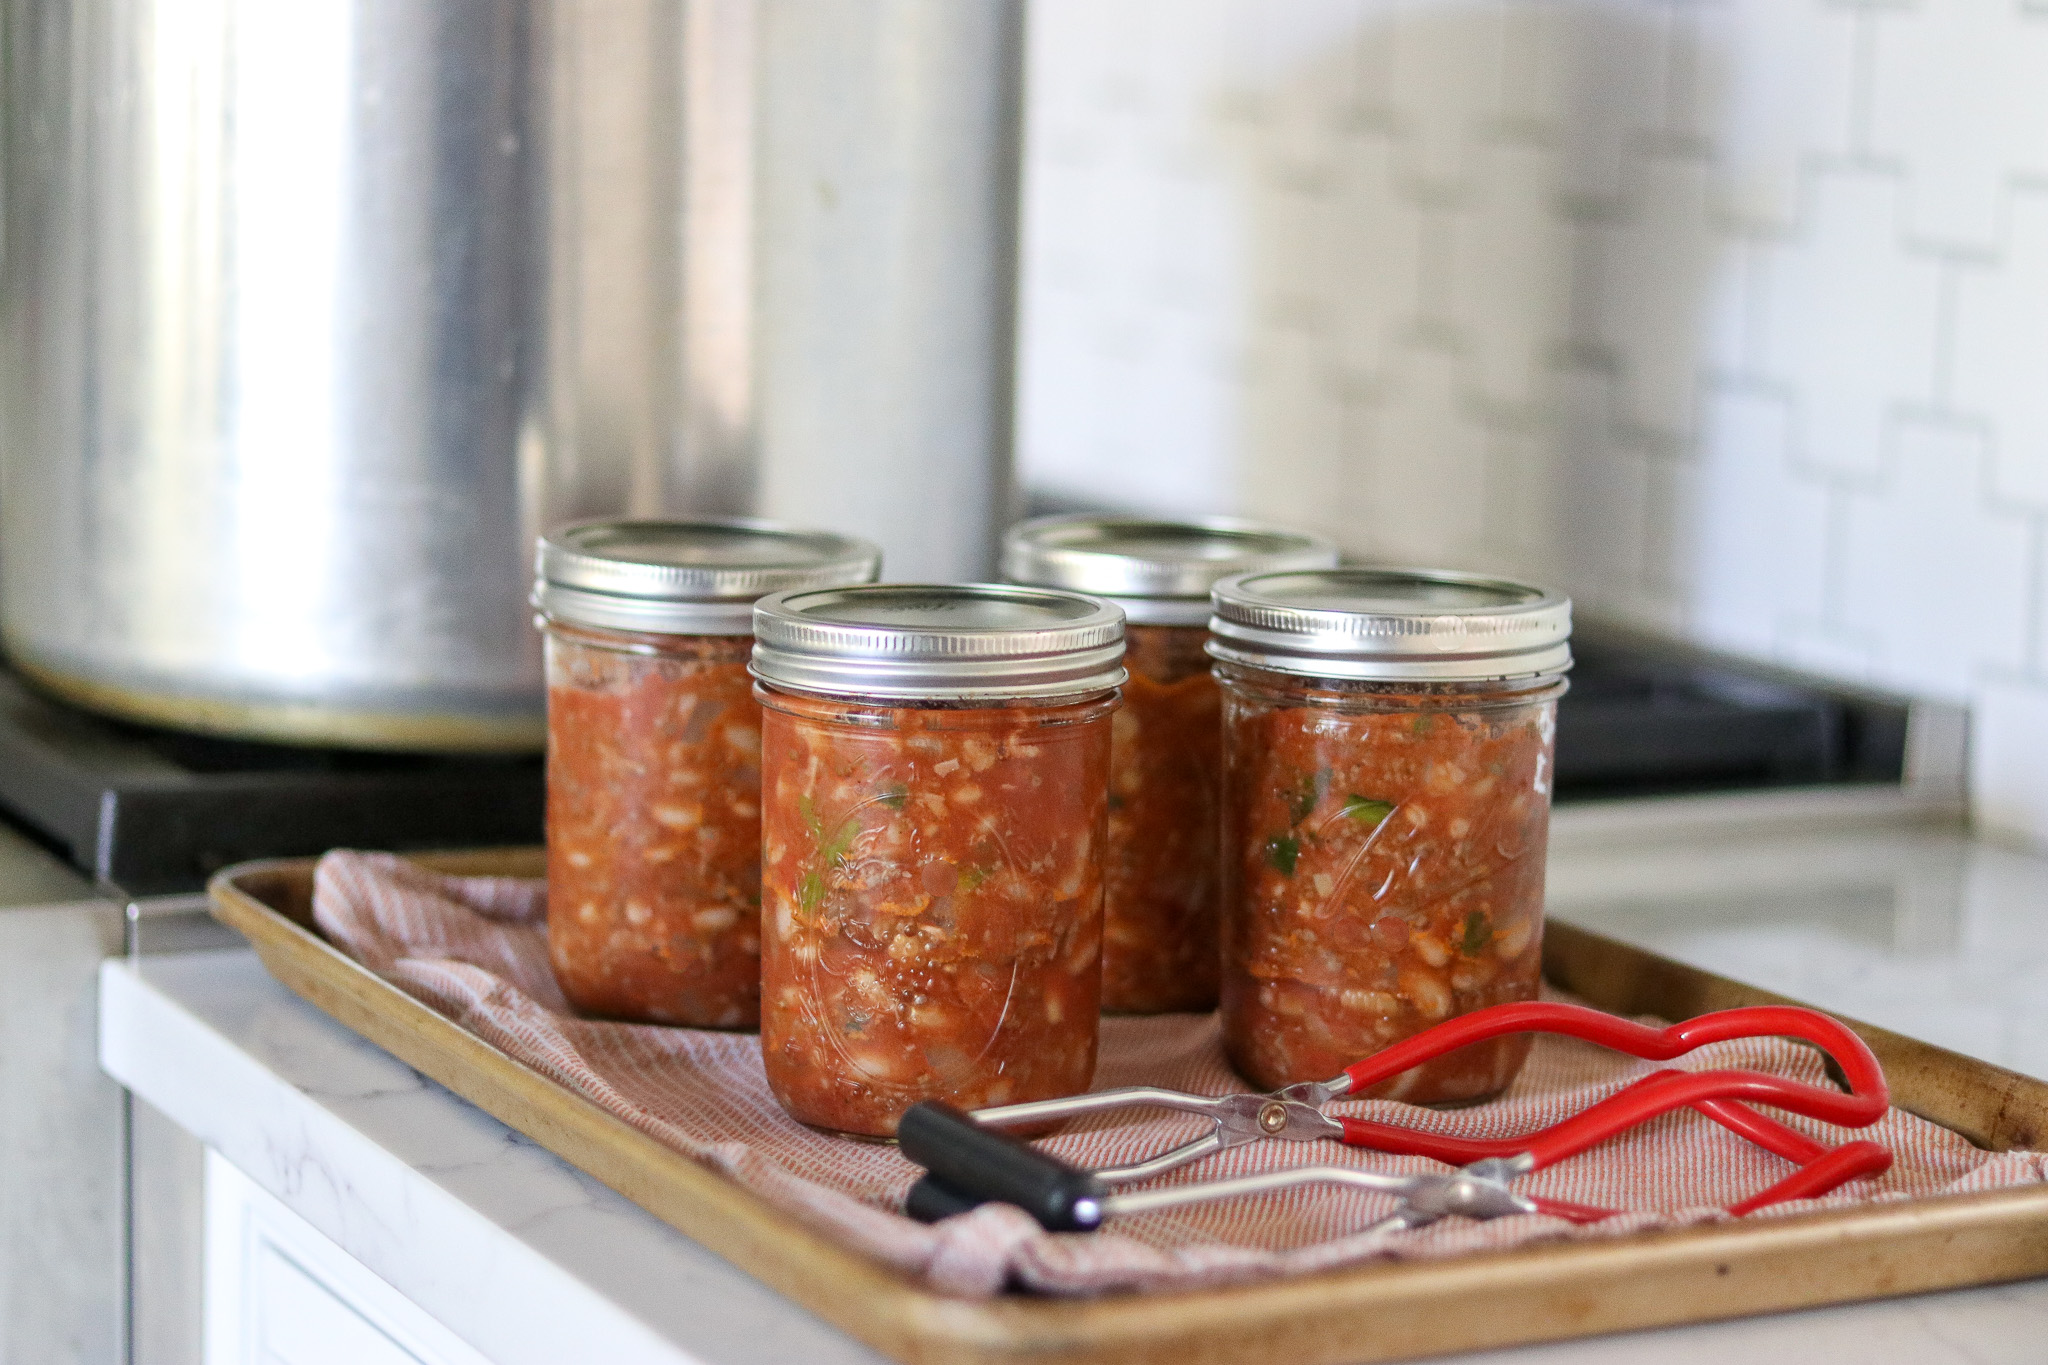
Table of Contents
Canning chili con carne is an excellent way to preserve delicious, savory flavors for a rainy day. Not only is canning chili con carne incredibly convenient, it’s also quite economical and practical.
Instead of having to purchase multiple cans of chili from the store, why not prepare and store away your own homemade version for months? Its long shelf life makes it one of the perfect dishes to put in storage – ensuring that you can always enjoy a satisfying and tasty meal!
Plus, nothing beats making your own chili using individual ingredients like herbs and spices tailored to suit your particular love of flavor.
This canning recipe for Chili con Carne was developed by the USDA, and it’s included in the USDA Complete Guide to Home Canning.
It has been tested for safety in a pressure canner, but since it includes all low-acid ingredients (beans, meat, peppers, etc.), it is not for water bath canning.
If you’re not familiar with pressure canning, please see my beginner’s guide to pressure canning before beginning.
Often recipes are tested in both pints and quarts, but this particular recipe is only tested in pints. It cannot be put up in quarts, as that has not been tested (yet).
Ingredients for Chili Con Carne
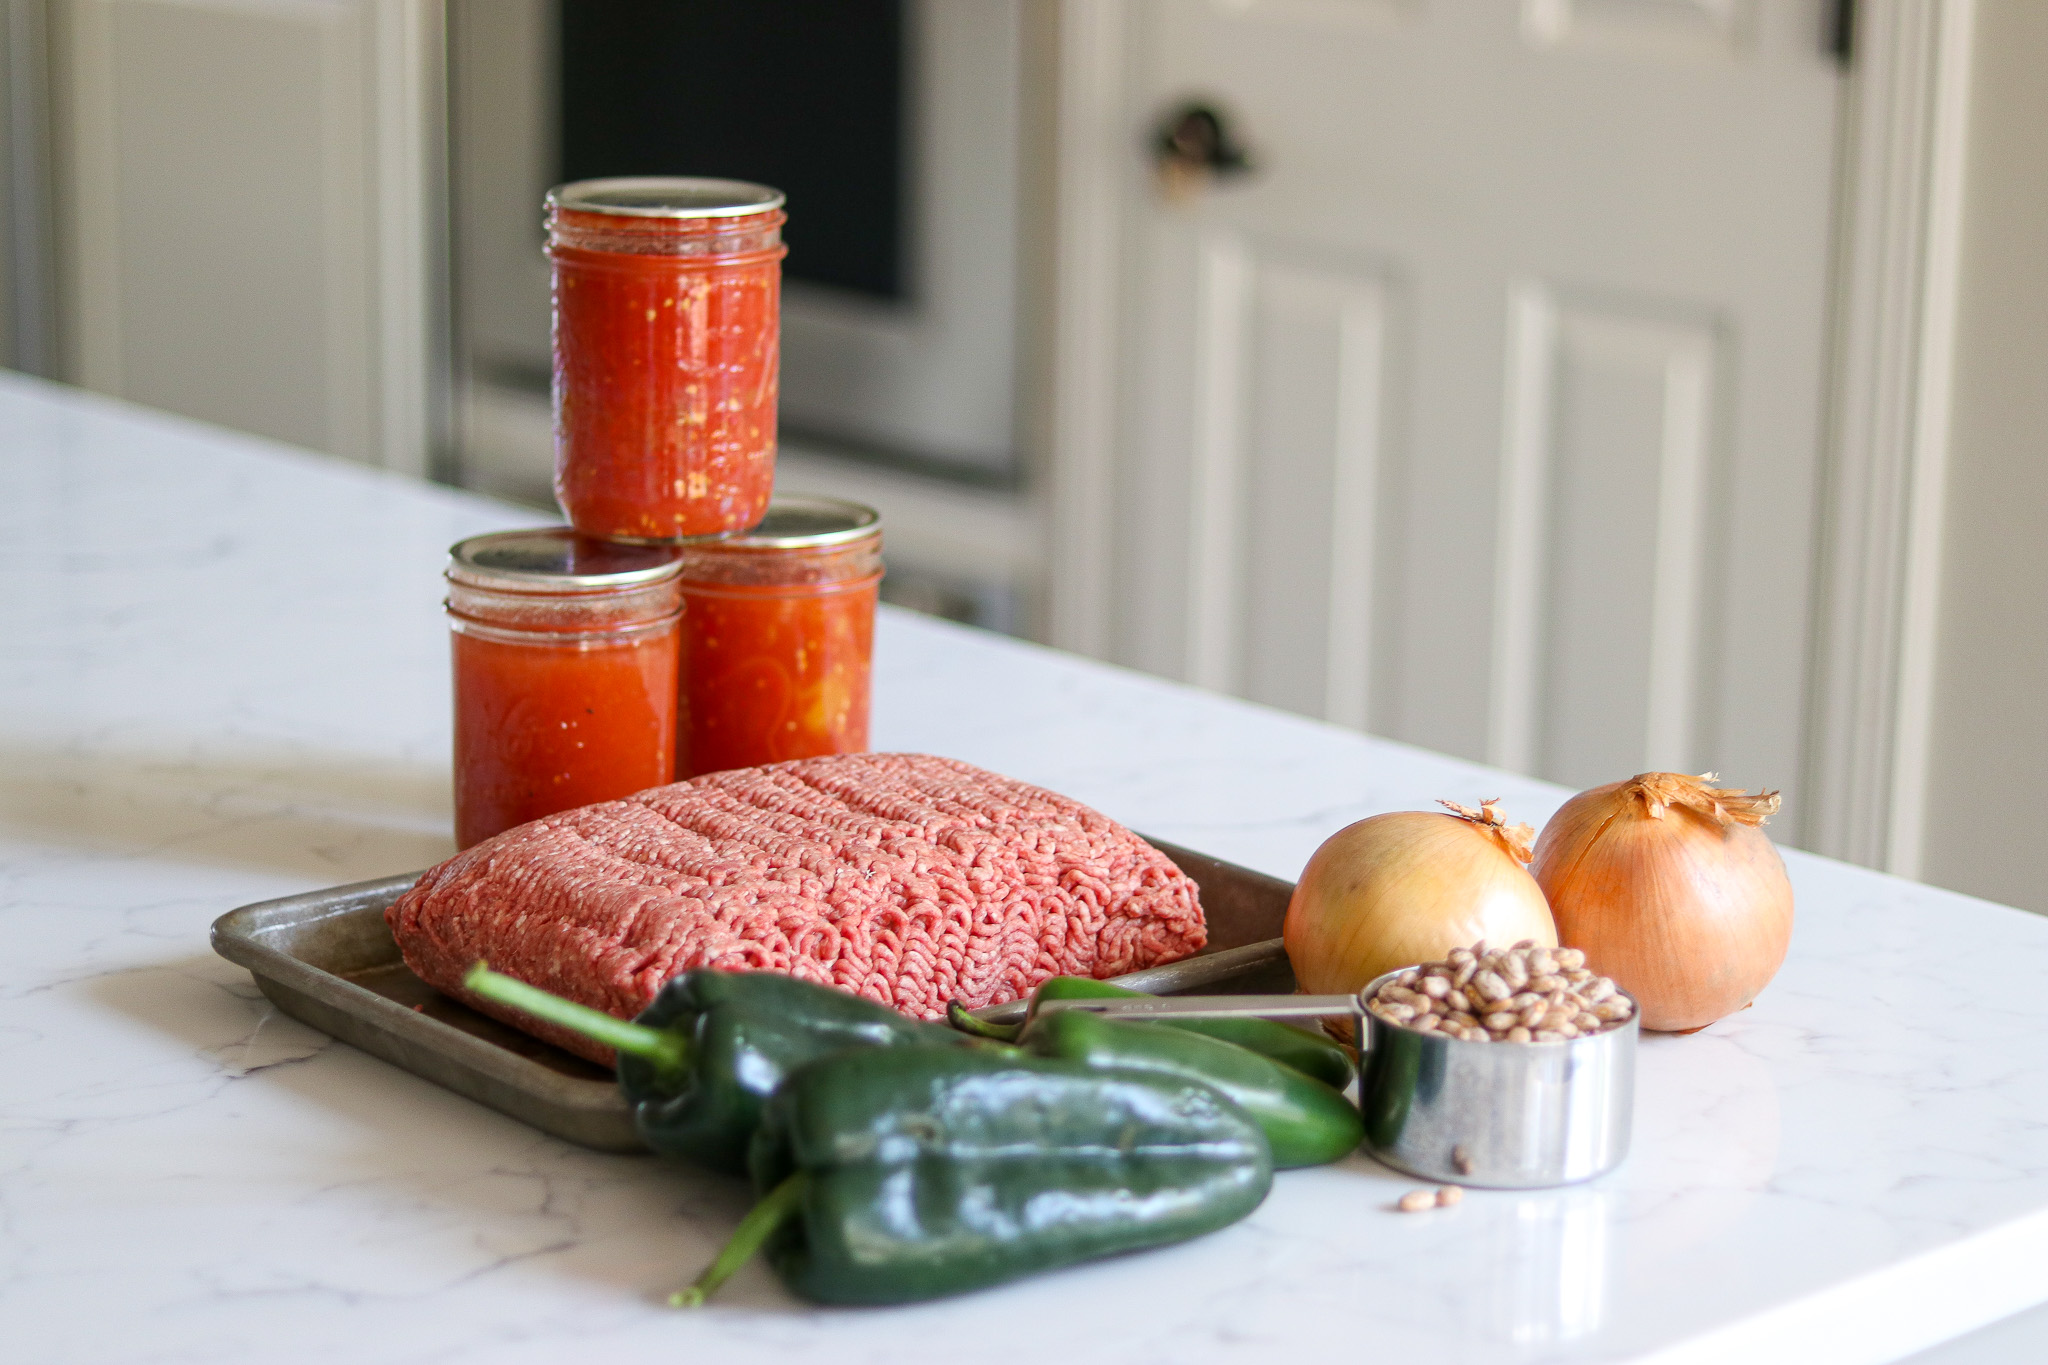
The ingredients for canning chili con carne are quite simple. To make a canner batch of 9 pints, you’ll need the following:
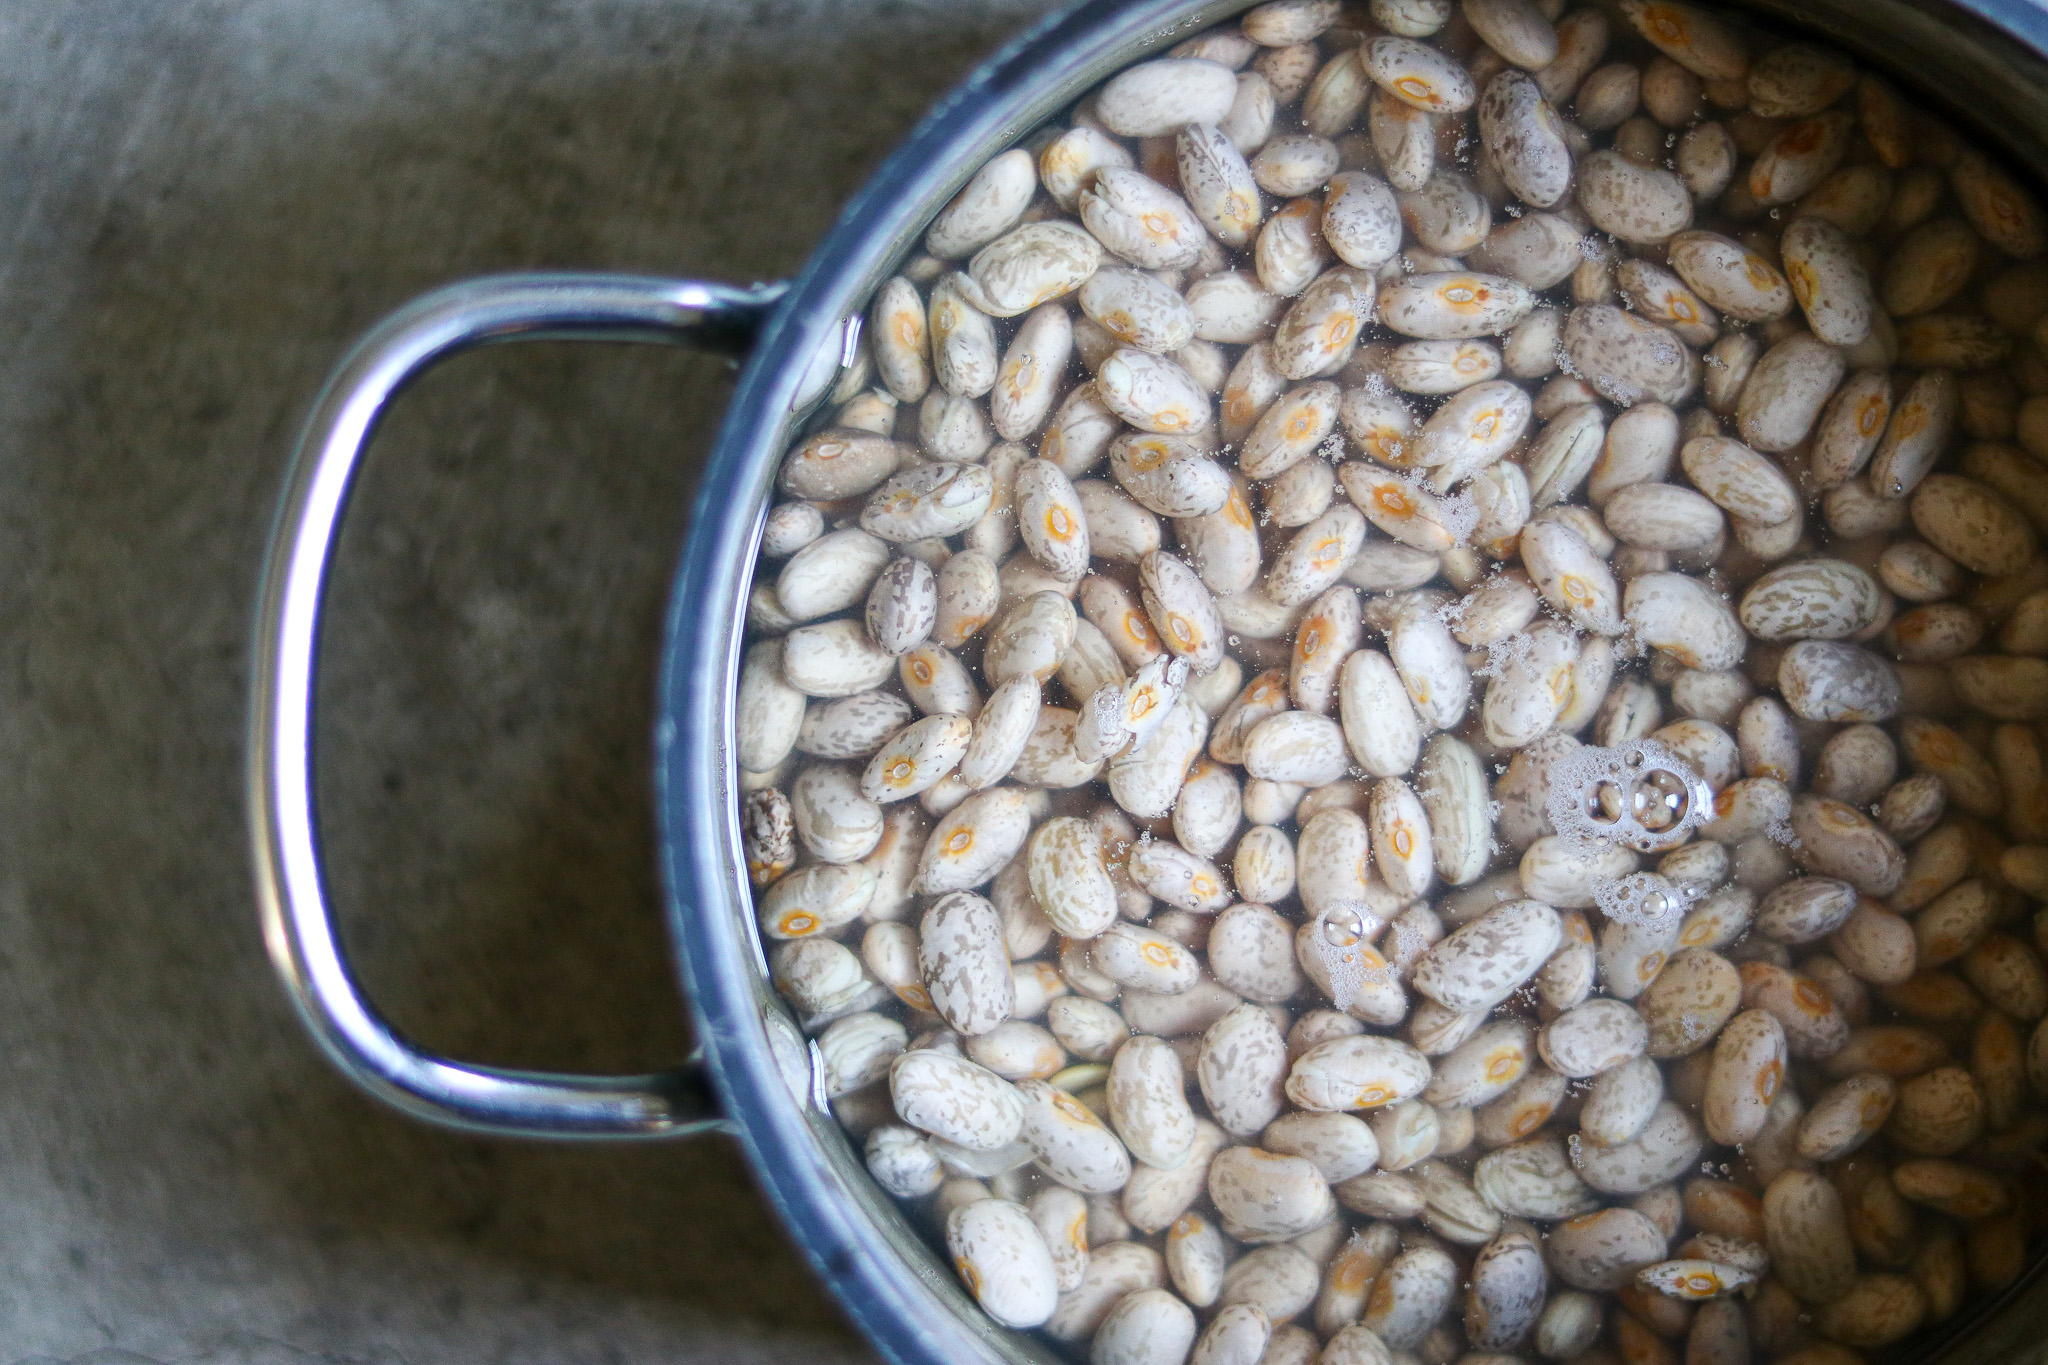
- 3 cups dried red kidney beans or pinto beans
- 3 lbs ground beef
- 1 ½ cups chopped onion
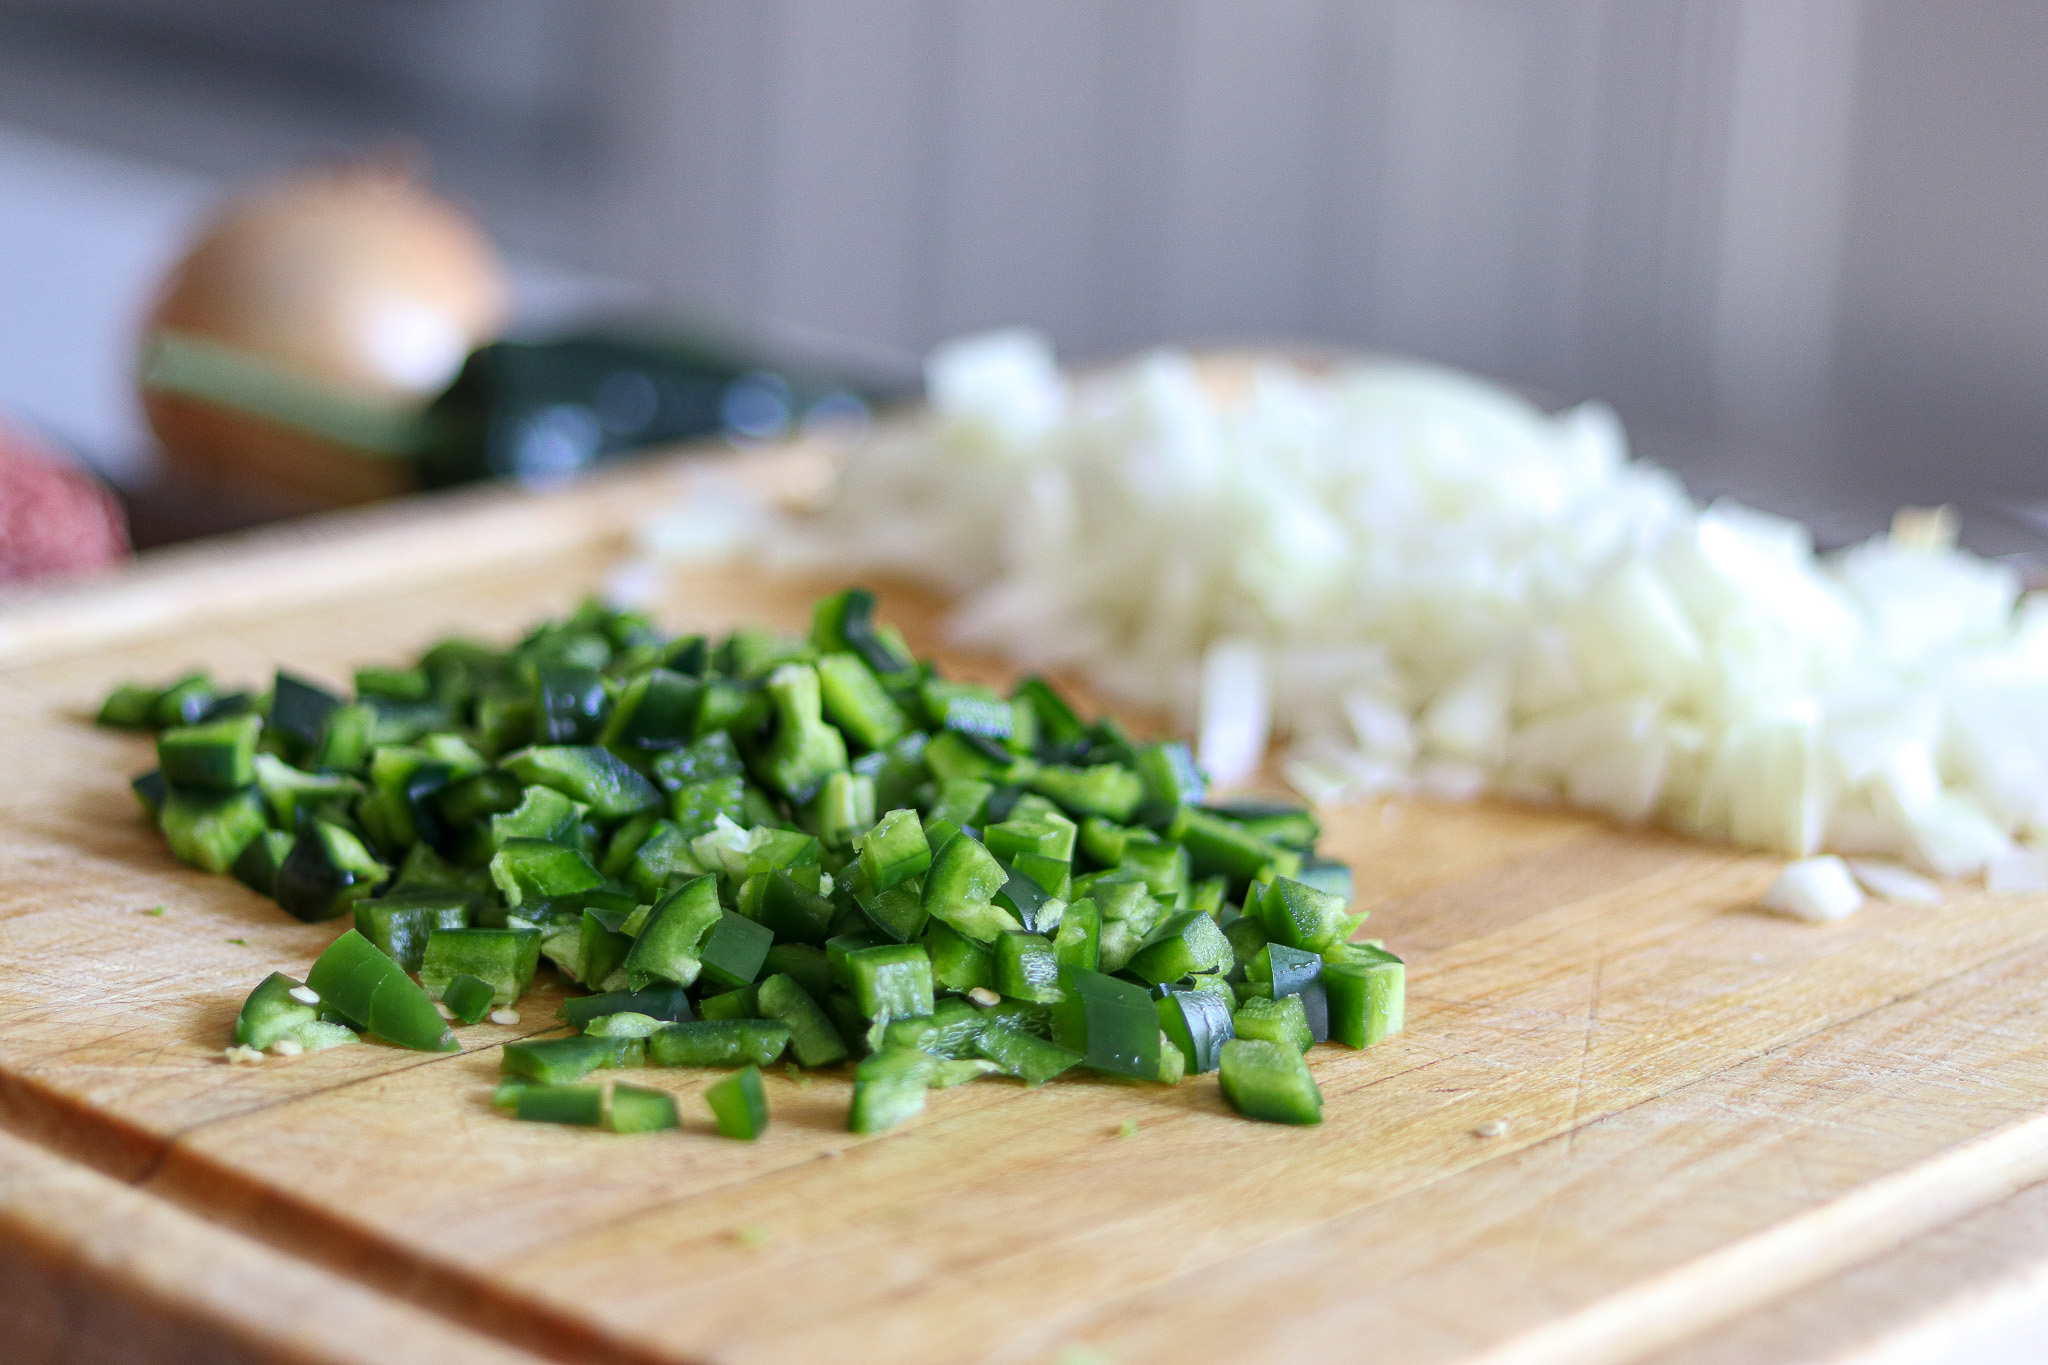
- 1 cup chopped peppers (optional)
- 2 quarts whole or crushed tomatoes
- 5 ½ cups of water
- 5 tsp salt (separated)
- 3-6 Tbsp chili powder
- 1 tsp black pepper
The recipe suggests using either kidney beans or pinto beans, and I’ve used both with success. You can also substitute black beans, white navy beans, or even chickpeas if you prefer.
Most people use ground beef, but you can also use ground venison, lamb, or pork in this recipe.
Peppers are optional for this recipe, but if you choose, you may wish to add some – either sweet or hot peppers are acceptable, depending on your preferences. A mix of poblano and jalapeno chilis gives a good balance without being too hot.
I’ve also made this with hatch green chilis, and it’s delicious.
For chili powder, the recipe specifies three to six tablespoons, which is a matter of personal preference as well. For a spicier chili con carne, use the higher end of that range; for one that is milder, three tablespoons should suffice.
Canning Chili Con Carne
Begin by washing the beans and placing them in a large two-quart saucepan. Add cold water to about three inches above the beans, then soak them for 12 to 18 hours.
After that time, drain and discard the water.
Alternatively, use the quick soak method.
To do that, place the beans in plenty of water and bring them to a boil in a pot on the stove. Boil 1 minute, then turn off the heat and leave them standing in hot water for an hour.
Drain, and proceed with the recipe using the drained “quick soaked” beans in place of overnight beans.
Combine the beans with 5 ½ cups of fresh water along with two teaspoons of salt. Bring the mixture to a boil, then reduce the heat and simmer for 30 minutes.
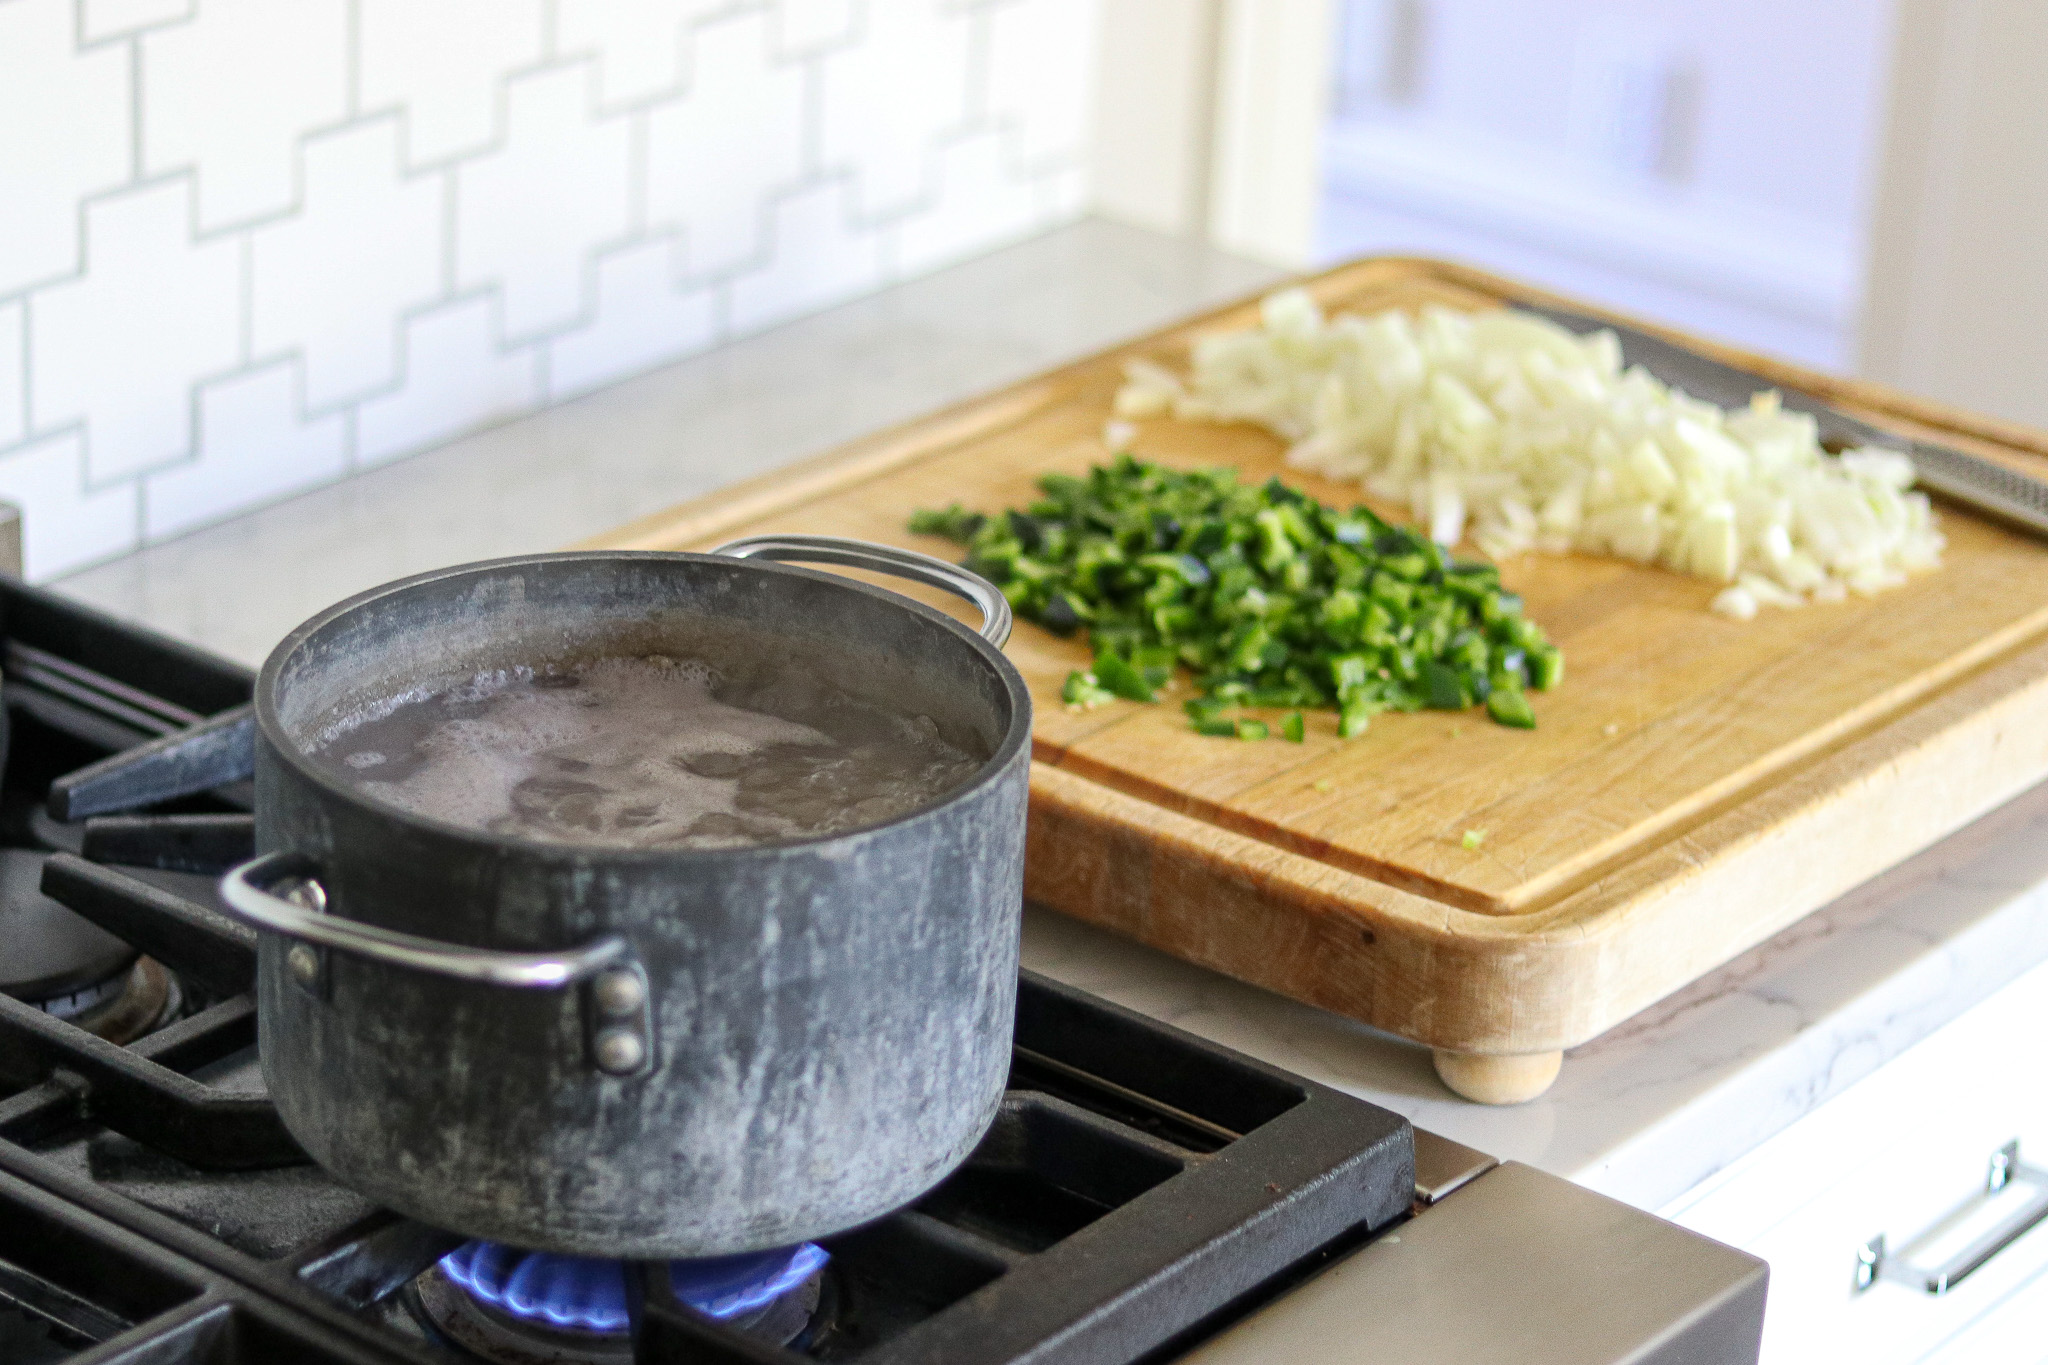
Drain the beans and discard the water.
This pre-cooks the beans and ensures that they’ve absorbed enough water for safe canning. If the beans are still too dry, they’ll expand in the jars as the jars cook, and it can result in breakage. Both soaking and a 30-minute pre-cook is essential for safe canning.
Once the beans are pre-cooked, it’s time to get everything ready for canning. Follow the instructions on your canner regarding preparation.
For most pressure canners, you need to put in the bottom trivet and then add 2-3 inches of water. Bring the water up to a gentle simmer (around 180F) for hot pack canning.
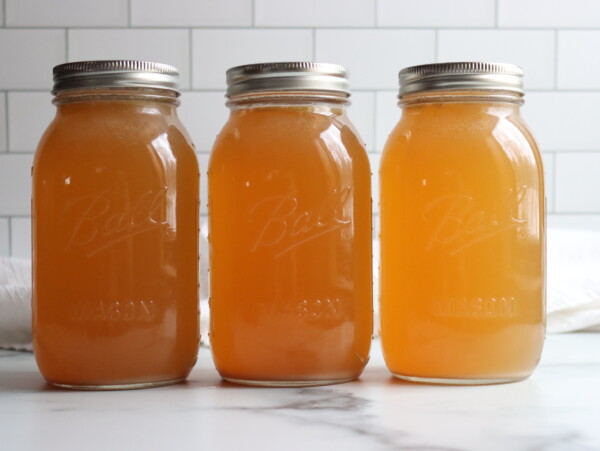
Also prepare 9 pint jars, rings, and lids.
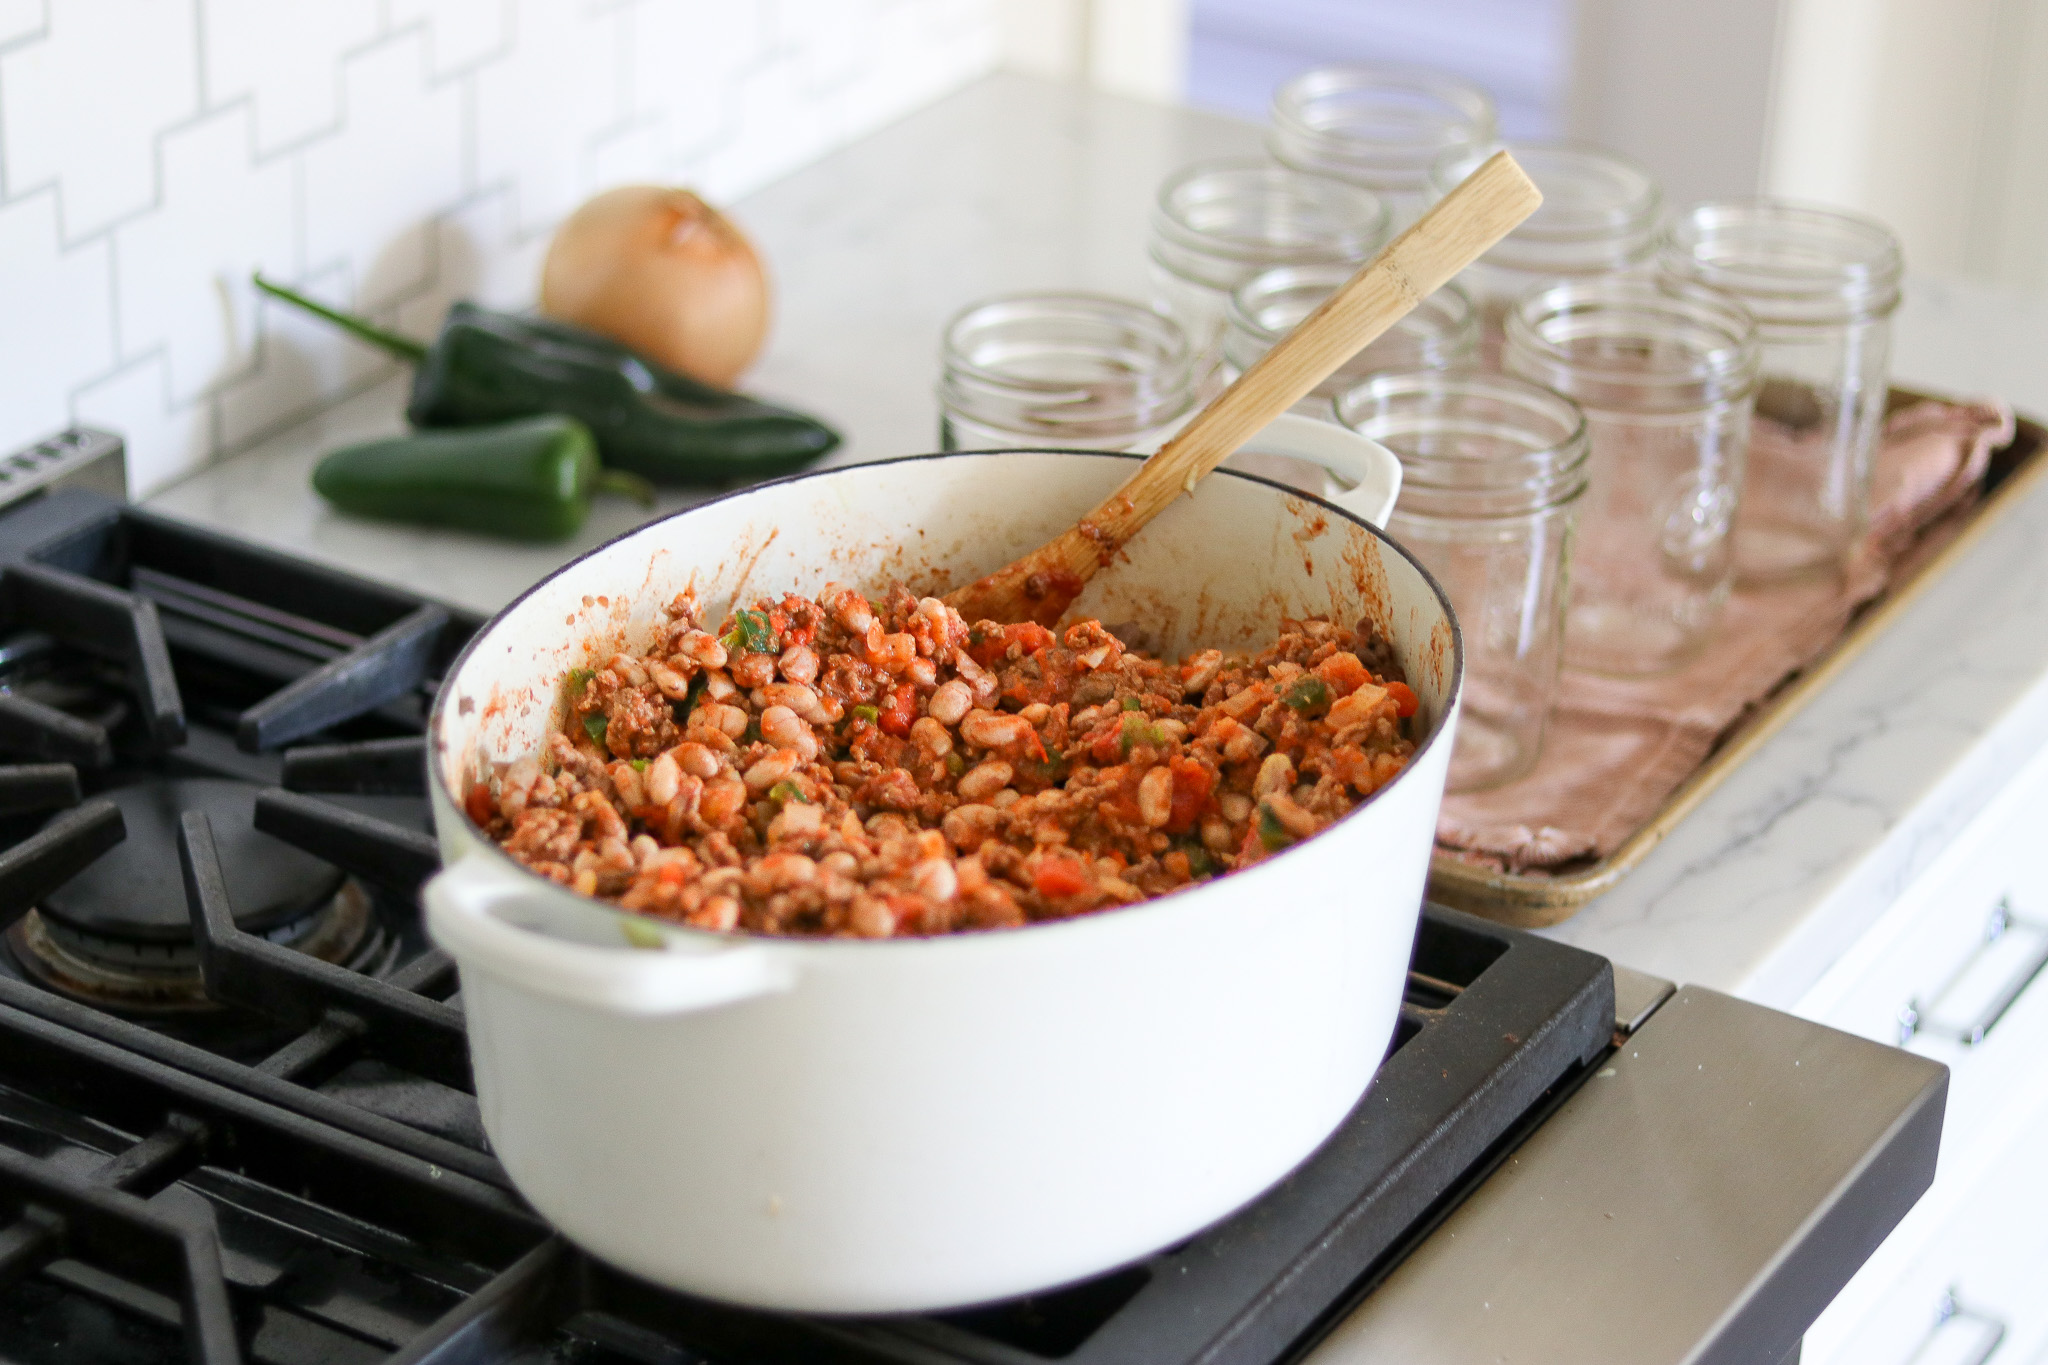
Next, you’ll brown the ground beef in a pan.
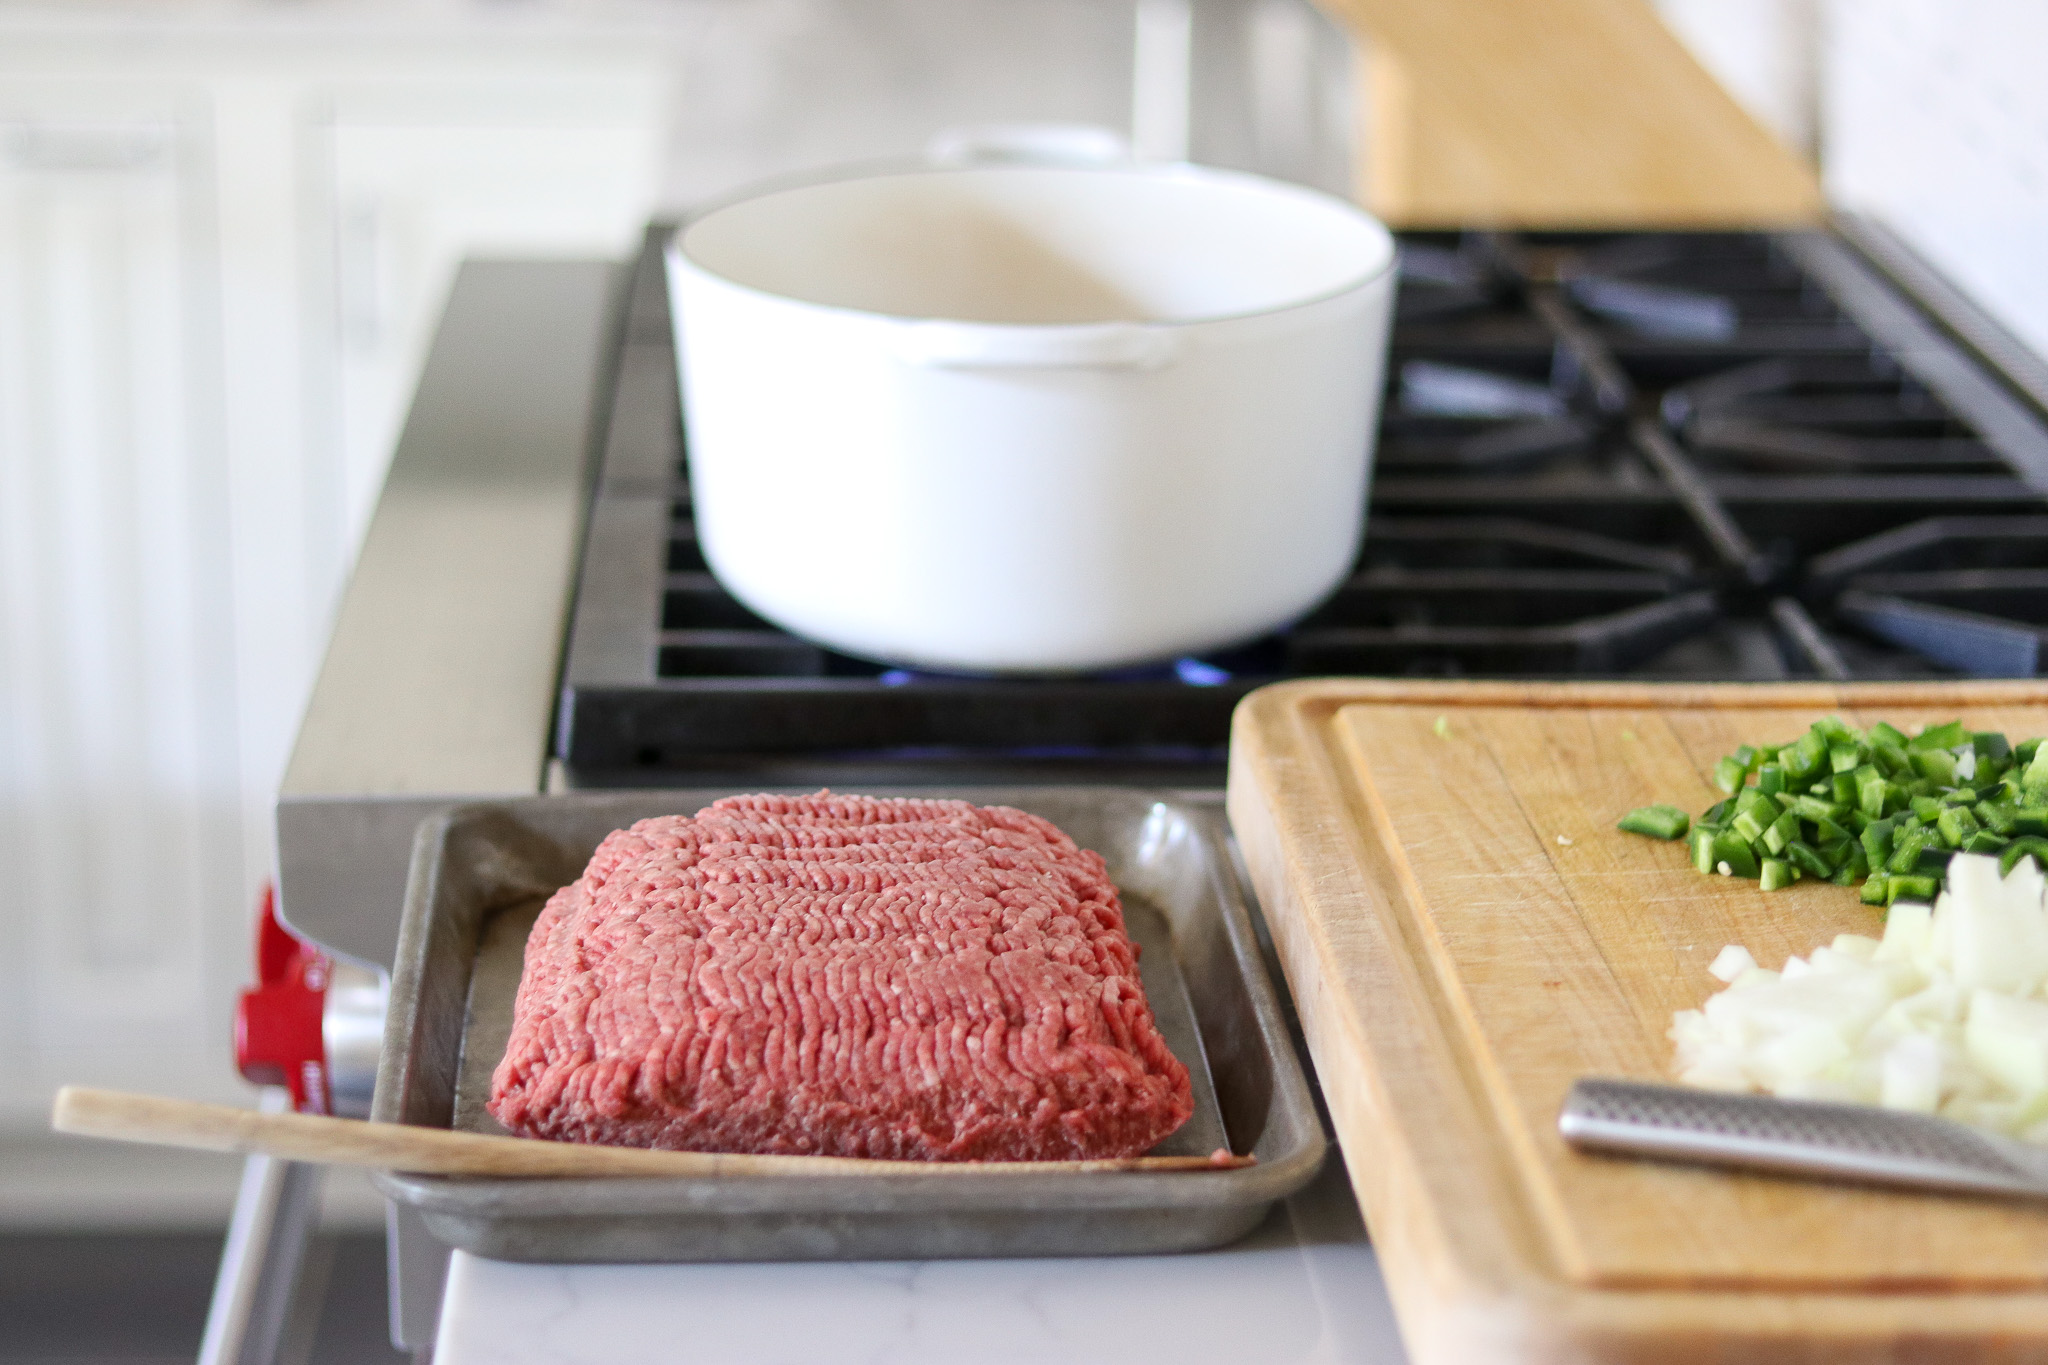
Once the meat is browned, add the peppers and chopped onions.
Drain off the fat and add three teaspoons of salt along with the pepper, chili powder, tomatoes, and beans.
Simmer everything for five minutes.
The chili may look a little thin at this point, but do not thicken. This will make the recipe unsafe for canning. If the chili looks thin after you’ve pressure canned it and opened the jars later on, you may add thickeners before serving, but do not do so before canning.
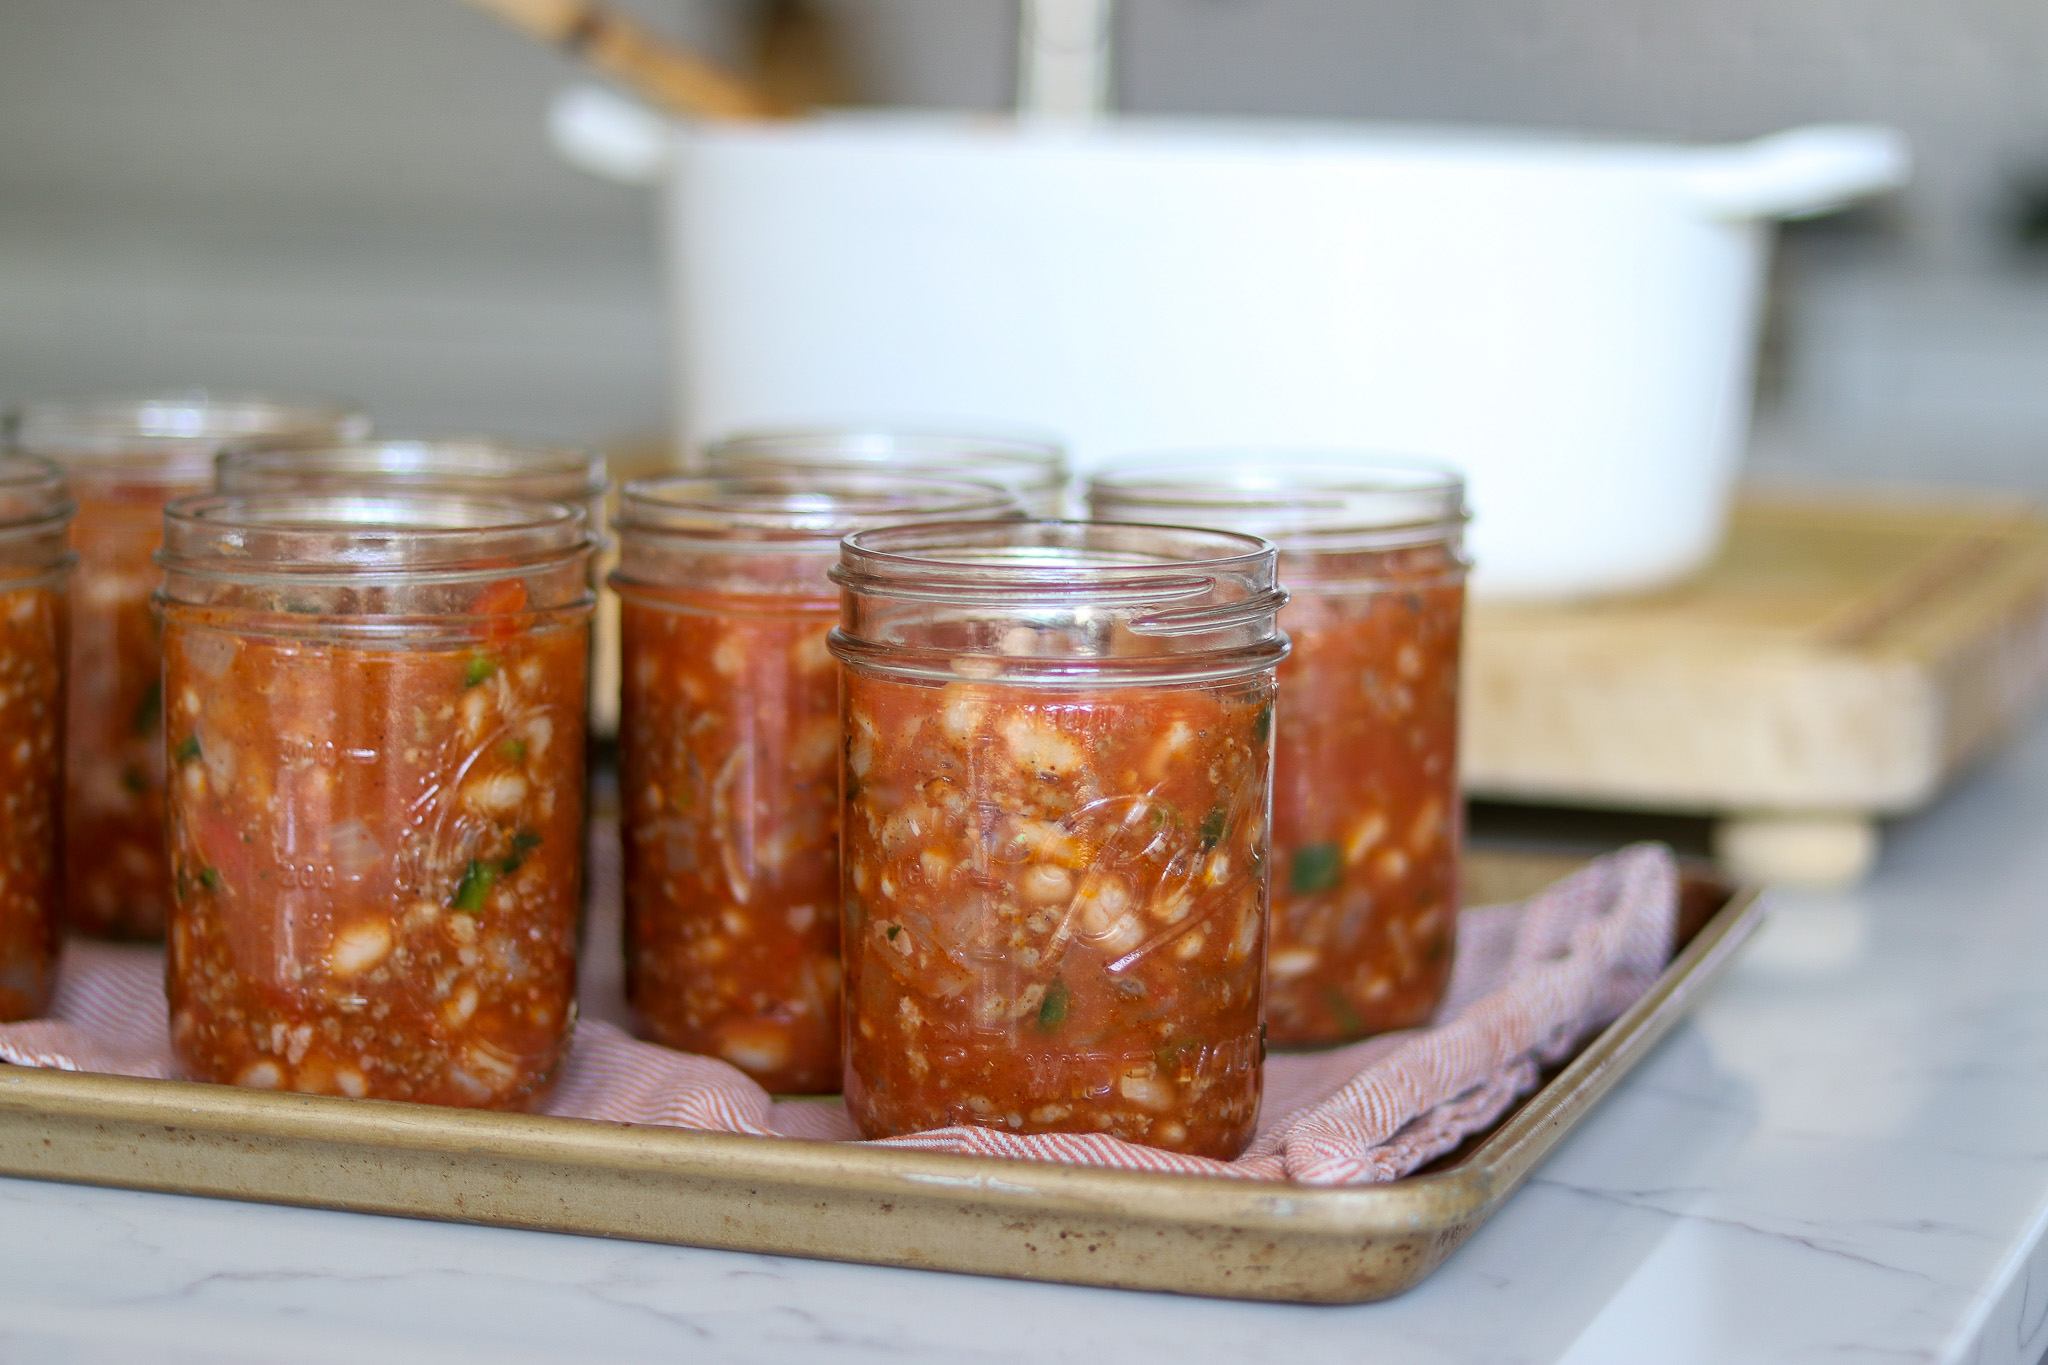
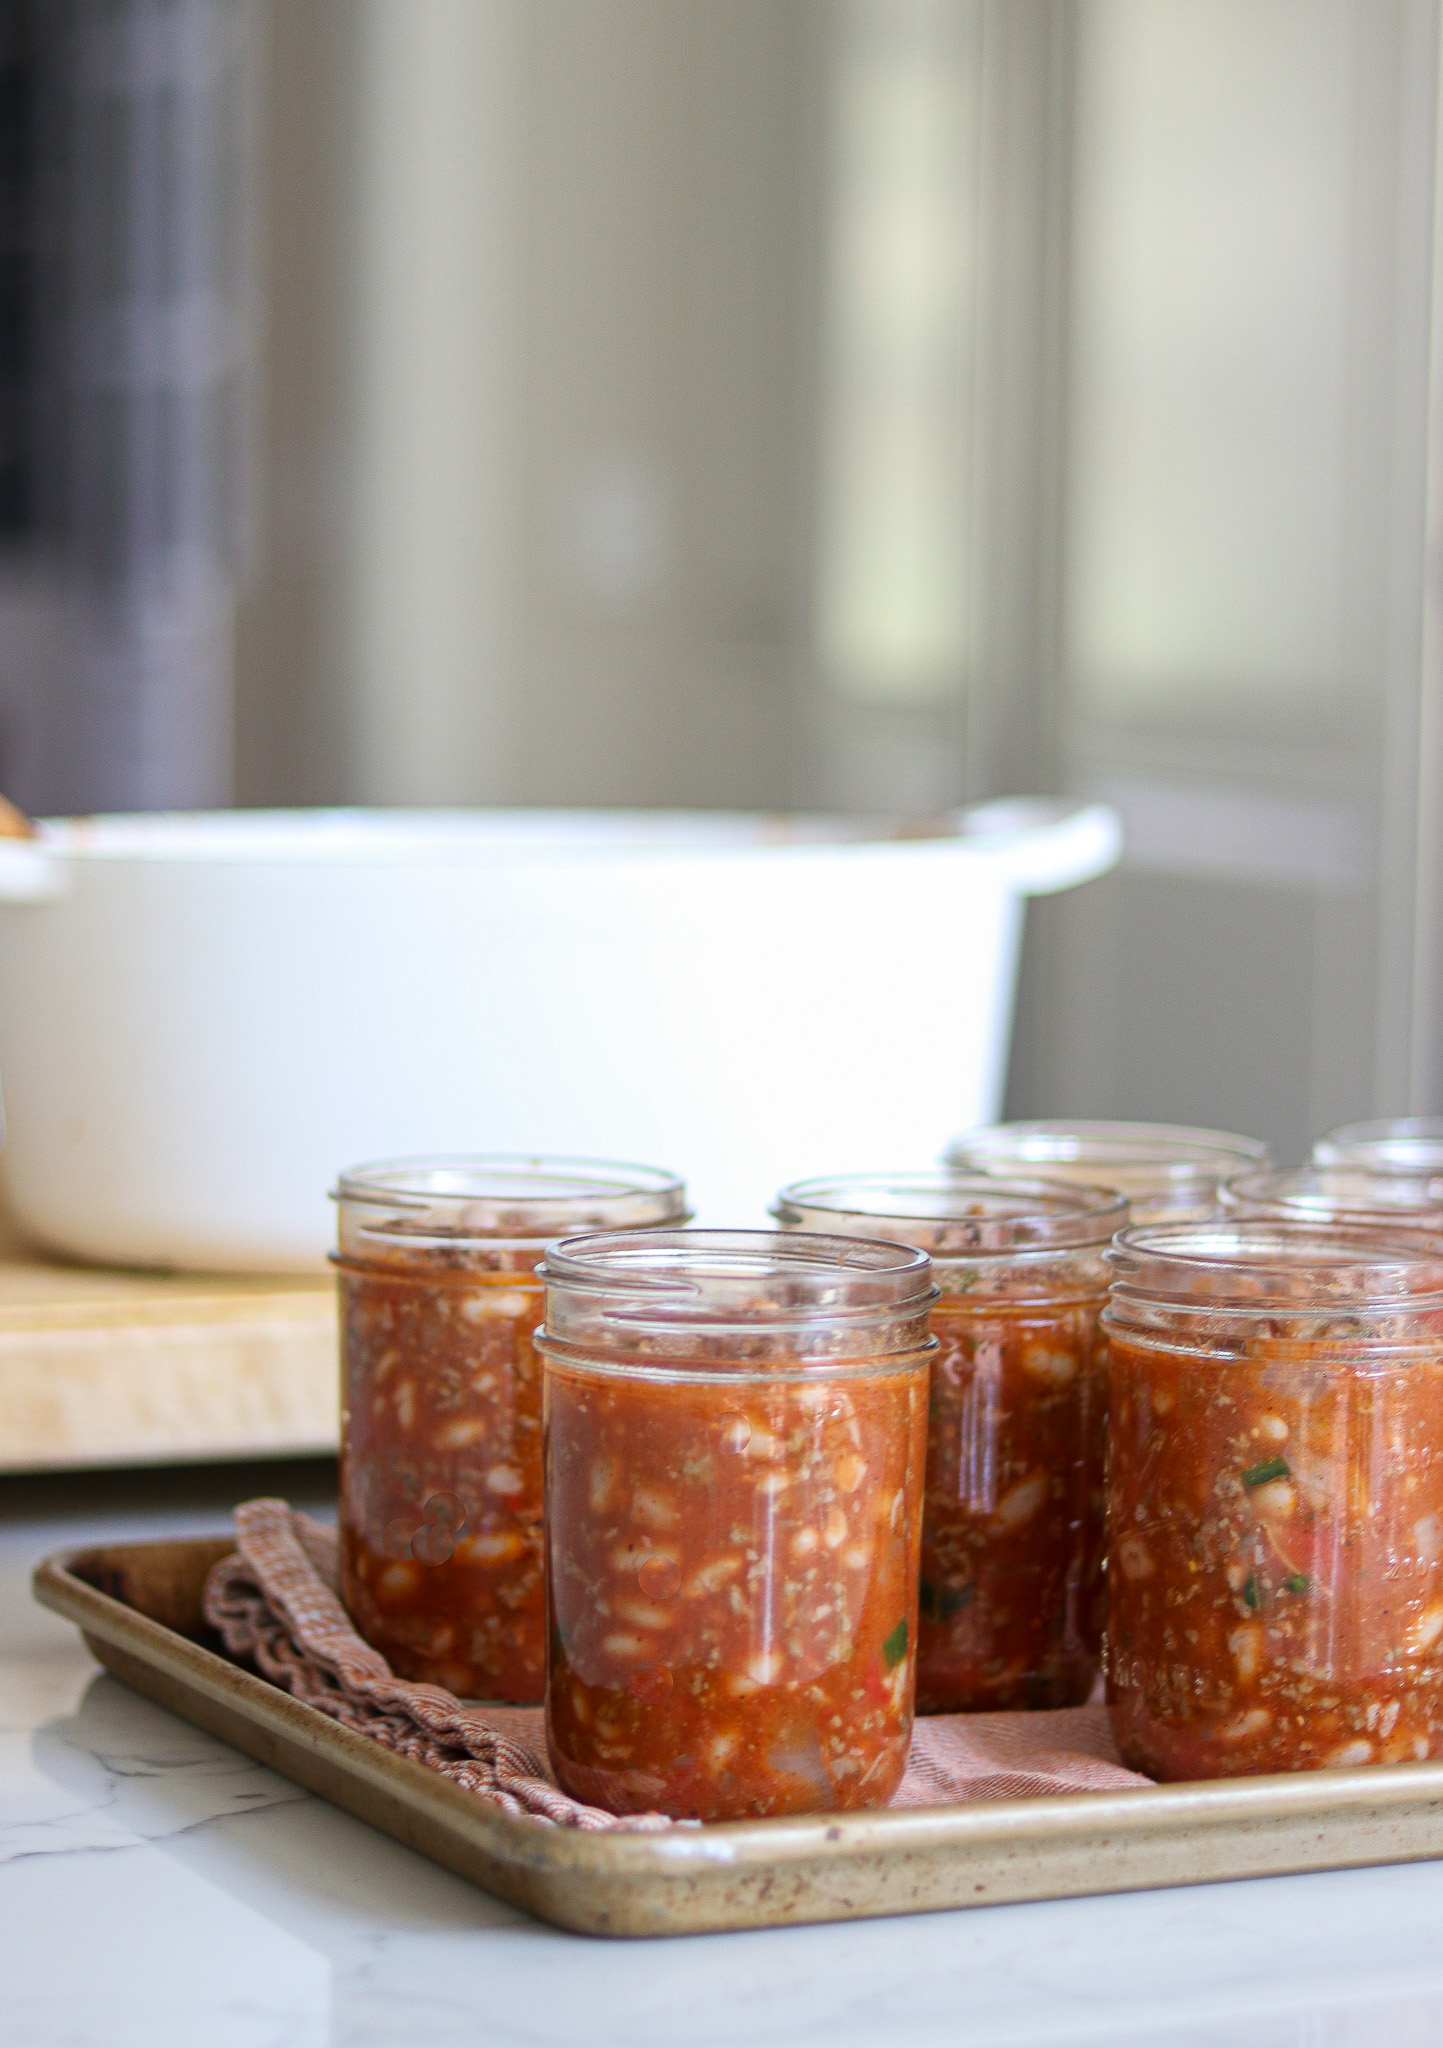
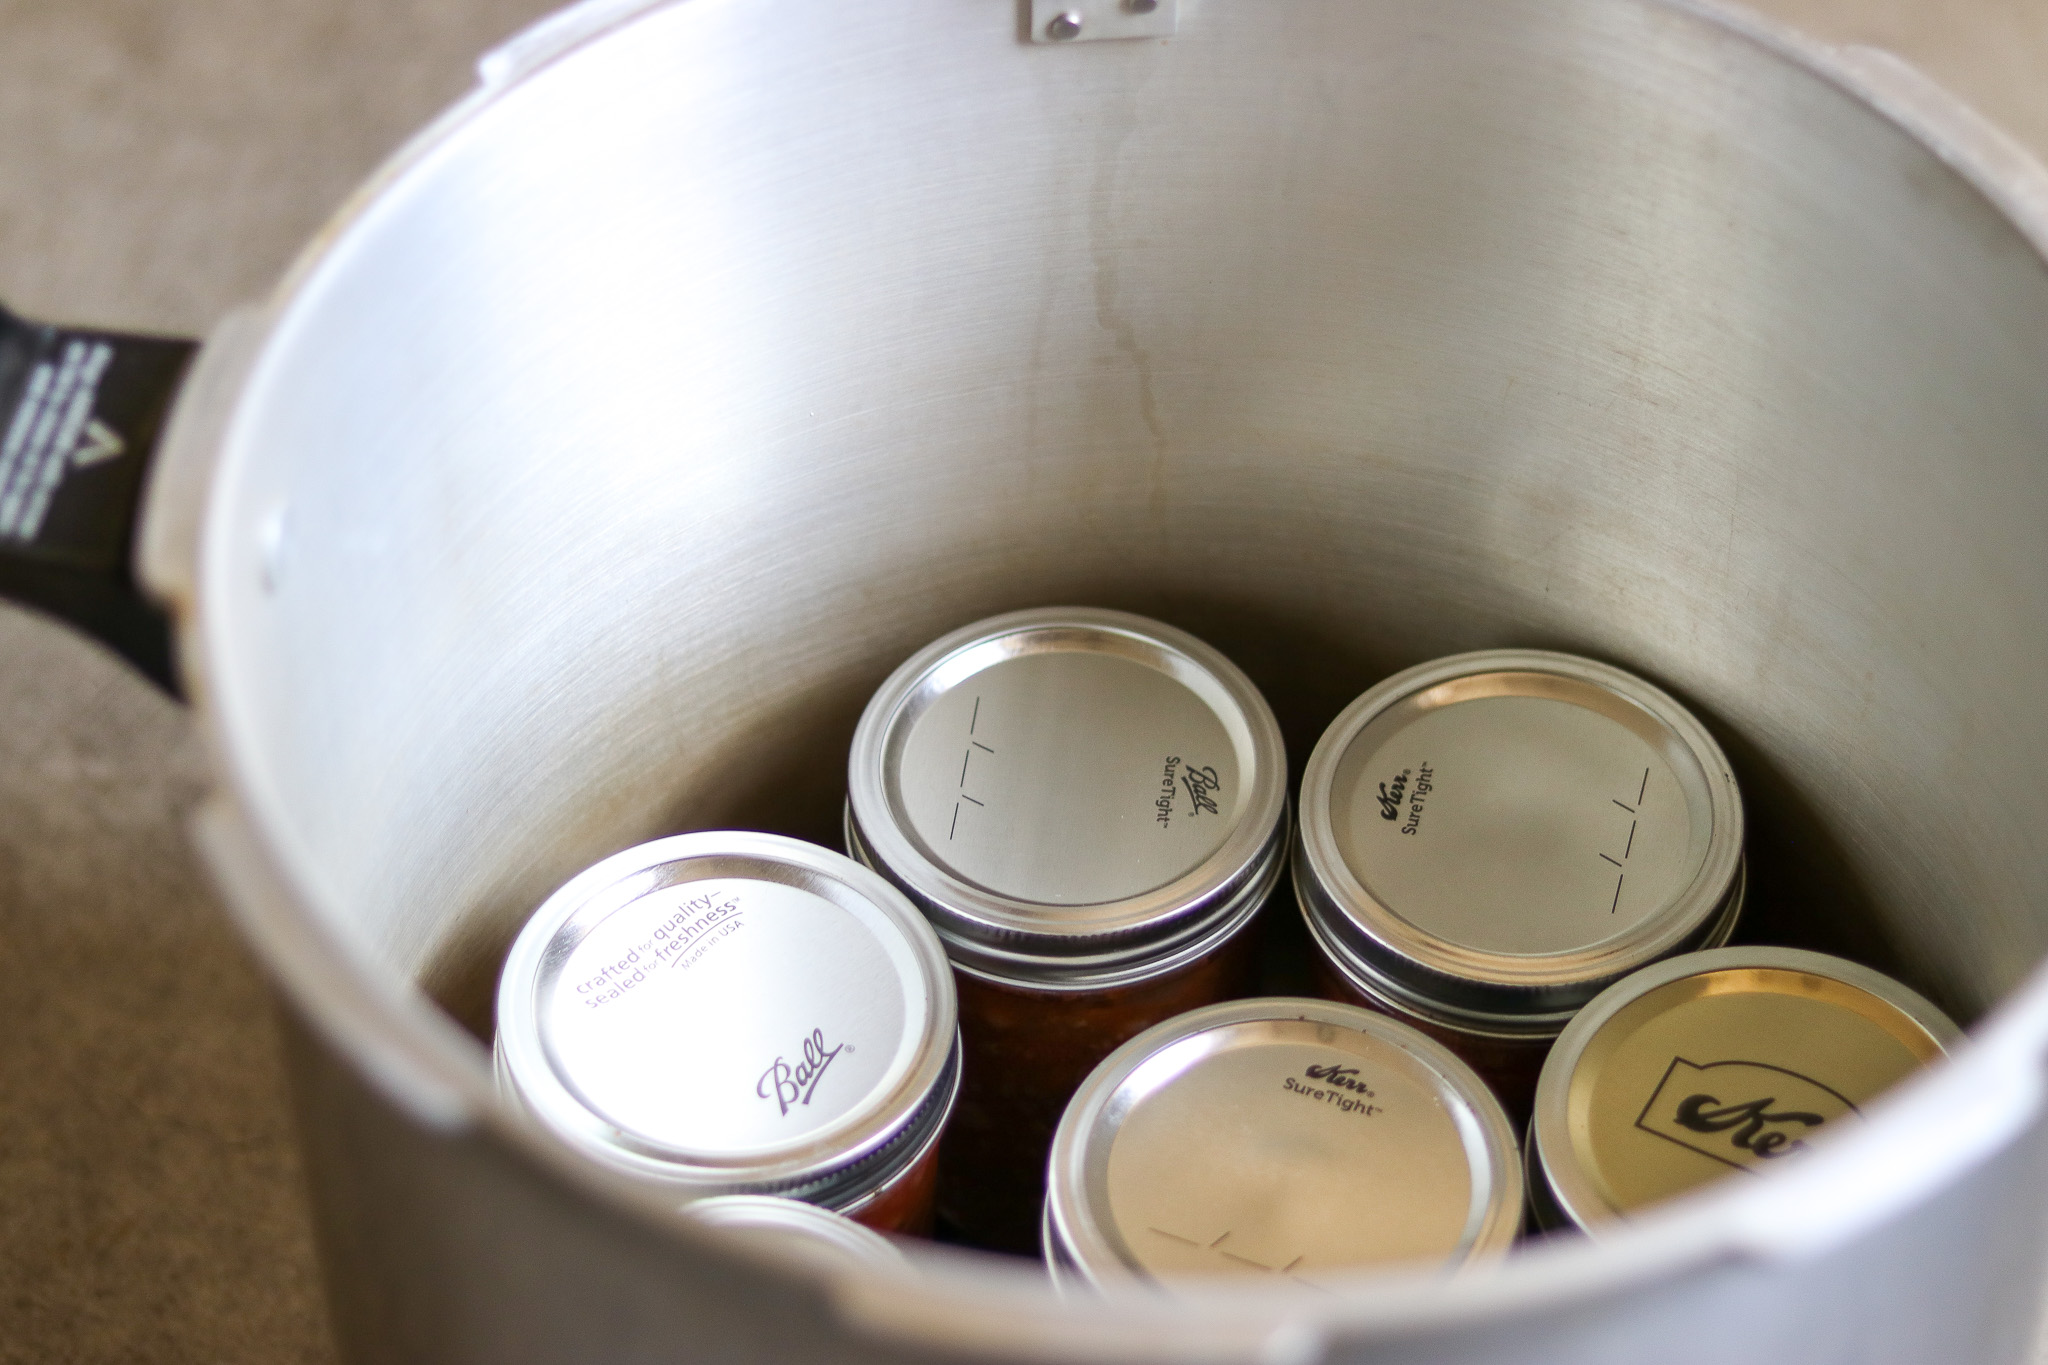
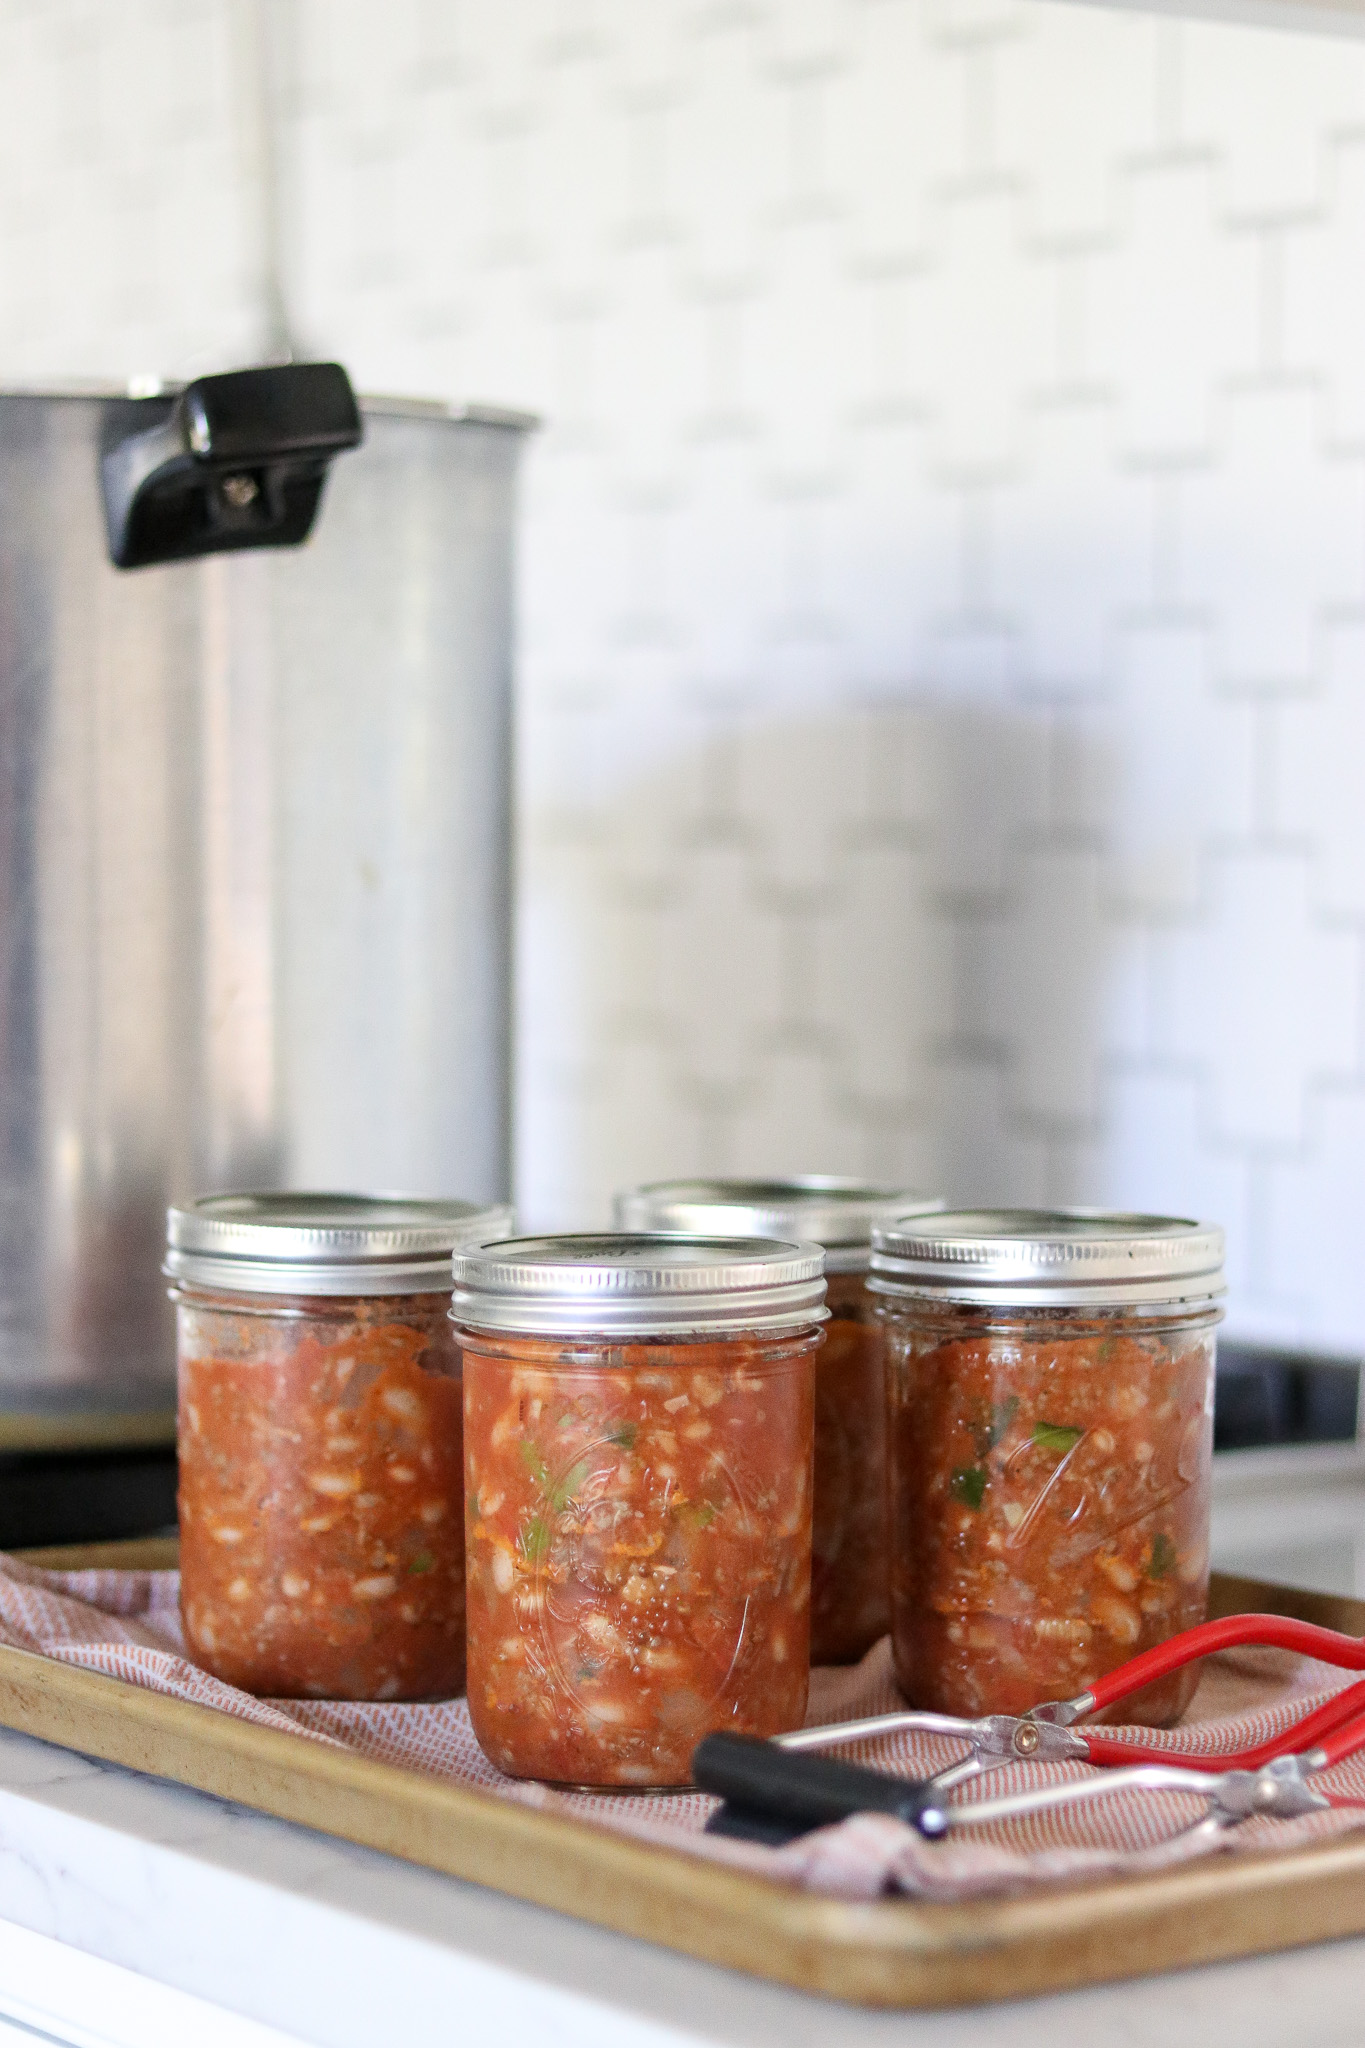
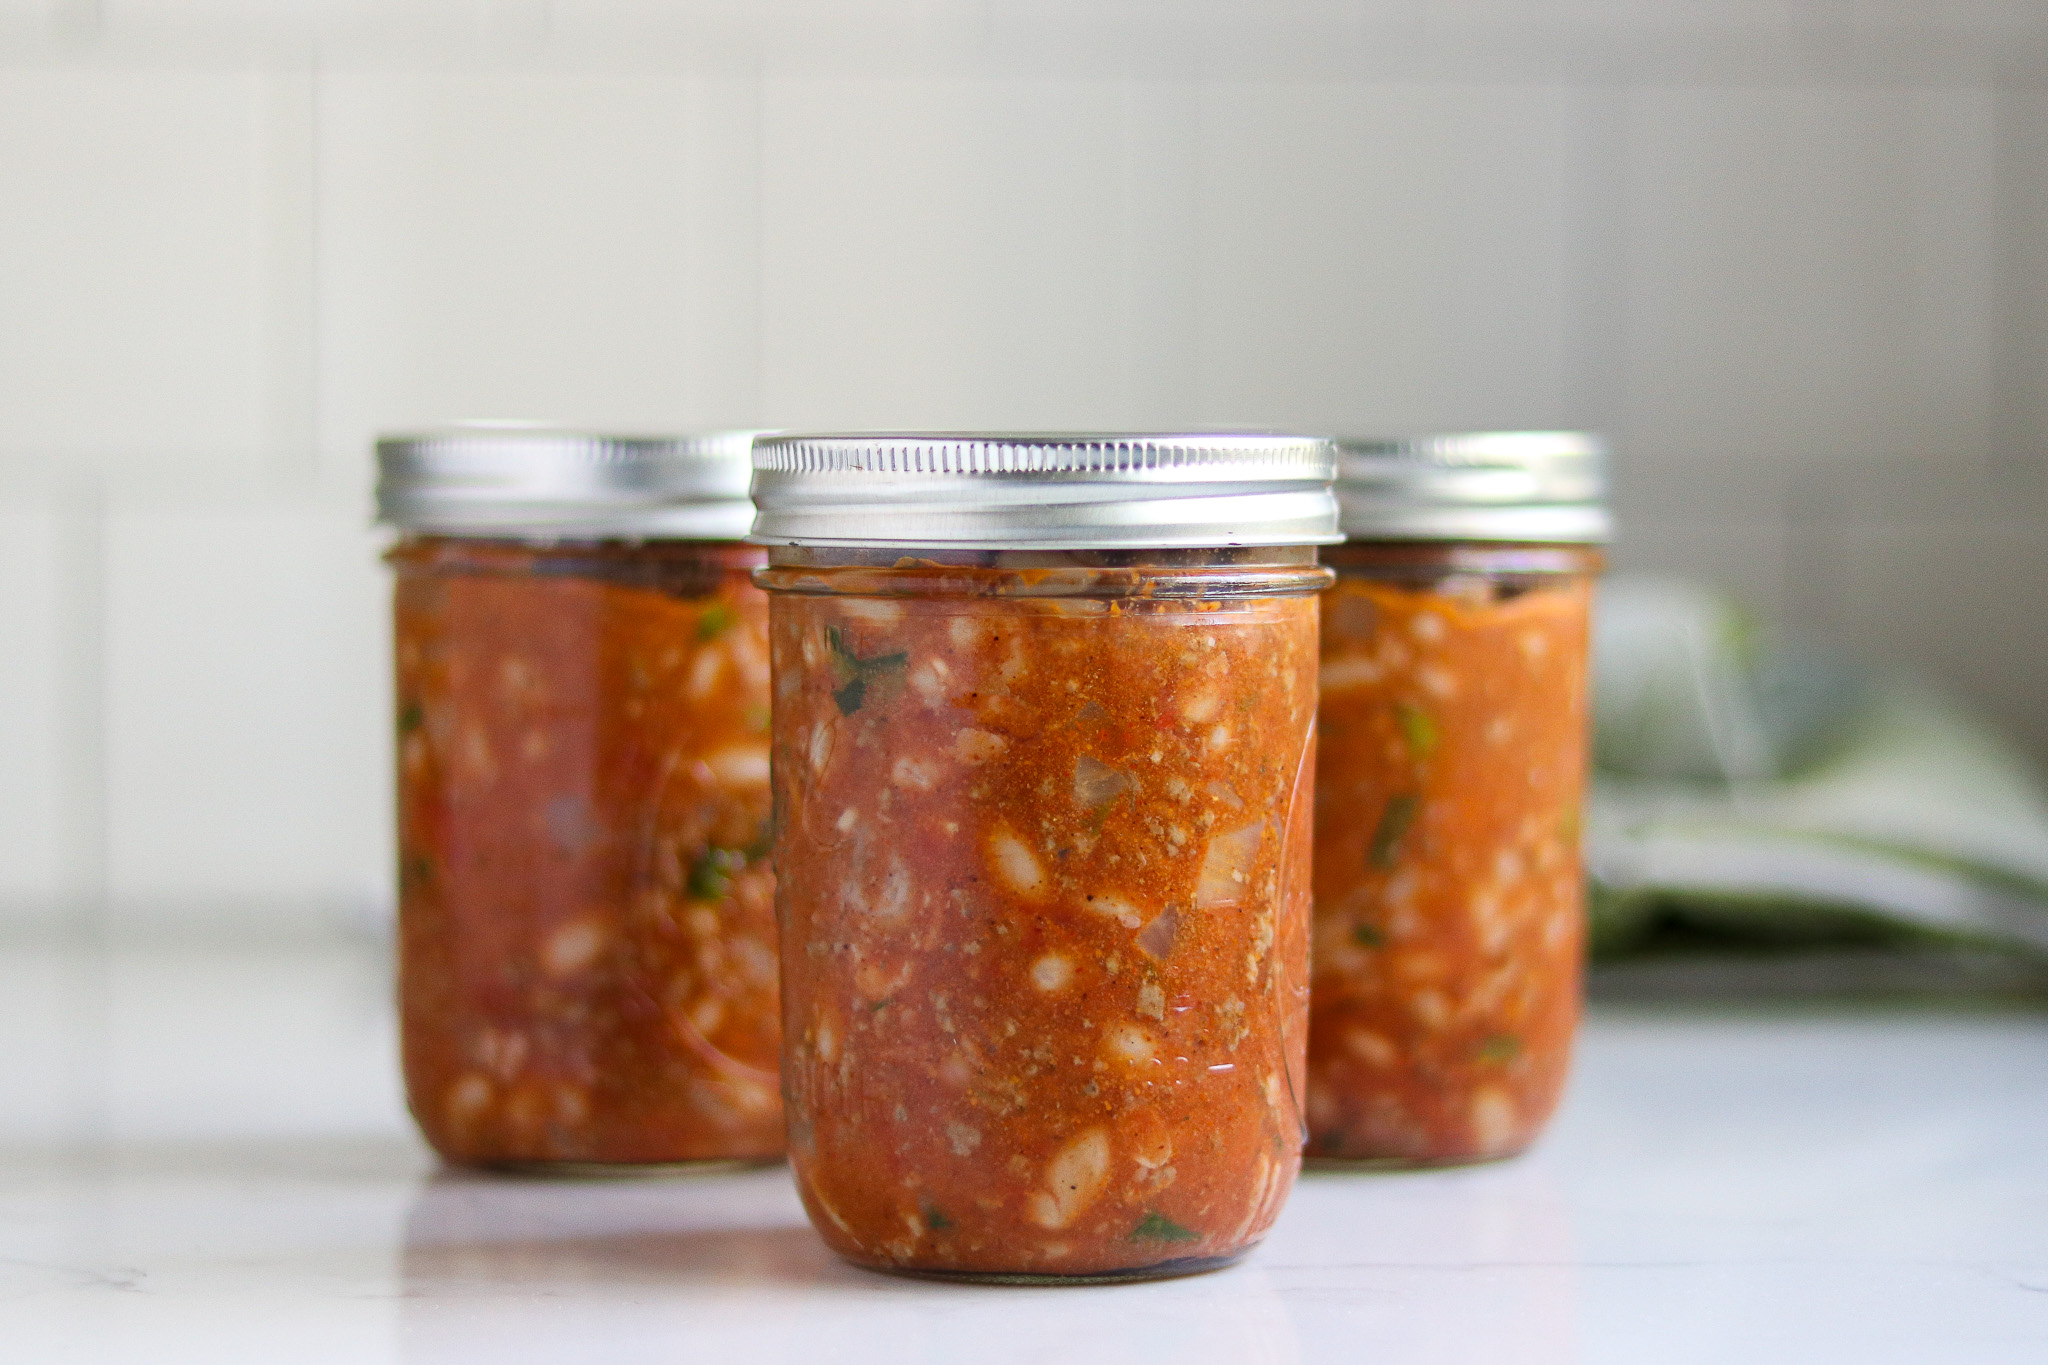
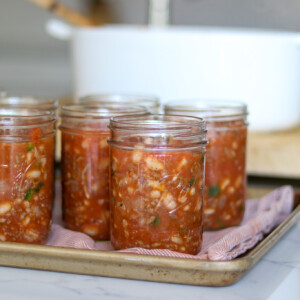
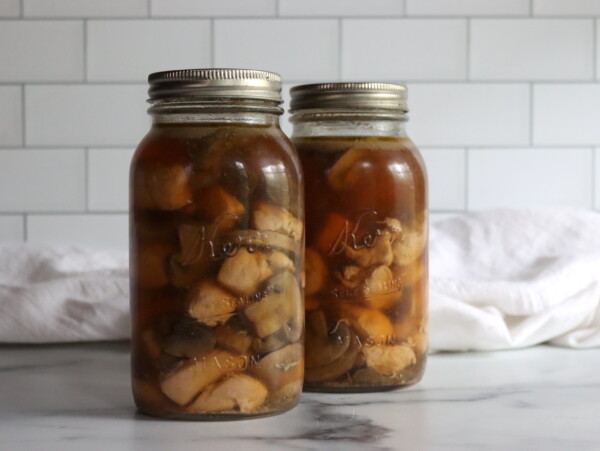
When all of the ingredients are combined, you may begin filling the jars. Fill each hot, sterilized jar with the chili.
Start with the solids first, and evenly distribute them across all of the jars. A slotted spoon helps with this.

This recipe makes 9 pints, and it should pretty well fill up the jars. Don’t use less than 9 pints, though.
Add the solids to 9 pints, and then top with the liquid from the pot. If you’re at all short on liquid, add in boiling water to fill the jars the rest of the way.
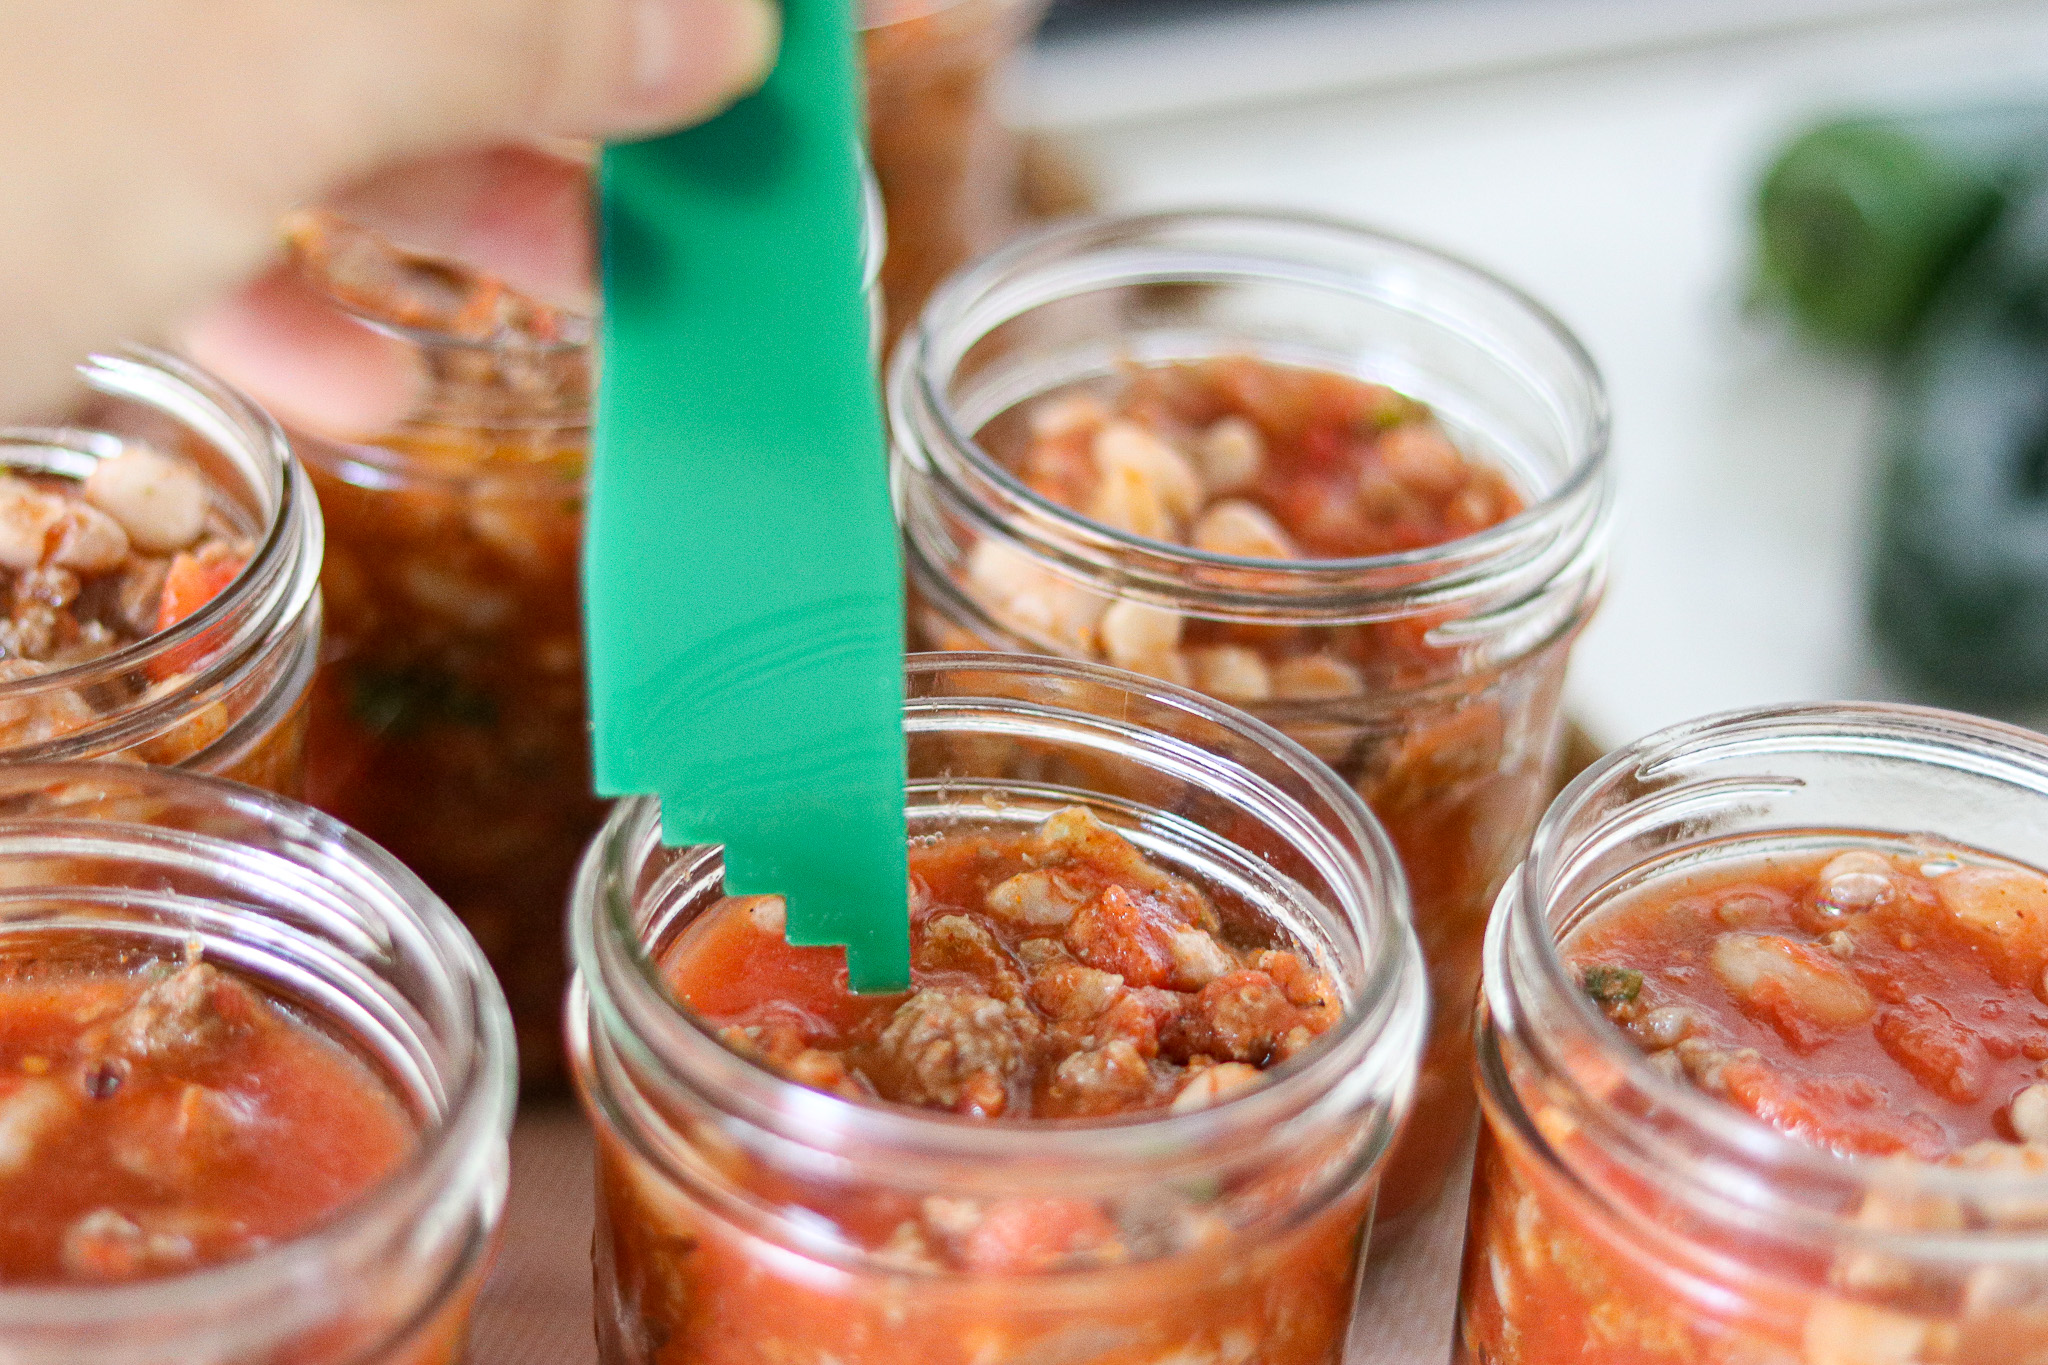
Once the jars are filled, check the headspace. You should have 1 inch of headspace.
Use a de-bubbling tool to de-bubble the jars, and then re-check the headspace and adjust as necessary.
Be sure you have 1” headspace when you cap the jars with 2-part canning lids.
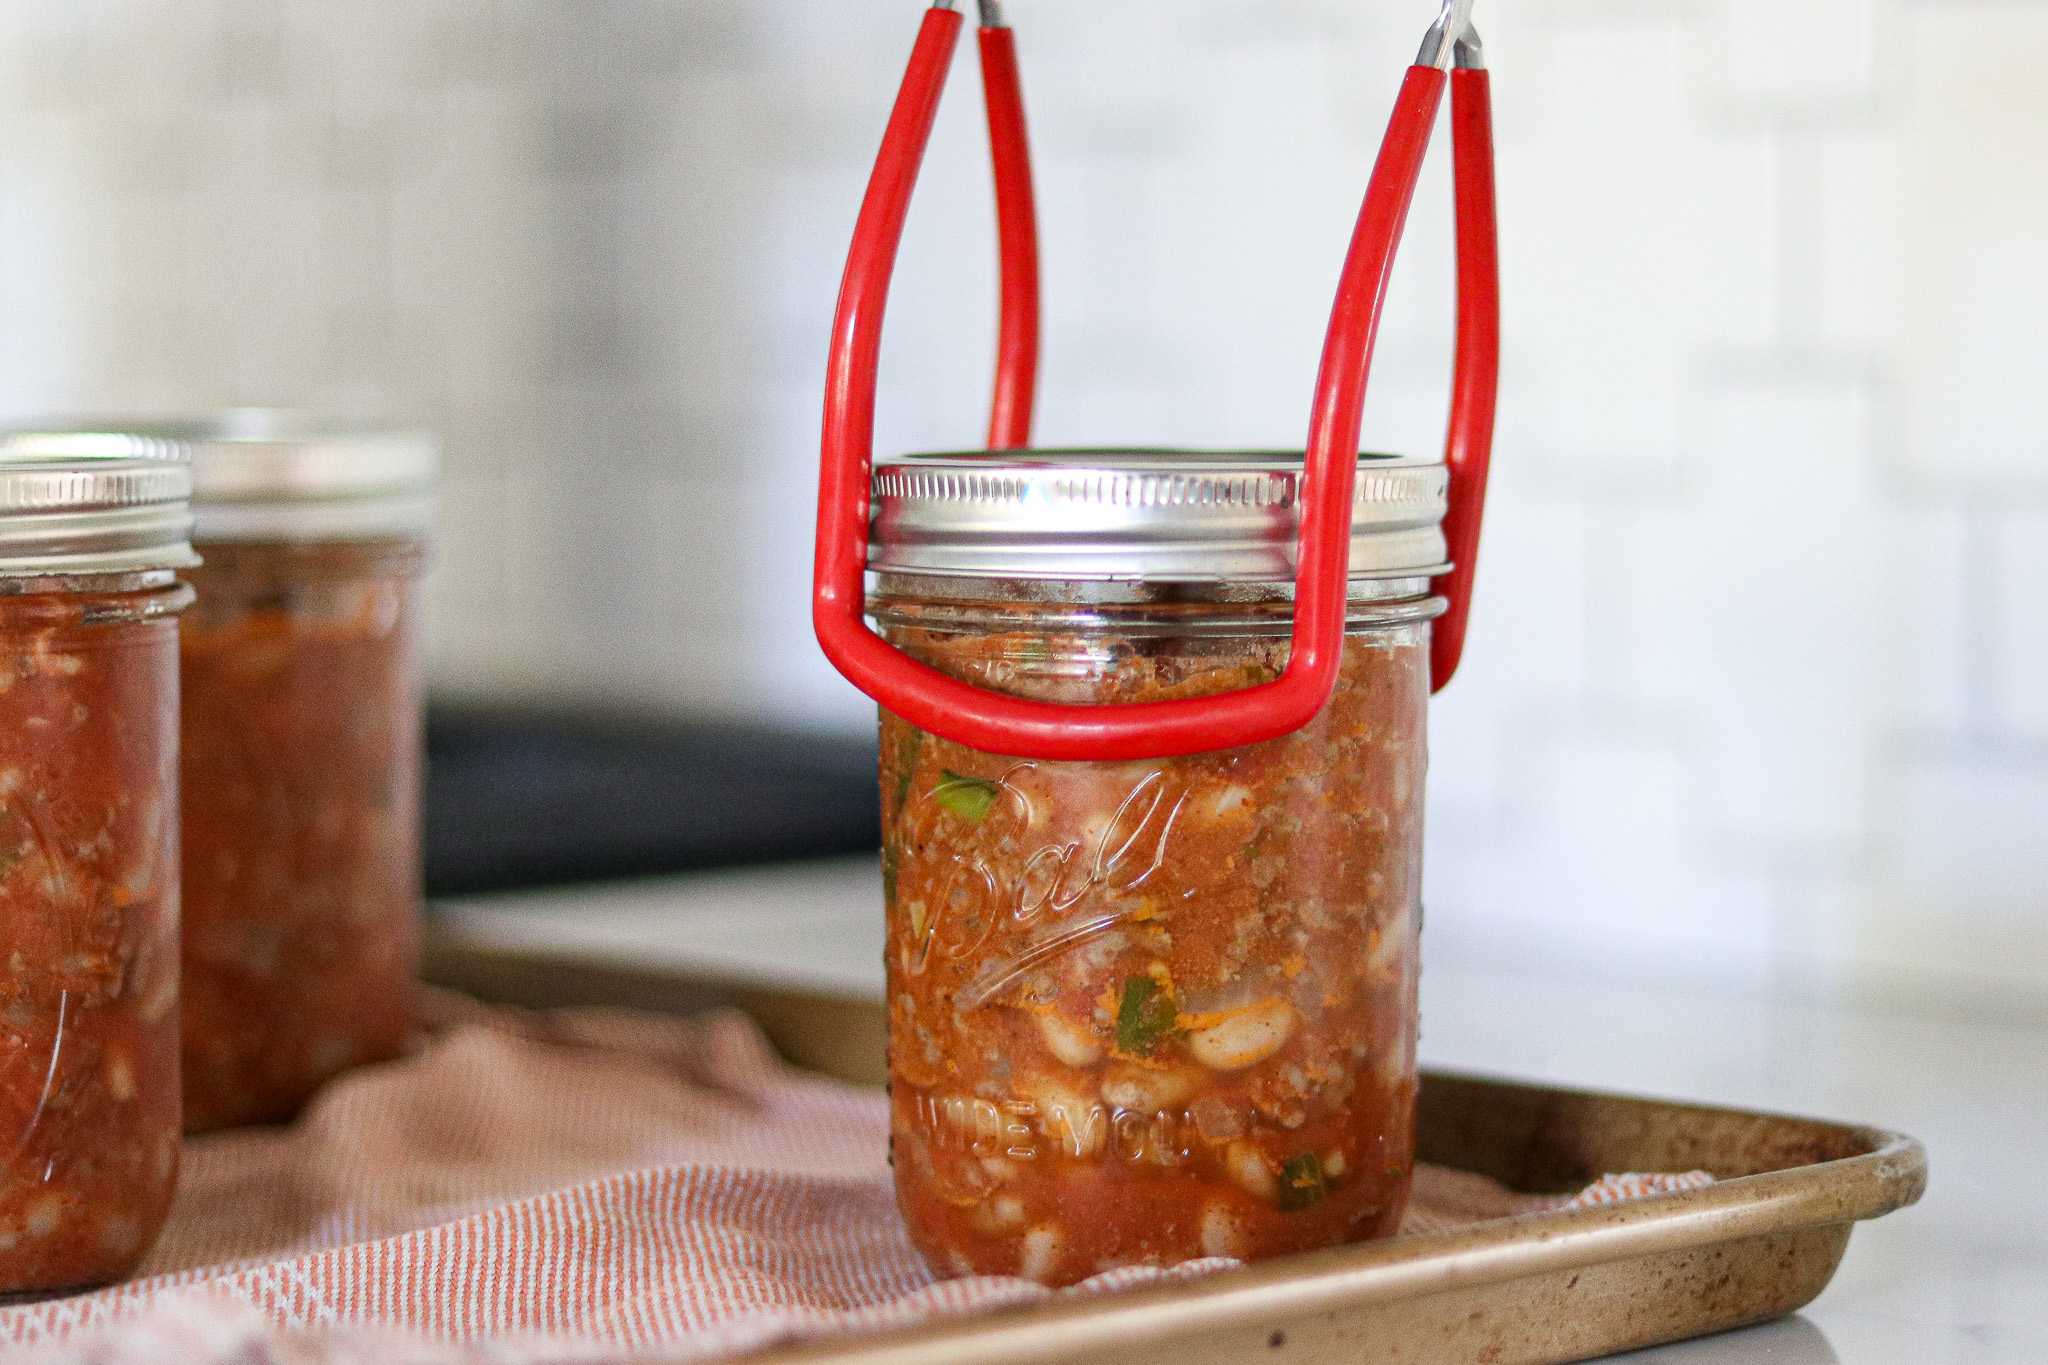
Wipe the rims of the jars to remove any food particles, then add the lids and bands.
Tighten until they are fingertip tight, and prepare to load the jars into the simmering canner.
Be aware that while 9 pints is a “standard” canner batch, some smaller canners can’t hold quite that much. Be sure to check your owner’s manual before starting. You can halve this recipe for smaller canners.
I run a high-capacity canner, and I often double this recipe to make 18 pints. (Yes, this recipe can be doubled.)
Turn the canning lid into the locked position, then allow the canner to build pressure. Vent steam for 10 minutes, then add the weighted gauge. Process points for 75 mins at 11 lbs pressure (dial-gauge canner) or 10 lbs pressure (weighted gauge canner), adjusting for altitude as needed.
*See altitude adjustments below
When the processing time has finished, allow the canner to depressurize naturally. Remove the jars from the canner, then let them cool at room temperature for 12 hours. Check the seals, then store.
Altitude Adjustments
Canning time remains the same regardless of altitude; however, the processing pressure increases as altitude increase.
Use the following table to determine the correct processing pressure if you’re above 1,000 feet in elevation.
For dial gauge pressure canners:
- 0 to 2,000 feet in elevation – 11 lbs pressure
- 2,001 to 4,000 feet in elevation – 12 lbs pressure
- 4,001 to 6,000 feet in elevation – 13 lbs pressure
- 6,001 to 8,000 feet in elevation – 14 lbs pressure
For weighted gauge pressure canners:
- 0 to 1,000 feet in elevation – 10 lbs pressure
- Above 1,000 feet – 15 lbs pressure

Chili Canning Recipe Variations
There are quite a few chili canning recipes out there, and I hope to add half a dozen more to the site this year. We love homemade chili!
In this chili, you can use chunks or meat instead of ground. Feel free to substitute venison or pork too.
The spices are up to you, and so long as you’re using dry spices, you can use whatever you’d like.
I’m particularly fond of hatch green chili powder.
Serving Chili Con Carne
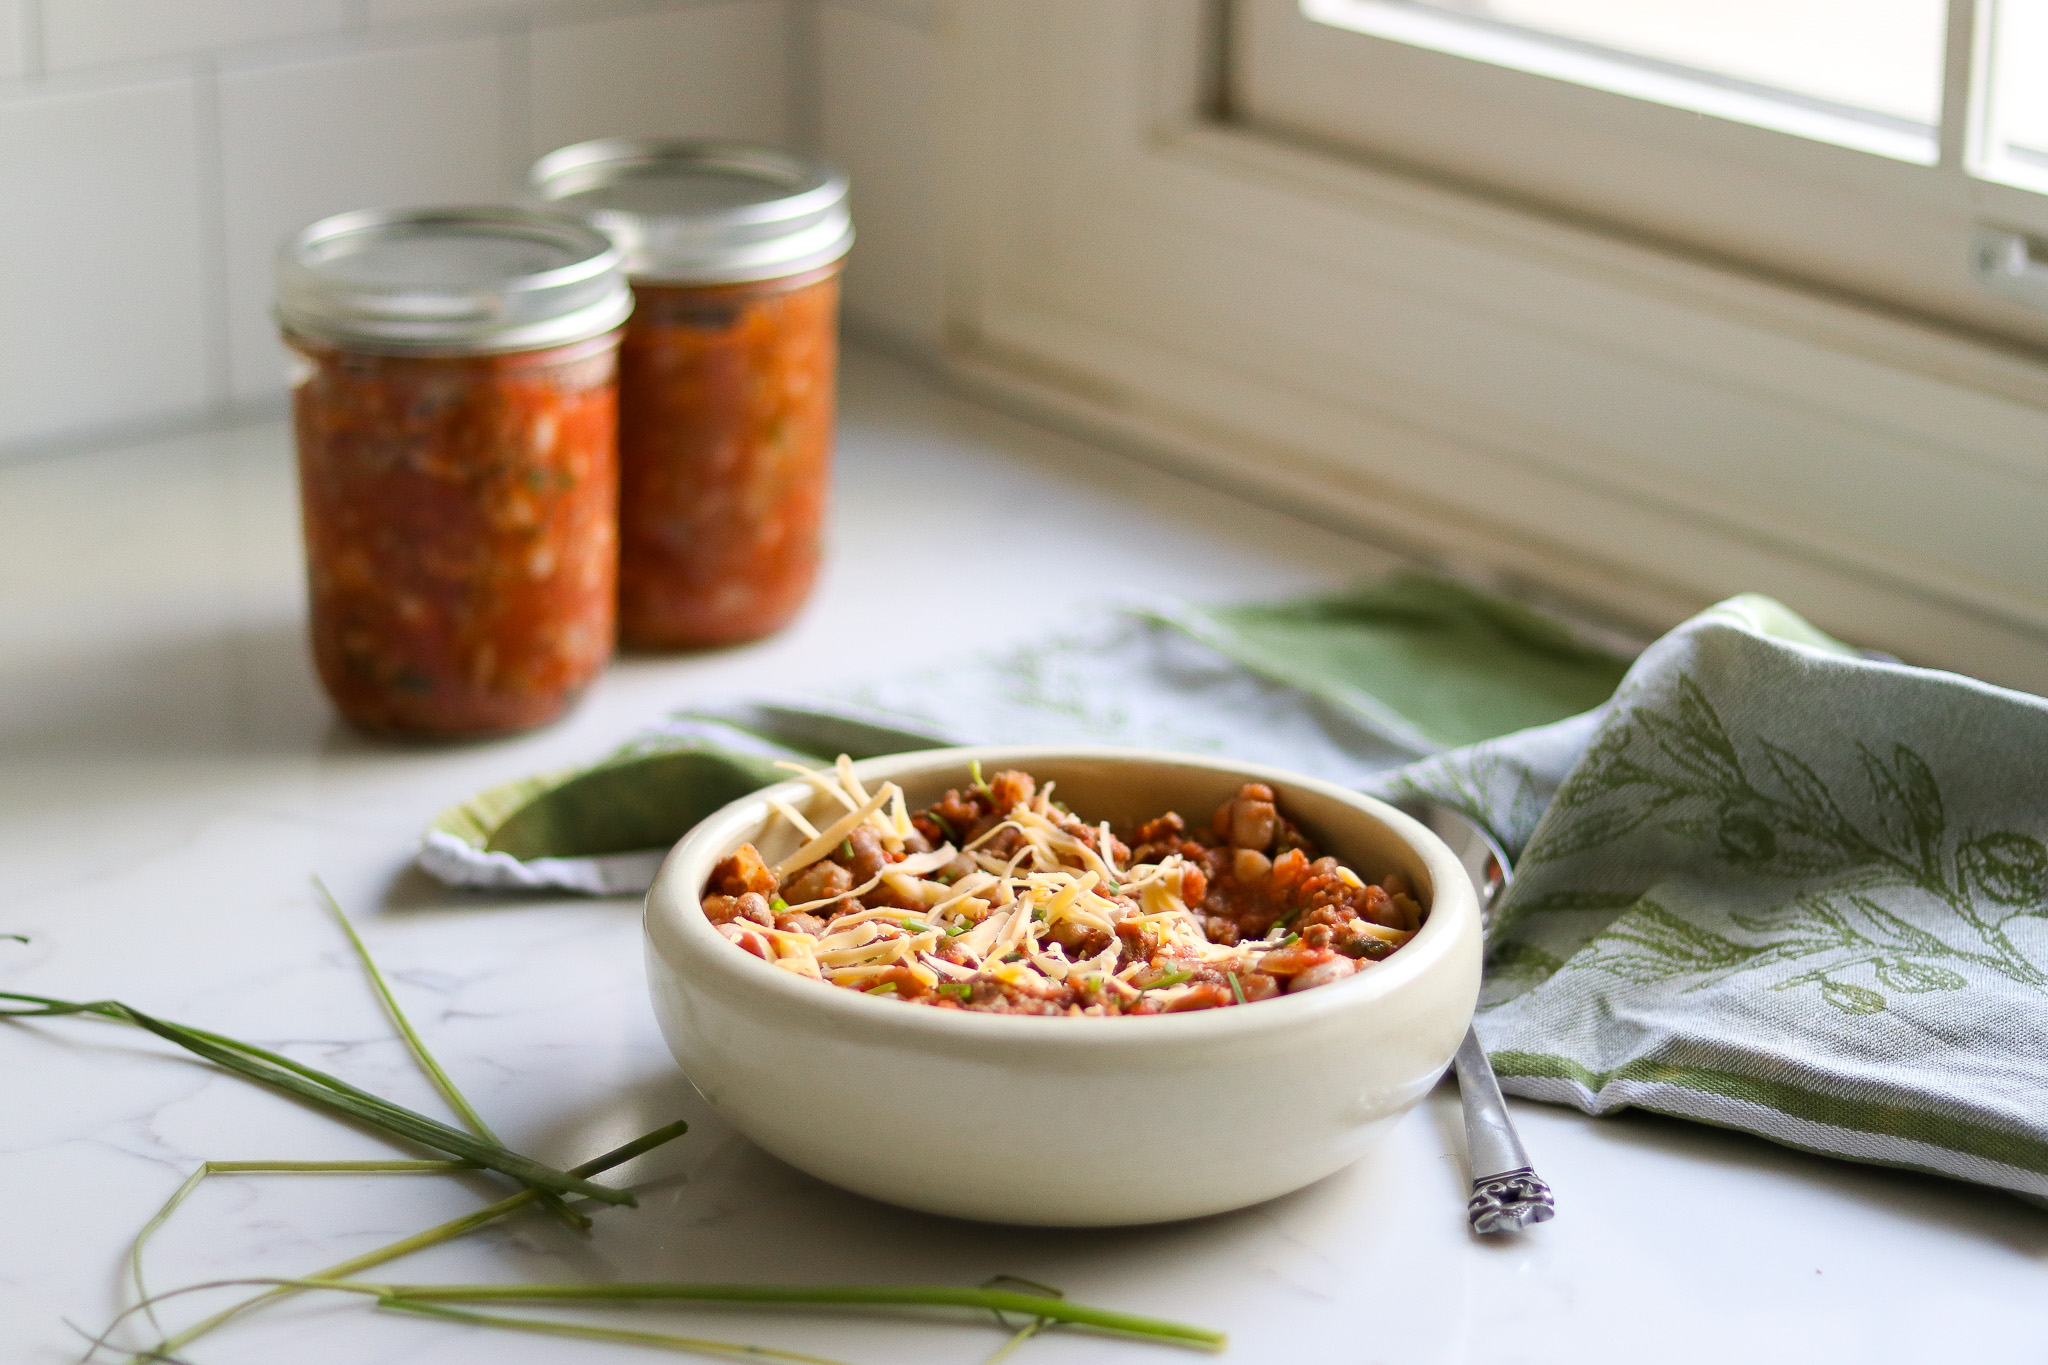
Chili con carne is always a hit at parties, or even on a regular weeknight. It’s hard to find someone who doesn’t like it! Serving chili is simple and easy; all you have to do is heat it up, and then you have an effortless main dish.
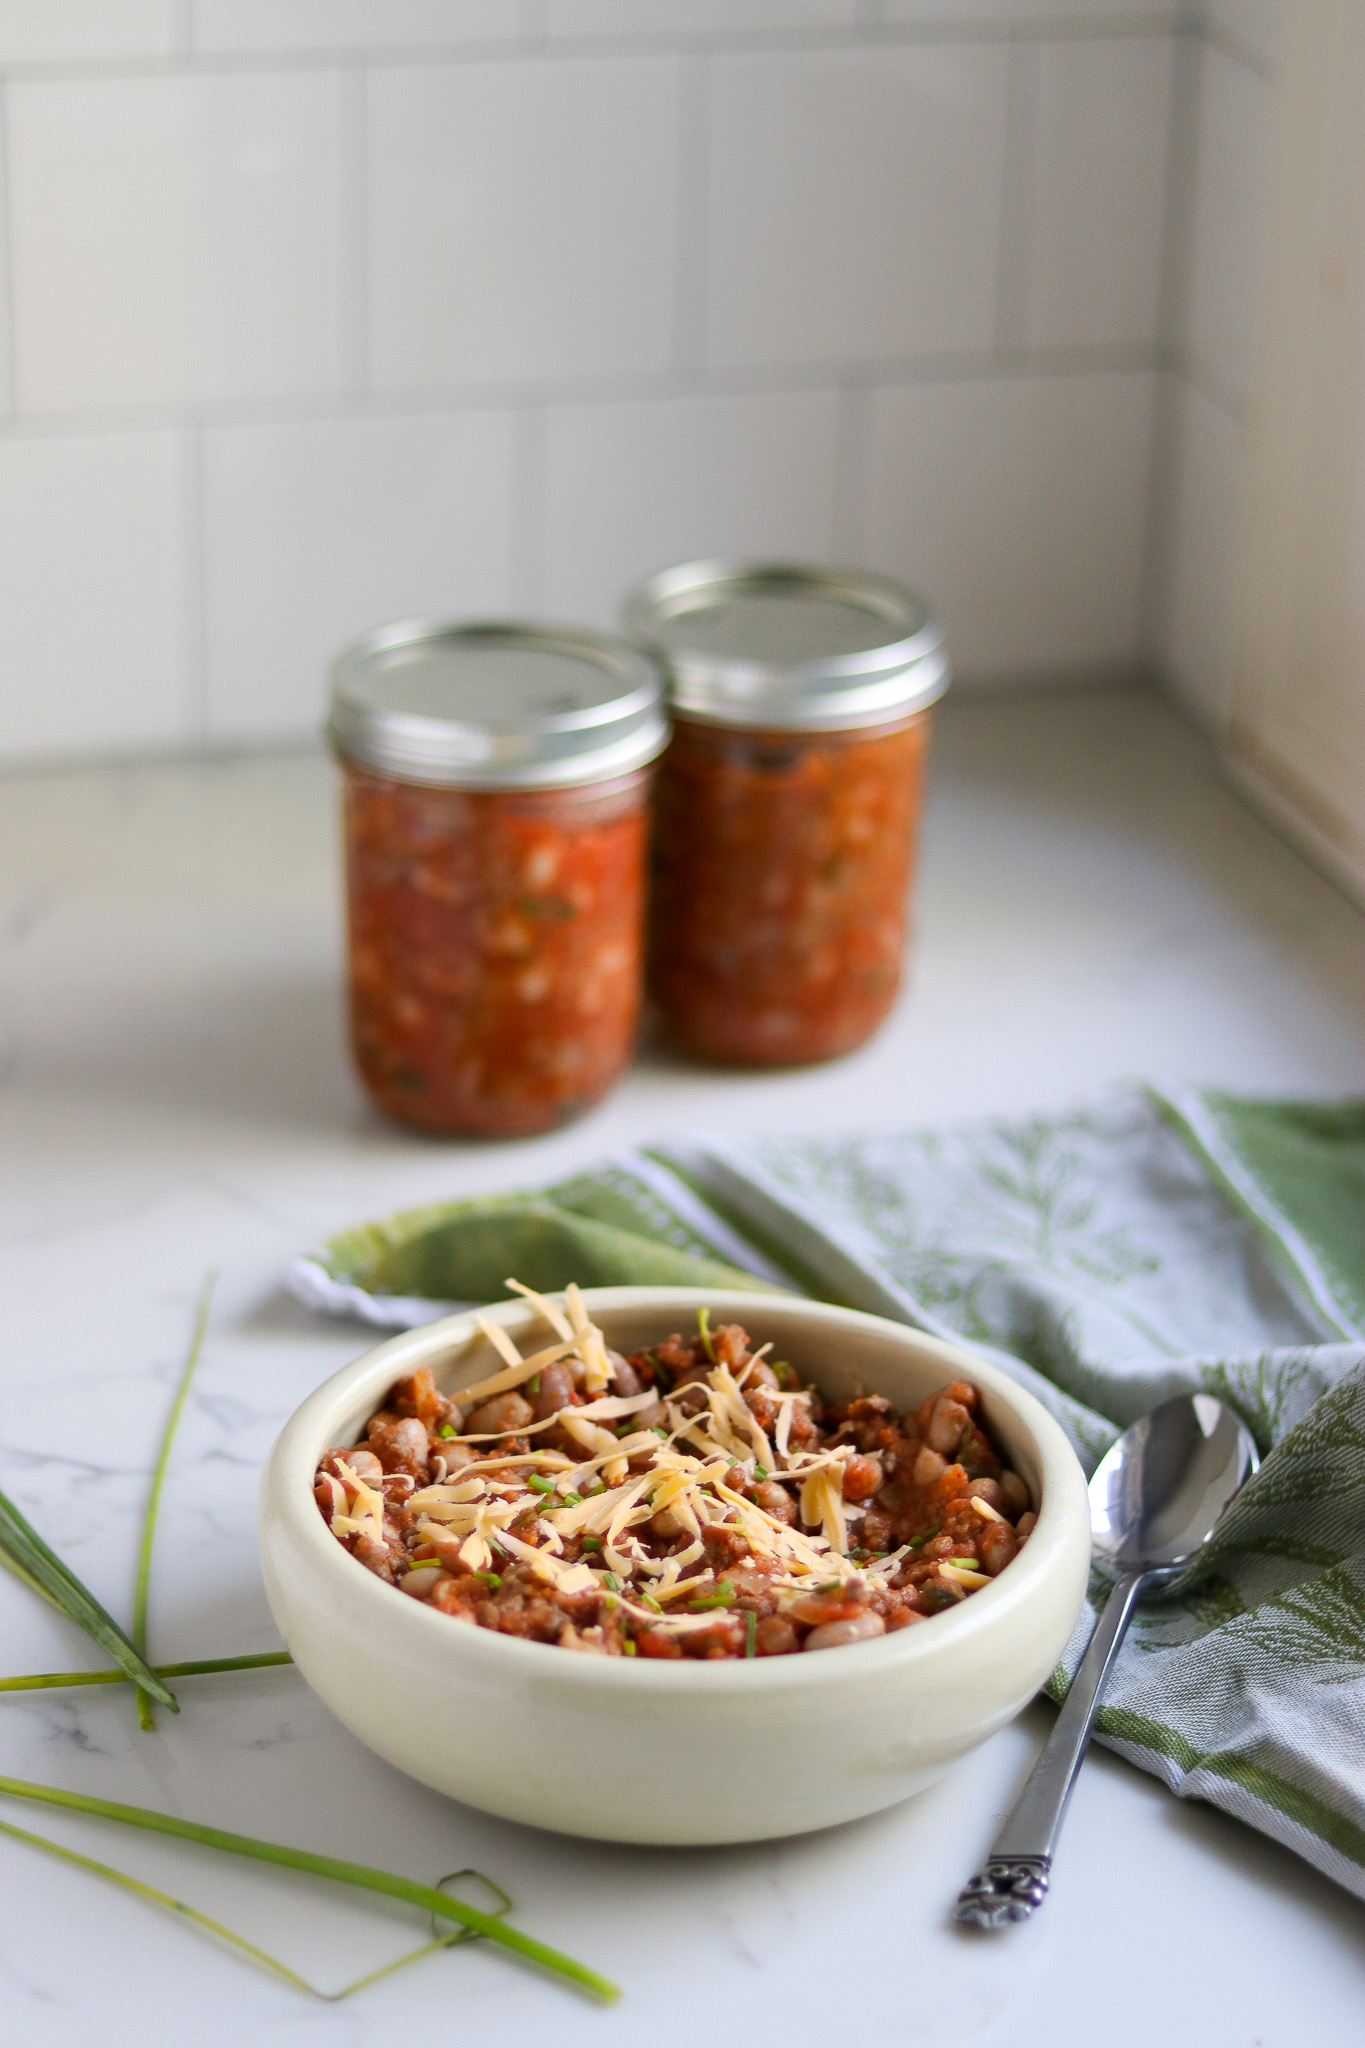
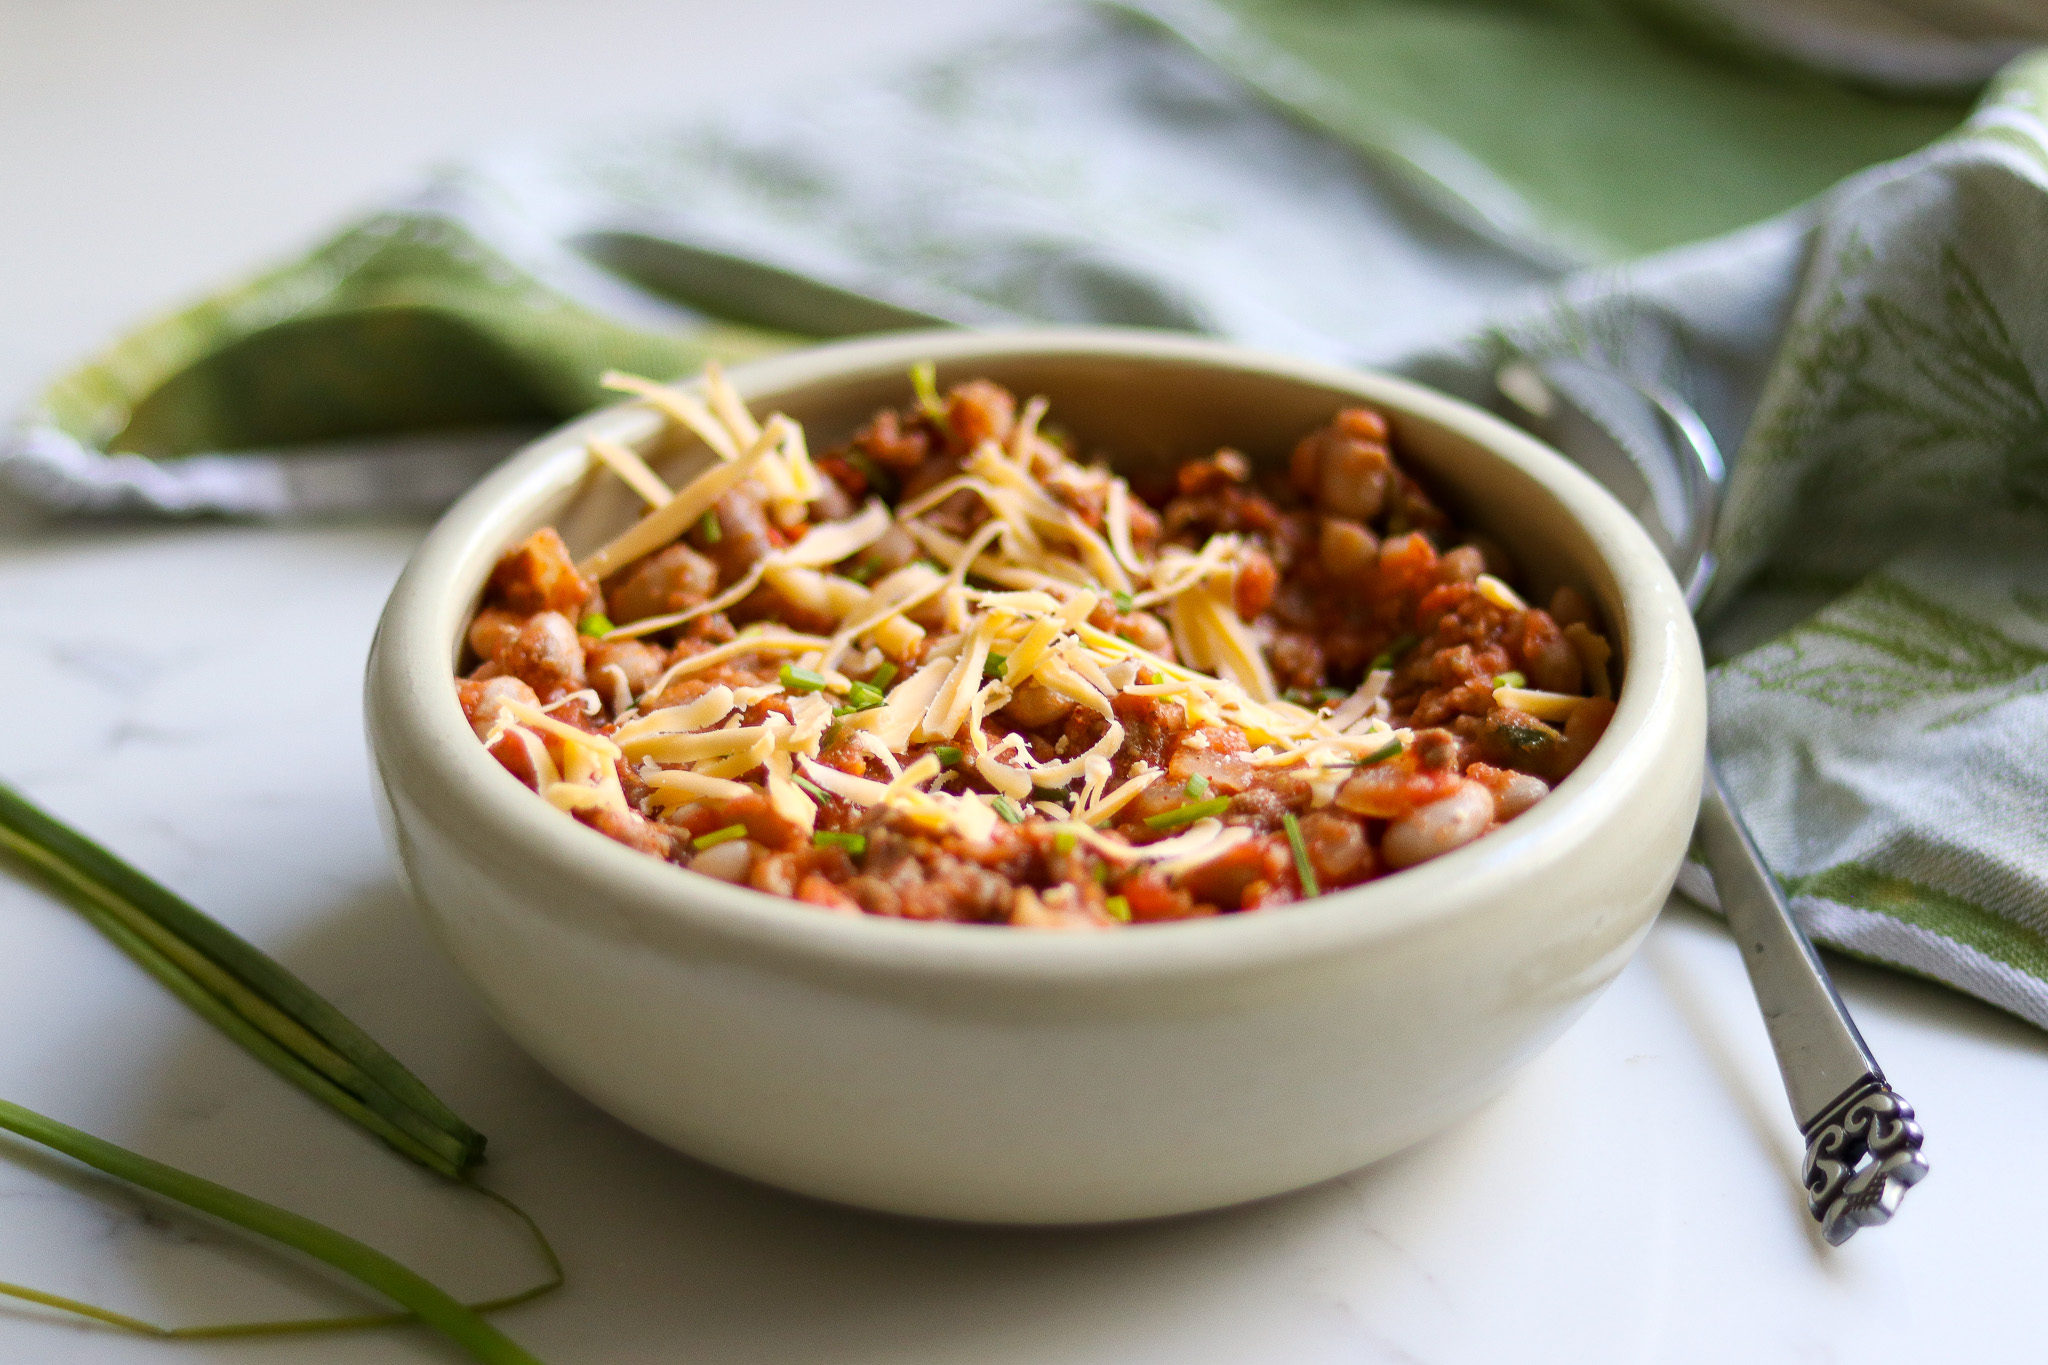
In fact, you can serve this chili con carne recipe right out of the jar! Simply pour it into a bowl and reheat over the stove or in the microwave.
Depending on your preferences, you can add additional ingredients, such as grated cheese, diced onions, sour cream, etc. to make this hearty meal even more delicious.
The great thing about chili con carne is that you can serve it with whatever sides you have on hand; think of something like a salad or a side of grilled vegetables to round off the meal. However you choose to serve it, chili con carne will definitely be a winner.
Meal in a Jar Canning Recipes
Need a few more meal-in-a-jar canning recipes?
Canning Chili Con Carne
Equipment
Ingredients
- 3 cups dried red kidney beans or pinto beans
- 3 lbs ground beef
- 1 ½ cups chopped onion
- 1 cup chopped peppers, optional
- 2 Quarts tomatoes, whole or crushed
- 5 ½ cups water
- 5 tsp salt, separated
- 3-6 Tbsp chili powder
- 1 tsp black pepper
Instructions
- Wash the beans and place them in a large 2-quart saucepan. Add cold water to three inches above the beans, then soak for 12-18 hours. (Alternatively, use the quick soak method. To do that, place the beans in plenty of water and bring them to a boil in a pot on the stove. Boil 1 minute, then turn off the heat and leave them standing in hot water for an hour. Drain, and proceed with the recipe using the drained “quick soaked” beans in place of overnight beans.)
- Drain and discard the water. Combine the beans with 5 ½ cups of fresh water and 2 tsp of salt. Bring to a boil, reduce the heat, and simmer for 30 minutes.
- Drain the beans and discard the water.
- Prepare a pressure canner, jars, lids, and rings. For most brands of pressure canner, that means adding 2-3 inches of water to the bottom, along with the bottom trivet and then bringing it up to a gentle simmer (180 F) for hot pack canning.
- Brown the ground beef in a pan, then add peppers and chopped onions. Drain off the fat and add the remainder of the salt, along with the pepper, tomatoes, chili powder, and beans.
- Simmer for 5 minutes.
- Fill the jars, loading each hot, sterilized jar with chili. Allow for an inch of headspace.
- Wipe the rims of the jars to remove food particles, then add lids and bands and tighten until they are fingertip tight.
- Load the jars into the canner. Turn the canning lid into the locked position, then allow the canner to build pressure.
- Vent steam for 10 minutes, then add the weighted gauge.
- Process pint jars for 75 mins at 11 lbs pressure (dial-gauge canner) or 10 lbs pressure (weighted gauge canner), adjusting for altitude as needed. See notes below for altitudes above 1,000 feet.
- After the processing time has ended, allow the canner to depressurize naturally, then remove the jars.
- Let the jars cool for 12 hours, check the seals, then store.
Notes
Altitude Adjustments
Canning time remains the same regardless of altitude; however, the processing pressure increases as altitude increase. Use the following table to determine the correct processing pressure if you’re above 1,000 feet in elevation.For dial gauge pressure canners:
- 0 to 2,000 feet in elevation – 11 lbs pressure
- 2,001 to 4,000 feet in elevation – 12 lbs pressure
- 4,001 to 6,000 feet in elevation – 13 lbs pressure
- 6,001 to 8,000 feet in elevation – 14 lbs pressure
For weighted gauge pressure canners:
- 0 to 1,000 feet in elevation – 10 lbs pressure
- Above 1,000 feet – 15 lbs pressure
Nutrition
Nutrition information is automatically calculated, so should only be used as an approximation.
Meat Canning Recipes
Looking for more ways to put up a bit of protein? Keep your pantry stocked with these meat canning recipes:
Bean Canning Recipes
Chili beans aren’t the only beans you can put in a jar!
- Cuban Black Bean Soup
- Chipotle Black Bean Soup
- Canning Boston Baked Beans
- Canning White Bean and Greens Soup
- Butternut Squash and White Bean Soup
- Cajun Red Beans and Sausage

I will make this but add cumin. I think that makes it chili.
I usually add cumin to my chili too. I left the recipe as they had it, but you can always adjust the dry spices in canning recipes to suit your tastes (and I do too). Enjoy!
Hi there, I really appreciate your information sharing. I’m learning a lot from you!
Can you please clarify ‘canned tomatoes’ – can I use commercially canned tomatoes from the grocery store? Or are you referring to fresh tomatoes you previously canned yourself?
Thanks!
You can use tomatoes that are commercially canned or tomatoes that you canned yourself, either way.
I don’t eat red meat , can I use chicken or tofu instead?
You cannot use tofu, but you can substitute chicken.
The taste was just amazing & directions brilliant.
So glad you enjoyed it!
I would like to add Hatch green chilis to this recipe. I get roasted green chilis every year, de-seed them, peel them and freeze in recipe-ready portions. Can I use these or would I need to use fresh chilis to include them in canning the chili con carne? Thanks.
You can use frozen hatch chilis in this recipe in place of the 1 cup peppers. Any type of peppers is allowed here, and from the freezer works just fine. Enjoy!
Hi Ashley,
Thank is for this recipe! I make a batch yesterday and tho a that the jars have cooled, they look a bit “dry” ? Not as much liquid I would expect. It looks like a little bit did seep out while canning. Do I need to be concerned about this?
This recipe does come out looking a bit dry, especially with the beans in there soaking up liquid. So long as the jars are sealed and were processed the proper time, you’re good safety wise. (Siphoning or liquid loss during pressure canning isn’t a safety issue, it’s a cosmetic issue, as odd as that sounds. At least according to the NCHFP.)
Everything is good
Lovely, glad you enjoyed it!
Hi there. I love your recipe for chili and would like to know if I could add other vegetables like zucchini
Thanks Heather
Recipes that are bean heavy are hard to modify safely, or at least, safe modifications haven’t been tested. If you’re looking to create your own recipes, I’d suggest taking a look at my article on creating your own meal in a jar recipes here: https://creativecanning.com/choice-meal-in-a-jar-canning-recipe/
Zucchini in particular is problematic since it tends to get really pasty when canned, so it’s not an approved ingredient.
Hi Ashley, Is it possible to substitute sweet potatoes for the beans? Would that affect the canning process?
This recipe is from the NCHFP, but it uses the processing times for “hearty soups” from the University of Alaska Extension (Publication FNH-00065). Their guidance allows you to make quite a few changes to recipes, but sweet potatoes are one of the things that’s explicitly not allowed. You can substitute in lots of veggies or meats, but not “greens, cream-style corn, winter squash, or sweet potatoes in Hearty Soup recipes.”
Regular potatoes, however, are fine according to their logic.
I have a different recipe I use and would like to can. How do I safely pressure can it? I am very particular in what I eat and what my food contains and once I find a recipe I like, I prefer not to deviate from it. What do I need to take into account?
If you look up the University of Alaska Hearty Soups canning instructions (publication FNH-00065) it will walk you through the allowed changes to a recipe like this. For the most part, the only things not allowed are things without canning instructions (cabbage, etc) or things not allowed for canning in general (flour, butter, etc). Beyond that, you’re not allowed to use “greens, cream-style corn, winter squash, or sweet potatoes in Hearty Soup recipes.” But, provided your recipe has plenty of liquid in it, and none of the “not allowed” ingredients, it may be able to be canned as you wish.
Oh, and my method, which may have a madness to it, but worked fine for me: did the one-minute boil and one-hour soak on the beans, browned grounds beef&pork in the airfryer (took 3-4 batches), meanwhile chopping/mandolining and sauteing the veggies. Added the tomatoes and spices (3T oregano, 2T basil, 6T homemade chili powder (ground up dried ancho, guajillo, and chilis d’arbol, and 3T cocoa powder), BTW, a slow cooker is great for keeping things at proper heat for canning if you have to batch stuff. The recipe came up short WRT the jars, (I am in Canada, so we have 500 ml jars, whereas pints are 473 ml) so I back-filled w more canned diced tomatoes. Worried that I was on the edge of poisoning my family, but hey, we’re olds so it doesn’t matter so much …
Anyway, we ate a test jar, it was magnificent. A thousand thanks.
Filling the extra space with tomatoes is a great idea, and that’s a perfectly fine addition. You’re definitely allowed to add extra tomatoes to this recipe without issue. You can also fill the extra space with water, but less flavorful that way. So glad you enjoyed it!
Hi
Instead of canned tomatoes., would tomatoe juice also work?
Thanks
Yes, you could use the same volume of tomato juice in place of canned tomatoes. That’d make the mix less thick, which is fine for pressure canning.
Hi Ashley, Because of you and your breezy and clear instructions I have been canning stuff for about two months (spring 2024), although I have had my pressure canner for (cough) some time. Um, since Covid lockdowns, actually. But I was terrified of it and the more I read, the more terrified I got. The recipes seemed so arcane, inconsistent, and totally lacking in theory. The USDA stuff in particular is totally unscientific and cannot be made sense of, it is more like a religious ritual. There must be a General Theory of Canning, but don’t look to the USDA for it. Also, I have to wonder about what they decided to test and what not to test. And no, can’t use celery since not in canning quide, but they put it in their spaghetti sauce. What would we have to do to get them to test quarts of chili? Or celery, for that matter? I like to put fennel (bulb) in my spaghetti sauce, fennel not in list of can-ables. Nor rapini, leeks, raw garlic, shallots, and a whole lot of ‘modern’ vegs and fruits. Did their budget get cut? Sigh, But I digress….
I want tom thank you for your calm and engaging directions, from the chatty articles to your comforting comments and answers to anxious canners. So, reporting: Canned 18 pints of chili con carne two weeks ago, splendid!. Have done some other stuff, too, will pop by those recipes and gush a bit.
Thank you so much Dawn, and I’m so glad you’re getting into canning. It’s a lot of fun once you take the leap =)
Would it be possible to use this recipe and sub ground turkey for beef? I have been scouring and cant find anything. I got a great deal on turkey today and i usually sub turkey as a lower fat alternative for the family and they dont even realize it 🙂 Thanks!
Yup, you can use any ground meat in this recipe. Enjoy!
This looks great! Just wondering if it would be okay to leave out the meat to make it for a vegetarian meal? And would adding a bit of garlic and ginger be okay? Thanks for the help!
Yup, leaving out the meat is perfectly fine in this recipe. And yes, you can add any dry spices you like, so ginger and garlic are great. Enjoy!
how long will this recipe be good for? It sounds delicios! Can’t wait to try it!
Home canned recipes generally maintain peak quality for 12-18 months. After that, quality goes down, but they’re still safe to eat as long as the jars are sealed (and they were properly canned in the first place).
Can dry lentils be safely swapped for the dry beans (as long as you follow the same soaking process)? Thank you in advance.
Probably? But you’ll have to work out exactly how to adjust the recipe there, and realize that it’s not a specifically tested recipe so you’re at your own risk for that one. The University of Oregon says that canning lentils are equivalent to canning beans, but in my experience, they tend to fall apart more than beans and may result in a thicker product. I would add more liquid to the recipe to make sure it’s not too thick in the jars.
Hi! I’m so excited to get started as I have always canned soups but no meats.
How long is the shelf life in Canning meaty recipes? I have soups good for years.
Thanks, Deborah
They maintain peak quality for 12-18 months, but they’re good indefinitely provided the jars are still sealed and they were processed correctly.
Are purchased, canned, kidney beans safe to use in canned chili? Do you have to drain the sauce or would you use the whole can as is? I am just feeling my way along since you say a lot of things aren’t tested yet and are unsafe.
I intend to prepare my own dried beans but have a few cans of canned beans that I need to use up first.
You are such an inspiration to me and I refer to your information often. I purchased a pressure canner a couple of months ago and love it. I was always afraid to try pressure canning as lots of people seemed to have them blow up. If you follow the instructions, that is not happening. I am 81.
Thanks so much for all of your hard work and information, Ashley!
Kathryn
Hi Kathryn, I’m so glad you’re canning at 81, that really makes me smile. For the canned beans, yes, you can use store bought canned beans in place of the dry beans, but the process would be a bit different. You don’t soak them or pre-cook them.
In this particular recipe, the beans are soaked and then pre-cooked for 30 minutes. If you’re using canned beans, you’d just pick up at that point. You can keep the bean liquid from the can, or strain it and rinse the beans, either way is fine.
Using canned beans in this recipe actually makes it a lot simpler and quicker to get it in the canner, and it’s perfectly fine from a canning safety perspective.
Enjoy!
I made the chili as my first canning project with meat!!! This was delicious and a wonderful experience!!! I have a Nesco electric pressure cooker. I love it but have only used it for jams and jellies. Likewise, this is a big game changer now that I can meat/poultry /soup/ I love if more as we lose power regularly here in Mi and now knowing how and the simple instructions I can make sure my pantry is well stocked. Thanks so much.
So glad you enjoyed it!
Hello,
Just a quick question. Can this be pressure canned in a wide mouth quart jar also? Or is there a reason to use only pints? What would be the timing and pressure for a for quarts if they are safe to use?
Thank you again!!
Colleen
You can use wide mouth or narrow mouth jars for this recipe, so long as they’re pints. For some reason, the USDA didn’t test this one in quarts (yet) and there is not an established time. I do believe there are other chili recipes that have been tested in quarts, I’ll see if I can find any of them in my canning books and let you know if I do.
Can you use fresh tomatoes not canned?
Yes, fresh or canned both work in this recipe.
I’m new to the pressure canning world and I have a few questions.
Would I use the 75 mins of canning time for your chili recipe in my NESCO pressure canner for the 0 to 1,000 feet in elevation – 10 lbs pressure canner?
I would like to make your chili recipe but I am not sure of the proper time to pressure can.
Split pea, Chili, pot pie, etc… I would love to have some directions of time so that my soups, and meats won’t spoil in their jars.
Thanks.
Yes, the canning time is 75 for pints. The Nesco canner is considered a “Weighted Gauge” canner and you would use the 10 pound weight if you’re under 1000 feet in elevation.
Would it be ok to sauté the onions before cooking the beef, and then cook them together? Or do the onions need to be added after the beef is cooked?
Yes, you can definitely sautee the vegetables first. In the pre-cooking phase, you can do whatever you’d like here, but the important parts are to make sure the meat is browned first (so it doesn’t clump when canned) and to make sure everything simmers together for 5 minutes so everything goes into the jars hot. Beyond that, however you cook things before they go into the jars is fine.