This post may contain affiliate links. Please see our disclosure policy.
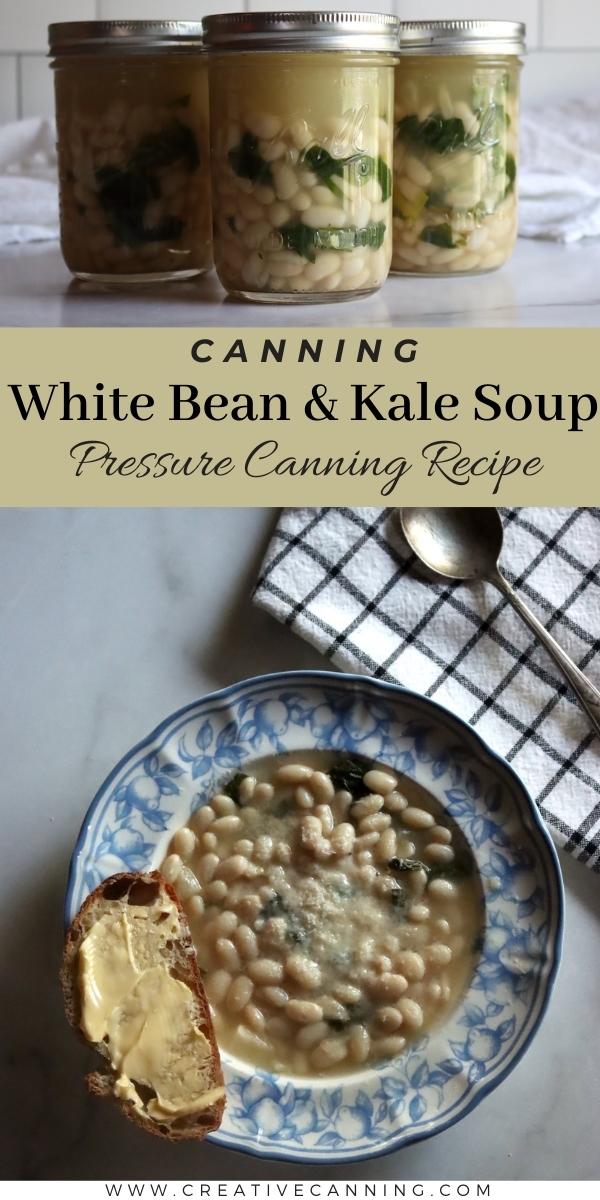
White bean and kale soup is a vegetarian classic, and it’s perfect for home canning.
Nothing beats a delicious, hearty soup, especially during the colder months. But cooking soup from scratch, especially bean soups, takes time.
That’s where pressure canning can safe effort on busy weeknight, and with just a little bit of work upfront, you can have a delicious and nutritious meal ready to go whenever you need it.
I’ve written this as a vegetarian soup canning recipe, but you can add sausage, chicken or other meats if that suits your preference. Just be sure you only fill the jars no more than halfway with solids, as this recipe is tested based on the NCHFP’s choice guidance for brothy soups. That requires half solids, half broth in each jar for safe processing.
Why you’ll love this easy Soup Canning Recipe!

This is the kind of pantry soup I’m genuinely happy to see on the shelf in the middle of winter. It’s hearty and comforting, but still feels light enough that I don’t need to plan a whole meal around it. When a day runs long, I can crack a jar, warm it up, and dinner is handled.
I also love how flexible it is without getting fussy. If kale is what I’ve got, great. If the garden is handing me chard or other greens, that works beautifully too. It’s a simple, reliable pressure-canned soup that tastes like something you simmered all afternoon, even when you’re just reheating it on a busy night. If you want, you can dress it up with a splash of cream and a sprinkle of parmesan or a spoonful of pesto, but it’s just as good straight from the jar.
A Quick Look at the Recipe
- Recipe Name: White Bean and Kale Soup
- Recipe Type: Soup Canning Recipe
- Canning Method: Pressure Canning
- Prep/Cook Time: 30 Minutes, plus soaking time
- Canning Time: 60 Min for Pints, 75 Minutes for Quarts
- Yield: 7 pint jars (or 3-4 quarts)
- Jar Sizes: Pint or Quart
- Headspace: 1 inch
- Ingredients Overview: White Beans, Onion, Kale, Broth, and Spices.
- Safe Canning Recipe Source: NCHFP Brothy Soup Canning Guidelines
- Difficulty: Moderate. Make sure you rehydrate the beans by soaking or pre-cooking them. Do not fill jars more than halfway with solids, as processing times are for a brothy soup.
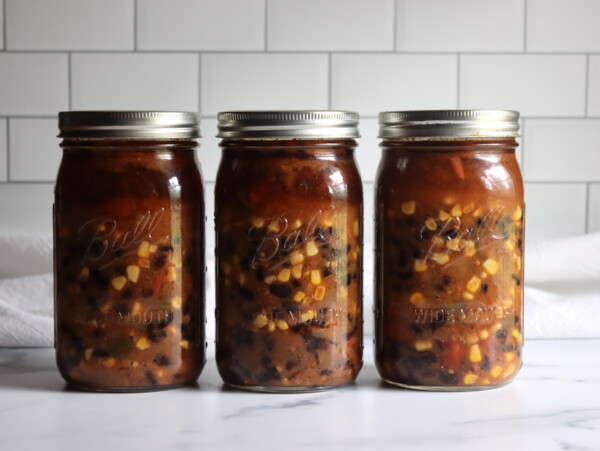
- Similar Recipes: The process is very similar to making other brothy bean soups, including Taco Soup, Butternut Squash and White Bean Soup, Chipotle Black Bean Soup and Cuban Black Bean Soup.
Ingredients for White Bean and Kale Soup
This recipe for Canning White Bean and Greens Soup is adapted from Pressure Canning for Beginners and Beyond by Angi Schneider, which happens to be my very favorite pressure canning book. I absolutely love this recipe, and I often substitute chard in for kale when available too.
The ingredients for canning white bean and kale soup are quite simple. To make a canner batch of 7 pint jars, you’ll need the following:
- 1 lb Great Northern Beans, or other white beans, dry, uncooked but presoaked
- 2 cups Onions, diced
- 6 cups Vegetable Broth, or chicken broth
- ½ lb Kale, Chard, or Other Greens, De-stemmed, and chopped
- 4 cloves Garlic, minced
- 1 Tbsp. White Wine Vinegar, or cider vinegar, optional, for flavor
- 1 Tbsp. Canning Salt
- ½ tsp. Black Pepper, Ground
For serving (optional):
- Smoked Paprika or Pesto
- ¼ cup Cream
- Sprinkle of Parmesan Cheese
- Croutons
Be sure to soak your beans before starting to make this recipe.
You can use the quick-soak or overnight method, but be sure to do this ahead of time so it doesn’t slow you down.
You will need about ¾ lb of unprepared onions and ¾ lb of kale or chard, before chopping or de-stemming, for this recipe.
How delicious! I added a spoonful of homemade garlic scape pesto when I heated it up and oh my, so good! I’ll definitely make this again!
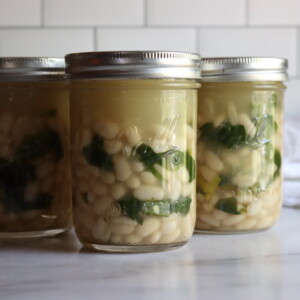
Canning White Bean and Kale Soup
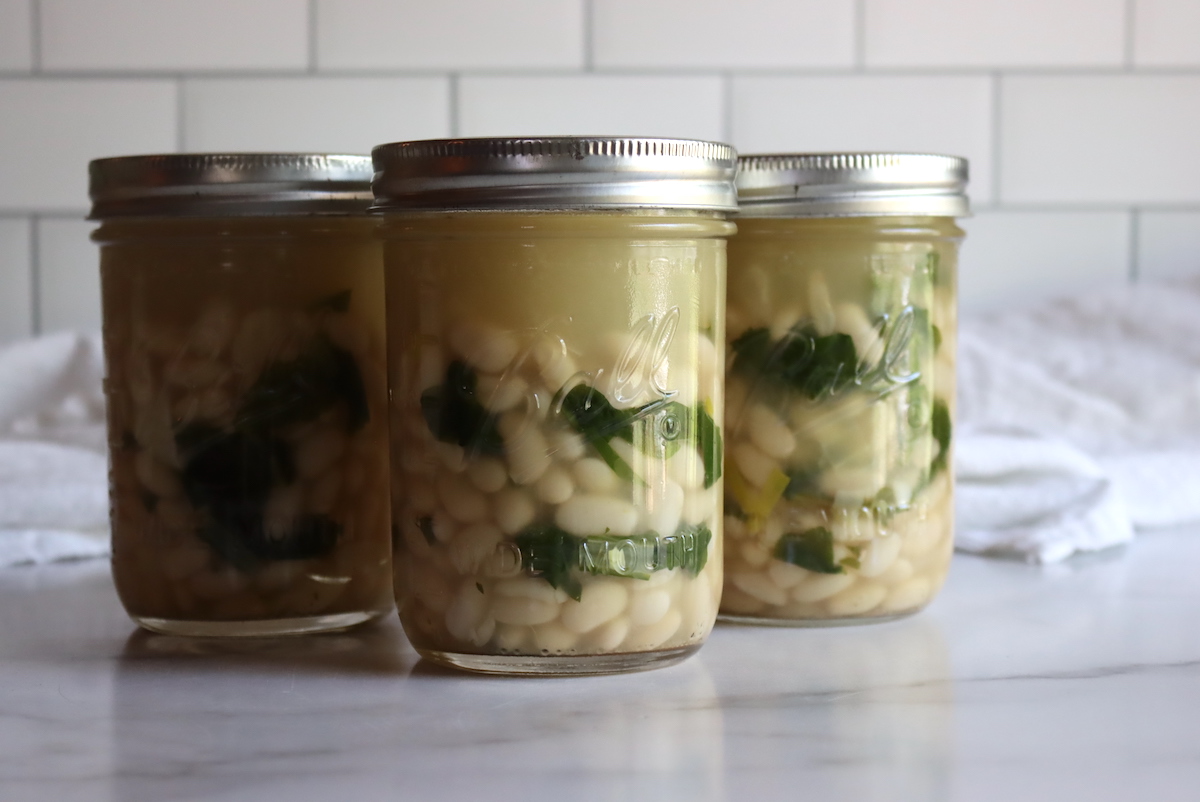
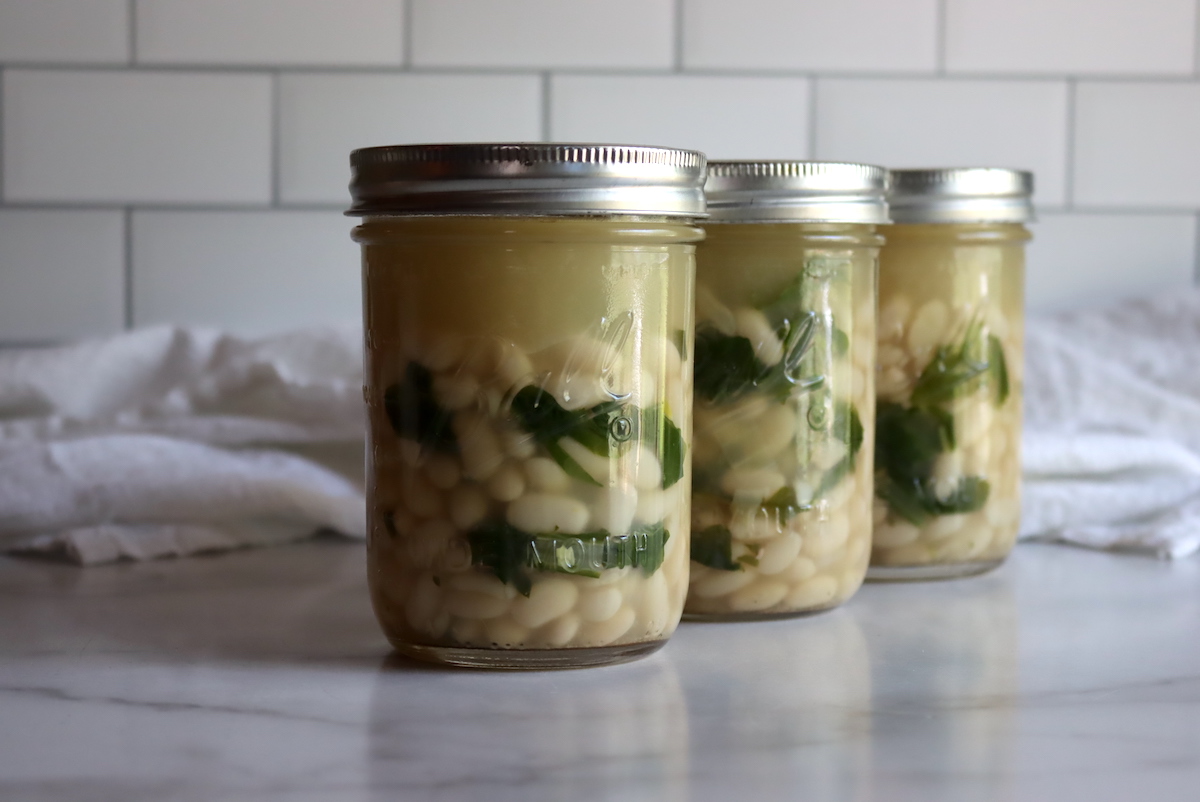
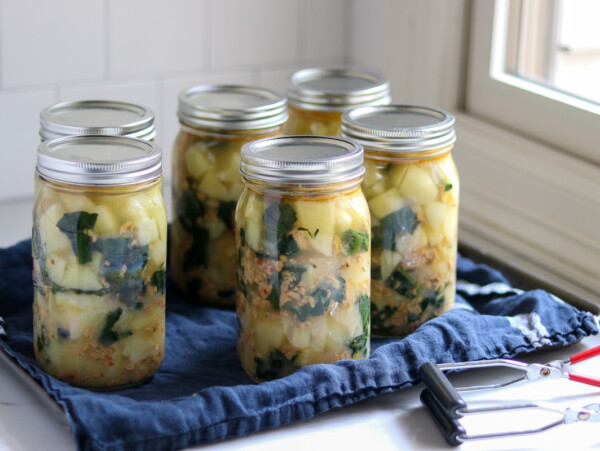
Begin by preparing your canning jars, lids, and the pressure canner itself. You will need seven 1-pint jars.
Fill the canner with a few inches of water, based on your manufacturer’s instructions, and place the canner on the stovetop over low heat with the jars inside. This will keep them hot, which is necessary because this is a hot-pack recipe. The water needs to be around 180 degrees Fahrenheit, or 82 degrees Celsius.
Drain the water from the soaked beans, placing the beans in a large stockpot. Cover them with fresh water. Bring the beans to a boil, then remove them from the heat and drain the water.
This pre-cook is important to ensure the beans fully rehydrate before canning.
Put the beans back into the stockpot, then add the broth, garlic, onions, greens, salt and pepper, and vinegar. Bring everything to a boil over high heat, then reduce to a gentle boil and boil for five minutes.
At this point, the beans and the vegetables will not be fully cooked. That’s okay! They’ll keep cooking in the jars while they are being processed. Resist the temptation to cook them fully, since this will cause the ingredients to become mushy while being canned.
Remove the stockpot from the heat, then use a slotted spoon to evenly distribute the beans and solids among the jars.
Each jar should be no more than half filled with solids. This is a brothy soup canning recipe, and canning times are not sufficient for jars fully filled with solids.
Ladle the remaining broth over the beans in jars, filling the jars to 1 inch headspace.
Use a bubble removal tool to remove the bubbles, then recheck the headspace. If you’re short on broth, use boiling water or hot chicken broth to top the jars off. Wipe the rims clean with a damp cloth, then put the bands and lids on the jars and load them into the pressure canner.
Process the jars in a pressure canner for 60 minutes for pints or 75 minutes for quarts. Adjust pressure for altitude, see below.
When you are done processing, let the canner depressurize on its own. Remove the jars and allow them to cool on the counter for 12 hours. Check the seals and store your jars for up to one year.
Altitude Adjustments
Canning time remains the same regardless of altitude. However, the processing pressure increases as altitude increases. Processing times are always 60 minutes for pint and 75 minutes for quarts, per the NCHFP guidance on brothy soups.
Use the following table to determine the correct processing pressure if you’re above 1,000 feet in elevation.
For dial gauge pressure canners:
- 0 to 2,000 feet in elevation – 11 lbs pressure
- 2,001 to 4,000 feet in elevation – 12 lbs pressure
- 4,001 to 6,000 feet in elevation – 13 lbs pressure
- 6,001 to 8,000 feet in elevation – 14 lbs pressure
For weighted gauge pressure canners:
- Above 1,000 feet – 15 lbs pressure
- 0 to 1,000 feet in elevation – 10 lbs pressure
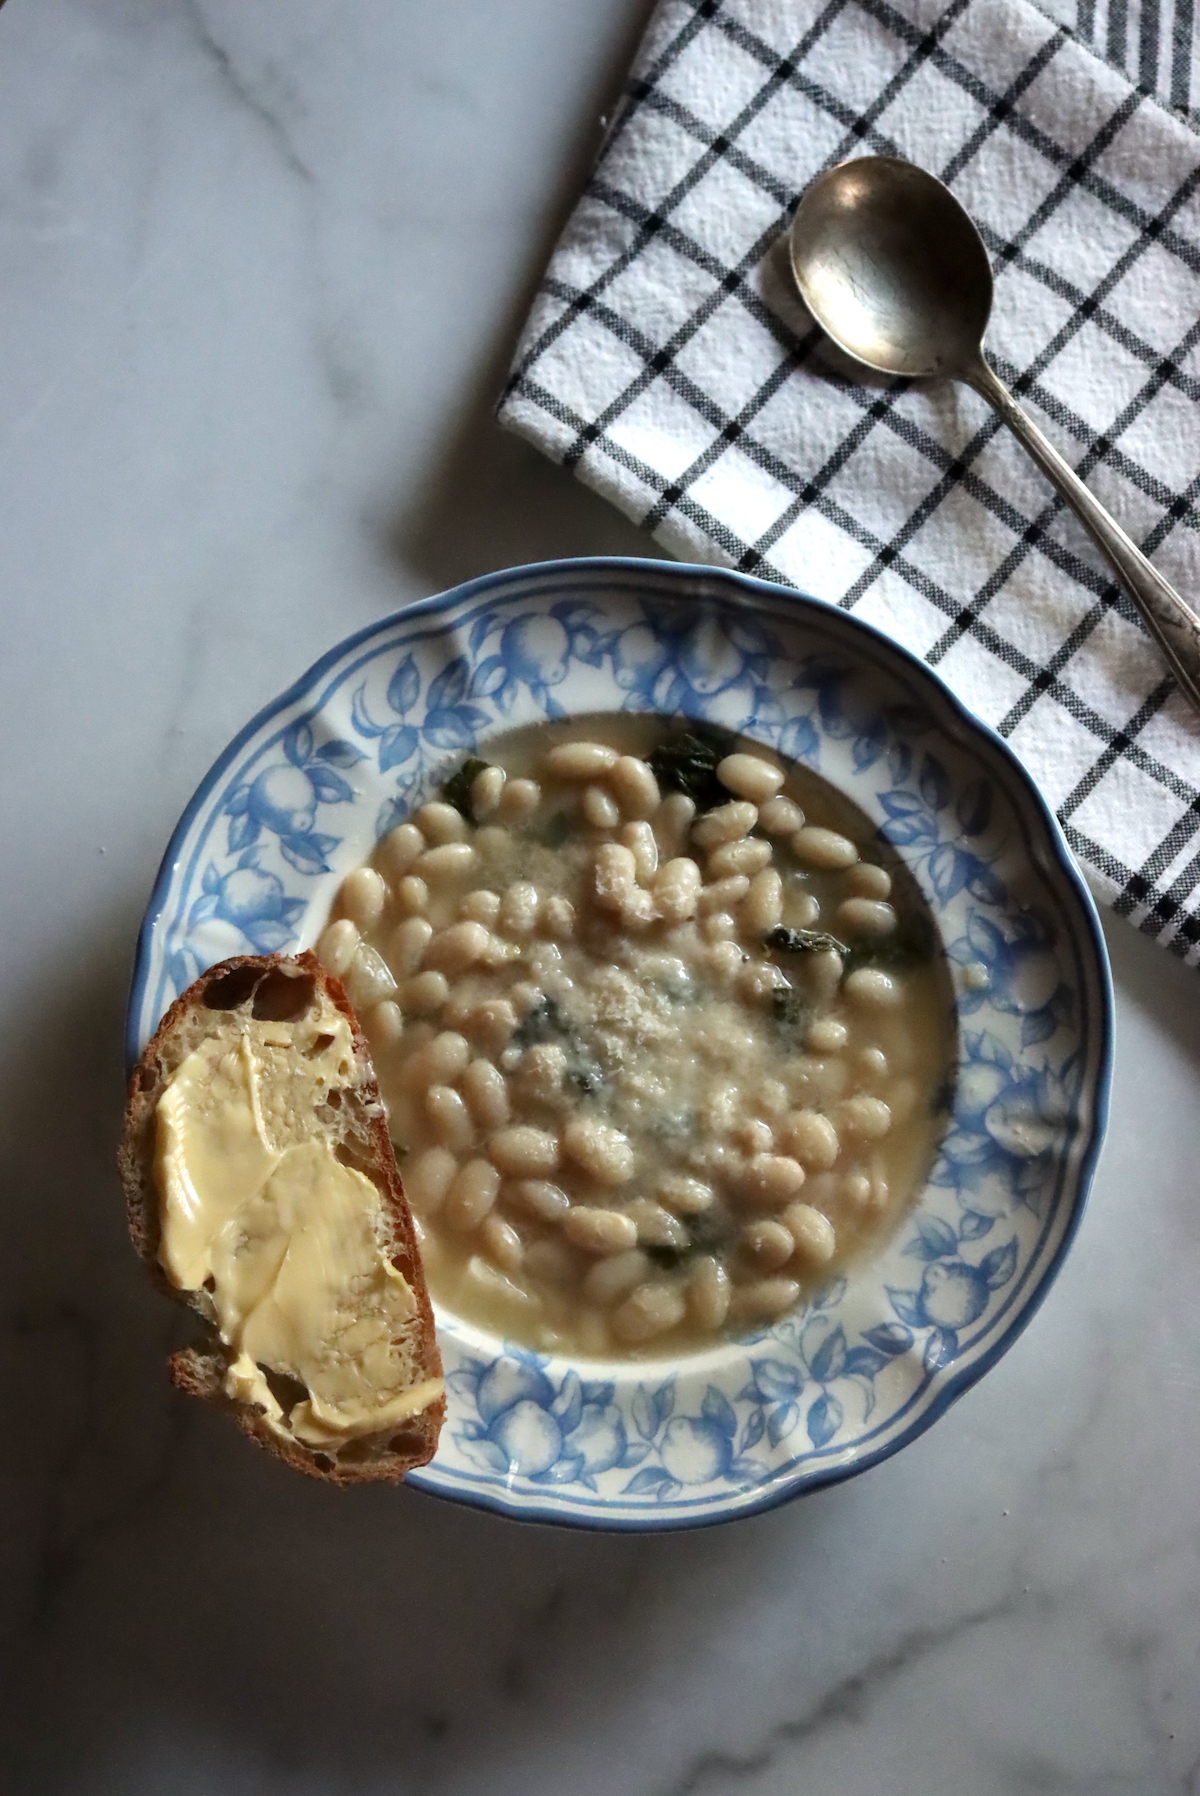
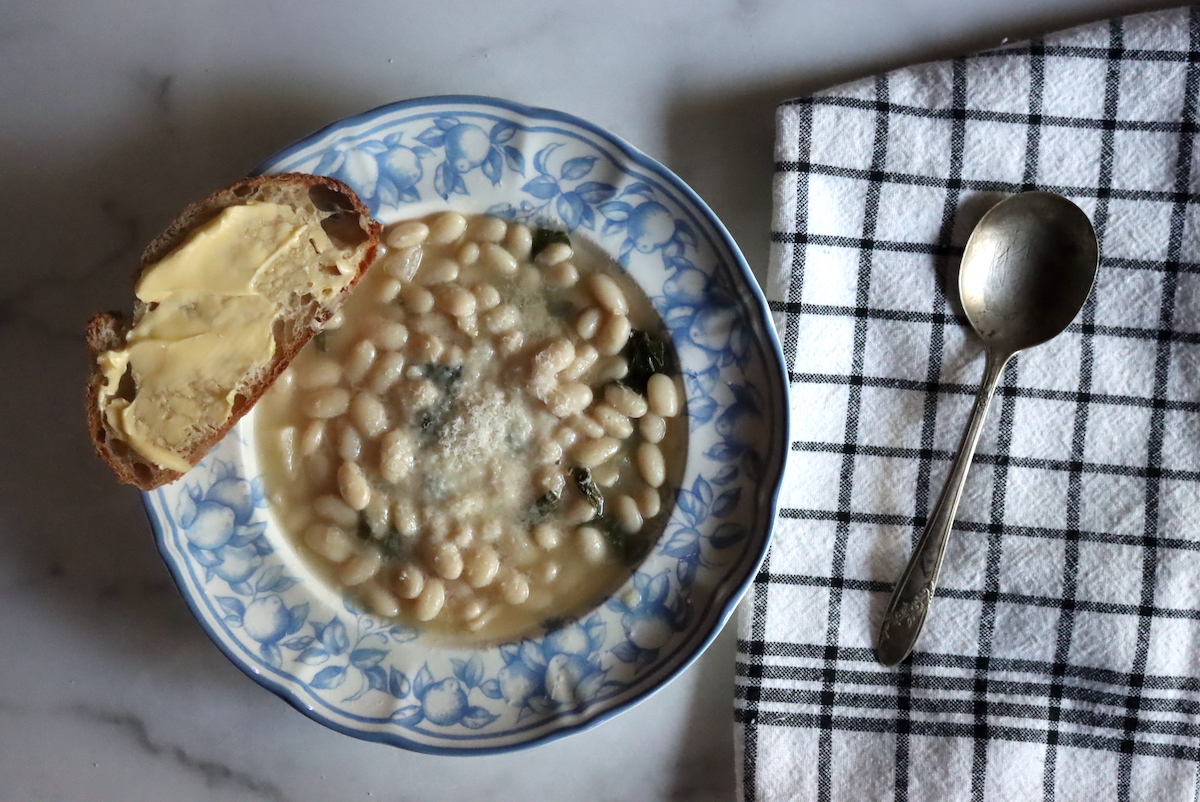
Serving White Bean and Kale Soup
This soup is truly heat and eat, meaning it’s perfect for those busy nights when you don’t have time to cook. Simply open a jar, heat up the soup, and enjoy!
However, if you’re looking to add a little something extra, consider pairing it with a crusty piece of bread or a side salad. I personally love topping it with freshly grated parmesan cheese.
We recommend just pouring the soup into a pot and reheating it for about 10 minutes, or until bubbling. Stir in a bit of cream, then top each bowl of soup with a bit of paprika and croutons to serve!
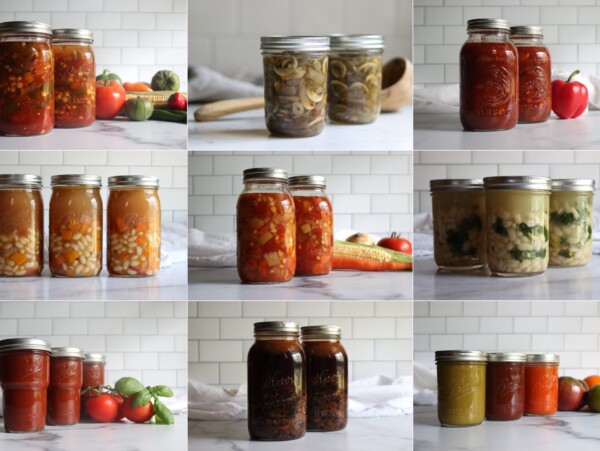
Soup Canning Recipes
If you tried this White Bean and Greens Soup Canning Recipe, or any other recipe on Creative Canning, leave a ⭐ star rating and let me know what you think in the 📝 comments below!
And make sure you stay in touch with me by following on social media!
Canning White Bean and Kale Soup
Equipment
Ingredients
- 1 lb Great Northern Beans, other dry white beans, pre-soaked
- 2 cups Onions, peeled and diced
- 6 cups Vegetable Broth, or chicken broth
- ½ lb Kale, chard, or other greens, de-stemmed and chopped
- 4 cloves Garlic, minced
- 1 tbsp White Wine Vinegar, or cider vinegar, optional, for flavor rather than preservation
- 1 Tbsp. Canning Salt
- ½ tsp Ground Black Pepper
Instructions
- Be sure to soak your beans before starting this recipe. You can overnight soak in cold water (slow method), or "quick soak" them by bringing them to a boil in a pot of water, then turning off the heat and covering them for 1 hour. Proceed with the recipe as written after a slow or quick soak.
- Prepare your canning jars, lids, and the pressure canner itself. You will need seven 1-pint jars.
- Fill the canner with a few inches of water, based on your manufacturer's instructions, and palace the canner on the stovetop over low heat with the jars inside. The water needs to be around 180 degrees Fahrenheit, or 82 degrees Celsius.
- Drain the water from the soaked beans, placing the beans in a large stockpot. Cover them with fresh water.
- Bring the beans to a boil, then remove them from the heat and drain the water. This pre-cook is important to fully rehydrate the beans before canning, don't skip it.
- Put the beans back into the stockpot, then add the broth, garlic, onions, greens, salt and pepper, and vinegar (if using). Bring everything to a boil over high heat, then reduce to a gentle boil and boil for five minutes.
- Remove the stockpot from the heat, then use a slotted spoon to ladle the solids into the canning jars. Evenly distribute the solids, filling each jar no more than halfway with solids. Use a ladle to top each jar with hot broth, filling to 1 inch headspace.
- Use a bubble removal tool to remove the bubbles, then recheck the headspace. If you’re short on broth, use boiling water or hot chicken broth to top the jars off.
- Wipe the rims clean with a damp cloth, then put the bands and lids on the jars and load them into the pressure canner.
- Process jars for 60 minutes for pints and 75 minutes for quarts, adjusting pressure to altitude (see notes).
- When you are done processing, let the canner depressurize on its own. Remove the jars and allow them to cool on the counter for 12 hours.
- Check the seals and store your jars for up to one year.
Notes
Altitude Adjustments for Canning Soup
Canning time remains the same regardless of altitude. However, the processing pressure increases as altitude increases. Use the following table to determine the correct processing pressure if you’re above 1,000 feet in elevation.For dial gauge pressure canners:
- 0 to 2,000 feet in elevation – 11 lbs pressure
- 2,001 to 4,000 feet in elevation – 12 lbs pressure
- 4,001 to 6,000 feet in elevation – 13 lbs pressure
- 6,001 to 8,000 feet in elevation – 14 lbs pressure
For weighted gauge pressure canners:
- 0 to 1,000 feet in elevation – 10 lbs pressure
- Above 1,000 feet – 15 lbs pressure
Nutrition
Nutrition information is automatically calculated, so should only be used as an approximation.
Find the perfect recipe
Searching for something else? Enter keywords to find the perfect recipe!
Soup Canning Recipes
There are so many different soup canning recipes out there, try these for your pantry:
Bean Canning Recipes
Looking for more ways to put healthy vegetarian protein into a jar?
Meal in a Jar Canning Recipes
Need a few more meal-in-a-jar canning recipes?

I’m considering trying this, but I can’t eat vinegar. Is it necessary to acidify the recipe? If so, can I substitute citric acid? Or is it added for flavor?
Also, if I want to add spices/herbs are there any limits on how much I can add?
The vinegar in this recipe is for flavor, not preservation. You can skip it altogether, or add a splash of white wine (if you can eat that) or a tiny bit of lemon juice. It really just helps round out the flavor.
As to spices, you can add any dry spices that you like from your spice shelf, that’s perfectly fine. The national center for food preservation says “reasonable amounts of dry spices” which I interpret as however much you’d normally use in everyday cooking (like a teaspoon/tablespoon of a few different spices, etc). Just don’t literally turn it into a paste with 1/2 cup or more of dry spices.
Enjoy!
How delicious! I used outer cabbage leaves for the greens and added a vegetable bouillon. I had one jar not seal, so I had for lunch. I added a spoonful of homemade garlic scape pesto when I heated it up and oh my, so good! I’ll definitely make this again!
Looks delicious! Any clue if chickpeas could work well in this? Looking to use up a couple of pounds…
Yup, this would work fine with chickpeas. Enjoy!
Would it be ok to add carrots and celery to this recipe?
Yes. This recipe is made using the USDA’s generic soup protocol, and those are fine additions. The main thing is that you can’t fill the jars more than halfway with solids, so if you’re adding more ingredients, just make sure that you’re not overfilling your jars and that they’re only half full when they go into the canner (the beans will expand during canning, and they’ll look more than half full when it’s finished). There’s more details on what you can and can’t add to this recipe here: https://creativecanning.com/choice-soup-canning-recipe/
Could I use pinto beans? Thanks Scott
Yes, all dry beans are considered equivalent in canning recipes. Enjoy!
I was so excited to try this recipe! I followed it exactly except I used chicken broth instead of vegetable broth. I left 1″ of headspace, but all my jars lost liquid, and the contents lost a lot of color. The kale lost its vibrant green and the beans look yellow instead of white – maybe due to my stock? Any insight would be appreciated!
The beans getting a bit yellow can either be your beans or your stock, but it can also be if the canner got extra hot during the canning process and some of the natural sugars in the beans caramelized a bit. Still tasty though. The greens darkening is going to depend on your exact green variety, some keep color better than others in canning.
This looks so good and I’m looking for more ways to preserve the abundance of kale in my garden! Would I be able to use homemade chicken stock instead of vegetable stock in this recipe?
Yup, you can use any type of broth or stock in this recipe, including chicken, beef, etc. Enjoy!