This post may contain affiliate links. Please see our disclosure policy.
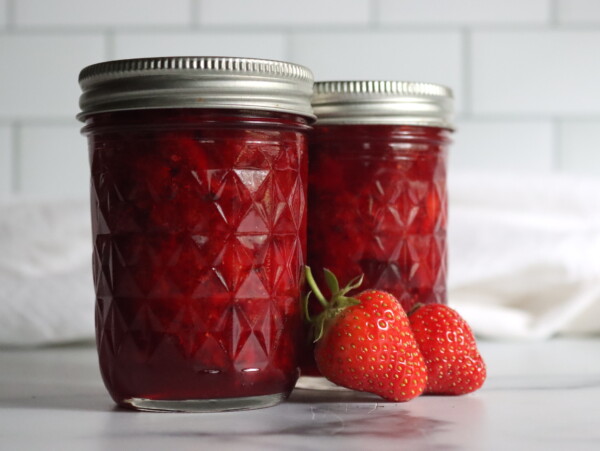
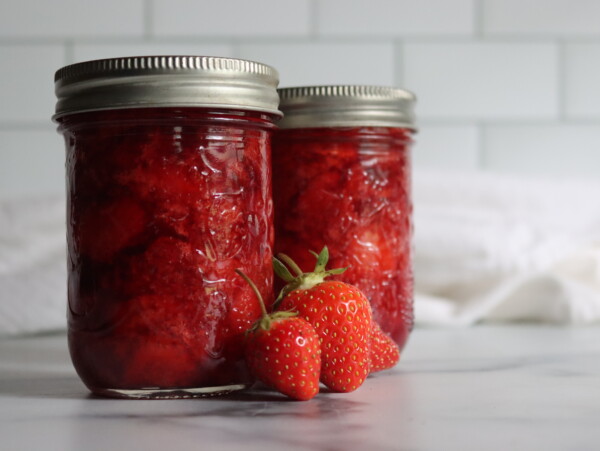
Canning strawberry pie filling ensures you have a supply on hand for tasty strawberry desserts year-round. More than just a pie filling, it’s perfect for layering between birthday cake layers, topping cheesecakes and spoons nicely onto summertime ice cream sundaes!
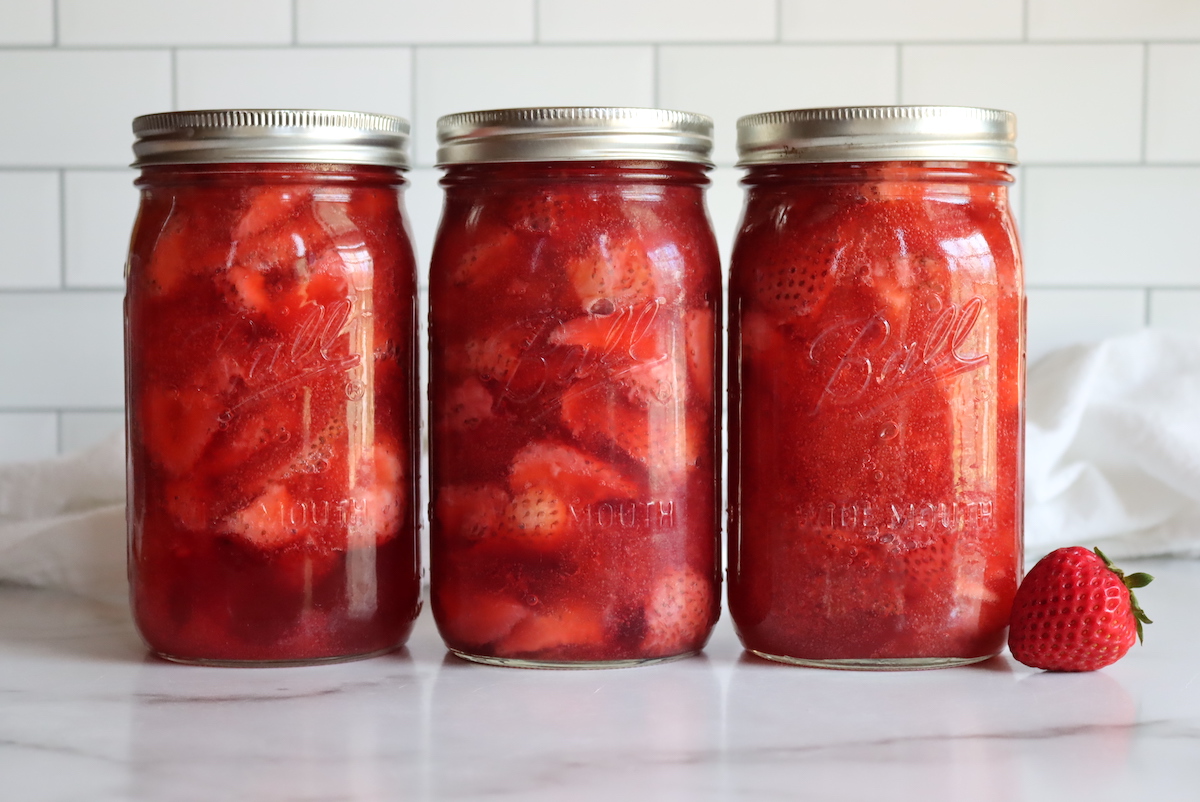
Strawberries are one of the very first fruits of the season, and they’re a welcome treat after the long winter here in Vermont. We keep several hundred plants in our garden because I just can’t stomach the thought of a summer without strawberries, not after all that snow shoveling during the winter.
We grow regular June bearing strawberries, of course, but also everbearing strawberries, alpine strawberries, and we even added pineberries to the mix this year.
Some years they produce enough to satisfy our need for fresh fruit right out in the garden but not much more. Other years, they’re incredibly prolific, and I’m absolutely buried in fruit.
When that happens, we go to work canning whole strawberries, which work wonderfully in muffins year-round. I absolutely love our simple old-fashioned strawberry jam, and my kids are partial to strawberry jelly.
Once our pantry shelves are full of canned goods, we even make strawberry wine.
This year I found myself wishing for a few jars of home-canned strawberry pie filling for wintertime treats, and it’s turned out so well that I’m adding it to my preserving list every year.
Ingredients for Canning Strawberry Pie Filling
Home-canned strawberry pie filling is thickened with a canning-approved thickener called Clear Jel (cook type).
Flour, tapioca starch, and regular cornstarch are not approved for canning as they can interfere with how heat penetrates through the jar. They also only thicken after a single heating, which means they’ll thicken during canning, but they won’t stand up to re-baking in a pie shell.
Clear Jel is different, and it can be heated and cooled repeatedly without any issue. Even if you’re planning on using your home-canned strawberry pie filling as a topping (rather than baking it into a pie), you’ll still want to use this thickener as it’s the only one tested and approved for canning safety.
For each quart jar of strawberry pie filling, you’ll need:
- 3 1/2 cups of cleaned, sliced strawberries (from 1 quart of fresh fruit, about 2 lbs)
- 3/4 cup + 2 Tbsp. Sugar
- 1/4 cup + 1 Tbsp. Clear Jel
- 1 cup water (or juice)
- 3 1/2 tsp. Bottled lemon juice
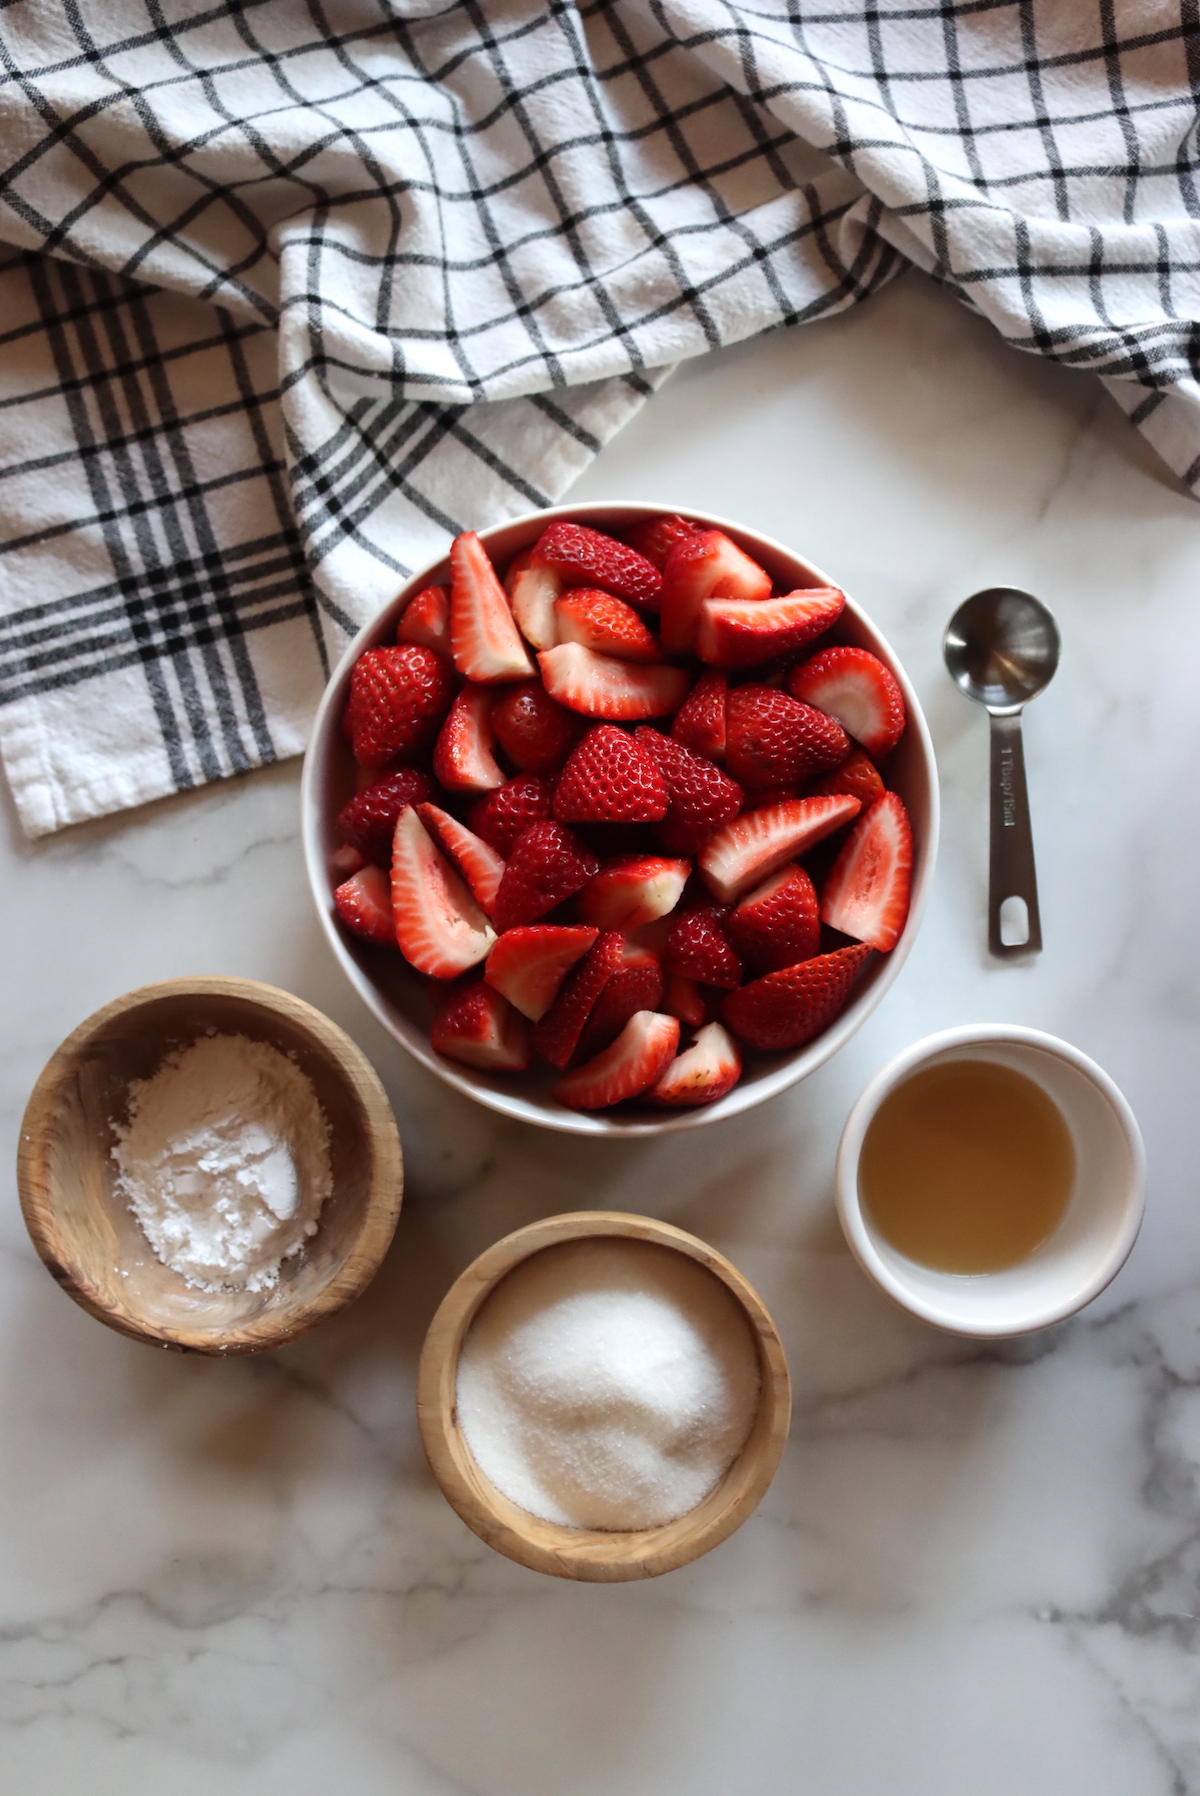
The amounts may seem a bit complicated for a single jar batch, but that’s because the full recipe with round numbers is designed for a 7-quart canner batch.
The amounts for a 7-quart canner batch are as follows:
- 6 quarts of cleaned, sliced strawberries (from about 7 quarts of fresh fruit, or about 14 to 15 lbs)
- 6 cups Sugar
- 2 1/4 cups Clear Jel
- 7 cups Water (or juice)
- 1/2 cup Bottled Lemon Juice
If you’re purchasing clear jel, it usually comes in containers measured by the pound rather than volume. One pound of clear jel equals about 3 cups, so plan accordingly.
Recipe Note: You may see different lemon juice amounts listed for berry pie fillings in older or copied canning handouts. A long-standing typo in the University of Washington’s publication listed 3 tablespoons per quart and ½ cup for 7 quarts, which isn’t accurate. The correct tested ratio (confirmed by the NCHFP) is 3½ teaspoons of bottled lemon juice per quart of filling, which works out to be ½ cup for a 7 quart batch. Those corrected amounts are used here, giving you the same amount of lemon juice per quart whether you’re doing a 1 quart or 7 quart batch.
Altering the Canning Recipe for Strawberry Pie Filling
You are able to change this recipe slightly without impacting canning safety. According to the Washington State Extension service:
“Adjust the sugar and spices in the recipe to suit your personal preferences. However, the amount of lemon juice should never be altered because it ensures the safety and storage stability of the fillings.“
You can also reduce the amount of clear jel used in the recipe if you try the recipe out and find that you’d like a looser set. I actually think it works wonderfully if you cut the total amount of clear gel down to 3 to 4 Tbsp. per jar. Yes, this is an approved modification, making the mixture less dense.
While the lemon juice cannot be decreased, you can add more if you want a tarter pie filling.
The main things you cannot do are decrease the ratio of lemon juice to fruit, or increase the clear jel beyond what’s stated in the recipe.
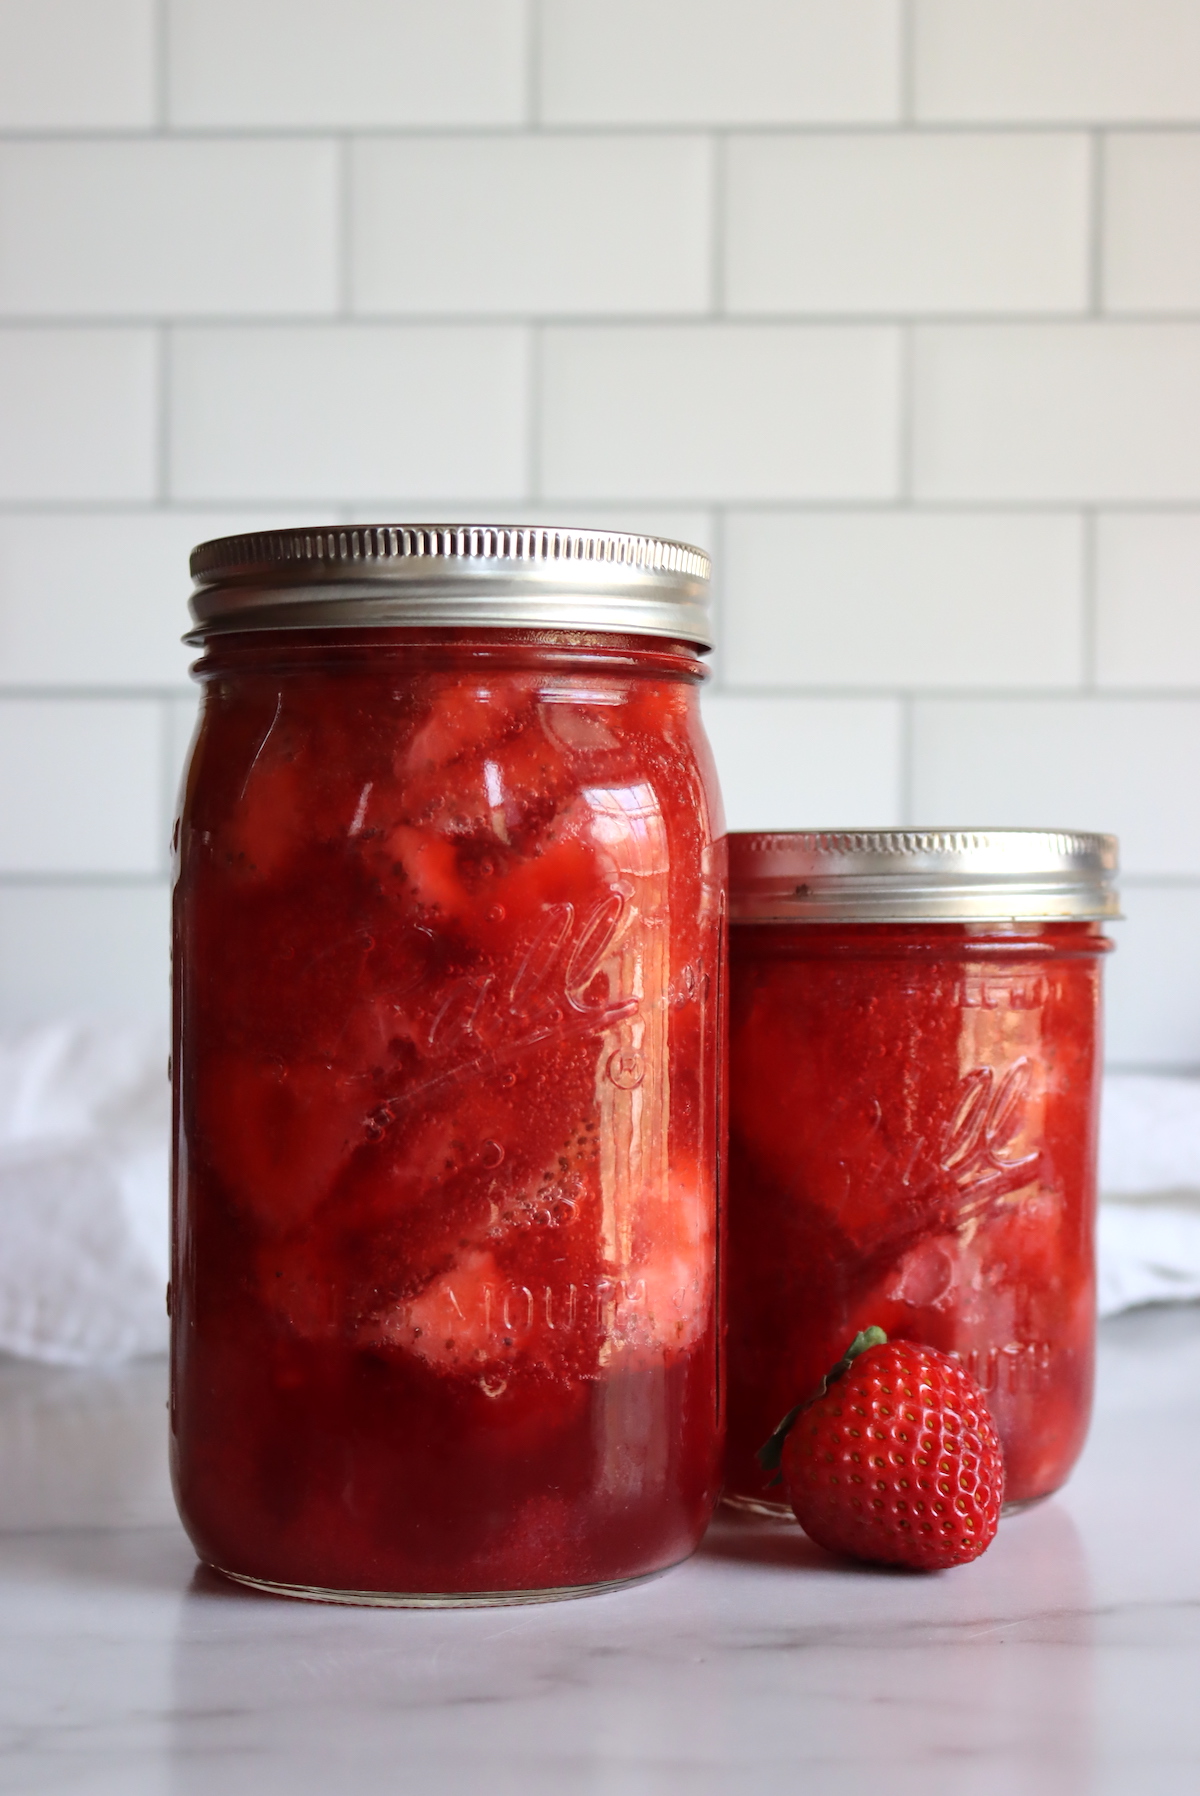
How to Can Strawberry Pie Filling
Working with clear jel is a bit different than canning plain fruit or jam, and the order of operations is really important.
It’s incredibly important that the clear jel is dissolved in cold water, as it’ll clump quickly in hot water, and you’ll have something that looks like tapioca pudding with lots of little white clumps of powder. Trust me on this one; it’s really not usable when that happens.
It’s also important that the fruit are pre-blanched so that they’re partially cooked and hot when they go into the clear jel.
Be sure to follow the instructions carefully for the best results.
Before you begin, prepare a water bath canner, jars, and lids. If you’re not familiar with water bath canning, I’d suggest reading my beginner’s guide to water bath canning before getting started.
Start by washing and draining the strawberries. If using frozen fruit, thaw the frozen strawberries in a colander over a bowl and reserve the juice.
Hull the strawberries and slice them. The size of the slices is up to you, I tend to halve the smaller strawberries and quarter the larger ones. Leave them a bit on the large side, as they shrink during canning and very small pieces will fall apart during cooking.
Bring a few quarts of water to a boil on the stove and blanch the strawberries for 30 seconds to 1 minute, until they’re heated through. Work in batches, and be gentle with the fruit so it doesn’t fall apart. Remove them with a slotted spoon and keep them warm while you make the clear gel mixture.
Combine sugar and clear jel in a large pot, big enough to hold all the fruit comfortably. Add cold water or cold juice to the pot and whisk to dissolve the clear jel completely. This is important! Do not turn on the heat until the clear jel is fully dissolved into the water.
Turn on the heat to medium-high and whisk continuously until the mixture begins to bubble and thicken. As soon as it bubbles, add lemon juice and cook for 1 additional minute.
Turn off the heat and fold in the drained berries.
Immediately fill the canning jars with the mixture, taking extra care to de-bubble the jars as the mixture will be thick. Leave 1-inch headspace.
Cap the jars with 2 part canning lids and twist on rings to finger tight. Process in a water bath canner for 30 minutes, adjusting for altitude. Canning times are the same for pints and quarts.
Altitude adjustments are as follows:
- 0 to 1,000 Feet in Elevation: 30 minutes
- 1,001 to 3,000 Feet in Elevation: 35 minutes
- 3,001 to 6,000 Feet in Elevation: 40 minutes
- Above 6,000 Feet in Elevation: 45 minutes
Juice or Water for Canning Liquid?
The main choice you have with this recipe is whether you’re going to use juice or water for the canning liquid to dissolve the clear jel. I think it tastes MUCH better if you use strawberry juice instead of water, and the color comes out better that way too.
If you do that, you’ll need to extract the strawberry juice ahead of time. You need about 1 pound of strawberries to make a cup of juice; just follow my instructions for extracting strawberry juice in my strawberry jelly recipe. I’d suggest bringing the chopped fruit to a simmer on the stove with a bit of water, then mashing with a potato masher before draining through cheesecloth or a jelly bag.
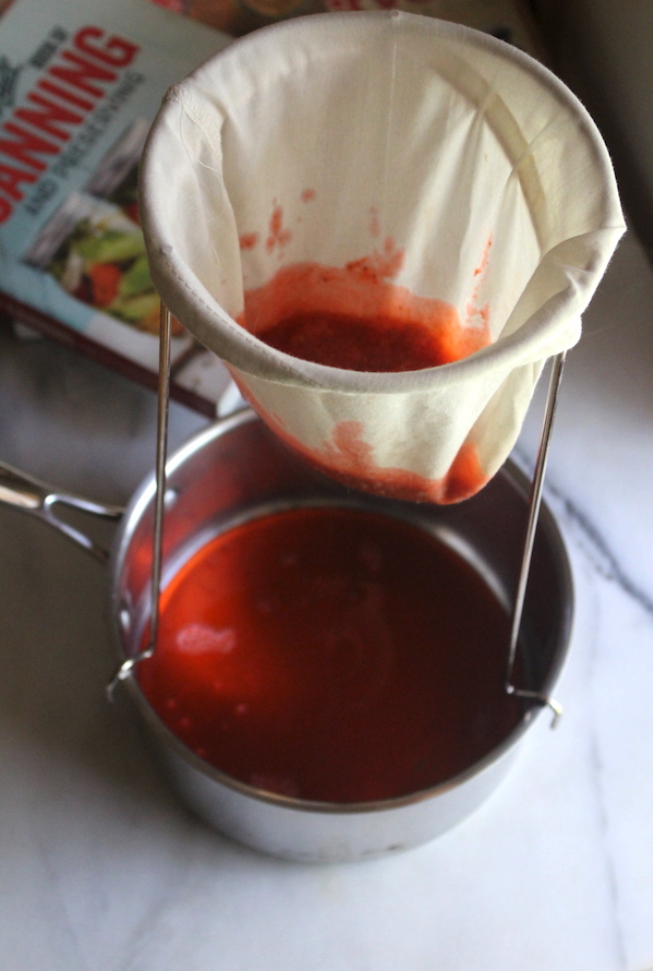
The problem with this approach is the juice is hot, and it needs to be cold to mix and dissolve the clear jel. You can extract it a day ahead and chill it in the refrigerator, or just extract slightly less juice than you need and add ice to bring the volume up to the full amount of the recipe.
If you’re using frozen strawberries, you can thaw them in a colander and collect the juice that way. Then use the thawed berries in the pie filling and the juice to activate the clear jel.
You can also juice the strawberries in a countertop juicer, which will extract their juice without heating them.
If this is all too much effort, go ahead and just use water. You might want to add a drop or two of red food coloring to it so that the “gel” around the strawberries has a bright red color, but that’s optional.
You can also use another type of fruit juice, like apple, cherry, or cranberry. Be aware that they’ll really add their own flavor to the mix, and even though apple juice seems mild, the canned strawberry pie filling will taste a lot like apples.
For best results, I’d suggest using strawberry juice for at least 1/4 to 1/2 of the liquid, as it really does yield the best flavor, even if it does mean sacrificing some volume of your strawberries to the juicer.
Troubleshooting Strawberry Pie Filling
Even though strawberry pie filling is a fairly straightforward canning recipe, there are a few common pitfalls that can trip up even experienced canners. Here’s how to avoid the most frequent issues:
If your pie filling comes out runny, it’s almost always a thickener issue. The only thickener approved for canning is Cook-Type Clear Jel—not instant Clear Jel, not cornstarch, and not tapioca. Cornstarch, in particular, can’t handle the heat of canning and won’t re-set when baked.
Make sure you’re using a reliable source; we use Hoosier Hill Farm’s cook-type Clear Jel with great results. If you are using the correct thickener and it still didn’t set, it’s likely a bad batch (which does happen occasionally).
When working properly, Clear Jel should be starting to set as you’re filling the jars, and you should have to work quickly to get the jars filled before it sets fully (making de-bubbling a hassle). If yours didn’t set, there’s something wrong with your clear jel.
This is one of the easiest mistakes to make. Clear Jel must be whisked into cold liquid before heating. If it touches hot juice or water, it starts to gelatinize on contact, forming gluey clumps that are nearly impossible to break up.
If this has happened to you, you’re not alone—check out the photos in my rhubarb pie filling post where I made this mistake myself using hot rhubarb juice. Always combine Clear Jel and cold liquid first, whisk thoroughly, then heat gradually.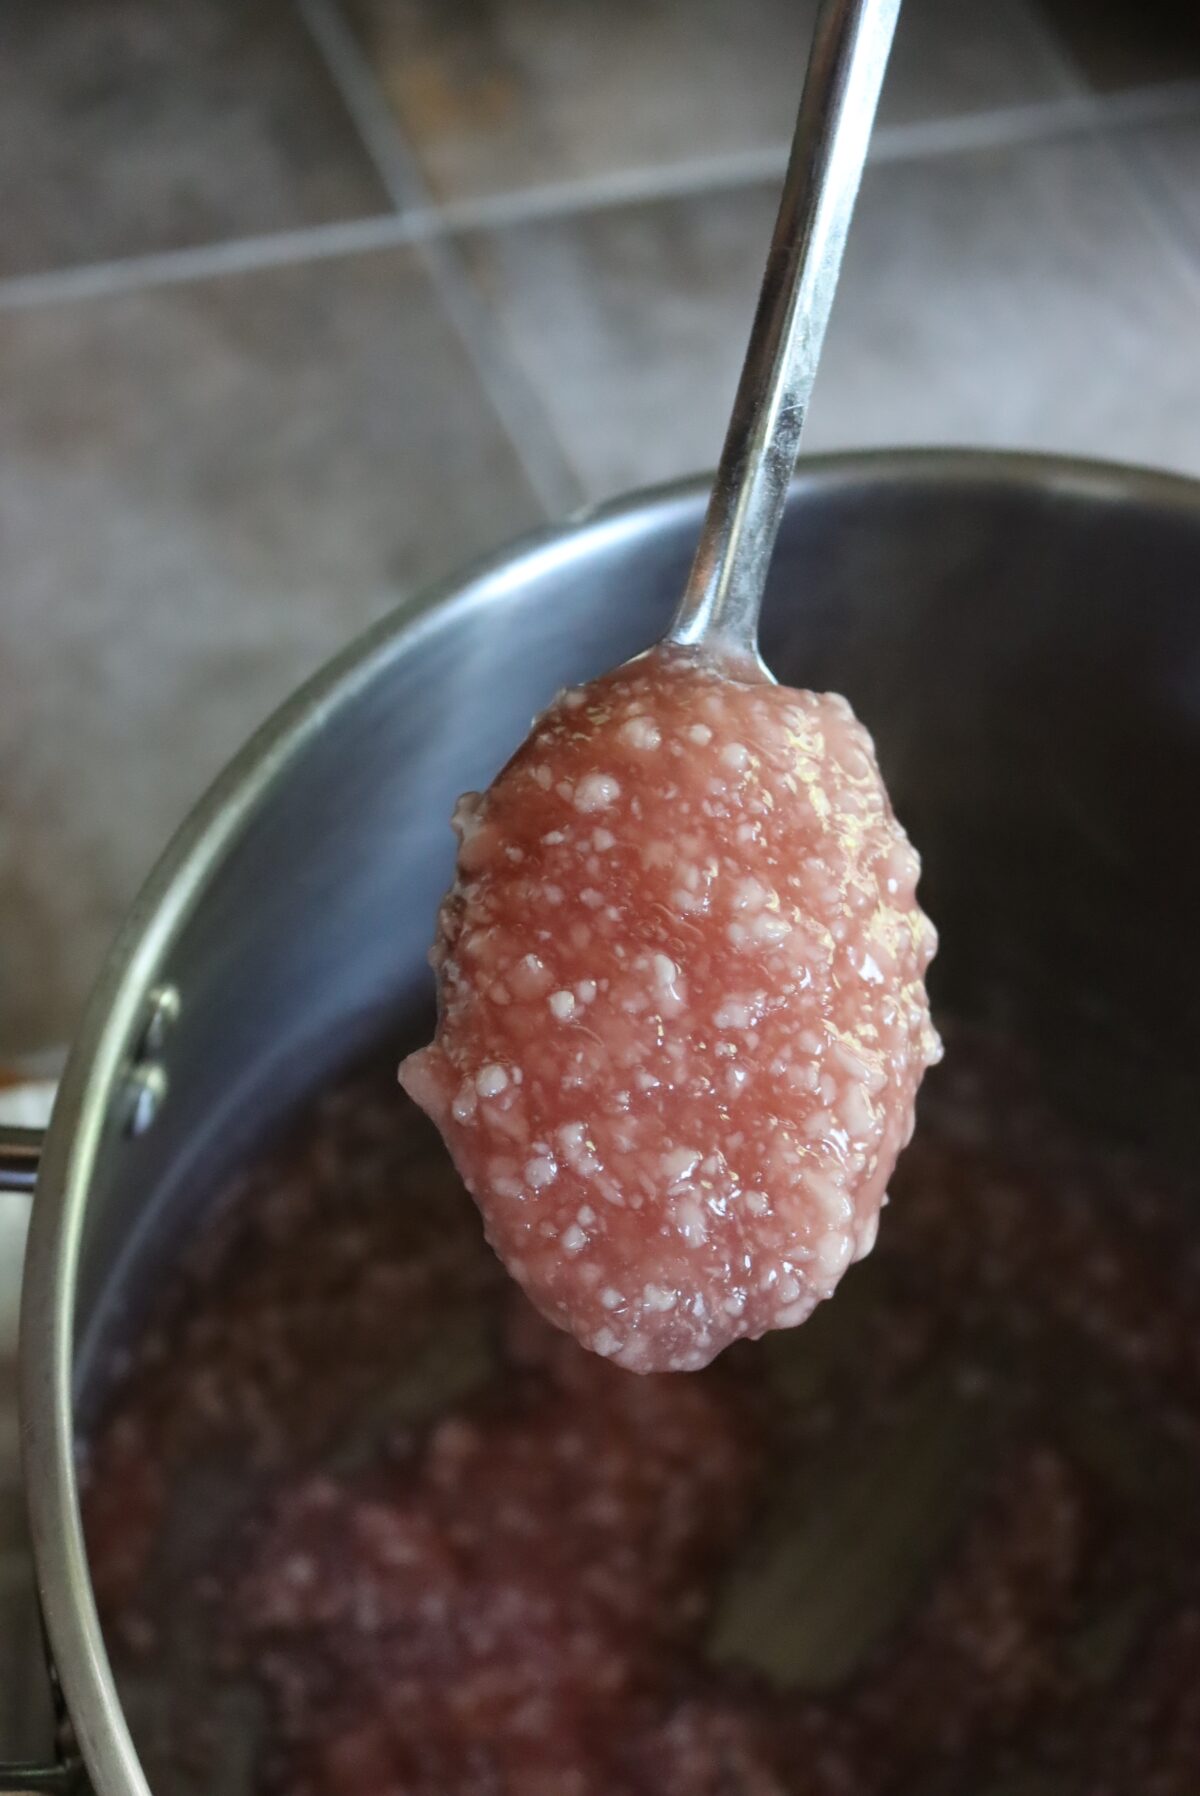
The yield for pie filling can be unpredictable because it depends on how the fruit is measured. Large whole strawberries take up more space (and have more air gaps) than small ones, and that throws off the volume. The amount lost to trimming and hulling also varies.
If you’re a bit short, it’s fine to pack a jar a little less full and process it anyway—it’ll still be safe and usable, just with a little less filling.
If you notice syrup leaking out of your jars during canning, that’s siphoning. It’s often caused by not allowing the jars to rest in the canner after processing. Always let jars sit for 5 minutes in the hot water bath with the heat off and lid removed before lifting them out. This helps equalize pressure and prevent loss of liquid.
Believe it or not, so long as the jars seal, it’s actually not a safety issue. Just remove the rings, check the seals really well and then wash the jars to remove any filling that’s on the outside before storing. (That’s my batch of apple pie filling siphoning below. It’s not ideal, but it’s still fine to store once cleaned.)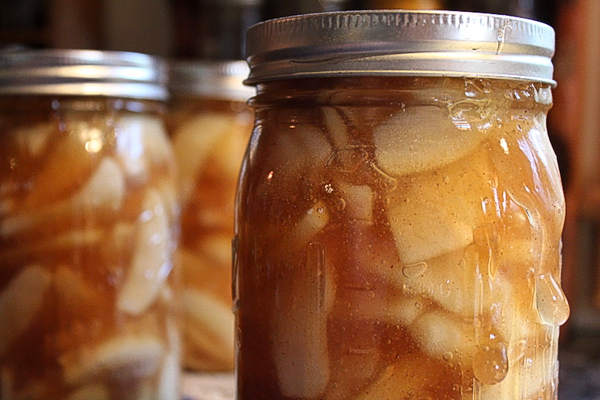
If your berries are all floating and the thickener settled to the bottom, it’s usually because the filling wasn’t quite thick enough, or the mixture wasn’t stirred well just before filling the jars.
Or, the fruit may not have been blanched properly before beginning. The blanching at the beginning is to remove air from the fruit so that it doesn’t float and incorporates evenly. Underblanching can yield to floating fruit too.
Be sure to stir gently but thoroughly right before filling the jars so the fruit is evenly distributed. And remember, fruit float is cosmetic—it’ll still taste great.
Because Clear Jel starts setting quickly, it can be difficult to de-bubble the jars, especially toward the end of the batch. Try to work fast, and use a bubble remover or chopstick to gently press along the inside of the jar.
If the filling is already firming up, you might not be able to remove all bubbles, just do your best and perfection isn’t really required here. Your jar may not win a state fair ribbon with bubbles in the filling, but it’ll still be perfectly safe so long as the jars are properly canned and sealed.
Using Strawberry Pie Filling
Once you have a home-canned strawberry pie filling, it’s shelf-stable and doesn’t need to be re-cooked before eating. Of course, you can bake it into a pie, but you can also use it as a topping for other desserts.
It works wonderfully as the strawberry topping on top of a banana split, and it’s also perfect on top of a cheesecake. Use it as a middle layer in a birthday cake, or go really nuts and eat it with a spoon right out of the jar.
You can also use it in a no-bake strawberry tart, as is traditional with gelled strawberry toppings like this.
I find that it works really well when I add in a drained quart of home-canned rhubarb. The strawberry pie filling has plenty of thickeners to thicken the rhubarb too, so I just use plain canned stewed rhubarb, and I have an instant strawberry rhubarb pie.
Canning Strawberry Pie Filling
Equipment
- Wide Mouth Quart Mason Jars
Ingredients
For A Single Quart:
- 3 1/2 cups strawberries, sliced, from 1 quart of fresh fruit, about 2 lbs
- 3/4 cup + 2 Tbsp. Sugar
- 1/4 cup + 1 Tbsp. Clear Jel
- 1 cup water, or juice
- 3 1/2 tsp. Bottled lemon juice
For a 7 Quart Canner Batch:
- 6 Quart sliced strawberries, from about 7 quarts of fresh fruit, or about 14 to 15 lbs
- 6 cups Sugar
- 2 1/4 cups Clear Jel
- 7 cups Water, or juice
- 1/2 cup Bottled Lemon Juice
Instructions
- Before you begin, prepare a water bath canner, jars, and lids.
- Start by washing and draining the strawberries. Thaw them in a colander over a bowl and reserve the juice if using frozen fruit.
- Hull the strawberries and slice them. The size of the slices is up to you, I tend to halve the smaller strawberries and quarter the larger ones. Leave them a bit on the large side, as they shrink during canning, and very small pieces will fall apart during cooking.
- Bring a few quarts of water to a boil on the stove and blanch the strawberries for 30 seconds to 1 minute until they’re heated through. Work in batches, and be gentle with the fruit so it doesn’t fall apart. Remove them with a slotted spoon and keep them warm while making the clear gel mixture.
- Combine sugar and clear jel in a large pot, big enough to hold all the fruit comfortably. Add cold water or cold juice to the pot and whisk to dissolve the clear jel completely. This is important! Do not turn on the heat until the clear jel is fully dissolved into the water.
- Turn on the heat to medium-high and whisk continuously until the mixture begins to bubble and thicken. As soon as it bubbles, add lemon juice and cook for 1 additional minute.
- Turn off the heat and fold in the drained berries.
- Immediately fill the canning jars with the mixture, taking extra care to de bubble the jars as the mixture will be thick. Leave 1-inch headspace.
- Cap the jars with 2 part canning lids and twist on rings to finger tight. Process in a water bath canner for 30 minutes, adjusting for altitude. Canning times are the same for pints and quarts.
- Once the processing time is complete, turn off the heat and allow the jars to sit undisturbed in the canner for about 10 minutes. This reduces the risk of siphoning as you remove the jars from the canner. (If you skip this step, there’s a good chance the thick mixture will siphon out of the lid as the jars cool. That’s not a safety issue, and the jars are still fine to eat if they do still steal, but it makes a big mess, and you lose some of the contents of the jar.)
- Remove the jars from the canner with a jar lifter and allow them to cool on the counter for 12 to 24 hours. Check seals, and store any unsealed jars in the refrigerator for immediate use.
- Properly canned and sealed jars of strawberry pie filling will maintain peak quality on the pantry shelf for about 12 months. Refrigerate after opening.
Notes
- 0 to 1,000 Feet in Elevation: 30 minutes
- 1,001 to 3,000 Feet in Elevation: 35 minutes
- 3,001 to 6,000 Feet in Elevation: 40 minutes
- Above 6,000 Feet in Elevation: 45 minutes
Lemon Juice Amounts
You may see different lemon juice amounts listed for berry pie fillings in older or copied canning handouts. A long-standing typo in the University of Washington’s publication listed 3 tablespoons per quart and ½ cup for 7 quarts, which isn’t accurate. The correct tested ratio (confirmed by the NCHFP) is 3½ teaspoons of bottled lemon juice per quart of filling, which works out to be ½ cup for a 7 quart batch. Those corrected amounts are used here, giving you the same amount of lemon juice per quart whether you’re doing a 1 quart or 7 quart batch.Nutrition
Nutrition information is automatically calculated, so should only be used as an approximation.
Home Canned Pie Fillings
Looking for more recipes for canning pie filling at home?
- Canning Apple Pie Filling
- Canning Blackberry Pie Filling
- Canning Peach Pie Filling
- Canning Cherry Pie Filling
Fruit Canning Recipes
Strawberries aren’t the only fruit to preserve this season! I have plenty of fruit canning recipes to keep you busy…
Hi, recipe calles for 14 to 15 lbs sliced strawberries should I weigh before or after blanching or does tht really matter cant wait to get fresh strawberries this next season so I can can many jars ,strawberries are my fave and your recipes are the too. Thank you for all your hard work…
In this recipe, they’re weighed as purchased (or harvested). Enjoy!
We have previously substituted In the Raw brand All-Purpose stevia sweetener for sugar when canning as it is heat stable & suitable for use when canning but it’s now become very difficult to find. Would similar stevia blended sweeteners (without Monkfruit) be suitable/safe to use in these recipes?
I don’t use sugar substitutes in canning, so I’m not an expert here. I did do a bit of research for you, and found that some sources are saying that monkfruit is fine for canning, but you may need to play around with the amounts. There is a good primer on canning with alternative sweeteners here: https://www.healthycanning.com/smarter-sweet-choices-for-your-home-canning/
Best of luck!
Yesterday my batch was only 5 jars so when I made it today I measured the strawberries after blanching in quart jars. I used 7 qts but finished with 8 1/4 jars. My question is is the batch safe because the ratio of lemon juice would then be off? Do I have to add more lemon juice and recan the batch?
Tastes sates good. I only got 5 jars. I thought I used almost 8 qts of berries. Thick as pudding, I’m thinking because it only made 5 jars it will be way too thick.
Hi! This sounds delicious. Can corn starch be substituted for clear gel?
No, not if you’re canning. Clear Jel is a type of corn starch, but it’s one specifically formulated for canning. It transfers heat within the jar better than regular corn starch, and it’s the only thickener specifically tested for canning. Regular cornstarch ends up to thick for safe canning.
Absolutely perfect. As a hint, I purchased a net laundry bag and use it for blanching all fruits, berries and vegetables as called for. I just place the produce in the bag, lower it into the boiling water, move it around a bit to evenly blanch and then, DONE! Lift them all out at once! No chasing tomatoes, berries, etc. and possibly over blanching some. I use a net bag also for onions, cucumbers, etc. when they need to be salted and iced before pickling. So much easier than trying to fish them out!
Wow, that’s such a neat idea. I honestly don’t know what laundry bags are made out of, probably cotton, but keeping them altogether like that would REALLY help the process. We have a bunch of brewing bags that we use for making beer (they’re designed to be boiled with malted grains in the bags). I bet that’d work wonderfully for this same thing. Thank you so much, I never thought of that!
Brewing bags are a tighter weave, but as long as the water can flow freely between the produce, I’ll bet they would work! I’ve been canning for 25 years and you’ve really gifted me with so many recipes and helpful hints. Thanks!
You say to use juice for strawberry pie filling, what kind of juice?
You can use grape, apple, pineapple, cranberry or strawberry. I actually often use strawberry, and I’ll make a batch of strawberry juice with some extra strawberries (or strawberry trimmings like the tops). Here’s directions for canning strawberry juice, which has how to make it, you don’t need to can it separately, you can just use it in the pie filling: https://creativecanning.com/canning-strawberry-juice/
Thank you for your perfect recipe I made pie filling it was amazing, I put up quarts and pints, so I can use for fried pies, put on pancakes waffles ect. I just wish that the cook jel could be found in our area in the store so my new mission is to convince one grocery store to stock it.
I know! It’s so unfortunate that you really can’t get it anywhere else but online. So glad you enjoyed the recipe!
Once canned is it just dump in a pie crust and chill? Or do you have to heat up the filling and then chill it? Maybe a dumb question but any other fruit pie fillings I’ve canned you have to bake the pie after and normally when I make strawberry pie you don’t…
You can go either way. My dad actually likes baked strawberry pie and serves it hot. I like the cold version. This pie filling doesn’t have to be re-cooked after canning, but it can be, if it’s your preference. So either way.
This was an easy recipe to follow and very tasty! Kid approved! I will definitely be making some more pie filling!
Excellent! I’m so glad you loved it =)
Since blanching the berries is, I assume, to release air and water, before canning, is it necessary to blanch them if you are starting with frozen berries, as freezing tends to do the same thing?
Yes, that’s more or less correct, but it’s also to make sure they’re cooked through before they go into the canning jars. If they’re frozen, thoroughly defrost them to room temperature, and then you can skip the blanching but make sure they get thoroughly heated in the mix before you pack the jars.
How long is the shelf life if you make a huge batch?
In terms of food safety, the shelf life is indefinite so long as the jars are sealed. They don’t spoil, but the thickener starts to break down in the jars after about 12-18 months. Your pie will still be tasty, but won’t set as nicely. I did test this, and just made a pie with a jar I canned 3 years ago. Fine flavor, but the color isn’t as vibrant and the set is very loose. For best quality, you really should plan to use them in under a year.
I was wondering if this would work for fried pies?
Yup, this works wonderfully for fried pies.
Do you have to use the Clear Gel or is it possible to can without it?
You can put up strawberries without the clear jel, and in that case they’re just canned strawberries (rather than a prepared pie filling). The process is a bit different, and you can find instructions here: https://practicalselfreliance.com/canning-strawberries/
First, thank you thank you thank you. As a working mom who is trying to learn and prepare for a move in the next few years to homesteading (not all in, but more than hobby farm) you are teaching me so much.
Now my question: is there anything useful to do with the water we blanch the strawberries in once we are finished? The berries were washed before cutting them, so is there anything to do to prevent excess waste. Obviously not for the garden with ants…could we use it to make ice cubes for “slushies” or is it a drinkable juice? Can-able juice? Serious novice here but hate waste.
Yup! You an use that strawberry flavored water for just about anything, and I’d say it’d make a really great base for lemonade. Once the strawberries are out, add sugar while it’s still hot so the sugar dissolves, and then chill it and add lemon juice. Or, you could use the strawberry water in place or regular water in this lemonade canning recipe: https://creativecanning.com/canning-lemonade/
For your single batch you have 3 TABLESPOONS lemon juice but your 7qt batch only calls for 1/2 cup. So you mean teaspoons?
Wow, thank you for catching that. I adapted this from a handout from the Washington state extension service, and I just went back and double-checked. They do indeed have 3 TBSP and then 1/2 cup. Checking other reputable sources (National Center for Food Preservation, etc) they show 3 1/2 teaspoons (not TABLESPOONS), and doing a bit of quick math, a half cup is 24 teaspoons, so across 7 jars that’d be 3.4 teaspoons per batch. You are indeed correct, and the Washington State Extension has a misprint.
I’ll change the recipe to be more in line with the national center for food preservation.
(That said, I did in fact make this batch as a small batch, originally planned for just two jars, then ended up making 4 instead…so I measured out a total of 12 tablespoons of lemon juice into 4 quarts. It is darn delicious, and not too tart at all. I think it actually works out wonderfully with the extra lemon, even if it’s not strictly required.)
Can fresh lemon juice be used in place of bottled lemon juice?
In this particular case, the lemon juice is for preservation and you need that specific acidity for canning with clear jel. You need to use bottled lemon juice here.