This post may contain affiliate links. Please see our disclosure policy.
Canning chicken broth is the perfect way to preserve homemade chicken bone broth without taking up valuable freezer space. It’s a quick pressure canning recipe, and it only takes 20 minutes for pints (25 minutes for quarts).
Canning chicken bone broth is a great way to leverage the full potential of your home-cooked chicken meals. As its name suggests, this method of canning uses bones left after cooking to create a flavorful, nutrient-rich broth.
This process allows you to use every bit of the ingredients and ensures that you are consuming all the wonderful vitamins and minerals in them. It also keeps your meals tasty, as each batch of broth brings with it unique flavor profiles and aromas.
With this method of canning, you will have all the benefits of homemade soup broth right from your pantry shelf.
I’m going to take you through the process of making chicken bone broth from scratch and then pressure-canning it at home. The recipe for broth here is just an example, and if you already know how to make chicken broth and have a favorite recipe, that will work too.
Once your broth is prepared, the instructions are always the same. Pressure can for 20 minutes (pints) or 25 minutes (quarts). The pounds of pressure depend on your altitude, and there’s a chart at the end with altitude adjustments.
Ingredients for Chicken Bone Broth
The ingredients for canning chicken bone broth are quite simple. Feel free to use your favorite chicken broth recipe.
I’m going to give you this small batch recipe from The Ball Blue Book of Canning, which uses just one chicken carcass. Feel free to increase the recipe to make a full canner batch if you have enough chicken bones on hand.
To make a canner batch of four pints or two-quart jars, you’ll need the following:
- Picked bones from 1 roast chicken, about 4-5 lbs (2-2.25 kg) before cleaning
- 1 Tbsp (15 ml) salt
- 2 large carrots, chopped
- 2 bay leaves
- 1 large onion, chopped
- 2 quarts (2 L) water
- 1 Tbsp apple cider vinegar (15 ml)
This recipe is just a guideline, and it’s sized for quantities that an average family would have left over after a roast chicken dinner. We make chicken broth in big batches using chicken backs, necks, and feet after we process chickens on our homestead. I whip out the big stock pot and make up a 14-quart batch often enough.
Unlike most pressure canning recipes, you don’t actually have to follow this one to the letter. When you’re making chicken broth, use your favorite recipe and then strain it thoroughly. When canning chicken broth, the process is always the same, regardless of the recipe you used to make it.
You can even substitute a turkey carcass into this recipe, but I also have a separate detailed recipe for canning turkey broth with all the specific quantities for working with a larger bird.
Go ahead and add extra carrots or onions, or skip the veggies altogether. Add whatever herbs you want, and use salt or not.
The only thing that’s important here is that it’s really well strained before canning, because the canning time here is only sufficient for the liquid with no solids included.
Making Chicken Broth
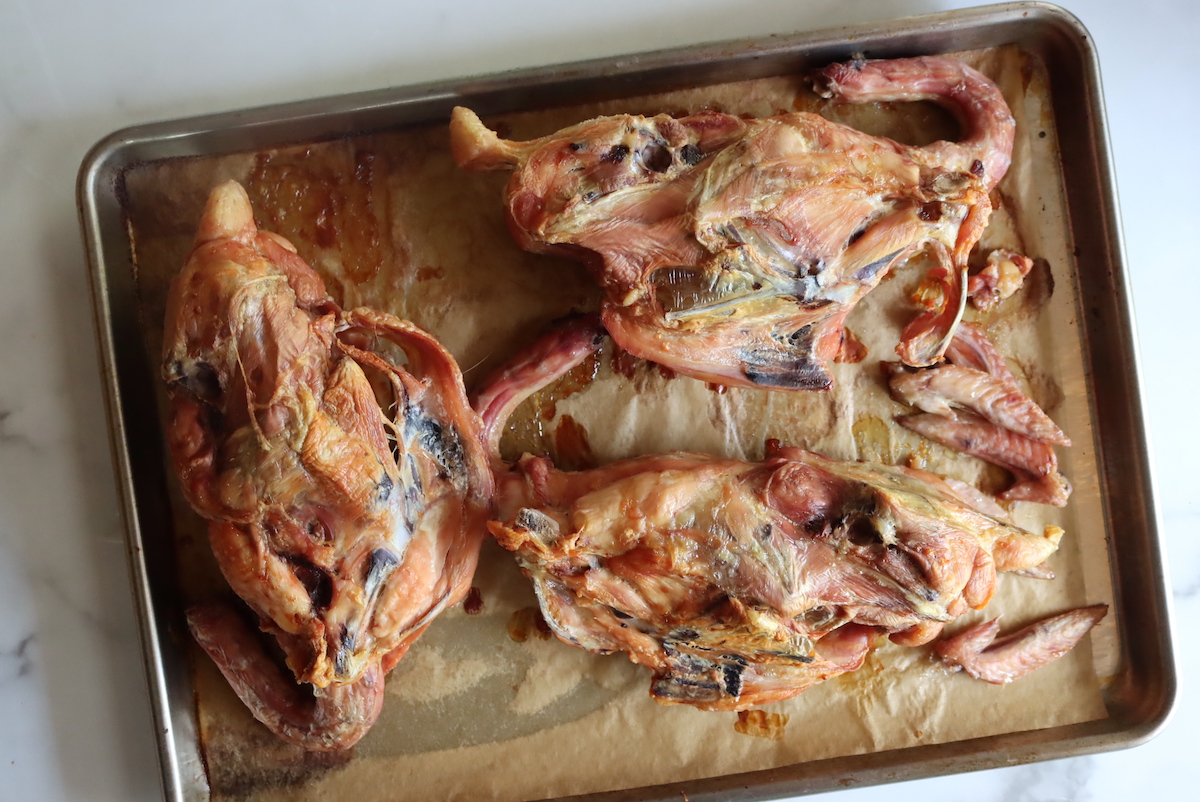
The first step to making a good chicken bone broth is to roast the bones. This does a few things:
- First, it adds depth of flavor to the finished broth. Roasted bones give a better flavored broth.
- Second, roasting helps add color to the broth. A broth is usually a golden color when the bones are roasted.
- Third, and most important, it helps the broth stay clear.
When you thorougly roast bones before they go into the broth water, it helps to set all the proteins in the meat. Anything that’s even thinking about being raw, or leftover juices or blood in the meat still clinging to the bones, can cloud the broth if it’s added to the water.
Even if you’re using the carcass of an already roast chicken, it’s still a good idea to roast the bones again for about 20 to 30 minutes at 350.
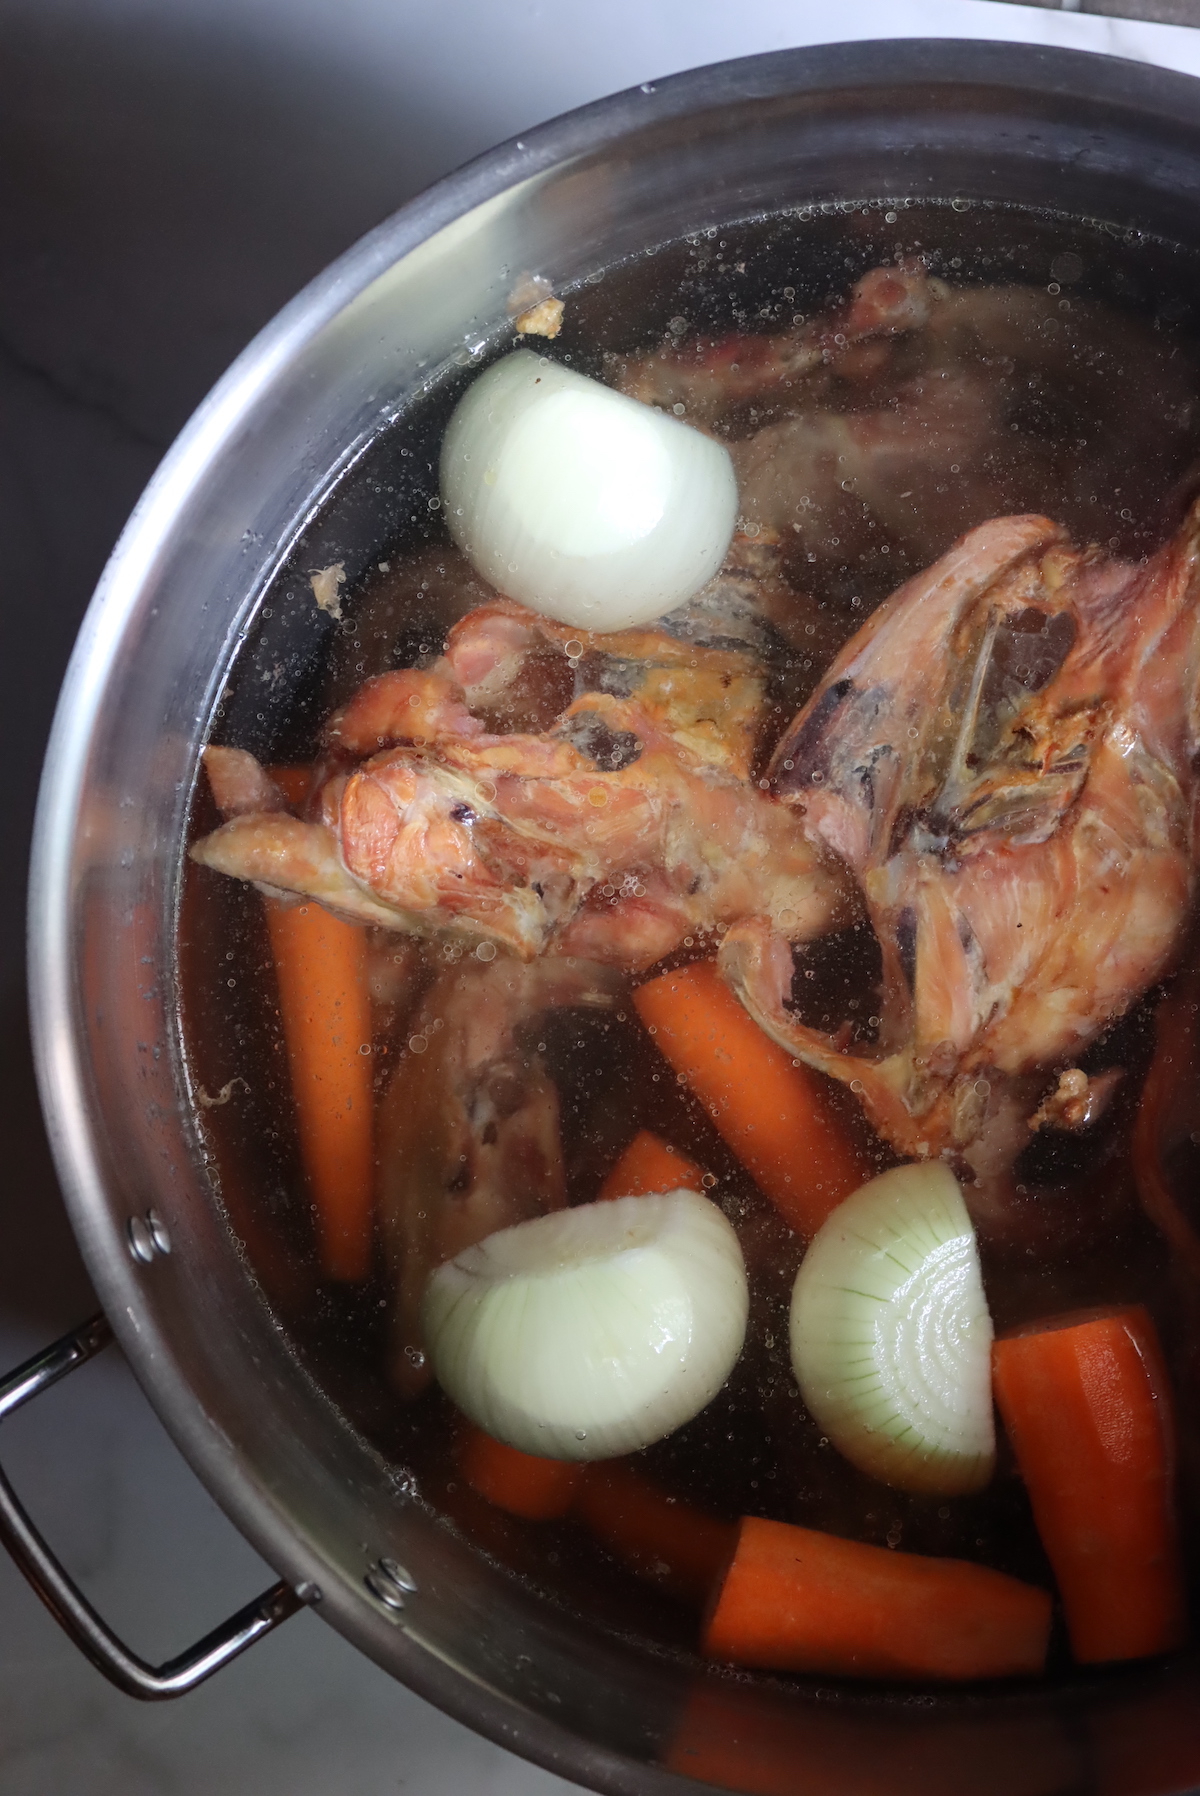
Once the bones are roasted, you just fill your pot with water and add your ingredients.
You can simmer it on the stovetop, but it’s important that you don’t let it come to a hard boil. Once a stock has been hard-boiled, it’ll never be clear.
That’s a cosmetic thing, and you can hard boil it if you don’t care, but the highest quality stock is cooked slowly for many hours to gently render all the nutrition out of the connective tissues attached to the bones.
The ball blue book of canning specifically recommends making bone broth in a dutch oven inside your regular oven, which is a great way to ensure everything slow cooks evenly. It’s not practical for big 14-quart batches as we make, but it works great if you’re just making the best bone broth you possibly can from a single chicken carcass.
These are the instructions from the Ball Blue Book of Canning:
This recipe calls for making bone broth in a Dutch oven, but you can also use a slow cooker for this task. Instead of cooking in the oven for 14 hours total, you’ll cook on low for about 12.
If you choose to cook the broth in the oven, begin by preheating your oven to 225 degrees Fahrenheit, or 107 Celsius. Put all of your ingredients in a large stainless steel crock or an enameled Dutch oven. Bake everything, covered, for seven hours at 225 Fahrenheit.
Reduce the oven temperature to 180 degrees Fahrenheit (90 degrees Celsius) and bake for another seven hours. Add water as necessary to ensure the bones stay covered inside your dutch oven.
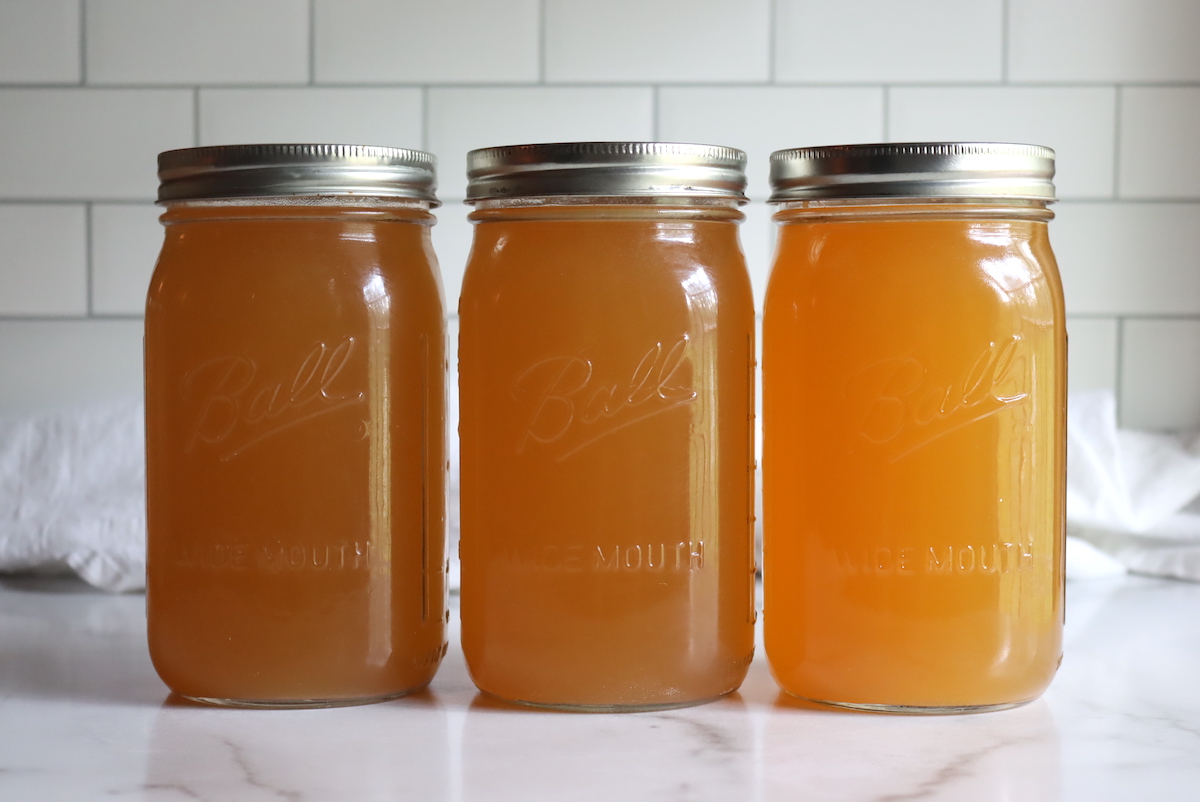
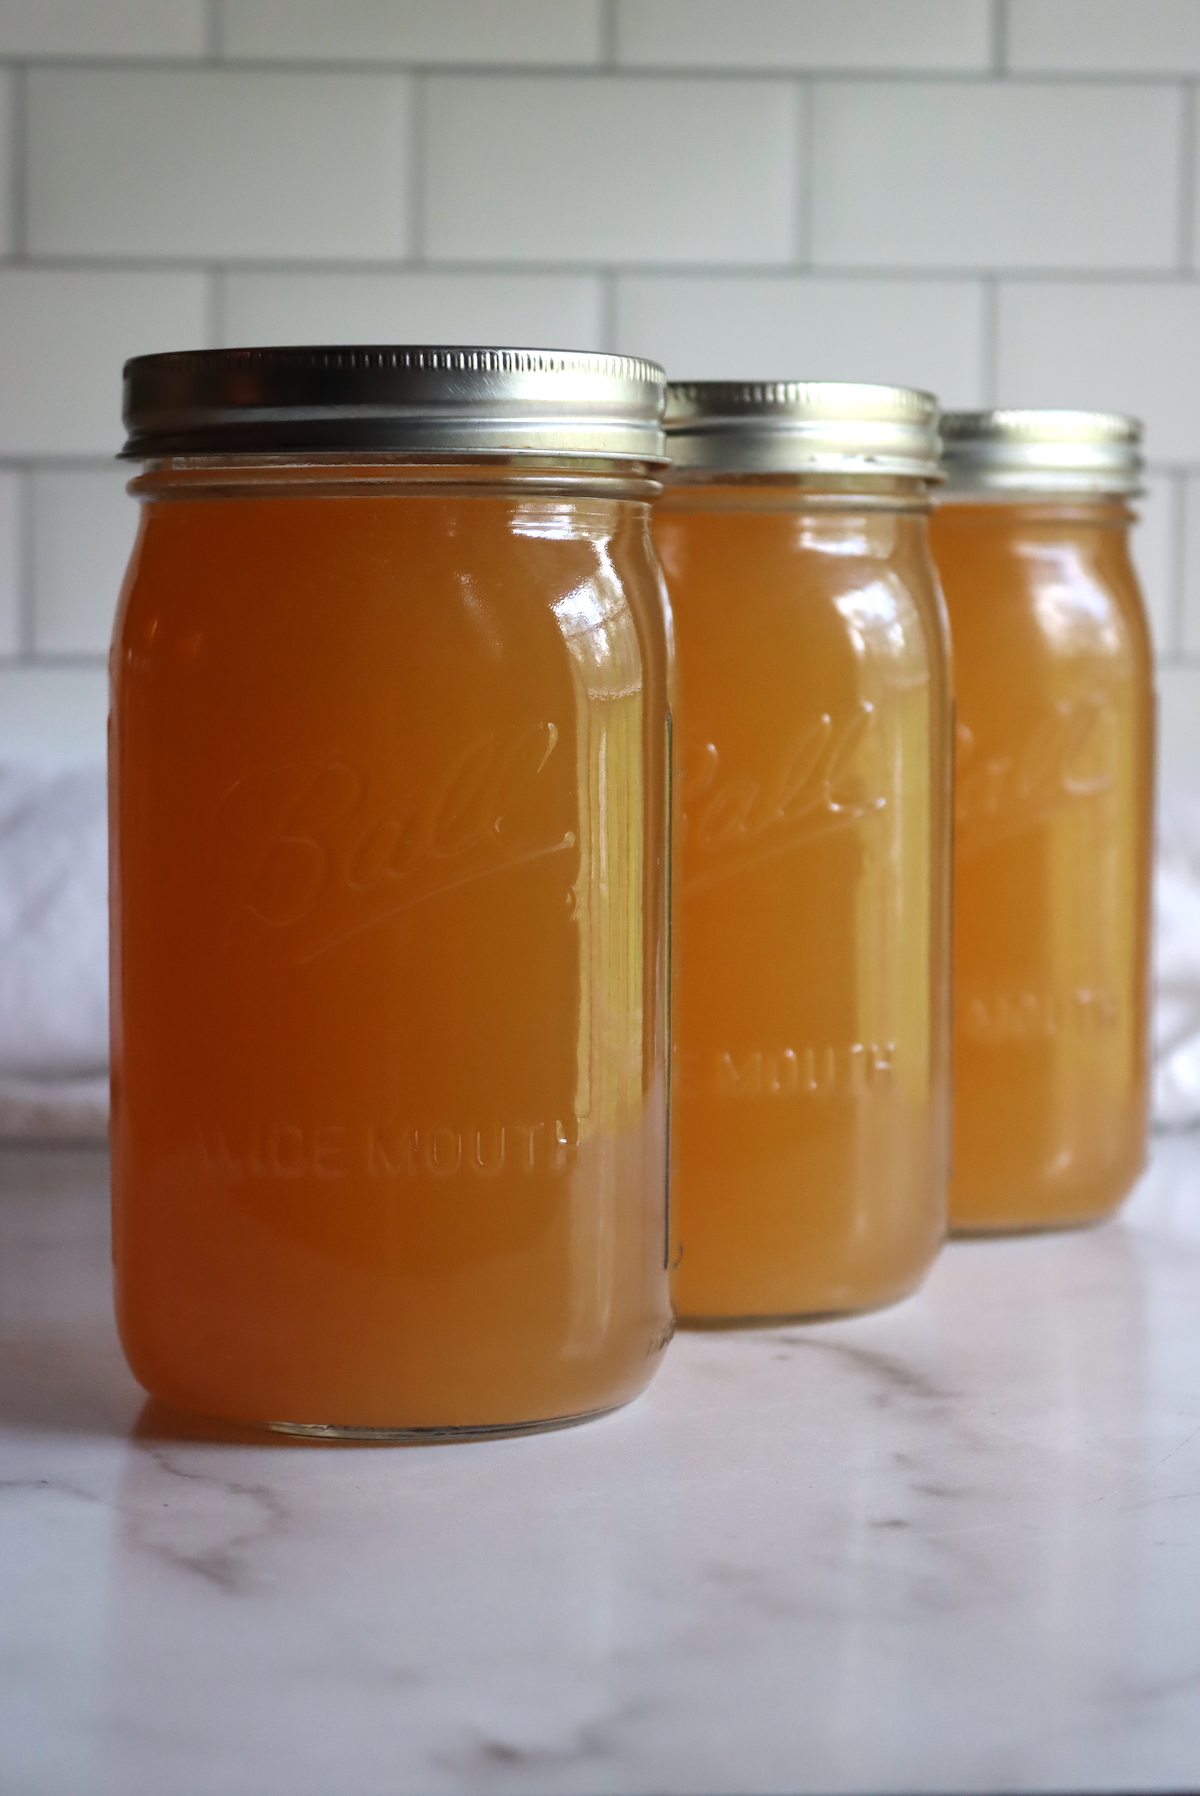
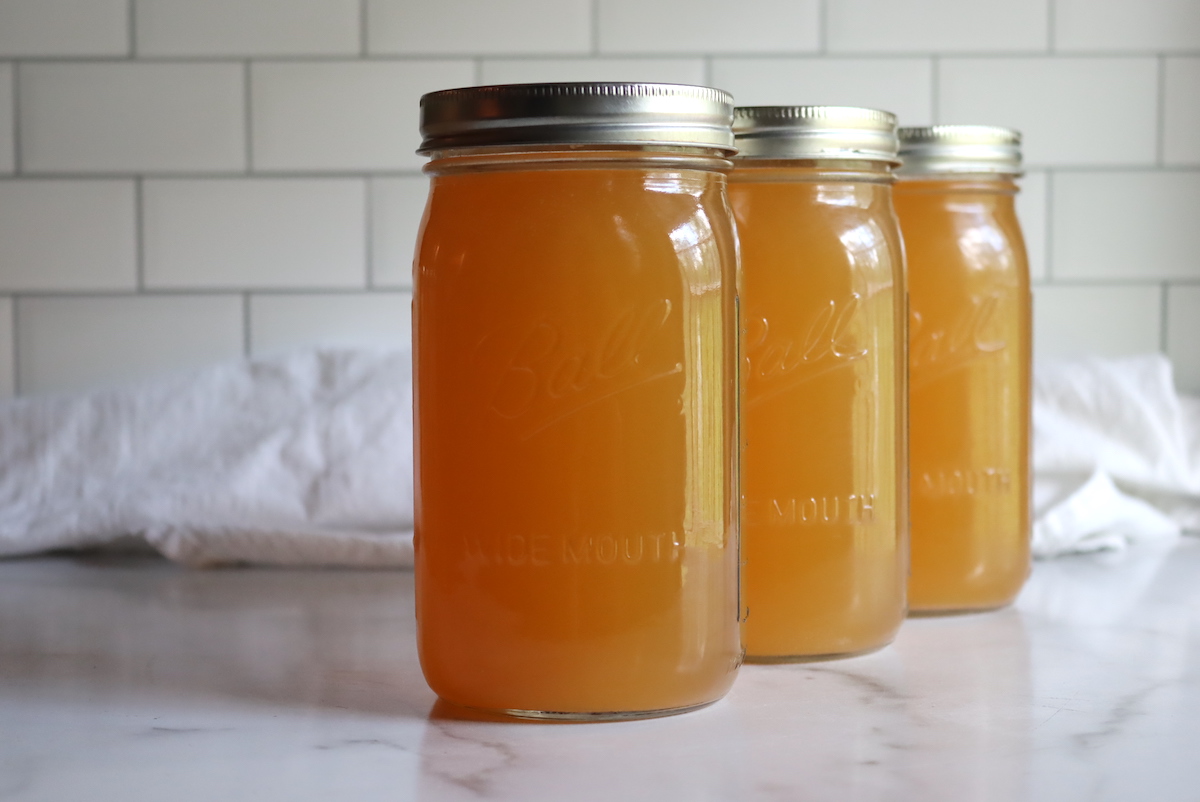
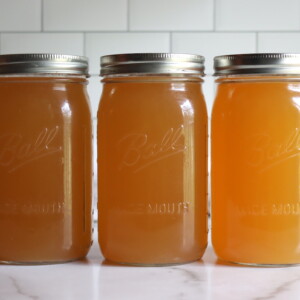
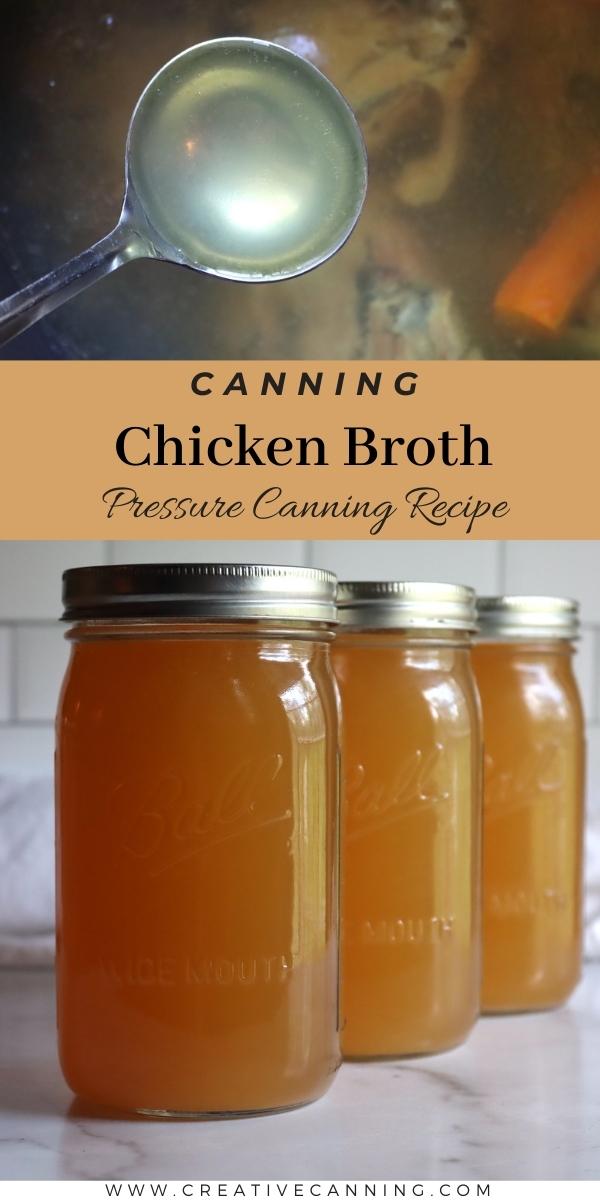
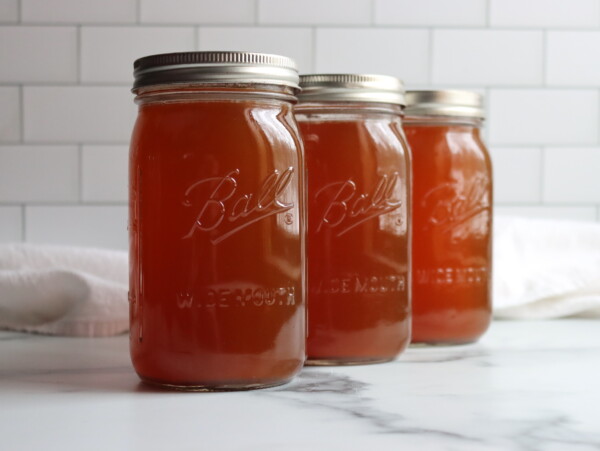
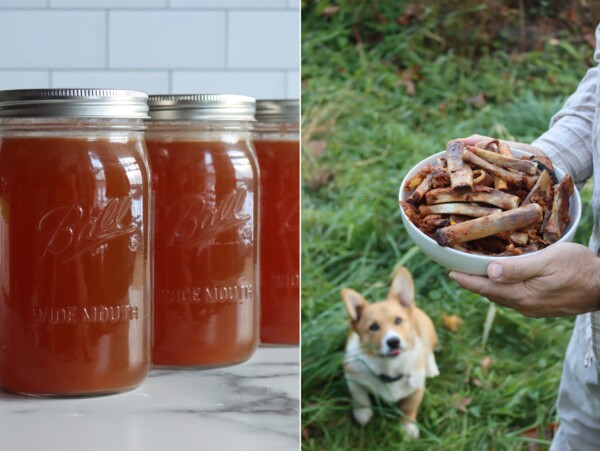
Take the bones out of the broth, then pour the broth through a fine wire mesh strainer. Pour into a glass measuring cup (about 2 quarts or two liters) or a large bowl. Get rid of the solids. Skim off the fat, and your chicken broth is now ready for canning.
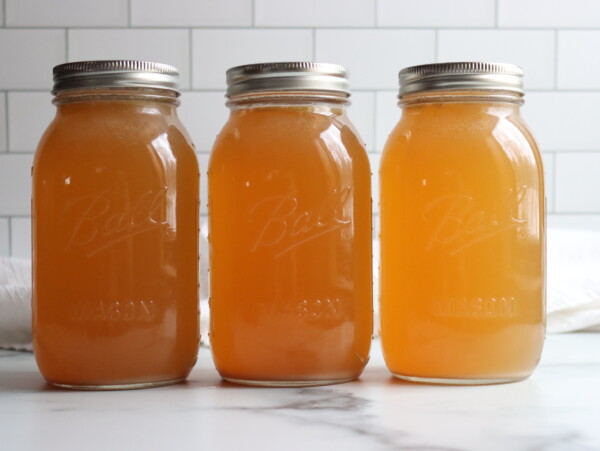
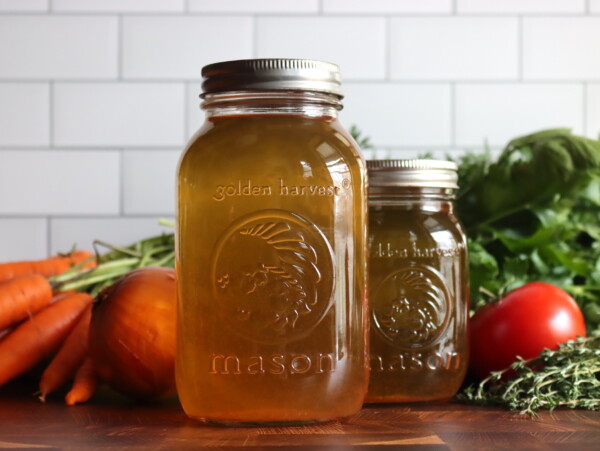
In the end, you should have a beautifully clear chicken broth, with a light golden amber color.
Canning Chicken Broth
Regardless of how you’ve made your chicken bone broth, the canning instructions are the same.
Prepare a pressure canner for hot pack. Refer to the manufacturer’s instructions for your brand of canner, but for most types, you’ll do the following:
Add in the bottom trivet and then fill the canner with about 2-3 inches of water.
Bring the canner up to a gentle simmer, about 180 degrees F.
Also, prepare jars and rings, either pints or quarts.
Next, ladle the hot broth into prepared and sanitized jars. Leave an inch (2.5 cm) of headspace.
Remove air bubbles with a bubble remover tool, then check to make sure you still have the proper headspace. Wipe the jar rim to remove any food residue, then put the lid and band on the jar. Adjust to fingertip tight, then repeat until all of your jars are filled.
Load the jars into the pressure canner.
Put the lid on the canner, then turn it to the locked position. Adjust the heat to medium-high, then vent steam for 10 minutes. Put the weighted gauge or the counterweight on the vent, then bring the pressure to 10 lbs for a weighted-gauge canner or 11 lbs for a dial-gauge.
Process pints for 20 minutes and quarts for 25 minutes. Once the time has elapsed, turn off the heat, then allow the canner to depressurize on its own. Let the canner sit for five more minutes after that before removing the lid.
Cool the jars in the canner for 10 minutes, then remove them from the pressure canner and let them continue cooling on the counter. After 12 hours, store the jars, checking the seals and labeling each one with the date before you do so.
Altitude Adjustments
Canning time remains the same regardless of altitude. However, the processing pressure increases as altitude increases.
Use the following table to determine the correct processing pressure if you’re above 1,000 feet in elevation.
For dial gauge pressure canners:
- 0 to 2,000 feet in elevation – 11 lbs pressure
- 2,001 to 4,000 feet in elevation – 12 lbs pressure
- 4,001 to 6,000 feet in elevation – 13 lbs pressure
- 6,001 to 8,000 feet in elevation – 14 lbs pressure
For weighted gauge pressure canners:
- Above 1,000 feet – 15 lbs pressure
- 0 to 1,000 feet in elevation – 10 lbs pressure
Serving Chicken Bone Broth
Nothing quite beats the comforting flavor of a nourishing bowl of chicken bone broth. When it comes to serving this delectable treat, the possibilities are virtually limitless! If you’d like a light meal, try heating up your chicken bone broth and sipping it on its own.
For a heartier dinner, consider adding noodles or vegetables. You can also combine the broth with cooked grains such as quinoa or rice in order to make an even more filling meal.
And why not complete the experience by topping off the dish with fresh herbs?
Whether you enjoy it alone or spice it up with a few ingredients, chicken bone broth is sure to satisfy everyone at your dinner table! Don’t forget – chicken bone broth can also be used as a base for heartier meals and side dishes like risotto, steamed vegetables, and much, much more. Don’t be afraid to get creative!
Chicken Canning Recipes
Looking for more chicken canning recipes?
- Canning Chicken
- Canning Chicken Soup (Classic Version)
- Chicken Chili Verde
- White Chicken Chili
- Thai Red Curry Chicken (or Duck)
- Chicken Pot Pie Filling
Canning Chicken Broth
Equipment
Ingredients
- 1 Picked carcass from 1 roast chicken, about 4-5 lbs (2-2.25 kg) before cleaning
- 1 Tbsp salt
- 2 large carrots, chopped
- 2 bay leaves
- 1 large onion, chopped
- 2 Quart water
- 1 Tbsp apple cider vinegar, 15 ml
Instructions
Making Chicken Broth (Small Batch)
- Preheat the oven to 225 degrees Fahrenheit, or 107 Celsius.
- Put all of your ingredients in an enameled Dutch oven. Bake everything, covered, for seven hours at 225 Fahrenheit.
- Reduce the oven temperature to 180 degrees Fahrenheit (90 degrees Celsius) and bake for another seven hours.
- Take the bones out of the broth, then pour the broth through a fine wire mesh strainer.
- Pour into a glass measuring cup or a large bowl. Discard the solids.
- Skim off the fat and add water until you have two quarts (two liters) of broth.
Canning Chicken Broth
- Prepare a pressure canner for hot pack according to the manufacturer's instructions. For most models, this means adding the bottom trivet along with 2-3 inches of water. Next, bring it to a gentle simmer and keep it warm while you get the broth into jars.
- Rinse out the Dutch oven, then return the broth to the oven and bring to a simmer.
- Ladle the hot broth into prepared and sanitized jars. Leave an inch (2.5 cm) of headspace.
- Remove air bubbles with a bubble remover tool, then check to make sure you still have the proper headspace. Wipe the jar rim to remove any food residue, then put the lid and band on the jar.
- Adjust to fingertip tight, then repeat until all of your jars are filled.
- Load the jars into the pressure canner, adding two inches (five centimeters) of simmering water.
- Put the lid on the canner, then turn it to the locked position.
- Adjust the heat to medium-high, then vent steam for 10 minutes.
- Put the weighted gauge or the counterweight on the vent, then bring the pressure to 10 lbs for a weighted-gauge canner or 11 lbs for a dial gauge. Altitude adjustments below in the notes.
- Process pints for 20 minutes and quarts for 25 minutes.
- Once the time has elapsed, turn off the heat, then allow the canner to depressurize on its own. Let the canner sit for five more minutes after that before removing the lid.
- Cool the jars in the canner for 10 minutes, then remove them from the pressure canner and let them continue cooling on the counter.
- After 12 hours, store the jars, checking the seals and labeling each one with the date before you do so.
Notes
Altitude Adjustments for Canning Chicken Broth
Canning time remains the same regardless of altitude. However, the processing pressure increases as altitude increase. Use the following table to determine the correct processing pressure if you’re above 1,000 feet in elevation.For dial gauge pressure canners:
- 0 to 2,000 feet in elevation – 11 lbs pressure
- 2,001 to 4,000 feet in elevation – 12 lbs pressure
- 4,001 to 6,000 feet in elevation – 13 lbs pressure
- 6,001 to 8,000 feet in elevation – 14 lbs pressure
For weighted gauge pressure canners:
- 0 to 1,000 feet in elevation – 10 lbs pressure
- Above 1,000 feet – 15 lbs pressure
Nutrition
Nutrition information is automatically calculated, so should only be used as an approximation.
Stock and Broth Canning Recipes
Homemade broth and stock recipes are easy to preserve in a pressure canner!
Meat Canning Recipes
Chicken isn’t the only meat you can preserve in a jar! Keep your pantry stocked with these meat canning recipes:
Pressure Canning Recipes
Fill your pressure canner again with these simple pressure canning recipes:
Simple easy instructions
How long does it take for the pressure to get to 10? I had my pot going on the stove for about ten minutes but nothing happened. Idk what’s normal for a pressure canner but mine has a back up steam vent in case the regular one is blocked. When I covered the normal one steam came through the back up one. Should the steam actually stay in the pot?
Yes, the steam is supposed to stay in the pot. After you close the main steam vent with your selected weight, it shouldn’t vent steam again until it’s up to pressure. If it’s losing steam out of the backup vent, then your backup vent is faulty (either broken, or not installed properly). That backup vent should only lose steam if the canner gets to dangerous pressure for some reason (like 18 to 20 pounds pressure). It’s an emergency safety release, and nothing should be coming out of it during normal operation. What type of canner do you have?
What if any instructions would be different if you can the liquid cold?
There’s no such thing as “canning the liquid cold” in terms of shelf stable preservation. So, I’m assuming you’re asking for instructions for freezing or refrigerating the broth? In that case, the instructions are the same for making it, and you just store it in the freezer or refrigerator once strained. I have specific instructions on freezing broth here: https://practicalselfreliance.com/freeze-bone-broth/
How long does the canned broth last?
When properly canned and sealed, it won’t spoil provided it stays sealed. That’s true of just about any canned good. Quality will degrade over time, and for broth, it’s best used within about 18 months.