This post may contain affiliate links. Please see our disclosure policy.
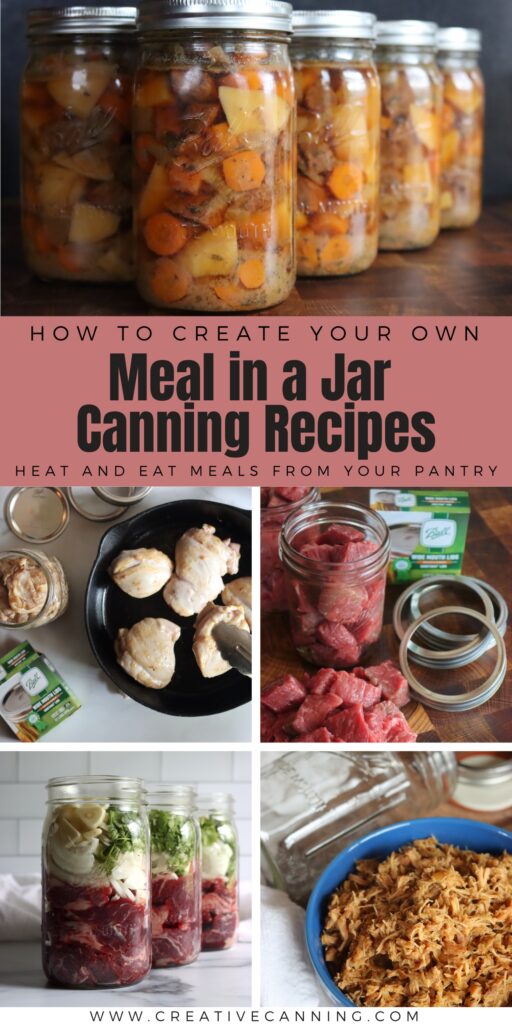
Creating your own meal-in-a-jar canning recipes opens up a world of convenience and flavor. By following these pressure canning guidelines, you can stock your pantry with homemade, ready-to-eat meals that are both safe and delicious.
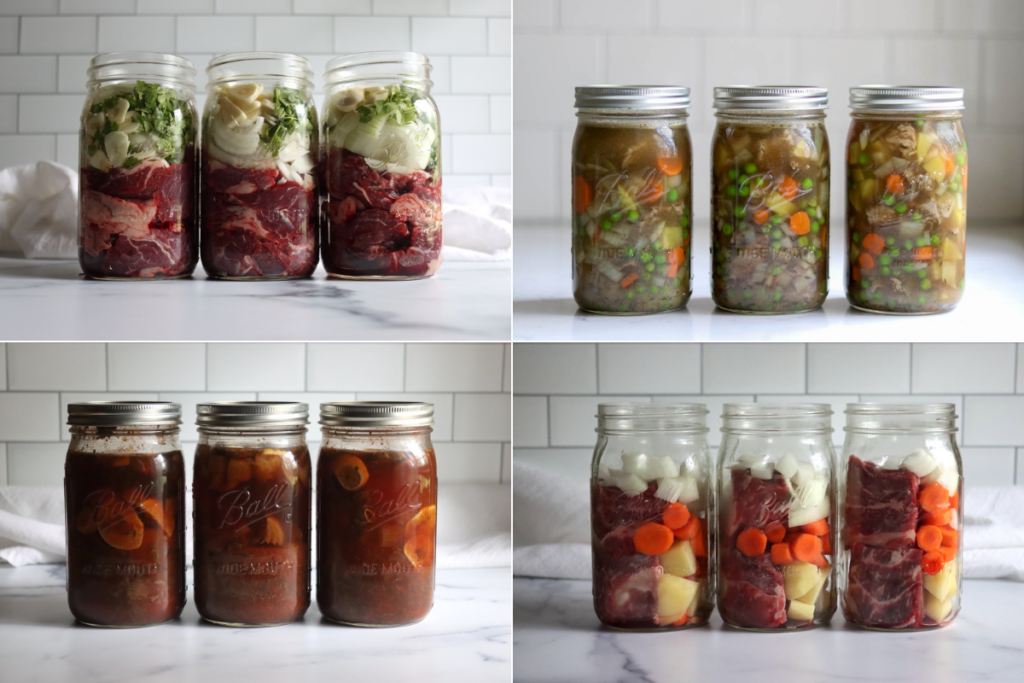
Table of Contents
- Understanding the Basics
- Ingredients for Meal-in-a-Jar Canning Recipes
- Important Safety Considerations
- Guidelines for Hearty Meals
- Guidelines for Brothy Meals
- Preparing Brothy Meals
- Processing Times for Brothy Meals
- Altitude Adjustments
- Checking Seals and Storing
- Shelf Life and Reheating
- Meal in a Jar Recipe Ideas
- Canning Meals in a Jar (Customizable Recipe)
- Customizable Canning Recipes
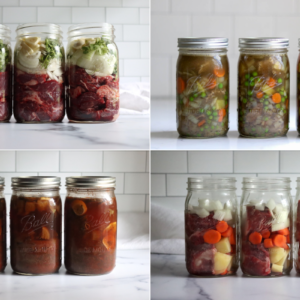
Creating your own meal in a jar canning recipes is an excellent way to stock your pantry with homemade, ready-to-eat dishes. Thanks to guidance from the National Center for Home Food Preservation (NCHFP) and the University of Alaska Extension, you can now safely develop your own pressure canned meal recipes at home.
I’ll walk you through the process of designing delicious and safe shelf-stable meals for pressure canning.
Understanding the Basics
Meal-in-a-jar recipes generally fall into two categories:
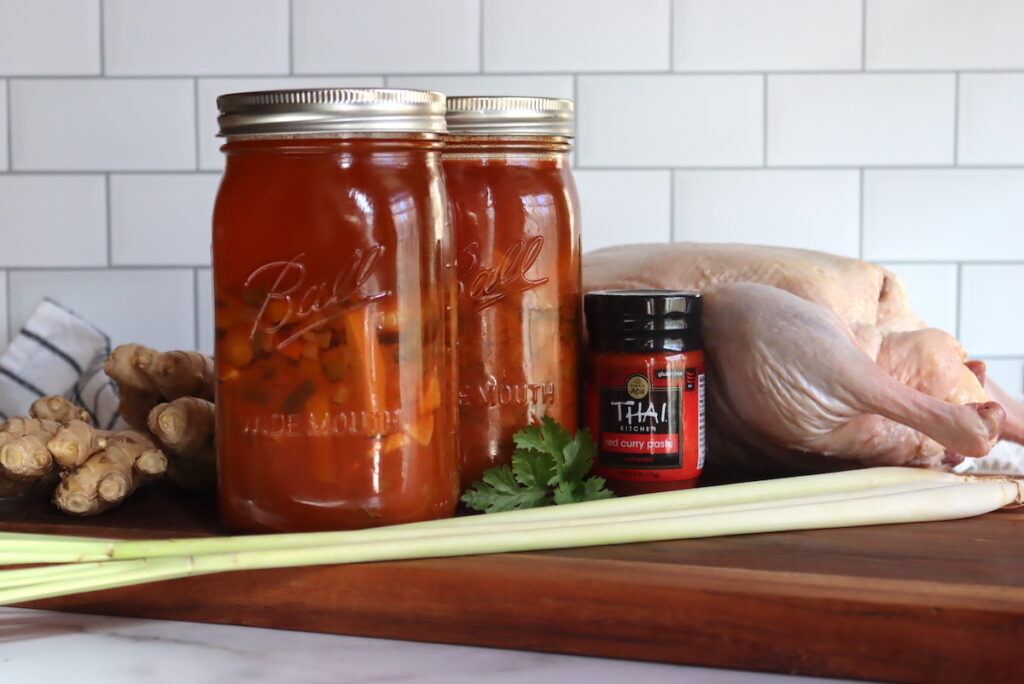
Brothy meals are dishes like chicken and vegetable soup where the jars are only half filled with solids, and the rest is liquid. These have shorter processing times and allow for a wider variety of ingredients.
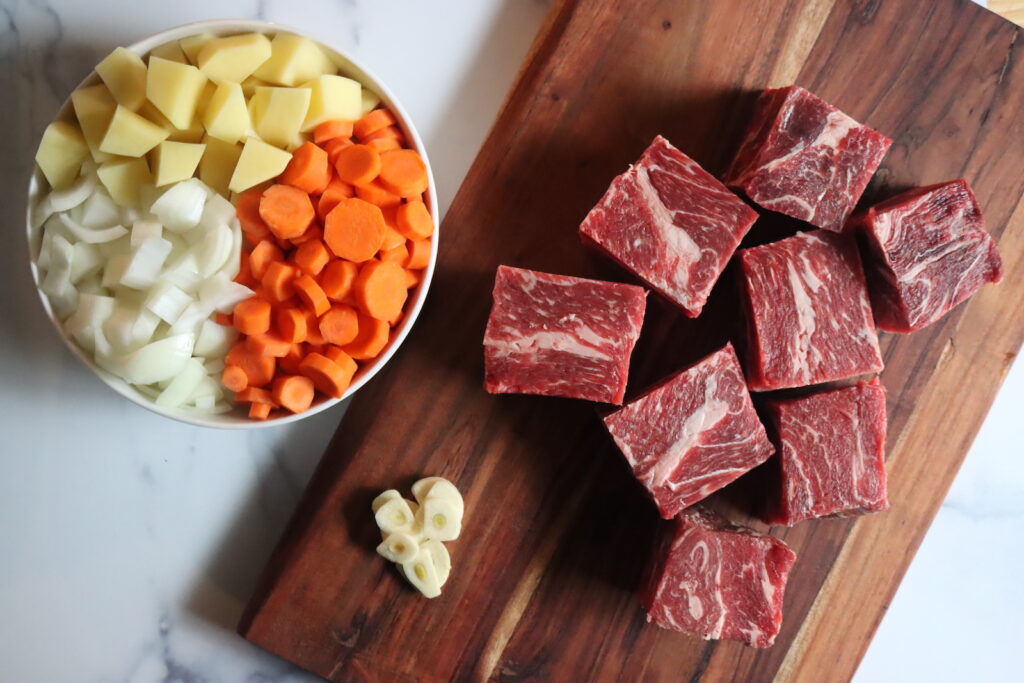
Hearty meals are dishes where the whole jar is full of ingredients with minimal broth. Examples include beef stew or fish chowder base. These require longer processing times but result in more substantial meals.
While the University of Alaska originally developed these guidelines for Brothy Soups and Hearty Soups, these guidelines can also be used for dishes that aren’t typically considered soup, allowing you to create delicious meal in a jar canning recipes for classics like pot roast, beef stroganoff, curries, chili, pot pie fillings and sloppy joe filling.
Ingredients for Meal-in-a-Jar Canning Recipes
When creating your own meal-in-a-jar canning recipes, it’s important to use vegetables that are approved for safe home canning. Here’s a list of vegetables that are generally considered safe and suitable for canning:
- Tomatoes
- Carrots
- Green beans
- Peas
- Corn
- Beets
- Peppers (sweet and hot)
- Asparagus
- Potatoes
- Pumpkin (cubed, not pureed)
- Spinach and other cooking greens, including swiss chard, kale, and collards (not lettuce)
- Onions
Beyond that, the university extension helplines also note that you can add garlic or leeks to meal-in-a-jar canning recipes, even though they don’t have their own canning recipes.
Plain cabbage isn’t allowed, but you can add sauerkraut since there is a canning recipe for sauerkraut.
Dry Beans are allowed, but they must be pre-soaked.
Meat and Seafood are also completely fine, following the instructions for canning that specific type of meat. Ground meat, for example, must be browned before canning, either in crumbles as you do when canning taco meat, or in patties or meatballs, as you do when canning hamburger.
Important Safety Considerations
All meal-in-a-jar canning recipes use a pressure canner. Water bath canning is only allowed for high-acid vegetables, pickles, and jams. Meat, vegetables, and beans, which are the main contents of most meals, need higher temperatures to preserve.
Do not attempt to make these recipes in a water bath canner.
Beyond that, certain ingredients should never be included in pressure-canned meals, as they can interfere with the canning process or create unsafe conditions:
- Thickening agents (flour, cornstarch)
- Dairy products (milk, cream, cheese)
- Pasta, rice, or other grains
- Bread products (breadcrumbs, dumplings)
These ingredients are never allowed in canning recipes, regardless of the type. Those exclusions apply to both Brothy meals and Hearty meals.
When canning meal in a jar recipes, all the ingredients must have their own specific tested canning recipe to be included. For example, there is a tested canning recipe for potatoes, but there’s no tested recipe for canning plain cabbage.
Several common ingredients lack specific canning instructions due to safety concerns or quality issues.
- Cabbage (and related cabbage family veggies like broccoli and cauliflower)
- Eggplant
- Summer Squash & Zucchini
- Celery
- Lettuce and other salad greens (Kale/Collards are allowed)
- Avocados
- Cucumbers
- Melons
- Bananas
- Coconut (or Coconut Milk)
These ingredients are generally not recommended for home canning for various reasons.
Some, like eggplant and summer squash, have textures that don’t hold up well to the canning process. They break down and can prevent the jars from heating evenly.
The same thing happens with tender leafy greens, which may become too dense when canned, potentially preventing proper heat penetration.
Certain fruits, like melons and bananas, lack the acidity needed for safe water bath canning and don’t maintain good quality when pressure canned.
Coconut just hasn’t been tested at all, so there’s no way to know if it’s safe for home canning. If you have a curry that includes coconut or coconut milk, you can add that at serving (and it’ll have better flavor that way anyway).
Guidelines for Hearty Meals
Most meal-in-a-jar recipes will be “hearty meals” where you’re filling the jar completely, and there’s minimal broth. This should allow you to pressure can most of your homemade favorites!
Ingredients for Hearty Meal in a Jar Recipes
You may include:
- Canning Safe Vegetables (except those listed below)
- Meat, poultry, or seafood
- Broth, stock, or water
- Herbs and spices
Do Not Add:
Some ingredients cannot be added to any meal in a jar canning recipe. They include the following:
- Thickening agents
- Dairy products
- Noodles, pasta, rice, grains
- Pureed vegetables
- Ham, bacon, or cured meats
- Any ingredients lacking specific canning guidelines (like cabbage, see above)
The guidelines for canning hearty meals are a bit more restrictive than brothy meals, since the jars are fully packed and there’s not a lot of liquid in the jars. To ensure proper even heating, meal-in-a-jar canning recipes that you develop on your own cannot include:
- Dry beans or legumes
- Leafy greens (kale, spinach, etc.)
- Cream-style corn (regular corn is fine)
- Winter squash
- Sweet potatoes
All of these ingredients are allowed in brothy meal-in-a-jar recipes, where the solids only fill half the jar. If you want to make a meal that contains any of these ingredients, skip down to the brothy instructions below.
Preparing Hearty Meals
- Choose Your Ingredients: Select ingredients that have their own canning recommendations from a reliable source.
- Prepare Your Ingredients:
- Vegetables: Wash, peel, and chop according to specific canning guidelines.
- Meat or Poultry: Cook until tender, remove bones and excess fat, cut into bite-sized pieces.
- Seafood: Cut into bite-sized pieces; bones may remain.
- Dried Beans: Fully rehydrate by soaking and pre-cooking.
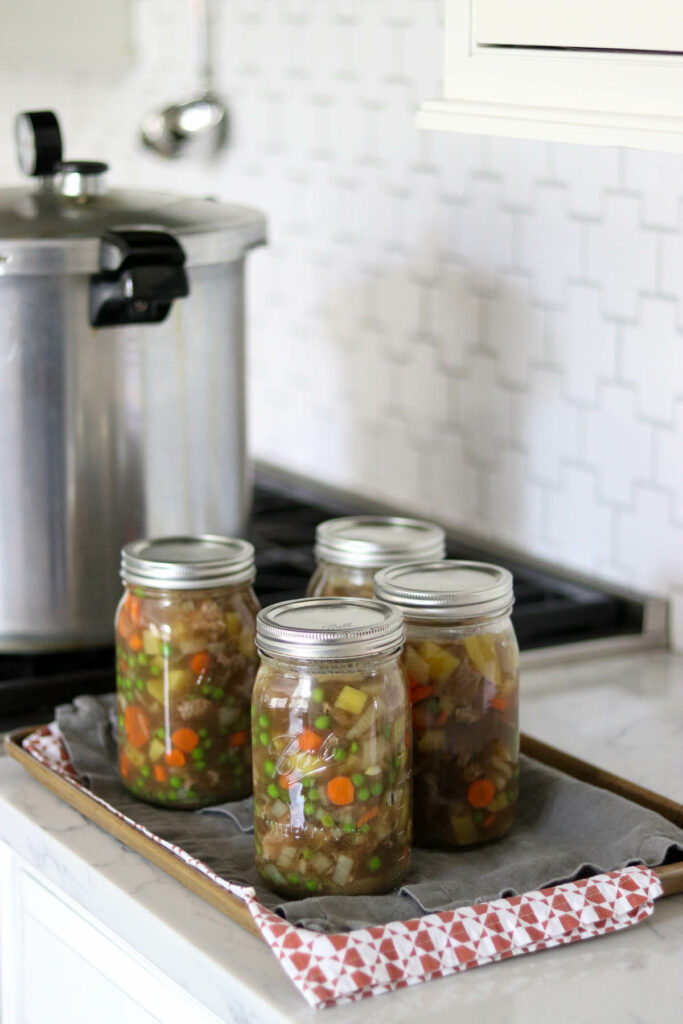
- Combine Ingredients: Add all solid ingredients to a pot, cover with hot liquid, bring to a boil, and simmer for 5 minutes.
- Fill Jars: Pack jars with solid ingredients to about 1 inch from the top, then add hot liquid to reach 1-inch headspace.
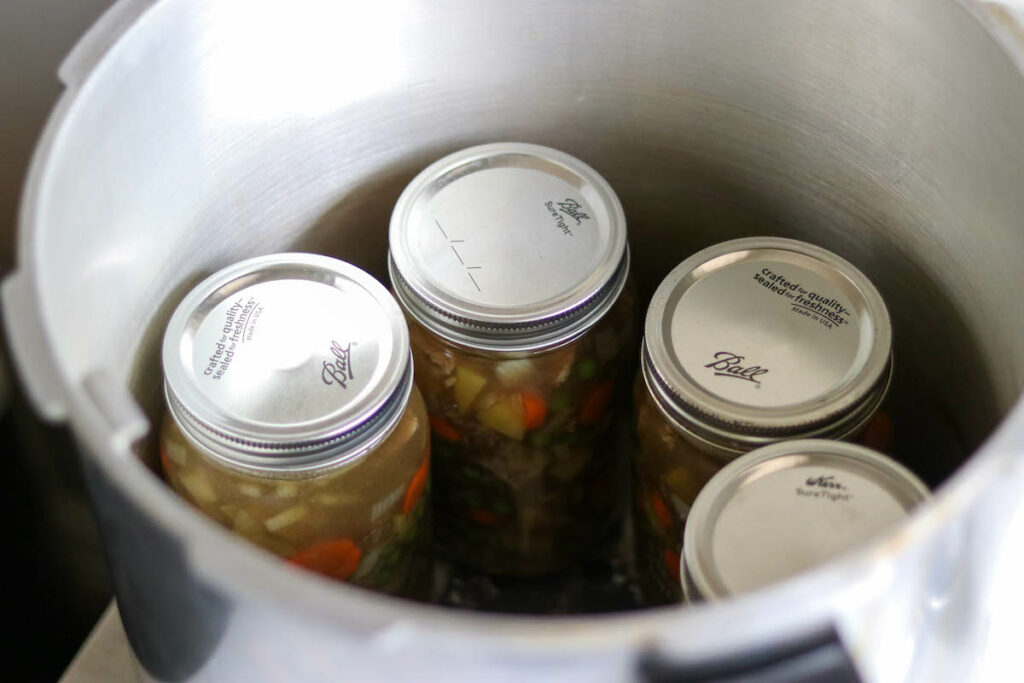
- Process: Seal jars and process in a pressure canner according to the guidelines below.
Processing Times for Hearty Meals
- Pints: 75 minutes
- Quarts: 90 minutes
- Seafood (pints only): 100 minutes
With hearty meal-in-a-jar canning recipes, recipes containing seafood can only be processed in pint jars. Everything else can be processed in pints or quarts. Be sure to adjust pressure to altitude, see the table at the end (altitude adjustments are the same for all pressure canning recipes).
Guidelines for Brothy Meals
If you’re ok with only filling your jars halfway, you have a lot more leeway in terms of the ingredients you can include. At serving, you can either boil away the liquid to reduce the meal to your desired consistency or simply strain the dish.
When you add beans to these recipes, the beans will absorb a good bit of water, and you’ll often end up with a jar that’s two-thirds to three-quarters full, so it actually works out. Most other ingredients won’t expand in canning, so you will have a good bit of liquid in the finished meal.
Ingredients for Brothy Meals
When creating brothy meal recipes, you can include:
- Fresh vegetables (carrots, celery, bell peppers, etc.)
- Meat or poultry (cut into pieces)
- Fish (in small pieces)
- Pre-soaked dry beans (they must be pre-soaked!)
- Water, broth, stock, wine, or juice
- Fresh or dried herbs and spices
Do Not Add:
- Thickening agents
- Dairy products
- Noodles, pasta, rice, grains
- Pureed vegetables
- Ham, bacon, or cured meats
- Any ingredients lacking specific canning guidelines
Preparing Brothy Meals
- Choose Your Ingredients: Select ingredients that have their own canning recommendations from a reliable source.
- Prepare Your Ingredients:
- Vegetables: Wash, peel, and chop according to specific canning guidelines.
- Meat or Poultry: Cook until tender, remove bones and excess fat, cut into bite-sized pieces.
- Seafood: Cut into bite-sized pieces; bones may remain.
- Dried Beans: Fully rehydrate by soaking and pre-cooking.
- Combine Ingredients: Mix solids in a large pot, cover with liquid, bring to a boil, and simmer for 5 minutes.
- Fill Jars: Use a slotted spoon to fill jars halfway with solids, then top off with liquid, leaving 1-inch headspace.
- Process: Seal jars and process in a pressure canner according to the guidelines below.
Processing Times for Brothy Meals
- Pints: 60 minutes
- Quarts: 75 minutes
- Seafood (pints and quarts): 100 minutes
Altitude Adjustments
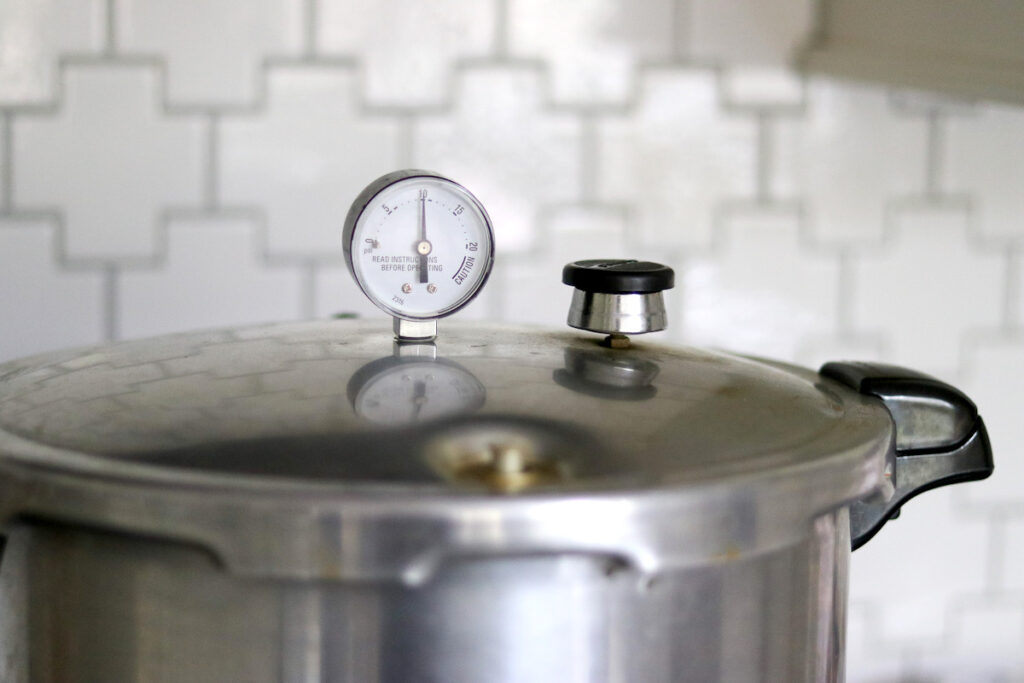
The altitude adjustments are the same for all pressure canning recipes. Here’s how to adjust pressure based on your altitude and the type of canner you’re using.
For dial gauge pressure canners:
- 0 to 2,000 feet: 11 lbs pressure
- 2,001 to 4,000 feet: 12 lbs pressure
- 4,001 to 6,000 feet: 13 lbs pressure
- 6,001 to 8,000 feet: 14 lbs pressure
For weighted gauge pressure canners:
- 0 to 1,000 feet: 10 lbs pressure
- Above 1,000 feet: 15 lbs pressure
Checking Seals and Storing
After your meal in a jar canning process is complete, it’s important to check seals before storing them. Unsealed jars won’t keep, and must be stored in the refrigerator for immediate use.
Once the jars have cooled completely, typically after 12-24 hours, check each jar’s seal.
You can do this by pressing the center of the lid – it should not flex or pop.
Visually inspect the lids as well; they should be concave. If any jars haven’t sealed properly, refrigerate them and use them within a few days.
For the successfully sealed jars, remove the bands, wash and dry the jars, then label each jar with its contents and the date it was canned. Store your sealed (without rings) jars in a cool, dark, and dry place, ideally between 50-70°F. While properly canned and sealed meals can last indefinitely, it’s best to use them within a year for best quality.
Shelf Life and Reheating
Properly sealed jars can last indefinitely, though quality may decline after 12-18 months. To reheat, simmer in a saucepan for about 10 minutes or microwave directly in the jar (after removing metal parts).
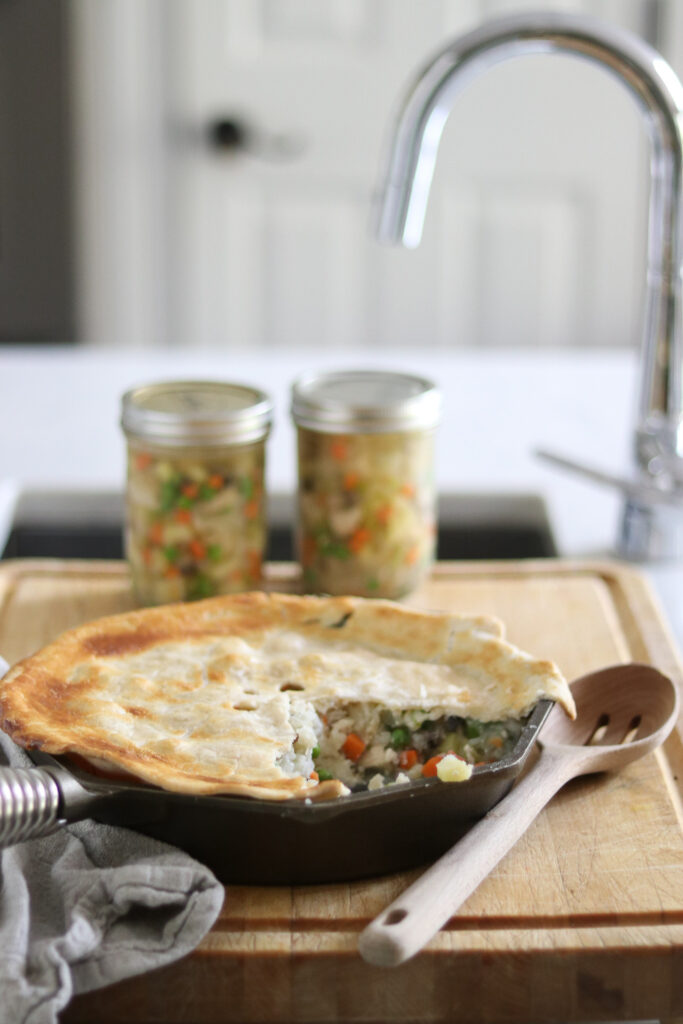
Meal in a Jar Recipe Ideas
I have a separate article with more than a hundred Meal in a Jar Canning Recipes, but here are some of my favorites:
Canning Meals in a Jar (Customizable Recipe)
Equipment
- Wide Mouth Quart Mason Jars
- Wide Mouth Canning Lids
- Jar Lifter
Ingredients
Ingredient Choices for Both Meal Types
- Fresh vegetables, e.g., carrots, onions, green beans
- Meat, e.g., beef, chicken, pork (cut into cubes)
- Fish or seafood, in bite-sized pieces
- Pre-soaked and fully cooked beans, Only for Brothy Meals, see notes
- Broth, or stock, water, or wine
- Herbs and spices, fresh or dried, to taste
Instructions
For Brothy Meals (Half Filled Jars):
- Choose only ingredients that are approved for canning (no flour, dairy, cheese, bread or thickeners).
- Prepare Ingredients as you would for canning them individually. Vegetables: Wash, peel if needed, and chop. Pre-cook dense vegetables like carrots. Meat: Cook until tender, remove excess fat and bones, then cut into bite-sized pieces. Brown ground meats. Fish/Seafood: Cut into small chunks, fish bones can remain. Beans: Fully rehydrate by soaking overnight.
- Combine Ingredients: Mix prepared solids in a large pot. Add enough liquid to cover plus 2-3 inches. Bring to a boil, simmer for 5 minutes. Add herbs and spices.
- Fill Jars: Use a slotted spoon to fill jars halfway with solids. Add hot liquid, this time filling the jar to nearly the top, leaving 1-inch headspace. The jars should be half solids, and the remaining space is filled with broth/water. Remove air bubbles, wipe rims, and secure lids.
- Process in pressure canner: 60 minutes for pints, 75 minutes for quarts. For seafood recipes, process both pints and quarts for 100 minutes. Adjust pressure for altitude (see notes).
- Cool and Store: Allow jars to cool completely before checking seals. Store sealed jars in a cool, dark place.
For Hearty Meals:
- Choose only ingredients that are approved for canning (no flour, dairy, cheese, bread or thickeners). With hearty meals, you cannot use dry beans, leafy greens, winter squash, sweet potatoes, or creamed corn. Those are only allowed in brothy meals with half filled jars.
- Prepare ingredients as you would for brothy meals above.
- Combine Ingredients: Add all prepared solids to a large pot, cover with hot broth. Bring to a boil, simmer for 5 minutes.
- Fill Jars: Pack jars with solid ingredients to 1-inch from top. Add hot broth to maintain 1-inch headspace. Remove air bubbles.
- Process in pressure canner: 75 minutes for pints, 90 minutes for quarts. For seafood recipes, process pints only for 100 minutes. Adjust pressure for altitude (see notes).
- Cool and Store: Let jars cool completely. Check seals before storing in a cool, dark place.
Notes
- Brothy meals: Jars should be half-filled with solids before adding liquid, then fill with liquid to 1-inch headspace. Beans will expand during canning.
- Hearty meals: Jars are mostly filled with solids to 1-inch headspace. Do not include dry beans, leafy greens, winter squash, sweet potatoes, or creamed corn.
- Never add: Dairy products, thickeners, pasta, rice, or ingredients without specific canning guidelines.
- Prepare all ingredients according to individual canning recommendations.
- Seafood in hearty meals can only be canned in pint jars.
- Minimum batch size: 2 quarts or 4 pints. Maximum depends on canner capacity.
- Shelf life: Indefinite if properly sealed, but best quality within 12-18 months. Always check seals before use.
Raw Pack or Hot Pack
This customizable recipe uses hot pack because that’s the way the guidance was developed at the NCHFP. The main reason is quality, as hot packs tend to work better with a wider variety of ingredients. Ball Canning has recently moved to raw pack in all of their pressure canning meal in a jar recipes because it’s so much more convenient to just put raw ingredients into a jar and top with hot broth. The NCHFP has not adopted this guidance as of yet, so I’ve stuck with the hot pack here.Altitude Adjustments
Canning times are the same regardless of altitude, but you do need to adjust the pressure at higher altitudes. Dial Gauge Canner:- 0-2,000 ft: 11 lbs pressure
- 2,001-4,000 ft: 12 lbs pressure
- 4,001-6,000 ft: 13 lbs pressure
- 6,001-8,000 ft: 14 lbs pressure
- 0-1,000 ft: 10 lbs pressure
- Above 1,000 ft: 15 lbs pressure
Reheating
- Stovetop: Simmer in a saucepan for 10 minutes.
- Microwave: Heat in jar after removing metal lid and ring.
Nutrition
Nutrition information is automatically calculated, so should only be used as an approximation.
Customizable Canning Recipes
Looking for more customizable canning recipes to get creative with your preserving?
Excellent article. I always go to your site first because I know you have the most accurate canning information and safety is your primary concern. Thank you for this reliable information and all the hard work you put into developing these recipes!
Thanks so much Emily!