This post may contain affiliate links. Please see our disclosure policy.
Altitude adjustments for pressure canning sound complicated at first, but once you look at the chart, they’re actually pretty simple. Once you understand why the pressure changes, and not the processing time, the whole thing feels a lot less intimidating.

Table of Contents
- What Are Altitude Adjustments for Pressure Canning?
- Standard Altitude Adjustments for Pressure Canning
- Why Pressure Changes Instead of Time
- Why Dial Gauge and Weighted Gauge Canners Use Different Adjustments
- How to Find Your Altitude for Canning
- A Few Practical Notes
- FAQs About Altitude Adjustments for Pressure Canning
If you do a lot of pressure canning, altitude adjustments are one of those topics you eventually hear about again and again. They sound intimidating at first, but the good news is that they’re actually pretty simple. With pressure canning, you’re not changing the processing time at all, you’re changing the pressure.
That little change matters a lot. Pressure canning processes are designed to reach and maintain the temperature needed for the full tested process time, and at higher elevations, water boils at a lower temperature. If you don’t adjust for altitude, the canner may not reach the processing conditions the recipe was tested for, even if you followed the recipe exactly otherwise.
What Are Altitude Adjustments for Pressure Canning?
Altitude adjustments for pressure canning are simply the pressure changes you make when canning above sea level. As elevation increases, air pressure drops. That lower atmospheric pressure changes the temperature your canner reaches at a given PSI, so safe recipes compensate by requiring more pressure at higher elevations.
For home canners, the key cutoff is usually above 1,000 feet for weighted-gauge canners and above 2,000 feet for most dial-gauge pressure canning tables that start at 11 PSI. That’s why the exact adjustment depends on what type of canner you’re using.
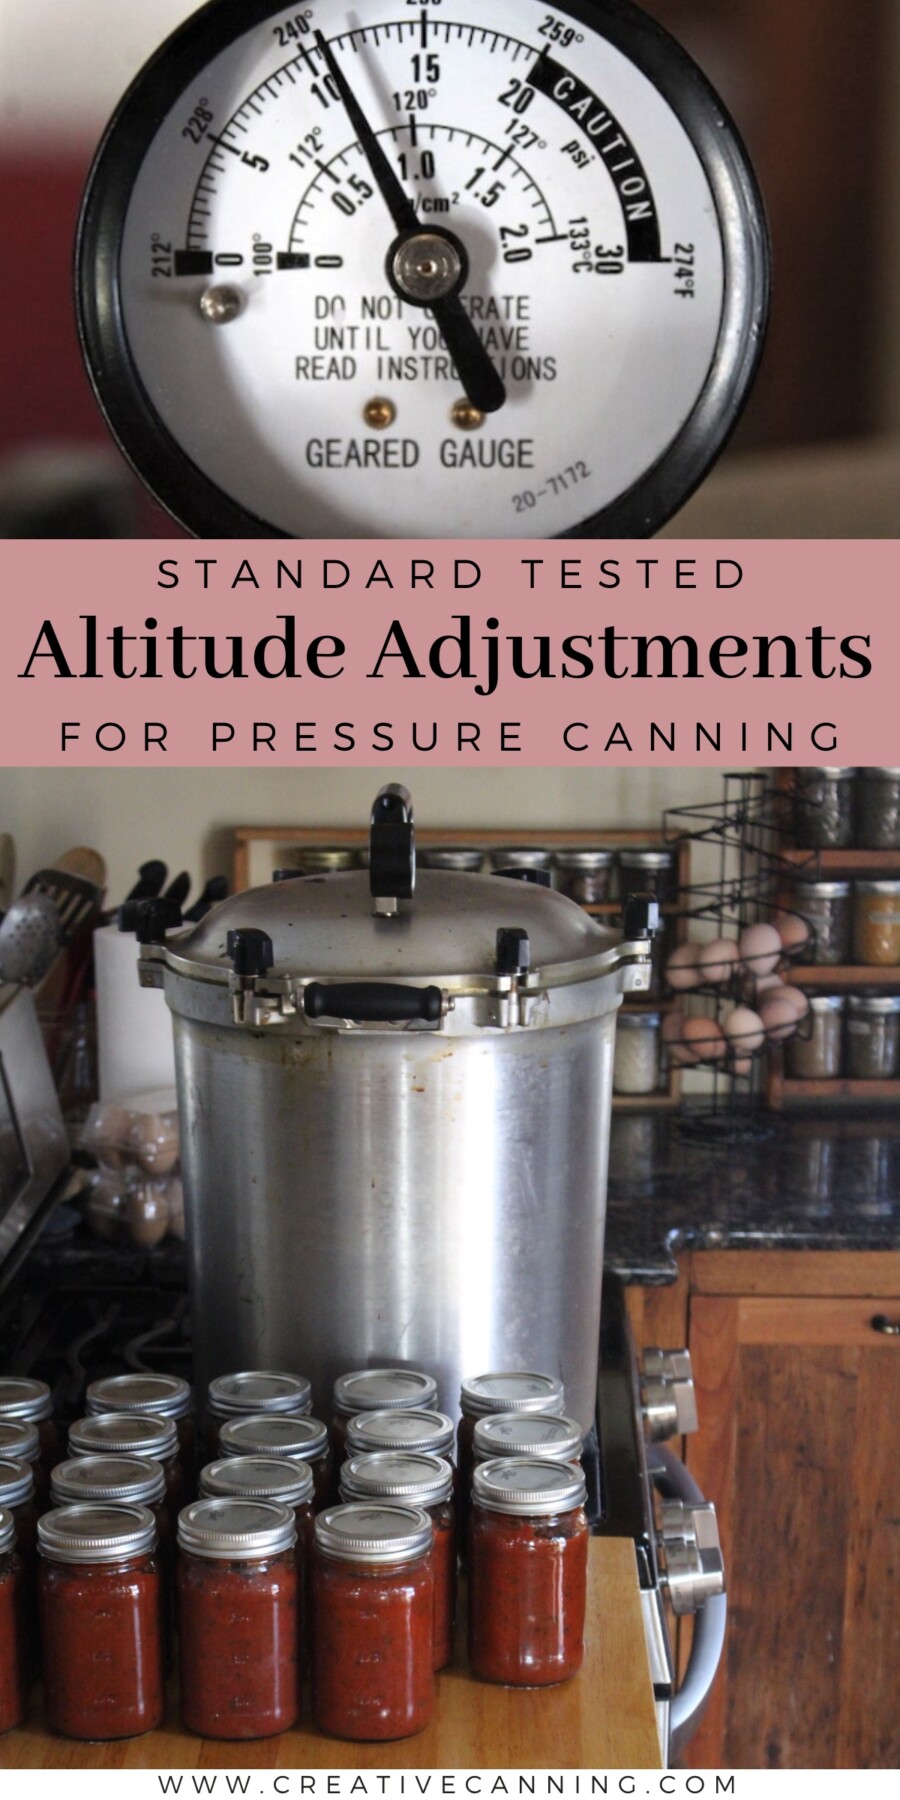
Standard Altitude Adjustments for Pressure Canning
Here’s the basic pressure canning altitude chart used for many USDA-style home canning recipes for low-acid foods like vegetables, meat, poultry, fish, beans, and soup:
Weighted-Gauge Pressure Canner
- 0 to 1,000 feet: 10 pounds pressure
- Above 1,000 feet: 15 pounds pressure
Dial-Gauge Pressure Canner
- 0 to 2,000 feet: 11 pounds pressure
- 2,001 to 4,000 feet: 12 pounds pressure
- 4,001 to 6,000 feet: 13 pounds pressure
- 6,001 to 8,000 feet: 14 pounds pressure
- 8,001 to 10,000 feet: 15 pounds pressure
That’s the basic adjustment chart most home canners need, but always check your specific tested recipe first. The processing time stays the same, but the correct PSI depends on both your altitude and whether you’re using a dial-gauge or weighted-gauge canner.
Why Pressure Changes Instead of Time
This is the part that confuses a lot of people, because with water bath canning, altitude adjustments usually mean adding more time. Pressure canning works differently.
For pressure canning, the tested process is built around reaching the proper processing temperature inside the canner, and the way you make up for altitude is by raising the pressure so the canner reaches that correct temperature. The time stays the same because the recipe has already been tested for that amount of time at the proper temperature.
In other words, pressure canning recipes are not underprocessed because they need more minutes in the canner. They become unsafe if the canner never reaches the right processing conditions in the first place. Raising the PSI solves that problem.
This is also why you should never casually mix and match water-bath logic with pressure-canning logic. For pressure canning, follow the tested processing time and adjust the pressure for your elevation.
Why Dial Gauge and Weighted Gauge Canners Use Different Adjustments
If you’ve ever wondered why one chart says 11, 12, 13, 14, or 15 pounds and the other just jumps from 10 to 15, it comes down to how the canner controls pressure.
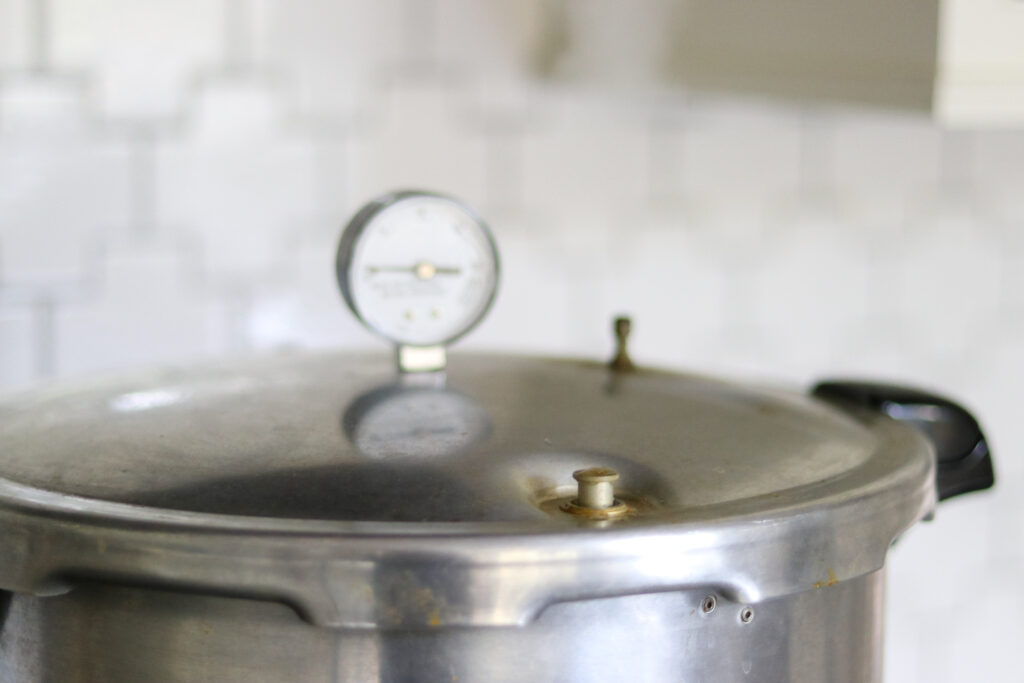
A dial-gauge canner lets you track pressure in smaller increments, so the recommendations can be more precise. That’s why dial-gauge charts move up a pound at a time as altitude increases.
A weighted-gauge canner is less flexible, because home models generally operate at fixed pressure settings, typically 10 or 15 pounds. Since there isn’t a practical 11-, 12-, 13-, or 14-pound option on a standard weighted gauge, the safe recommendation is to move to 15 pounds pressure for any altitude above 1,000 feet.
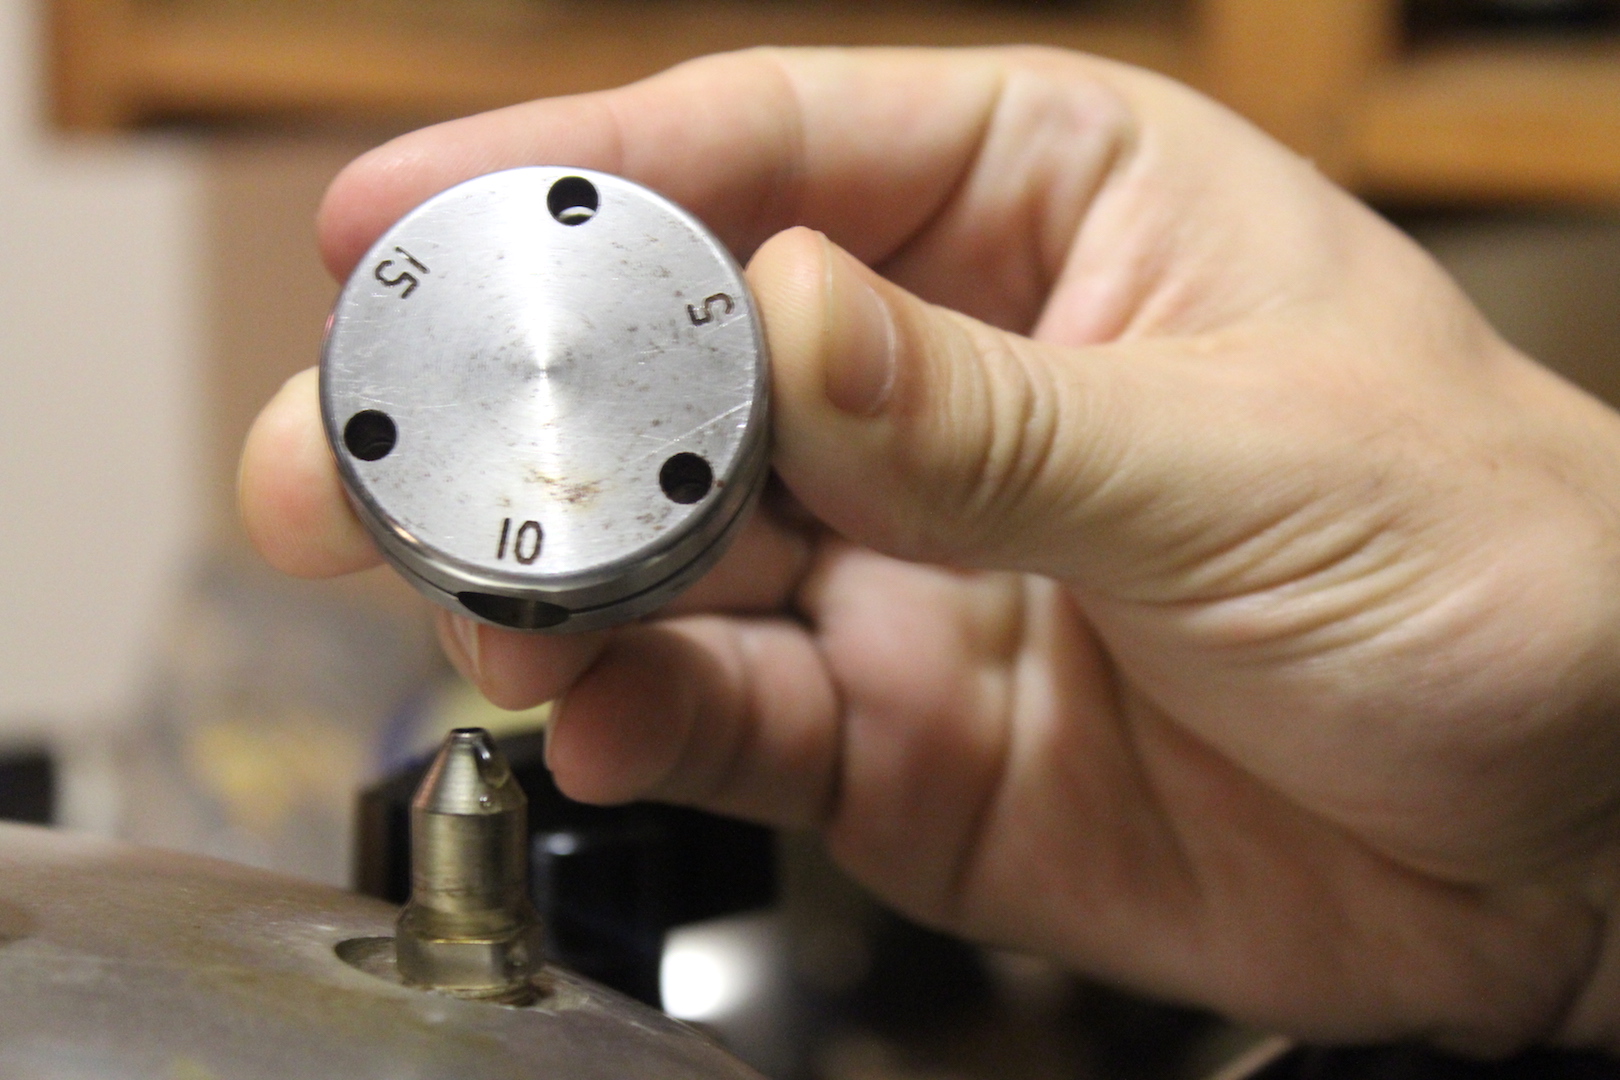
That’s also why weighted-gauge canners are often considered simpler in everyday use. There are fewer small pressure changes to manage, even if the higher pressure can sometimes be a little harder on food quality.
How to Find Your Altitude for Canning
Before you can adjust anything, you need to know your elevation. Thankfully, that’s easier than it used to be.
One of the simplest options is to search your town name plus words like altitude or elevation, which many Extension offices specifically recommend. Some states also publish town-by-town or county-by-county altitude charts for canners, which can be really handy if you want a quick local reference. The National Center for Home Food Preservation also suggests checking with your local planning or zoning office, your town or city website, or your local Cooperative Extension office.
Google Maps can help too, especially when you’re looking closely at a specific property or rural location. If you’re using online map tools, just make sure you’re getting an elevation in feet above sea level, since that’s what canning charts use.
If you live near an altitude cutoff, I’d personally look for the most precise number you can get and then round conservatively in the safe direction. Once you know your altitude, write it right on your canning notebook or tape it inside a cabinet door so you don’t have to look it up every single time.
In my case, Google Maps is really helpful. Vermont has rolling hills everywhere, and our town center sits down in the river valley at about 300 to 400 feet of elevation. My house, just two miles away, is over 1,000 feet, so a town-based elevation guide would be off, whereas a pinned location on Google Maps is much more accurate.
A Few Practical Notes
The adjustment is based on where the canner is being used, not where the food was grown, where the recipe author lives, or the altitude listed for the nearest major city. If you’re canning at your house on a hill outside town, use your actual location if possible.
It’s also important to remember that these adjustments apply to tested pressure canning recipes. You’re adjusting the pressure in an approved recipe, not inventing your own process.
And if you use a dial-gauge canner, don’t forget that the gauge needs to be checked for accuracy regularly. Extension services commonly offer this in many areas, and dial gauges are the type that need that extra verification.
FAQs About Altitude Adjustments for Pressure Canning
Usually, no adjustment is needed up to and including 1,000 feet for weighted-gauge canners using the standard chart. For dial-gauge canners using the common USDA-style 11 PSI table, the first increase typically starts above 2,000 feet.
You can use higher pressure only if it matches the safe guidance for your canner and recipe, but it’s not always ideal for quality. Using more pressure than necessary can lead to softer vegetables, more liquid loss, and lower overall quality. When canning corn or canning sweet potatoes, using more pressure than needed can soften the texture, increase liquid loss, and sometimes darken naturally sugary foods. The goal is to use the correct tested pressure for your altitude, not automatically the highest one.
No. For pressure canning, the standard guidance is to increase the pressure, not the processing time.
Because they solve the altitude problem in different ways. Water-bath canning can’t raise the temperature enough beyond boiling, so it compensates with more time. Pressure canning can reach higher temperatures, so it compensates by increasing the PSI to maintain the target processing temperature.
If you use a dial-gauge pressure canner, the gauge should be checked regularly for accuracy. Many Extension offices recommend having it tested before each canning season, and any time the canner has been dropped, damaged, or seems off.
Altitude adjustments for pressure canning sound more complicated than they really are. Once you know your elevation and whether you have a dial-gauge or weighted-gauge canner, the whole thing usually comes down to one quick chart lookup.
The good news is that the adjustment is simple. The important part is that it really does matter. Pressure canning is all about reaching the right temperature for the full tested process, and altitude changes that equation.
So if you can above sea level, take the extra minute, check your elevation, and use the right pressure every time.