This post may contain affiliate links. Please see our disclosure policy.
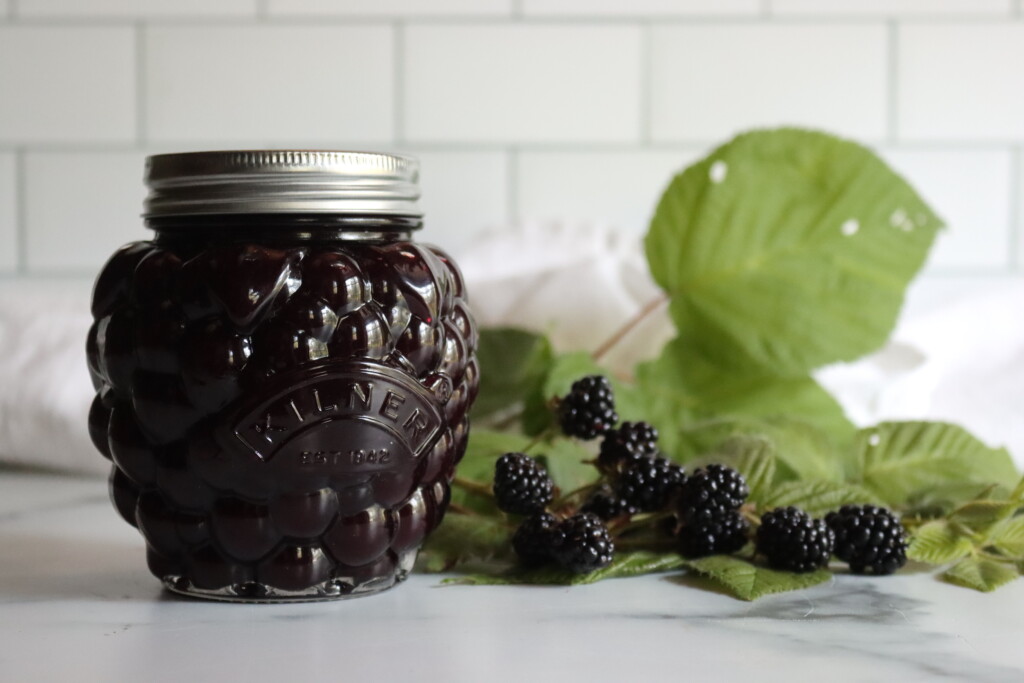
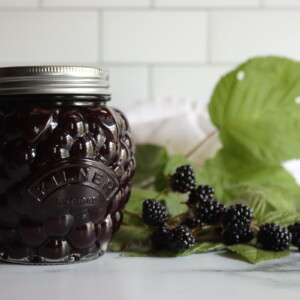
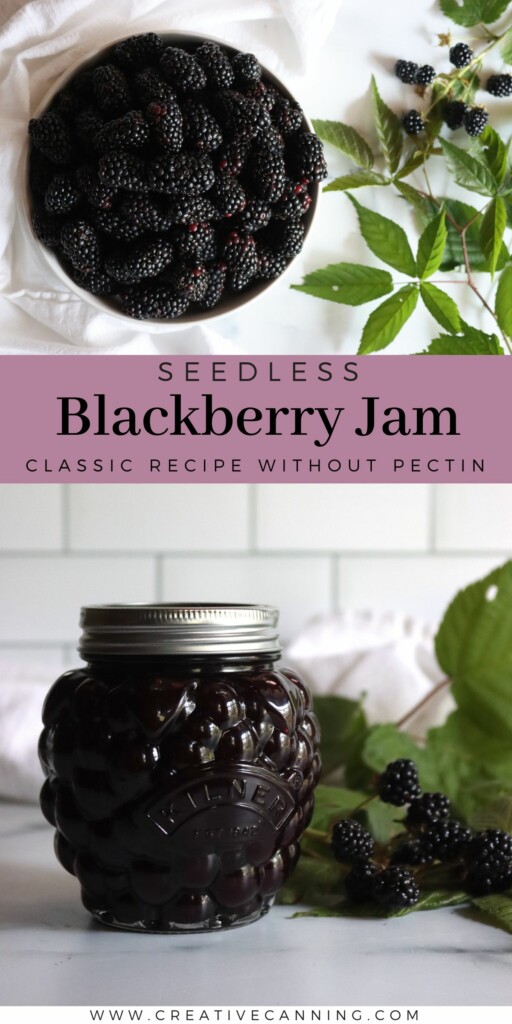
Seedless blackberry jam is a silky-smooth preserve that delivers all the rich flavor of summer berries without the crunch of seeds. While I love the rustic texture of a classic blackberry jam, there are plenty of times when I want something smoother, and plenty of people prefer their berry jams without those pesky seeds.
While I often reach for a jar of rustic old fashioned blackberry jam when I want something hearty and fruit-forward, there are plenty of moments when I prefer a more refined texture. Seedless jam is perfect for spreading on soft baked goods like scones or crepes, stirring into yogurt or oatmeal, or layering into thumbprint cookies and cake fillings where a smooth finish really shines.
The process does take a bit more work than traditional jam, simply because blackberries are so seedy. Recipes like blackberry jelly, syrup and juice solve this problem by simply straining out everything but the juice (pulp as well as seeds).
Jam, however, needs to keep the pulp but just remove the seeds.
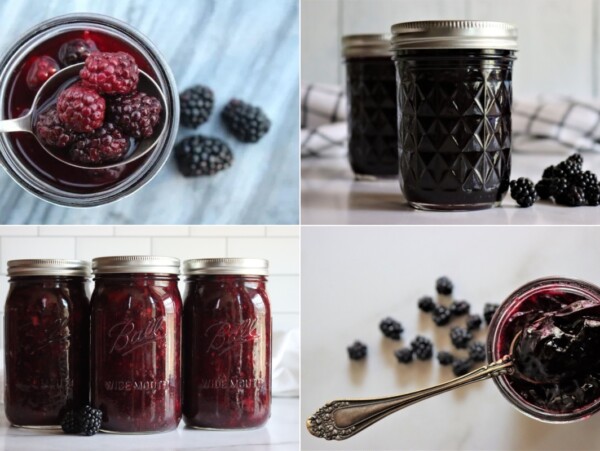
You’ll start by cooking and mashing the fruit to help release the juice and break down the pulp, then strain it through a food mill, chinois, or fine mesh sieve to remove the seeds. It’s not difficult, but it does take a few extra minutes—and some elbow grease if you’re using a strainer. That said, the payoff is a glossy, spoonable jam with a luxurious texture and concentrated berry flavor.
Whether you’re preserving a bumper crop of wild blackberries or using berries from the market, this delicious blackberry canning recipe is a great way to capture the essence of summer in a smooth, seedless spread.
Ingredients for Seedless Blackberry Jam
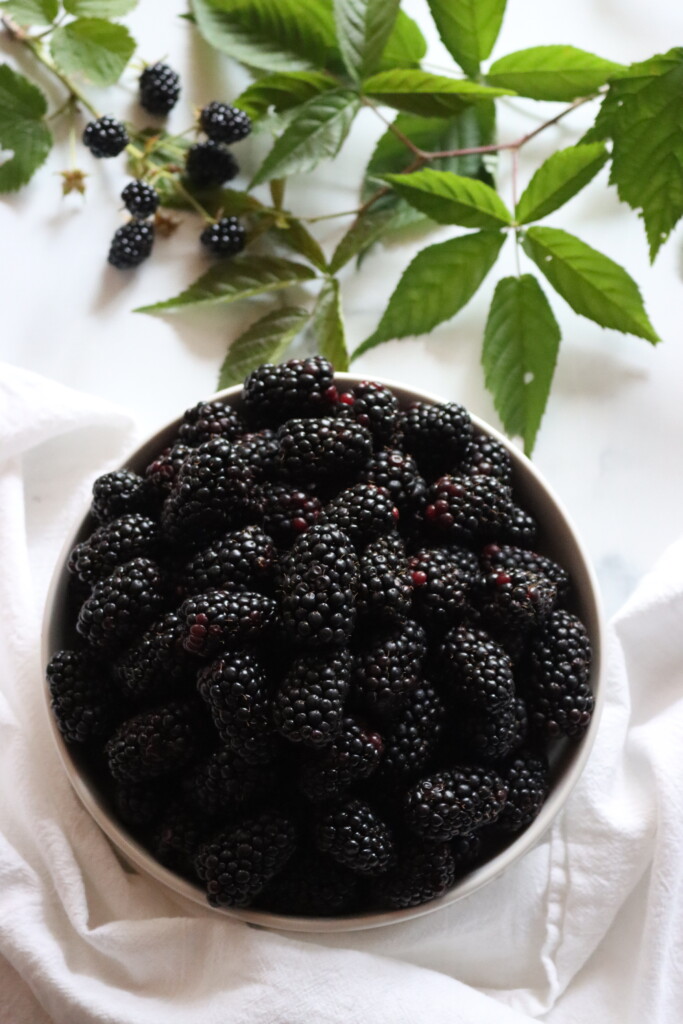
To make this seedless blackberry jam, you’ll start with 8 cups of mashed blackberries, which typically comes from about 16 cups of whole fruit or 4 pounds as purchased. After straining, you’ll be left with around 6 cups of seedless pulp—just right for a small batch of jam yielding about 4 half-pint jars.
The only other ingredient you need is sugar—this recipe uses 4 cups, which gives a good balance between fruit flavor and sweetness.
You don’t need added pectin, as blackberries contain enough natural pectin to set the jam when cooked properly.
While lemon juice isn’t required for safety, since blackberries are already high in acid, you can add a tablespoon or two of fresh lemon juice to brighten the flavor, especially if you’re using sweet cultivated berries.
Equipment for Seeding Blackberries
Removing seeds from blackberries isn’t difficult, but the right tool can make the job a whole lot easier. If you’re planning to make seedless blackberry jam more than once, it’s worth investing in a food mill.
A food mill with a fine or berry screen is hands-down the easiest option—it’s fast, efficient, and doesn’t require much effort. Just turn the crank and it separates the seeds from the pulp in minutes. There are handheld versions that will sit on top of your jam pot, and there are big counter mounted versions, and there are even versions that attach to a Kitchenaid mixer to speed up the process.
If you don’t have a food mill, a chinois sieve (also called a conical strainer) is another great choice. It’s sturdy and fine enough to catch all the seeds, and when paired with a wooden pestle or tamper, it allows you to work the pulp through the mesh with a bit of pressure. It’s a bit more manual, but still very effective.
For a lower-cost option, a fine mesh strainer will get the job done too—just know that it takes the most elbow grease. You’ll need to press and scrape the pulp through using a spoon, spatula, or silicone scraper, which can take a while if you’re processing a large batch.
Whichever method you use, I personally suggest quickly cooking the berries slightly before straining. A quick simmer helps the fruit break down, making it easier to extract the pulp without wasting any juice. With the right setup, you’ll end up with smooth, seedless blackberry puree perfect for jamming.
Seeding Blackberries for Jam
Start with about 16 cups of whole berries, which is roughly 4 pounds as purchased. That should give you about 8 cups of mashed berries once they’re crushed. Once seeded, you should have about 6 cups of seedless pulp.
Technically, you can strain the seeds out of raw blackberries, but it takes a lot of muscle and you end up losing quite a bit of good pulp. I strongly recommend briefly cooking the berries first to make the process easier and more efficient.
Place the crushed berries in a large jam pot with 1 cup of water. Bring to a simmer and cook for about 5 minutes, mashing with a potato masher or spoon until the fruit falls apart.
Once the berries are soft, work them through a fine mesh strainer, food mill, or chinois sieve to separate the pulp from the seeds. You should end up with about 6 cups of seedless blackberry pulp and roughly 2 cups of seeds to discard or compost.
Making Seedless Blackberry Jam
Return the strained blackberry pulp to a clean jam pot. Add 4 cups of granulated sugar and stir well. If you ended up with significantly more or less pulp, aim for a 3:2 ratio of pulp to sugar by volume.
Use a deep jam pot, as seedless jam tends to foam quite a bit while cooking. Make sure the mixture doesn’t come more than halfway up the sides of the pot.
Bring the jam to a boil over medium-high to high heat, stirring frequently. Cook for 15 to 20 minutes, until the mixture thickens and reaches gel stage. It will darken, become glossy, and reduce in volume.
Testing for Set
Use the plate test: Keep a plate in the freezer and drop a spoonful of hot jam onto it when you think it’s ready. After 30 seconds, push the jam with your finger. If it wrinkles and holds a line, it’s done.
Or use a thermometer: At sea level, jam sets at 220°F. Subtract 2°F for every 1,000 feet of elevation if you live at higher altitudes.
Canning Instructions
Ladle the hot jam into prepared half-pint or pint jars, leaving 1/4-inch headspace. Wipe the rims, apply lids, and process in a boiling water bath canner:
- 10 minutes at elevations up to 6,000 feet
- 15 minutes above 6,000 feet
The canning times are the same for both pints and half pints.
Let jars cool for 12 to 24 hours before checking seals. Properly canned jam will keep in the pantry for 12 to 18 months.
Troubleshooting
This recipe should be pretty simple, even for beginning canners. Still, sometimes things don’t go quite as planned. Here are the most common issues:
The most common reason is undercooking. Since there’s no added pectin, seedless blackberry jam relies on evaporation and natural pectin in the fruit to thicken. Keep cooking until the jam reaches gel stage—around 220°F at sea level (subtract 2°F for every 1,000 feet above sea level). If you’re unsure, test on a cold plate or use a thermometer for accuracy.
It’s possible your pulp had extra moisture or the heat wasn’t high enough to evaporate it efficiently. Try turning the heat up slightly and continue boiling, stirring constantly to avoid scorching. You can also re-cook the jam later with added pectin, or just call it “blackberry syrup” and enjoy it over pancakes or ice cream. I have never had this happen with blackberries, as they generally set pretty dependably, but there is natural variation in fruit and it’s possible your batch were low in pectin due to growing conditions.
It looks like you overcooked it a bit. Try using an instant read thermometer next time, as temperature is a pretty good indicator of set point. If the jam is overly thick, stir in a tablespoon or two of boiling water just before serving, or gently warm the jar to loosen it. It still works great as a fruit glaze or stirred into yogurt or oatmeal.
Nothing! Foam is completely normal in seedless blackberry jam, especially since removing the seeds reduces bulk and allows more bubbling. You can add ¼ teaspoon of butter to reduce foaming during cooking, or simply skim it off at the end. The foam is harmless and doesn’t affect safety or taste—just appearance.
That’s fine! The yield can vary depending on the juiciness and size of your berries, and how thoroughly you strain them. If you end up with less pulp, simply scale the sugar to maintain a 3:2 fruit-to-sugar ratio. For example, 5 cups pulp = 3⅓ cups sugar.
Seedless Blackberry Jam Variations
Low Sugar Seedless Blackberry Jam works just fine with a reduced sugar content. Use as little as 2 to 3 cups sugar for 6 cups of seedless pulp for a bold, tangy flavor with a softer set. You can also substitute honey or maple syrup, using about 2/3 the volume of sugar. Keep in mind that lower sugar versions often take longer to reach gel stage and may yield a slightly thinner jam.
Blackberry Jelly is even smoother than seedless jam. To make jelly instead, cook the fruit with a splash of water and strain through a jelly bag or cheesecloth to remove all pulp. Measure the juice, then add sugar and cook until it sets. Jelly also sets without added pectin, provided you use a full sugar recipe. With lower sugar, you’ll need boxed pectin for jelly because it’s missing all the pectin from the pulp.
Add a Flavor Twist by stirring in a splash of blackberry liqueur, Chambord, or cassis just before jarring. Or try a pinch of cinnamon, cardamom, or vanilla to give the jam warm, spiced undertones. For a mixed berry jam, combine blackberries with raspberries, blueberries, or even plums—just be sure to strain out all seeds before cooking.
The process works the same with raspberries too, incase you want to make a seedless raspberry jam or a seedless black raspberry jam. I’ve yet to find a good way to make a seedless home canned blackberry pie filling, as you really need the structure of the seeds and fruit to make it a filling instead of puree, but if you have ideas, I’d love to hear them.
Seedless Blackberry Jam
Equipment
Ingredients
- 16 cups blackberries, see notes
- 4 cups sugar
- 2 tbsp lemon juice, optional, see notes
Instructions
- Prepare your canning setup: Wash and sterilize 6 to 7 half-pint jars. Place new lids in hot water (not boiling), and prepare your water bath canner. Keep everything hot until ready to fill.
- Cook the berries to loosen seeds: Combine the mashed blackberries and water in a deep saucepan or jam pot. Bring to a gentle boil and simmer for about 5 minutes, mashing with a potato masher as they cook. The fruit should break down completely and release its juice.
- Strain out the seeds: Working in batches, press the softened berries through a fine mesh strainer, chinois, or food mill fitted with a berry screen. You should end up with approximately 6 cups of seedless blackberry pulp. A little more or less is fine—just be sure to adjust the sugar (see notes).
- Measure and add sugar: Return the seedless pulp to a clean jam pot. Stir in 4 cups granulated sugar and optional lemon juice. Mix well to dissolve some of the sugar before heating.
- Bring to a boil: Turn the heat to medium-high and bring the mixture to a rolling boil, stirring frequently. Use a deep pot, as seedless blackberry jam foams quite a bit.
- Cook to gel stage: Boil the jam, stirring constantly, for about 15–20 minutes or until it reaches gel stage. Test for doneness using the plate test, thermometer method, or sheeting test (see notes).
- Remove from heat and skim foam: Once gel stage is reached, take the pot off the heat. Skim off any foam from the surface if desired.
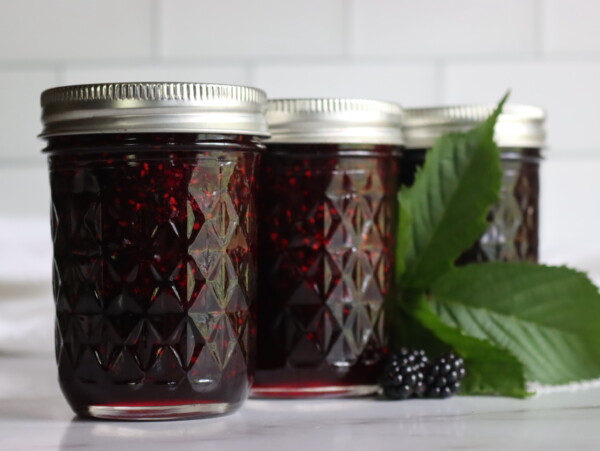
- Ladle into jars: Carefully ladle the hot jam into prepared jars, leaving ¼ inch headspace. Wipe rims clean, apply lids, and screw on bands until fingertip tight.
- Process in a water bath canner: Submerge jars in boiling water with at least 1–2 inches above the lids. Process pints and half pints for 10 minutes, or 15 minutes about 6,000 feet in elevation.
- Cool and store: Remove jars and let them sit undisturbed for 12–24 hours. Check seals, label, and store in a cool, dark place for up to 18 months. Refrigerate after opening and use within 2–3 weeks.
Notes
Gel Stage Testing Methods
Plate Test: Freeze a plate and spoon. Place a spoonful of jam on the cold plate and wait 30 seconds. Run your finger through it—if it wrinkles and holds a line, it’s done. Thermometer Test: Jam gels at 220°F at sea level. Subtract 2°F per 1,000 ft of elevation. Sheeting Test: Dip a spoon into the jam and turn it sideways. If it falls in a sheet or slow blob rather than droplets, it’s likely done.Altitude Adjustments
If canning, both pints and half pints are canned in a waterbath canner for 10 minutes. If you’re above 6,000 feet in elevation, be sure to increase the canning time to 15 minutes. Don’t can in jars larger than pints.Nutrition
Nutrition information is automatically calculated, so should only be used as an approximation.
FAQ
Still have more questions? Hopefully this FAQ section can help!
Yes, absolutely. Thaw them first so they’re easier to mash and strain. Frozen berries tend to release their juice more readily after thawing, which can make the seeding process smoother. Expect a slightly lower yield due to pectin loss from freezing, but the jam will still set with proper cooking.
That’s totally fine. The 6-cup measurement is just an average yield from 8 cups mashed berries. If you get more or less, simply adjust the sugar using a 3:2 ratio of fruit pulp to sugar by volume. That’ll keep the texture and sweetness balanced.
Yes, but it’s a trade-off. Reducing the sugar below the 3:2 ratio may result in a looser set and lower yield. If you prefer low-sugar jam, consider using Pomona’s Pectin or another low-sugar pectin to ensure a proper gel. Without added pectin, it will still taste great, but the texture may be more like a fruit spread.
Many people think so! While the straining step takes a little time, the end result is a smooth, silky jam that’s perfect for kids, elegant desserts, or anyone who dislikes the crunch of seeds. It also spreads more cleanly, making it ideal for jam-filled cookies, cakes, and pastries. My husband loves a seedy jam, my kids like the seedless version. It’s all about personal taste.
Not for safety. Blackberries are naturally high in acid, so the jam is safe to can without it. That said, a tablespoon or two of fresh lemon juice can help brighten the flavor—especially useful if you’re working with extra-sweet cultivated berries. Skip it if your berries are tart already.
It’s best to stick with small batches when making no-pectin jams. Doubling can affect the set, as larger volumes take longer to reach gel stage and may cook unevenly. You’re better off making two separate batches if you want a larger quantity.
Properly canned and sealed jars will keep for 12 to 18 months in a cool, dark pantry. Once opened, store in the refrigerator and use within 2 to 3 weeks. You can also freeze the jam in freezer-safe containers for longer storage if you prefer not to can it.
My local farmers market had a special on BlackBerry flats which I picked up. Kept 3 containers for eating & the balance of 12 cups I used your recipe for jam.
After ladeling into the jars & popping into the water bath I had to swipe the remainder out of the pot with my finger like a kid.
Sooooo good! Thanks for sharing.
Lovely! I’m so glad you enjoyed it!
I failed at making blackberry jam my first time. Figured I’d try one more recipe before I gave up. It’s kind of crazy most jam recipes make so much. I wanted to make a jar or two for a friend, so I really appreciated your notes on ratios! It enabled me to scale it down to a smaller (and more affordable) amount, and also figure out where I went wrong the first time (not enough sugar). The jam is delicious and I love it!
Wonderful! So glad it turned out for you.