This post may contain affiliate links. Please see our disclosure policy.
Canning hamburger, as either ground beef crumbles or heat and serve hamburgers, is a simple way to preserve beef right in your pantry.
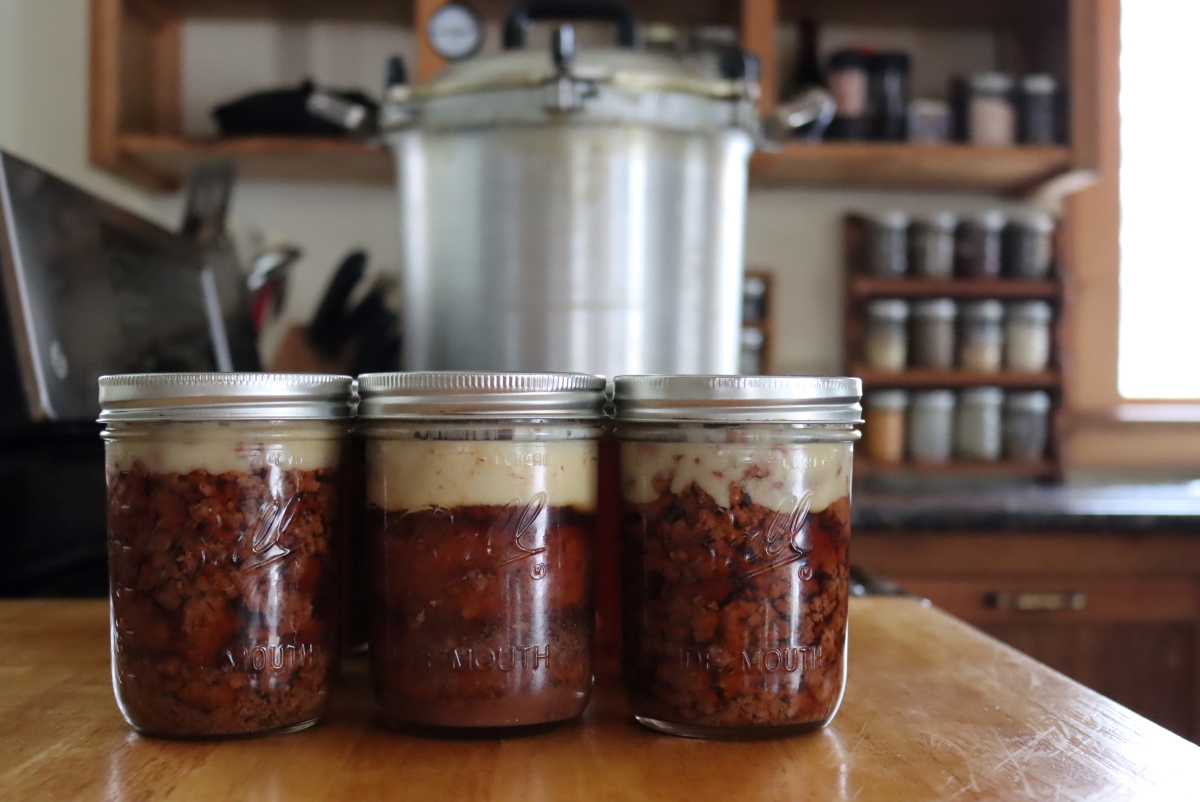
Canning ground beef is a great solution for the not-so-tragic problem of having too much ground beef and not enough freezer space to store it all.
Since we’ve started buying our beef by the side, which yields a lot of meat in terms of how much room it takes up, I’ve been using the canning method for storage.
Canning beef isn’t limited to ground meat, either, you can also preserve chopped beef chunks and beef broth for long term storage.
Using a pressure canner (a water bath canner isn’t suitable for low acid foods like meat in general) to preserve ground beef has actually become my favorite method of storing it. Unlike frozen beef, there’s no need to worry about freezer Tetris or accidentally forgetting to defrost dinner with canned beef.
Canned ground beef is basically heat-and-serve, especially when you’ve included a couple of jars of pre-made hamburger patties, which only need to be crisped up and served with your choice of burger fixings (which for me, would include bread and butter pickles or pickled onions).
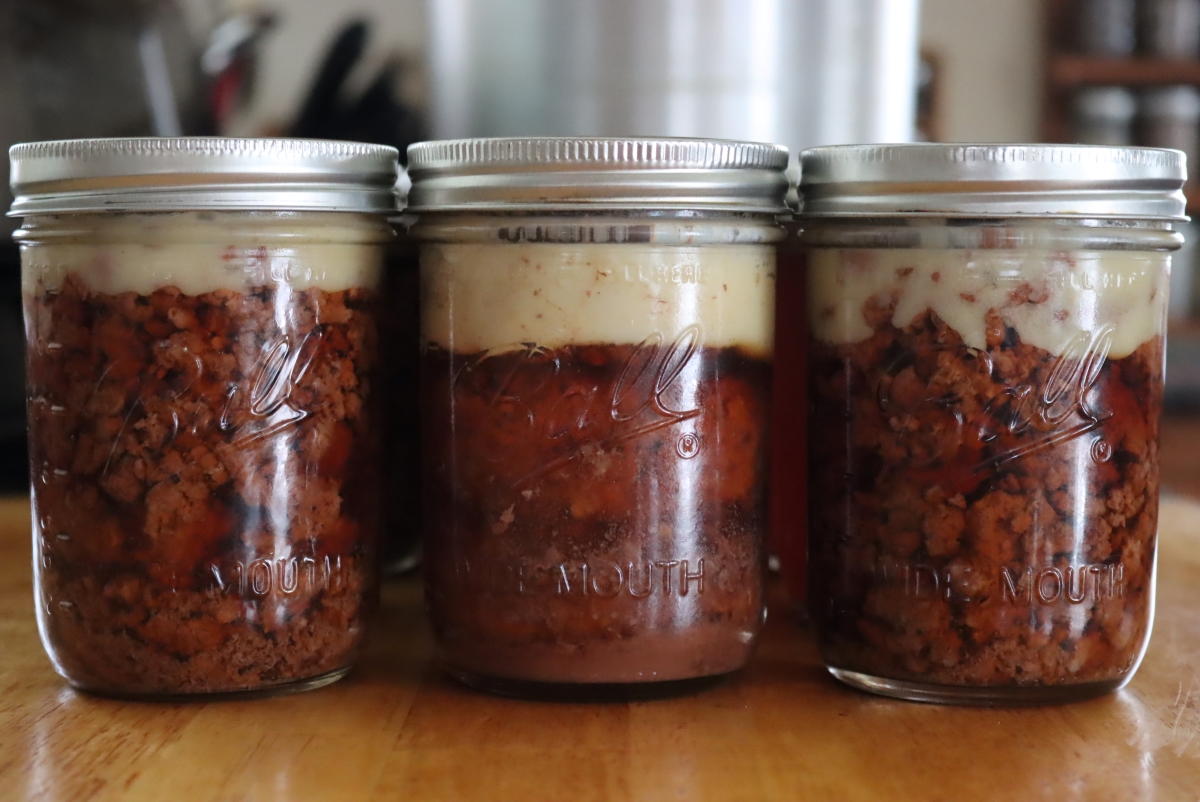
Canning Ground Beef
Canned ground beef can be used any way you’d normally use it: tacos, spaghetti sauce, chili, stir fried rice, casseroles, soups, Sloppy Joes, and stews (and anything else you can think of).
When you’re trying to figure out amounts, I find that the best way to divvy up the raw hamburger is to weigh it out into 3/4 pound sections (for pint jars) or 1 1/2 pound sections (for quart jars) using a food scale.
Preparing the meat for canning is easy: just brown the ground, season with salt and pepper (optional), and pack into jars leaving 1-inch headspace at the top.
Because my family loves tacos so much, I’ll typically pre-season some of the ground beef with taco seasoning, which makes mealtimes a snap on busy nights.
I’ve also heard of adding a small amount of beef bouillon to enhance the flavor, but I generally use our own homemade beef broth instead.
If you want to salt the ground beef before canning, 1 teaspoon per pint or 2 teaspoons per quart is the general guideline. You can always add more before serving, so I always hold back when it comes to salting the meat before canning.
(Don’t add salt if you’re adding bullion cubes, they already have plenty of salt.)
There are certain spices I’d caution against using, as the flavor intensifies over time (and not in a pleasant way).
For example, sage and thyme can become quite bitter and even sour-tasting, and cumin tends to overwhelm the taste of the meat after pressure canning. Fresh herbs, as a rule, shouldn’t be added when canning, just dry herbs.
Always remember, it’s much easier to add seasoning immediately before serving than it is to mask accidental over-seasoning during canning.
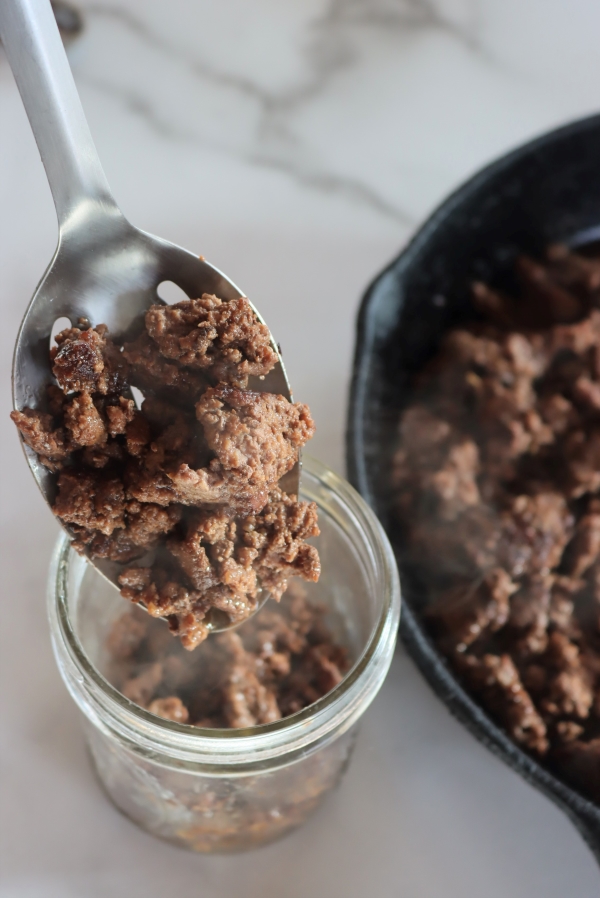
Unlike when canning chunks of beef, ground beef must be browned before filling the jars for two reasons: it renders some of the fat out of the beef, and it prevents the crumbled beef from clumping together into one big piece during the canning stage.
Brown it in a small amount of oil or beef fat, and drain the crumbles before packing them into pint- or quart-size canning jars. You’ll need to leave 1-inch headspace between the surface of the beef and the underside of the lid.
Even though the browning process will render out some of the fat in the beef, there will still be plenty more in the jar once they’ve cooled down after canning. This layer of fat is desirable, as it’s perfect for crisping up the ground hamburger (or patties, see below).
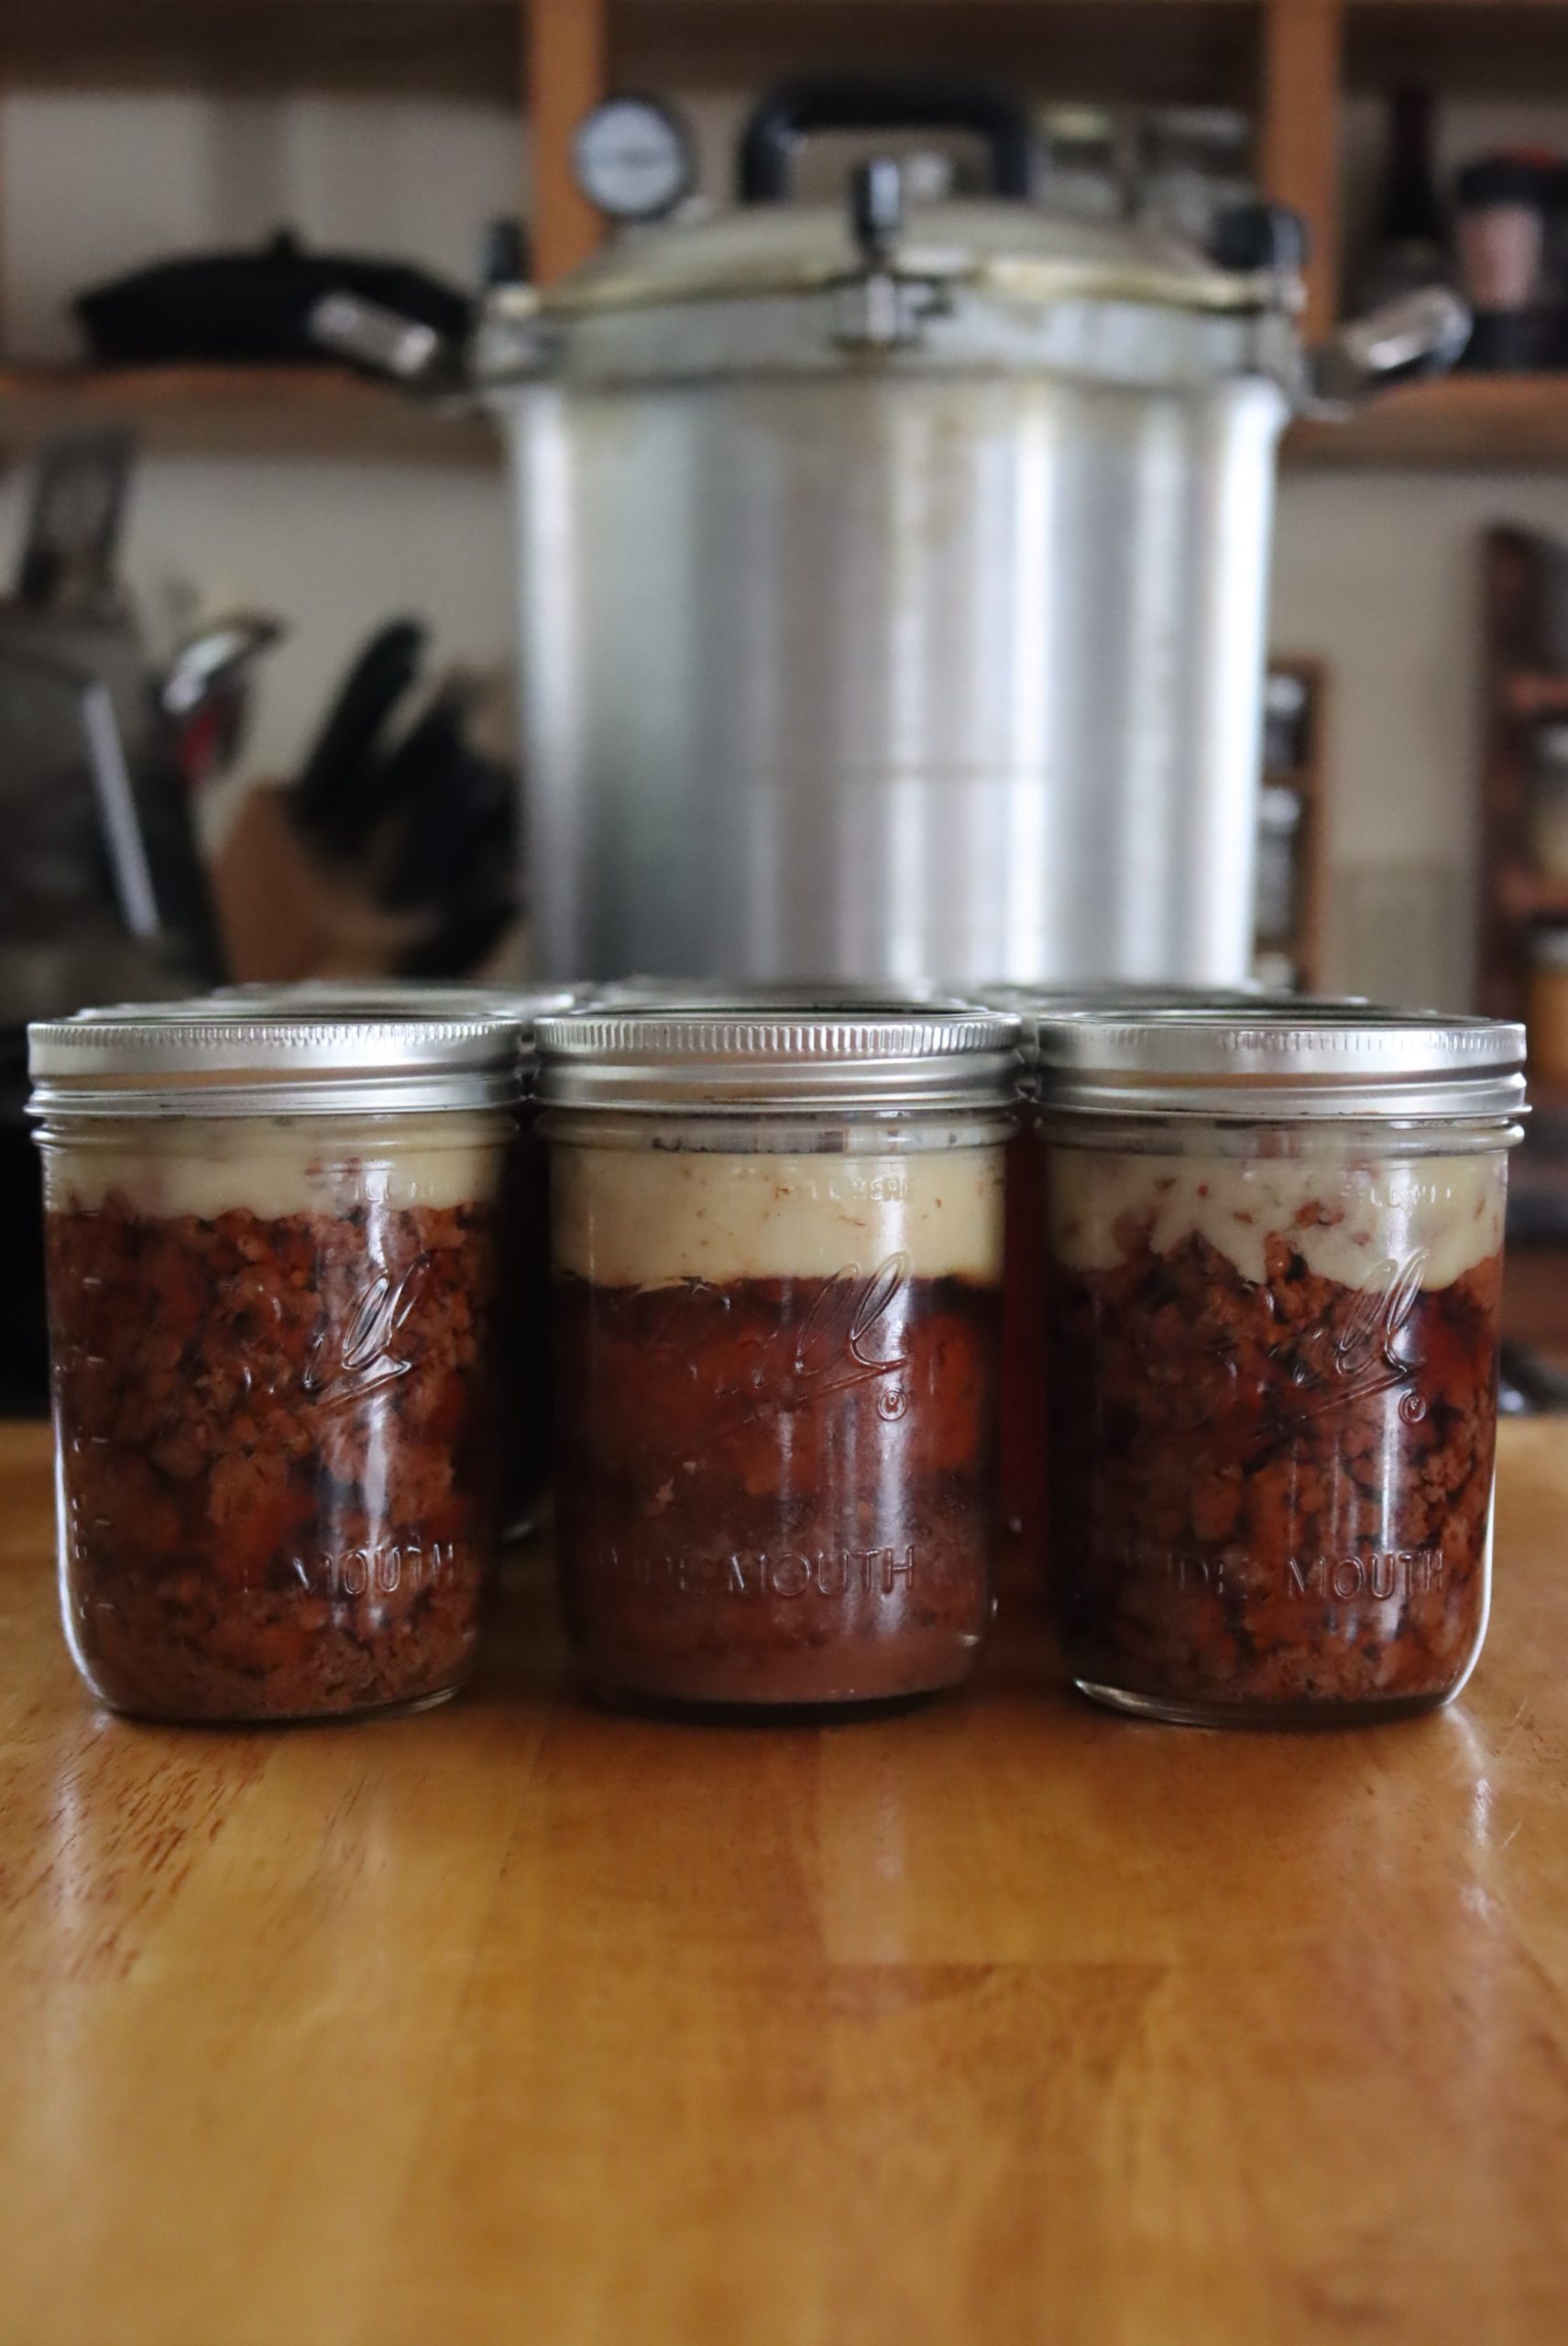
Since this is a hot pack, you’ll need to add boiling liquid to cover the ground beef (leaving 1-inch headspace) before sealing the jars and loading them into the pressure canner.
The choice of liquid is up to you, and you can choose from boiling water, beef stock, or tomato juice, depending on your preference.
Once the jars are filled, apply 2-piece canning lids until fingertip tight and wipe down the jars with a clean dish towel.
Canning Hamburger Patties
Another option is to shape the ground beef into hamburger patties, in which case they should be pre-seasoned with salt and pepper before being placed into the jar. These patties are great for busy nights and fast meals as they’re essentially heat-and-serve straight from the jar.
Whenever I’m canning ground beef I like to reserve a canner batch for hamburger patties. Canned ground beef is more versatile, but I can get dinner on the table in under 15 minutes if I have a couple of these jars hanging out in the pantry.
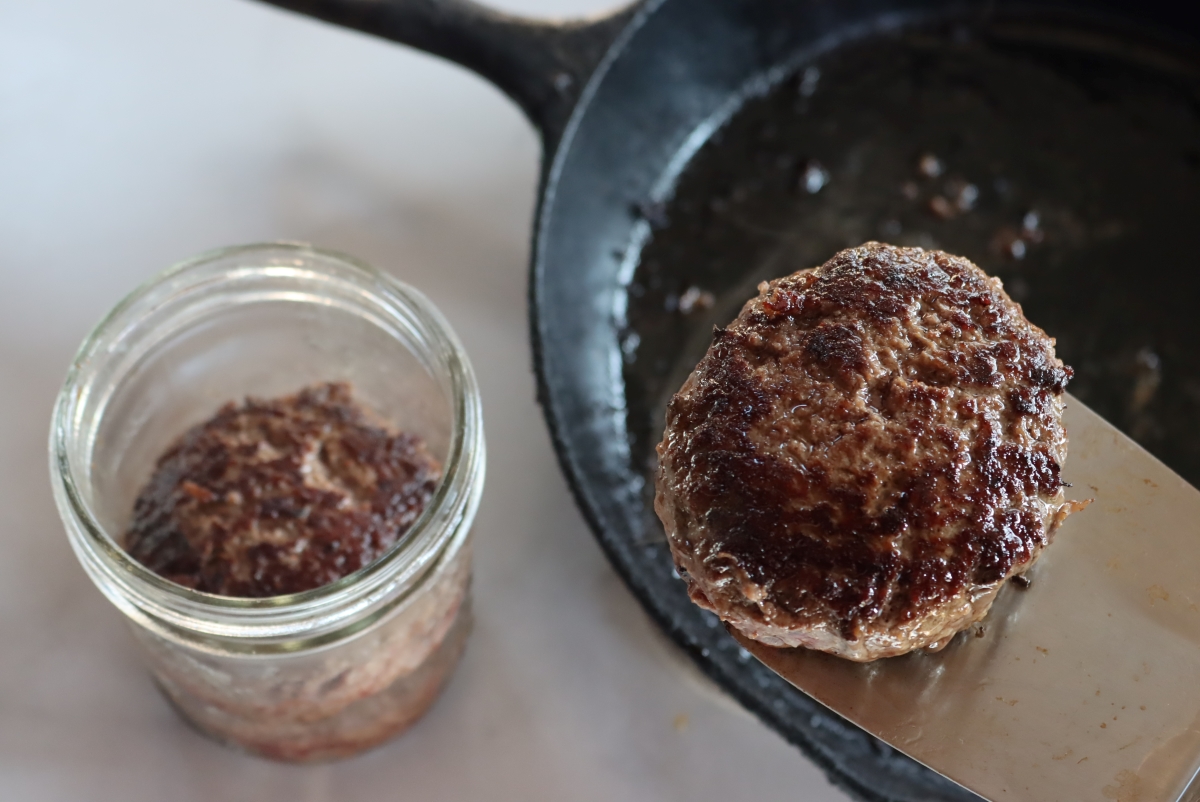
Unlike non-canned ground beef patties, which are sometimes made with binders such as bread crumbs, eggs, or another form of starch, the canned version can only be made with ground beef, salt, and pepper.
I weigh out the ground beef into 3/4 pound chunks, and then shape each segment into uniform 1/4 pound patties (giving me three patties per pint jar, or six patties per quart).
They don’t have to be perfect, but when it comes to cooking and serving them, it makes things easier if they’re about the same size.
Don’t be afraid to form them fairly tightly, too, as this helps the patties hold their shape in the jar. Just like the beef crumbles, you’ll want to brown the patties in a small amount of oil or beef fat before transferring them to jar (they don’t have to be cooked through).
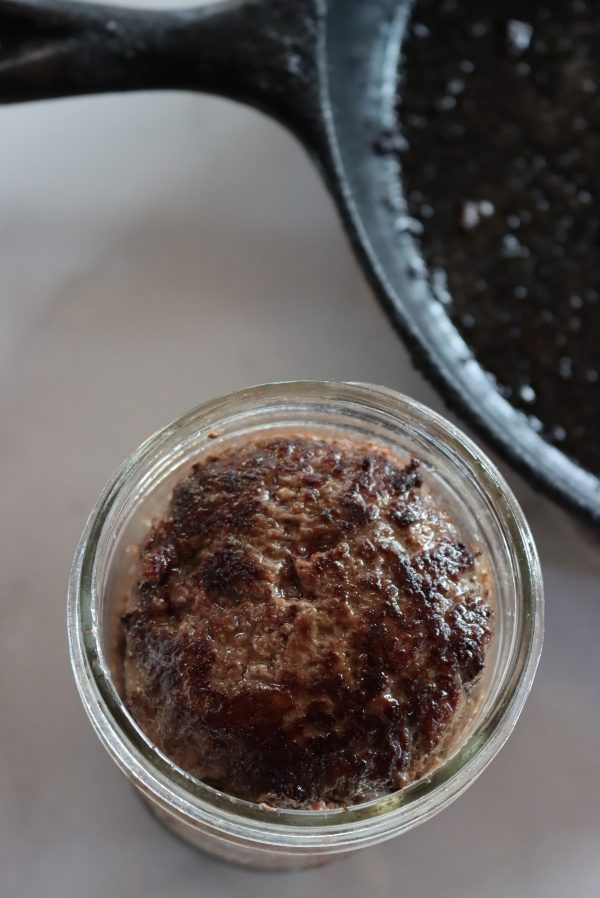
Just like the prepping ground beef for canning, there should be a 1-inch headspace at the top jar. And again, since this is a hot pack, you’ll need to cover the hamburger patties with boiling liquid — either water, beef stock, or tomato juice.
When the jars are filled, apply your 2-piece canning lids until fingertip tight and wipe down the sides and tops of the jars.
At this point, the beef is ready to be loaded into a pressure canner.
Pressure Canning Ground Beef and Hamburgers
Meat is a low acid food it must to be canned using a pressure canner.
A hot water bath canner can’t and won’t reach a high enough temperature or sustain that high temperature for the time required to properly can the ground beef.
If you’re new to pressure canning, check out my in-depth beginner’s guide to pressure canning before you begin.
The two most common brands of pressure canner are:
- All American Pressure Canners – Weighted gauge pressure canners that are durable, easy to use, and last a lifetime. No gaskets or seals to replace, and high capacity. This is what I use.
- Presto Pressure Canners – Great for beginners, these are inexpensive and easy to find. They have a dial gauge, which makes them a bit harder to use since you’ll be constantly adjusting the stove to maintain proper pressure. They also have rubber gaskets that need to be replaced regularly.
Don’t use an instant pot or other electronic pressure cooker. While they work wonderfully for cooking, they don’t reliably reach safe temperatures for canning.
To get started, prepare a pressure canner so that the water inside is barely simmering, about 180° F.
Load the jars into the pressure canner, and close the lid but don’t start bringing it up to pressure yet. Allow the canner to vent steam for 10 minutes, then apply the canning weight and bring the canner up to pressure.
(Be sure to follow the directions for your model of pressure canner if they differ at all.)
Process the jars for 75 minutes (pints) or 90 minutes (quarts).
Don’t set the timer until the canner has come up to pressure — the processing time only includes the time the canner is at the specified pressure.
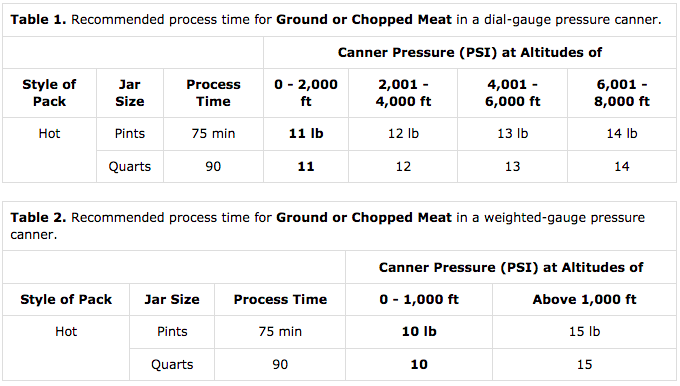
Adjust the canning pressure based on your altitude and the type of canner you’re using following the table below.
Once the timer has gone off, let the pressure release naturally (never attempt to rapid release a pressure canner!) until the PSI has reached 0.
Using a jar lifter, remove the jars from the canner and place them on a clean towel to cool (the contents of the jars will still be very hot, so be careful not to burn yourself).
Let the jars come to room temperature, anywhere from 12 to 24 hours, before wiping them clean and checking the seals.
Remove the canning rings from the sealed jars and store them in a cool, dry place out of direct light for 12 to 18 months.
Cooking Canned Ground Beef & Hamburger Patties
When cooking canned ground beef crumbles, it really just depends on how you’re going to use it.
For tacos and similar things, I drain the liquid and crisp the meat in the fat from inside the jar.
When making chili, I’ll pull off most of the fat to reserve for another project and then dump in the meat and canning liquid broth, which is rich in flavor.
Cooking canned hamburger patties might seem daunting, but it’s actually quite simple.
They don’t look all that appetizing when you pop open the jar lid, but they cook nicely.
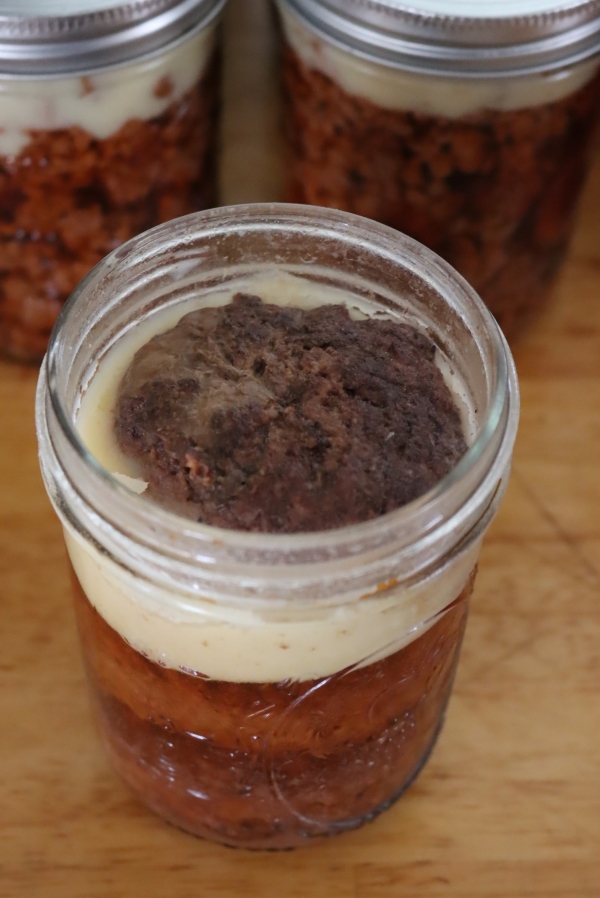
Simply reheat and brown them in a hot skillet with some of the rendered fat from the jar.
I do find that canned hamburgers are on the wet side, so I recommend pressing on them with a spatula as they’re crisping up to release some of the extra moisture.
If you have a grill, these patties turn out perfectly, as the moisture can drip away as they’re cooking.
While you’ll want to reserve the fat at the top of the jar for browning the patties, be sure to drain the liquid from the jar. This can be used as an extra rich beef broth, and you can save it in the refrigerator for up to a week to use with a different recipe (soup, chili, etc).
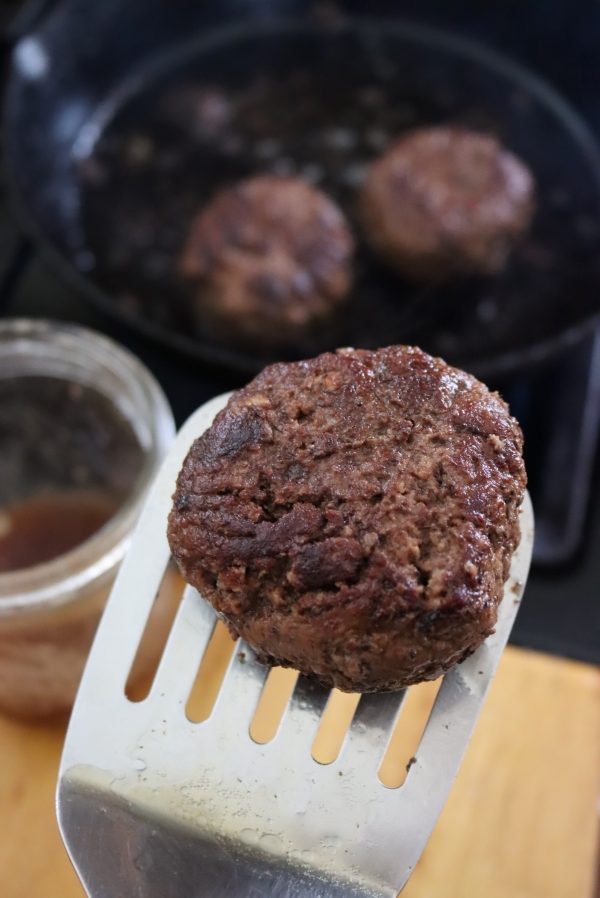
At the end of the day, I prefer the texture and taste of canned ground beef over the formed hamburger patties, but it’s great to have a few jars of canned hamburgers just in case.
You can always break the patties up into beef crumbles if you’re in a pinch, and use them as you would for any recipe calling for ground beef.
But like I said, canned hamburger patties are good to have around for last-minute meals on those nights when you’re too tired to get dinner ready.
Meat Canning Recipes and Tutorials
Looking for more ways to preserve meat in a pressure canner?
Canning Hamburger (Ground Beef)
Equipment
Ingredients
- Ground beef, 3/4 pound/pint or 1 1/2 pounds/quart
- Canning liquid, choose from water, broth, or tomato juice
- Salt and pepper, optional
- Seasoning, taco mix, beef bouillon, etc. (optional)
- Neutral oil or beef fat, for browning
Instructions
- Prepare a pressure canner according to manufacturer's directions.
- In a large skillet, brown the ground beef in a small amount of oil or beef fat. Season with salt and pepper and/or seasoning as the beef cooks.*
- Pack ground beef into jars and cover with boiling liquid of your choice, leaving 1-inch headspace.
- Wipe down jars with a clean dish cloth and apply 2-piece canning lids until fingertip tight.
- Load in jars into prepared pressure canner.
- Allow the canner to reach the correct pressure (see notes below) and process pint jars for 75 minutes or quart jars for 90 minutes.
- When the timer goes off, remove the pressure canner from heat and let the pressure naturally release until it reaches 0 PSI.
- Transfer the still-hot jars to a clean surface using a jar lifter, leaving an inch of space between each jar, and let cool to room temperature (12 to 24 hours).
- Check the seal for each jar, remove the rings, and wipe down the outside of each jar with a clean cloth. Unsealed jars should be stored in the refrigerator and used immediately.
- Store sealed jars in a cool, dry place away from direct light for 12 to 18 months.
Notes
Canning Pressure for ground beef and hamburger patties
The total time required does not change with elevation, but the pressure required does increase at higher elevations.Weighted Gauge Canner:
- Under 1,000 Feet Elevation Use 10 lbs
- Over 1,000 Feet Elevation use 15 lbs
Dial Gauge Canner:
- 0 to 2,000 Feet Elevation Use 11 lbs
- 2,001 to 4,000 Feet Use 12 lbs
- 4,001 to 6,000 Feet Use 13 lbs
- 6,001 to 8,000 Feet Use 14 lbs
Nutrition
Nutrition information is automatically calculated, so should only be used as an approximation.
Pressure Canning Recipes
Keep that pressure canner hot with these canning recipes:
when making hamburger patties we add a egg when pressure canning patties is this ok or do i need to leave the egg out
At least according to the NCHFP, eggs are not approved for canning in any form. My mom adds eggs to her hamburgers too, and it does really help keep things together. For canning though, it can lead to density issues (safety issue) and the egg kinda weird in the pressure canning process (quality issue). Leave it out when canning.
I have some hamburger that is already cooked. Do I still need to can it for the 75 minutes?
Yes! The patties are pre-cooked before they go in the jars. The canning time is not to cook them, but to make them shelf stable.
How do you keep the patties from getting crumbly?
If you brown them really well before going into the jars, and then brown them really well again when you serve them it’s less of an issue. They’re not obviously the same texture as a freshly made burger, but they were really quite good and held together as full patties for me when well browned.
I have canned crumbled ground beef in batches of 10#, All I do is bring a large stockpot of salted water to a boil and drop in pieces of the raw meat. Cook for about 10 min and use a potato masher to chop it into smaller pieces. I then let it set overnight in the fridge which allows the grease to rise to the top and harden. Skim it off or you will end up with a thick layer of fat in your jars. Do not drain, but bring to a boil. Fill jars to within 1″ the top with the crumbled beef and then pour in the boiling broth to 1/2″ from top. Seal and process as posted recipe directs. This is so handy for many quick meals, although if you make your crumbles too small, they tend to get mushy. Sometimes I add taco seasonings to part of what I can, which dramatically cuts down on time when making Mexican dishes!
That sounds like you have a process down there for large batches, nice. Everything’s pre-cooked, broken apart and you’ve drained the fat. Sounds great!
very helpful ty I am curious I may have missed this but how large are these patties………….Look small but looks can be deceiving
The patties in this recipe are 1/4 pound patties. I put 3/4 pound in a pint jar, with three patties.
I am having a hard time getting all the canning step done at one time. For example, I have been browning beef in batches. I have been setting aside to cool over night. Do I need to reheat or keep hot all of the browned beef before canning? Or is there a safe way to can the already brown meat in a cold pack? Could I essentially treat it like a raw pack but add liquid?
Yes, you would treat it like a raw pack and add liquid. No need to reheat the meat, but you do need to pour boiling water or broth over the top before loading them into the canner. Don’t preheat the canner too hot in that case, to prevent thermal shock on the jars. Keep it below a simmer. Best of luck!
I noticed an off smell and flavor of the pressure canned hamburger. It smells and taste between metallic and burnt. I tried the hamburger 24 hours after canning. The lid was sealed tight. Is it normal to have a an off smell with pressure canned hamburger? It definitely taste and smells differnt than canned raw packed beef chunks. Thanks.
That’s a strange one? It sounds like you’re an experienced canner and have canned beef before, just not ground beef. It should smell/taste the same as when you do raw pack beef chunks, and there’s really no difference. If it has an off smell/taste, then there’s a problem.
Can you please tell me how long I can keep the ground beef in the refrigerator after opening the jar? I have quart jars but I only use a pound at a time so I am trying to figure out how long before I need to make a meal with the remaining beef. Thanks!
That’s the same as any cooked food in your fridge, which is usually about a 7 to 10 days. Treat it like any batch of leftovers once opened.
Read your article,it sounds great. I’m 80 years and just starting pressure canning.I want to make beef broth & beef soup.Ill probably ask more questions ,cause my memory is getting weak
No worries! I hope it works out for you. Here I am canning taco meat with seasoning based on this recipe today, so we’re both canning today =)
The top of my canned hamburger that was canned a year ago , that isn’t in any liquid, has turned brown and the rest below the liquid is more of a pinkish color. I haven’t unsealed it would it still be good?
Yes, that’s normal. Food above the liquid line can discolor but so long as it was properly processed and stays sealed, then it’s fine to eat.
When canning ground beef can I use a barbecue sauce instead of just water, builion or tomato sauce. My family did not like the texture of my canned ground beef and I’m hoping I can improve the taste by using a spicy barbecue sauce when pressure canning the beef.
That should work as there are a number of recipes that basically do the same thing (like canning sloppy joe filling). The thing is, the BBQ sauce can’t have thickeners in it and it should be a pretty runny BBQ sauce so that the jars aren’t too dense. There’s not a particular tested recipe here, this is just my opinion, so you’ll have to use your best judgement here.
Good morning! I’m semi- experienced with canning but just now venturing into canned meats. I canned ground beef last night for the first time. When done the jars had some fat on the outsides and tops of jars. I’m assuming it was due to siphoning. Do your jars have fat on the outside when you can meat? Thank you!!
Yes, pretty much always, that’s normal with any meat canned product. Some of the fat pretty much always siphons into the pressure canner body, and all the jars will be a bit greasy when you pull them out. Wait for the jars to cool completely and then take of the rings and wash the jars really well in warm soapy water before storing.
Can I re pressure can the meat if the jars didn’t seal? Will that hurt the meat?
Yes, you can try to re-can the meat if the jars didn’t seal. I’d suggest getting new lids, and making sure the rims of the jars are really clean as oil from the meat can get in there and cause failed seals. Wipe the rims with a cloth dipped in white vinegar and then put on new lids.
Here’s the instructions on re-sealing jars from clemson university:
“Can food be re-canned if the lid does not seal? Canned food can safely be re-canned if the unsealed jar is discovered within 24 hours. To re-can, remove the lid and check the jar rim for tiny nicks. Change the jar, if necessary. Add a new treated lid and reprocess using the same processing time.”
https://hgic.clemson.edu/factsheet/most-frequently-asked-canning-questions/
Great article, thanks so much. I’m really interested in different ways to preserve meat. I didn’t see this in the post, so I wanted to ask: how long will these cans of beef keep in a cool dark place?
Canned goods are generally rated for 12-18 months, or at least that’s how long the lids are rated to hold a seal. If they are still completely sealed and have not come unsealed at any point, they’re good to eat almost indefinitely. The thing is, though all the bacteria etc. inside the jars is completely destroyed, there are still enzymatic processes happening in there. The meat, after several years, will start to degrade and flavor will decline. It’s a quality thing, not a safety thing, and so long as the seals hold then the meat is safe to eat for a LONG time.