This post may contain affiliate links. Please see our disclosure policy.
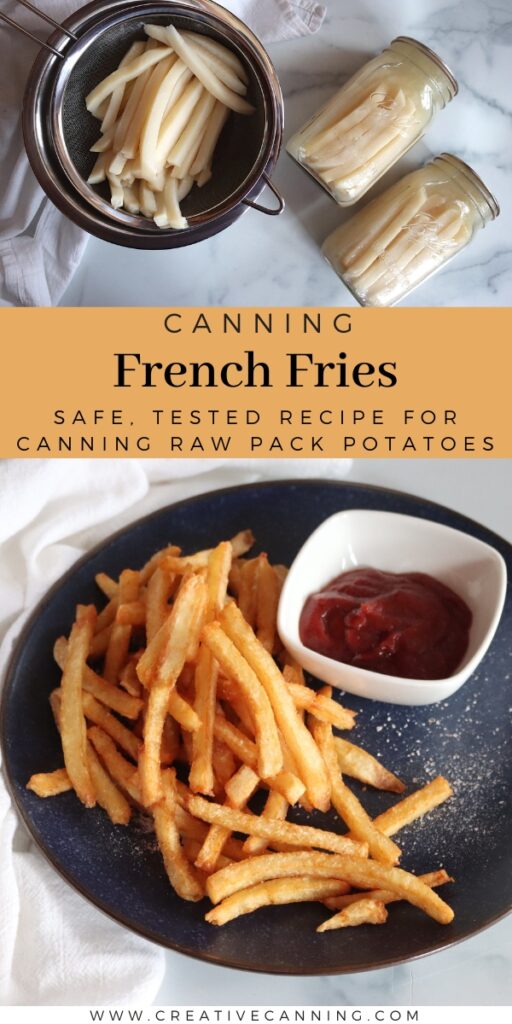
Pressure canning French fries is a convenient way to preserve homemade fries for later use, so you can enjoy crispy, golden fries with minimal effort. Simply prepare, pack, and pressure can the fries, then fry or bake them whenever you’re ready for a delicious snack!
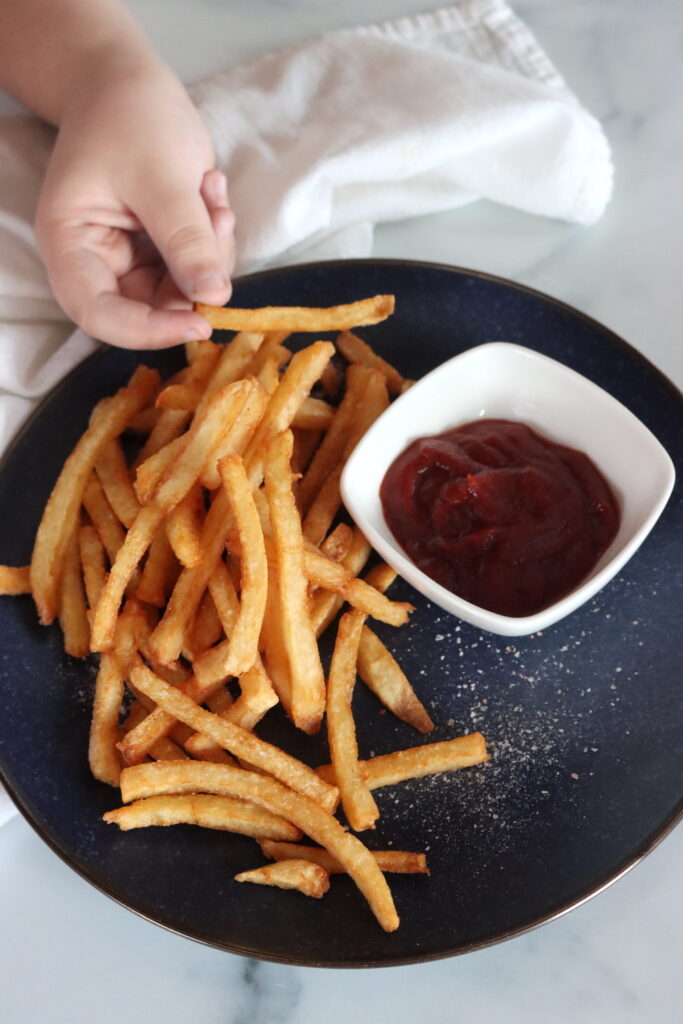
My daughter’s used to me canning up just about anything in the house that can be safely preserved in a jar. When she walked into the kitchen as I was planning out this recipe, she was understandably skeptical.
Canning french fries? Mom, that’s disgusting. What are you doing?!?!?
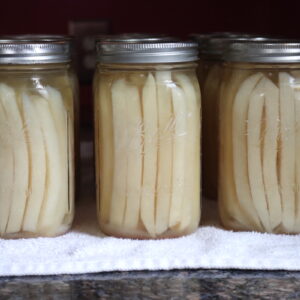
No, they’re not all the way fully cooked French Fries when they go into jars. They’re just raw potatoes, cut into fry shapes.
Pressure canning allows you to prepare them ahead of time, and do all the peeling, cutting, and soaking in one big batch. When you need them, just pull a jar off the shelf, drain, and then fry or bake.
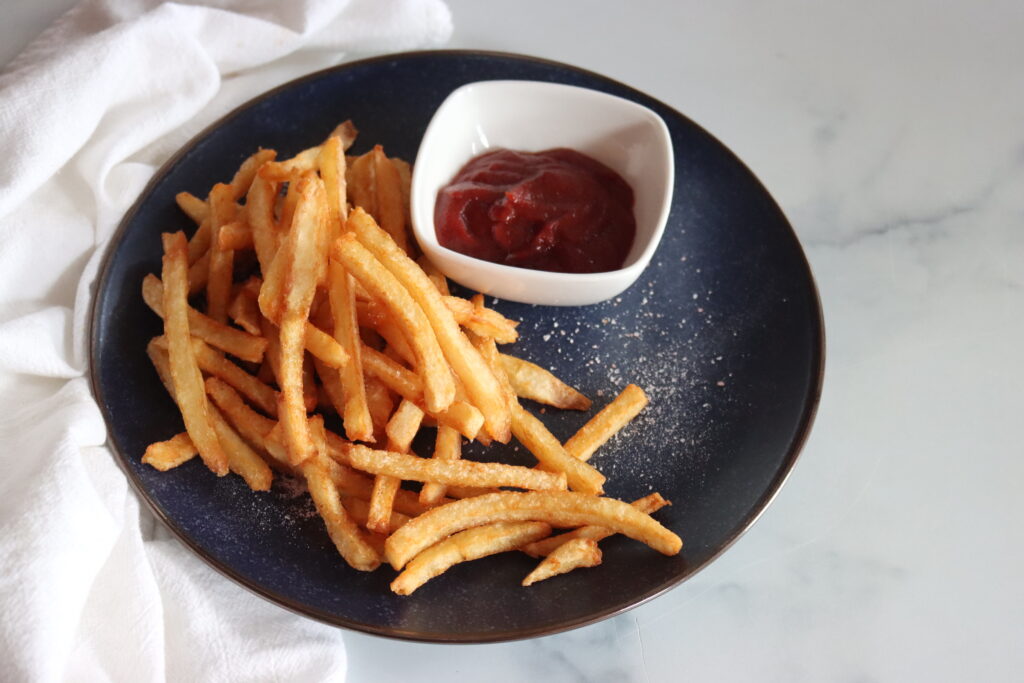
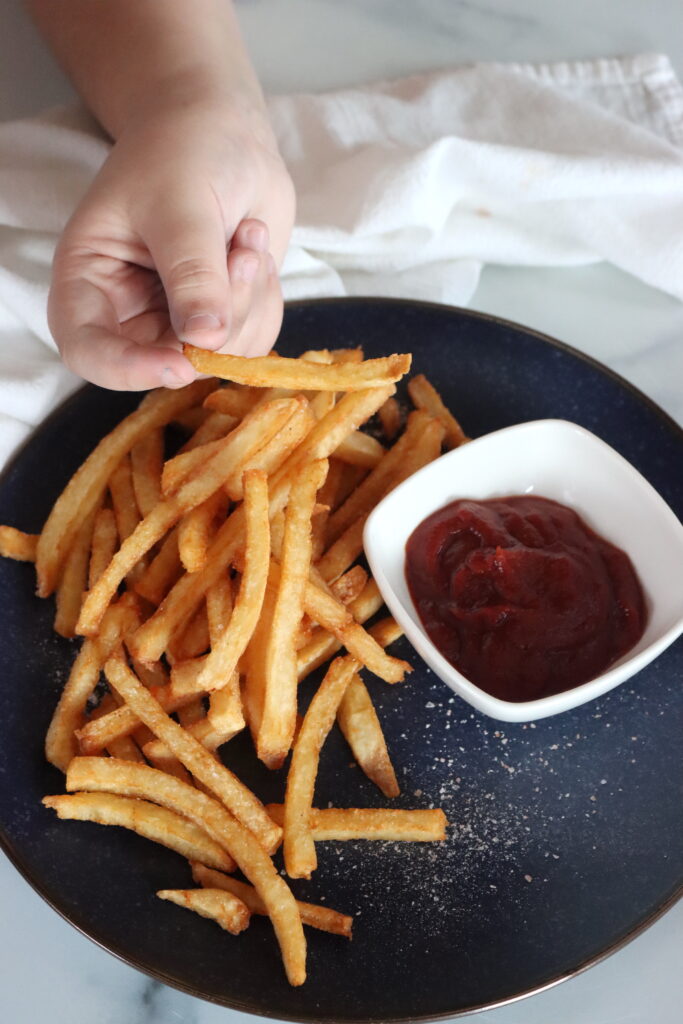
They are, hands down, the best fries I’ve ever had in my life.
Why?
Well, the best fries are made by first soaking the potatoes in water for extended periods, to remove starch and ensure they’ll crisp in the fryer. And when they’re cooked, they’re twice cooked, to ensure that they cook with a tender, fluffy inside and crispy outside.
This pressure canning recipe does all that!
You soak the potatoes ahead of time, removing starch, and then they’re pre-cooked in the canner under pressure. When they’re served, all you’re doing is crisping them, of that second cook that they’d do in a restaurant.
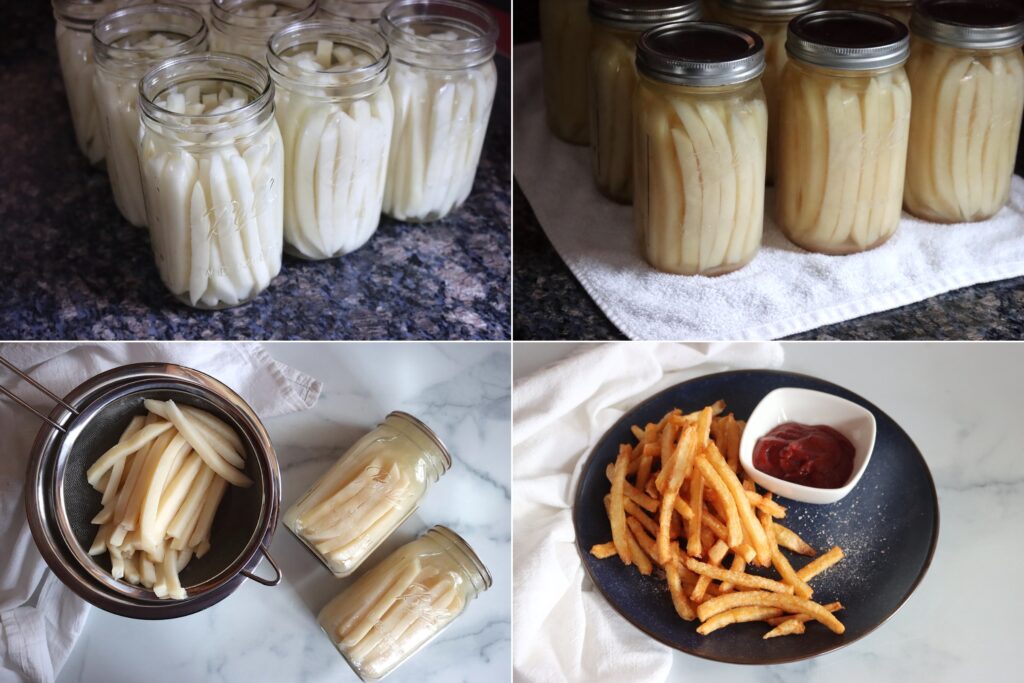
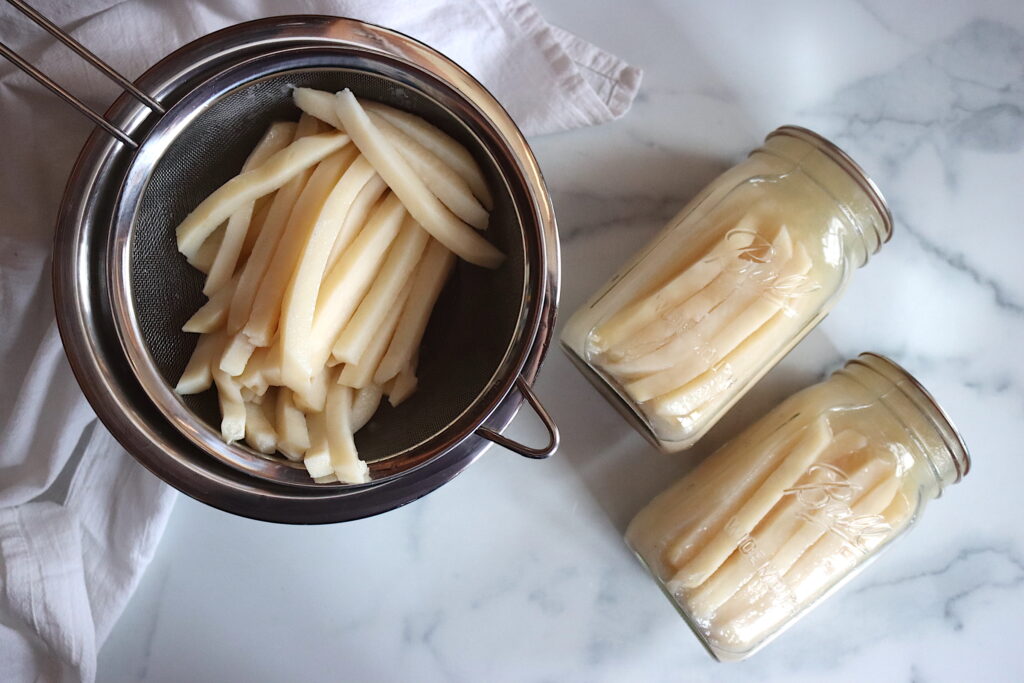
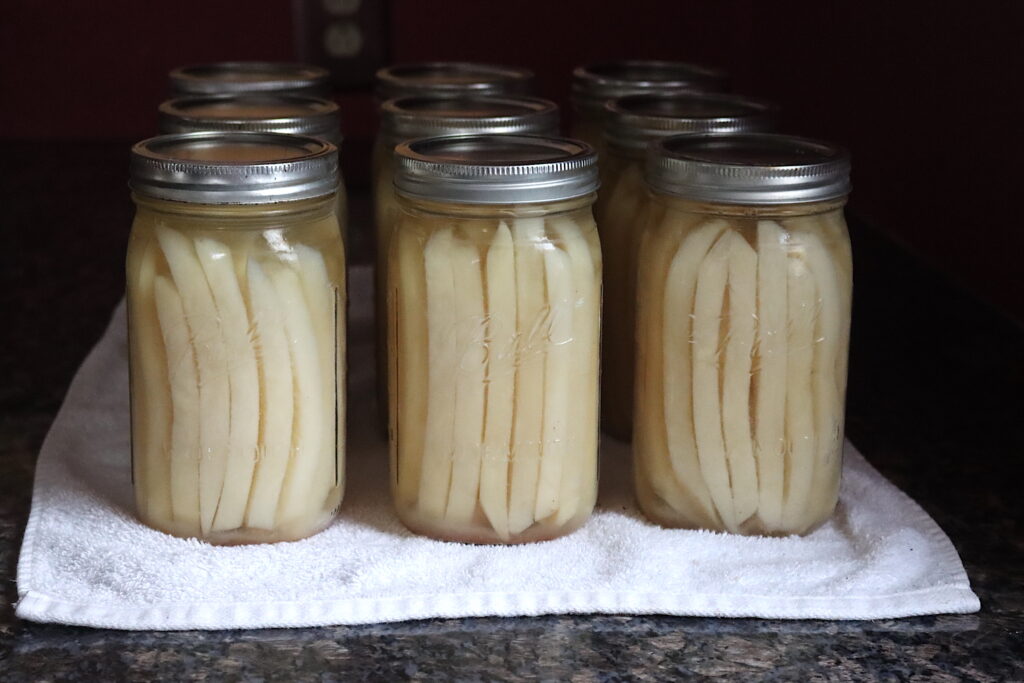
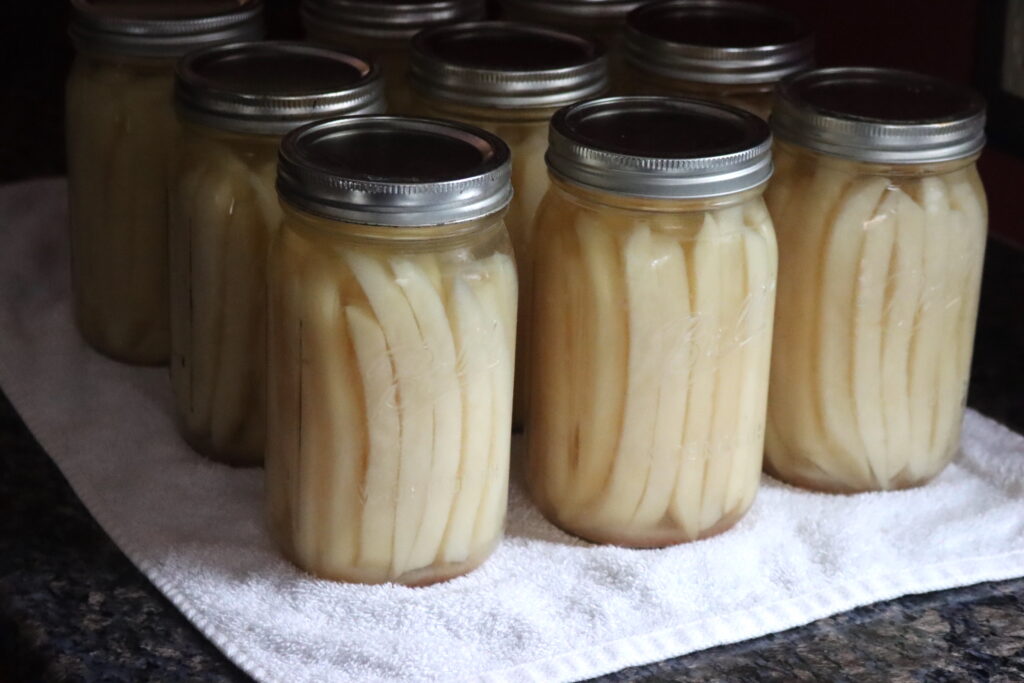
Surprisingly, the pressure canning process leaves the fries firm and intact, and they pour right out of the jar into a colander as pre-made fries. They don’t fall apart or turn to mush, at least not when they’re packed raw after soaking.
I know, I was skeptical before I started making them. While boiling potatoes in a pot on the stove can turn them into mush, that’s not what happens in the canner.
When they’re fried, they crisp perfectly on the outside, especially if you use the old fashioned trick of frying them in tallow. My daughter was convinced after the first bite, and you will be too.
Is this a Tested Canning Recipe?
The best part is this is a safe, tested canning method, developed by Ball Canning, and published in the All New Book of Canning and Preserving. All of the pressure canning recipes in that book are raw pack recipes, as they recognized that it’s kind of a pain to pre-cook everything in a pot before canning.
They re-tested a bunch of vegetable and meal-in-a-jar canning recipes to remove the pre-cooking steps, and they found that pre-cooked or not, it didn’t change the total canning time in any of the recipes they tried.
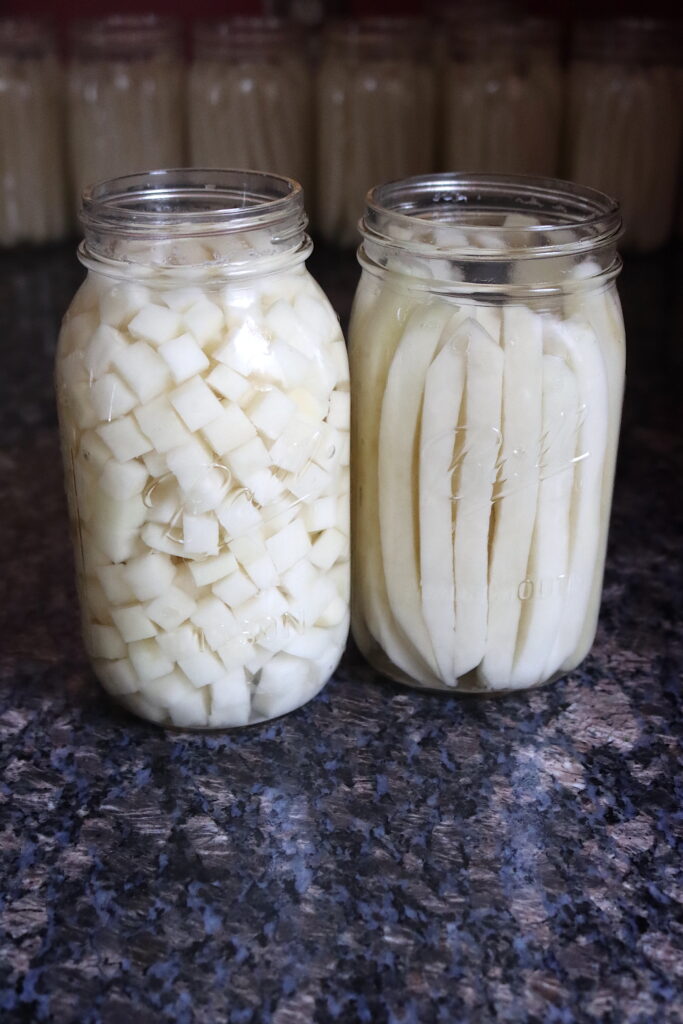
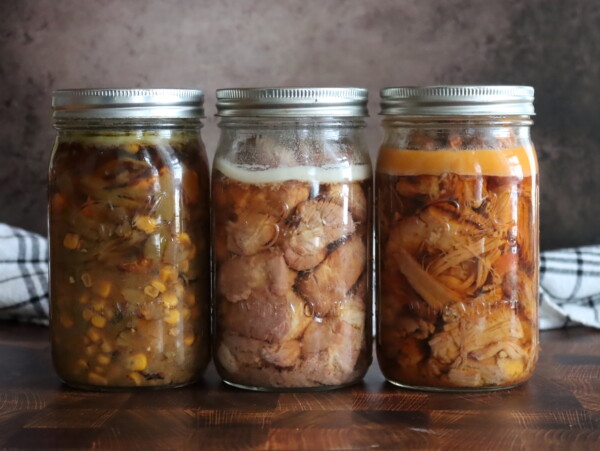
They have a number of recipes for raw packed potatoes, canning in broth with herbs, or canned with peppers and onions, or canned with chipotle peppers.
This raw pack variation is simpler, and removes those extra ingredients, but makes use of the new tested raw pack method for potatoes to give you the perfect fries.
I’m actually working on adapting Ball’s method for making canned home fries too, so hopefully I’ll have that technique perfected and written up for you shortly.
Ingredients for Canning French Fries
All you need here is potatoes, water, and salt.
The total amount is going to vary based on the size of your potatoes, and how efficient you are at peeling them, as well as how you pack the jars. Potatoes shrink when canned, not a lot, but enough that you can pack the jars pretty tightly and still have them slip out smoothly as whole fries when you open the jars.
A canner load of 7 quarts requires about 20 pounds of potatoes, and a canner load of 9 pints requires about 12 to 14 pounds of potatoes.
I’ve found that large baking russets make the best canned fries. I’ve tried it with waxy yellow potatoes like Yukon Gold, but those potatoes have a good bit of natural sugar. When pressure canned, sweet waxy potatoes can get a caramelized sugar taste to them and turn a bit brown. It’s fine in a beef stew, but not the best in fries. Stick with russets or other baking potatoes.
Salt is pretty essential, both for flavor and for maintaining texture during canning. And the fact that the fries are salted before they’re fried really makes them taste amazing, and then you just need a tiny sprinkle on top to serve.
Add 1 tsp per quart jar and ½ tsp per pint jar.
For boiling water quantities, I found that I needed about 1 ¾ cups per quart jar on average. Plan on bringing at least 2 cups to a boil in a kettle for each quart jar, and 1 cup per pint.
Preparing Fries for Canning
Start by peeling your potatoes. Peeling is not optional when canning, both for safety and for quality. Thoroughly peel the potatoes, removing all peel, eyes and any soft spots.
As you peel them, place the potatoes in a bowl of water to keep them from browning while you work with the others.
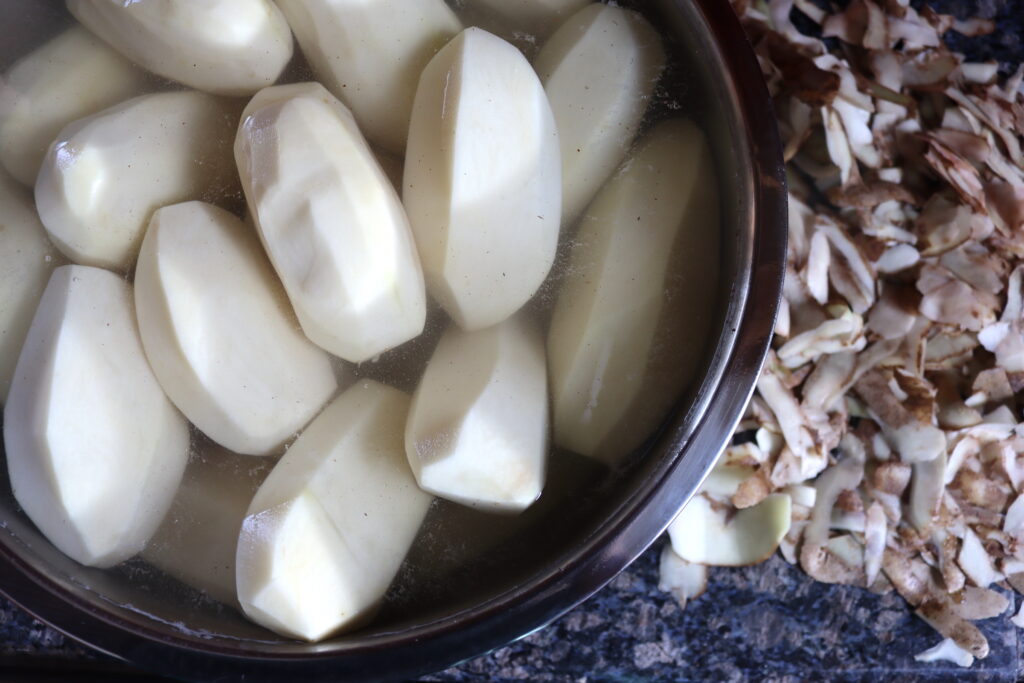
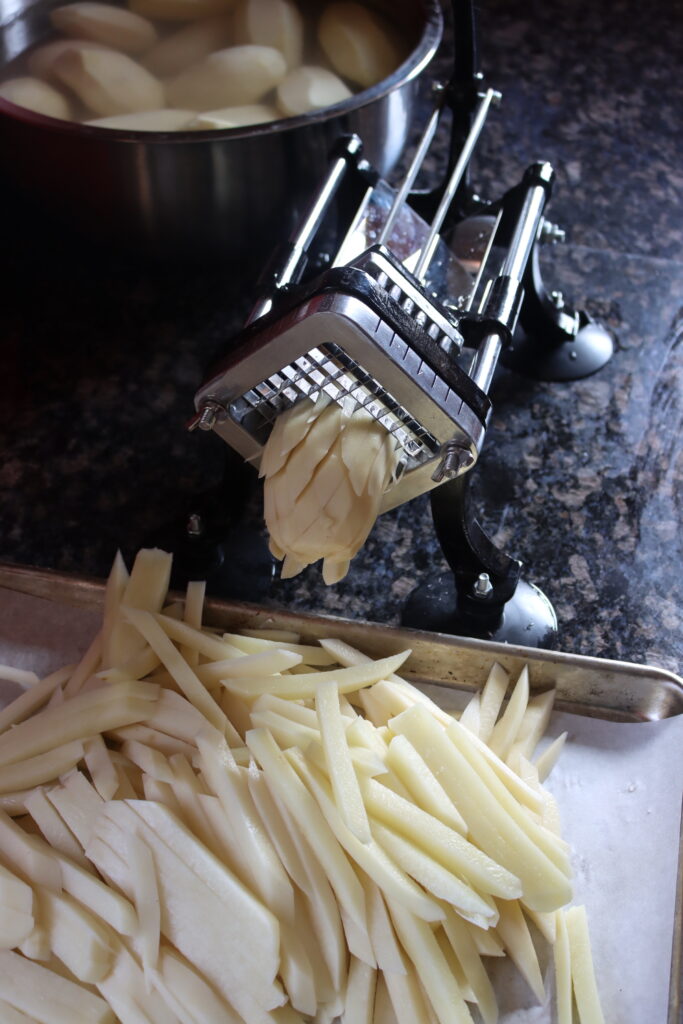
Once peeled, cut your potatoes into fry-shaped strips. Aim for fries about ½ to ¾ inch wide—this size works perfectly for canning and ensures a great texture when they’re cooked later.
Ideally, they’re a consistent size and shape, and using a french fry cutter is the best way to get them even. This recipe worked out so well that I actually bought a french fry cutter so I could put them up more efficiently. And, I’ve found that my little ones absolutely LOVE using it, and they’re can’t wait for their turn to cut the potatoes. One less thing for mama to do!
Before you can can your fries, you’ll need to remove as much starch as possible. To do this, soak the fries in three changes of water.
Place the cut fries into a large bowl and cover them with water, making sure they’re completely submerged. Soak for an hour, drain, soak again, drain and then soak one final time.
For that last soak, you can also soak the fries overnight, of just proceed with the canning recipe.
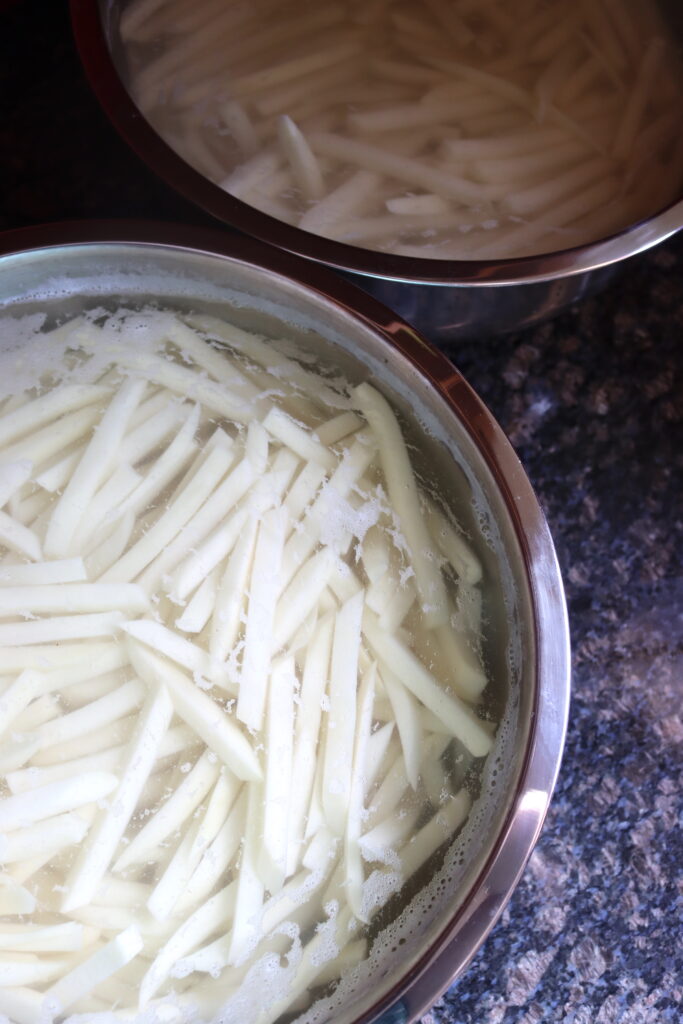
After the final soak, drain the fries well and give them a quick rinse in cold water to remove any remaining starch on the surface.
At this point, don’t cut your potatoes again. I’ve found that if they’re cut after soaking, it opens up more surface area, and they start releasing starch into the jars. If any of the the fries are too long to fit in jars, just fry those up for a snack now, but they won’t do well if you can them with a fresh cut.
Canning French Fries
Now it’s time to pack your jars and get canning.
Prepare a pressure canner by pre-heating it to just warm (about 140 F) for this raw pack recipe. Also prepare jars and lids.
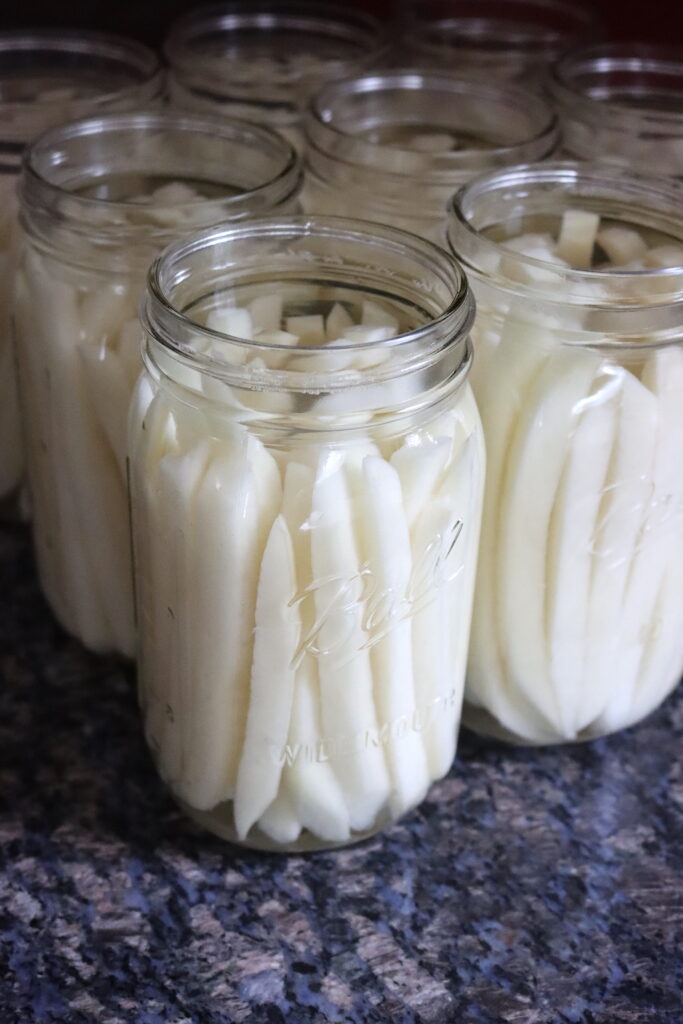
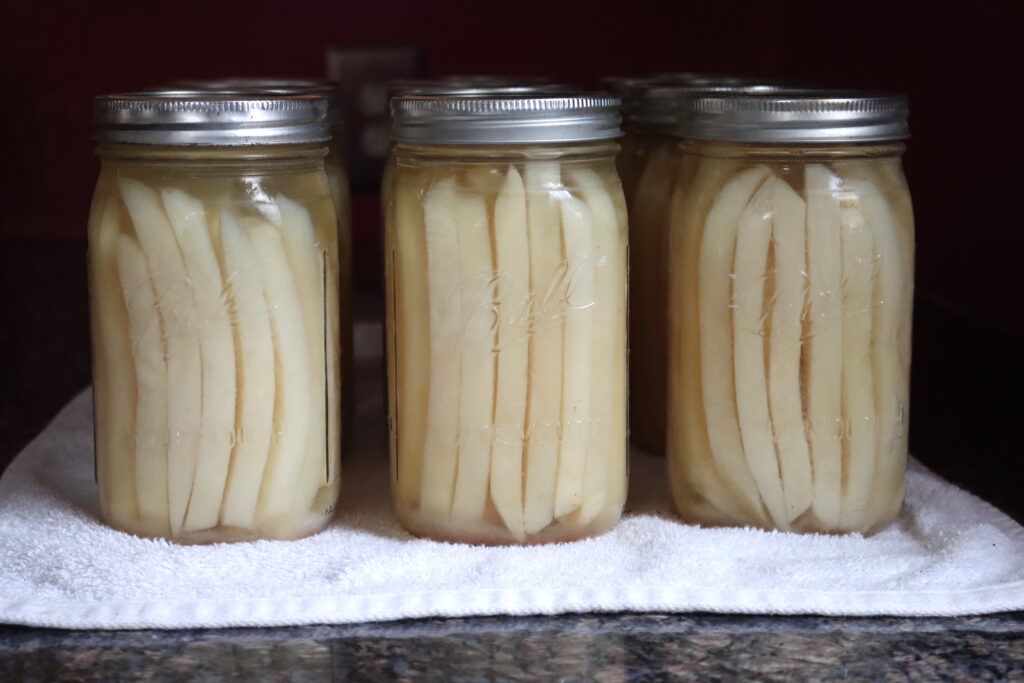
You can use either pints or quarts. I find that wide-mouth jars work best for this recipe, as they let the fries slide out of the jars more easily later. And, of course, they’re a lot easier to pack before canning too.
Add 1 teaspoon of salt per quart jar or ½ teaspoon per pint jar. This is optional, and not required for preservation, but it dramatically improves flavor and quality.
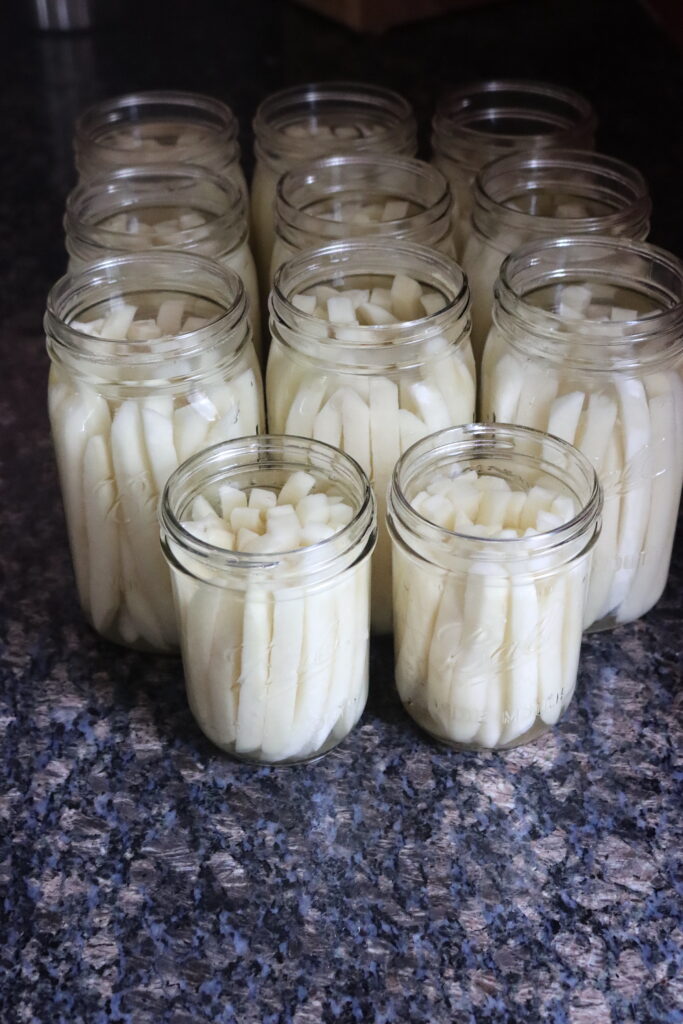
Then, begin packing the raw fries into the jars. Make sure the fries are packed fairly tight but not crushed. Leave about 1 inch of headspace at the top of the jar and try to keep the fries upright, so you fit as many as possible.
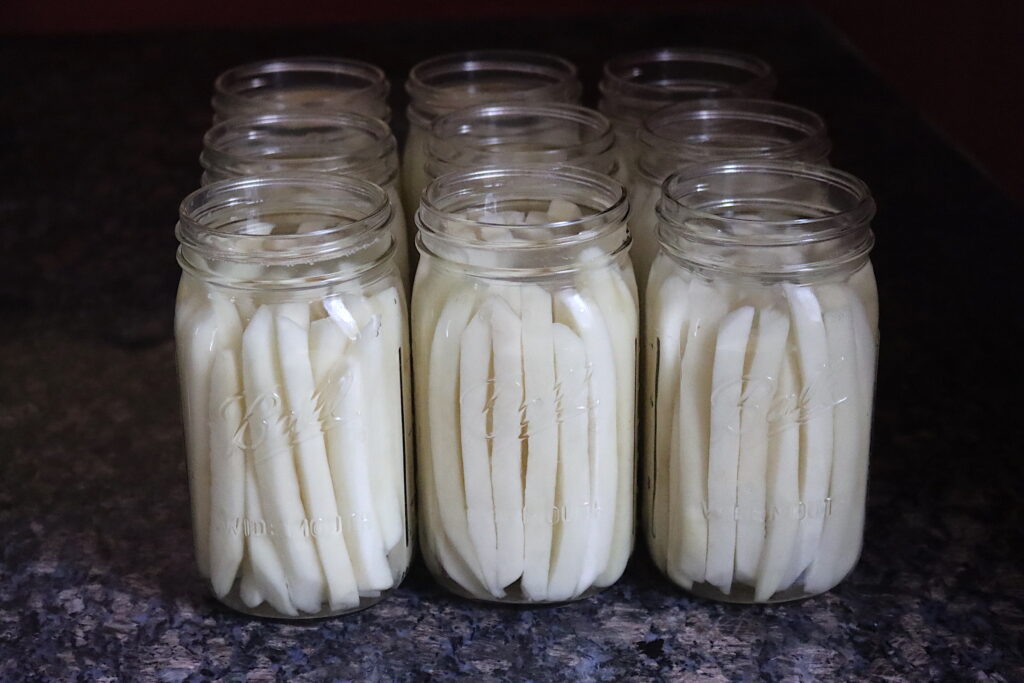
Next, bring a pot of water to a boil and carefully pour the boiling water into the jars, making sure the fries are completely submerged. Again, be sure to leave the required 1-inch headspace.
Use a non-metallic utensil, like a spatula, to gently remove any air bubbles by running it along the sides of the jar. Wipe the rims of the jars with a clean towel to ensure a good seal.
Apply two part canning lids to fingertip tight.
Place your filled jars into the pressure canner, following the manufacturer’s instructions. Process the jars at 10 pounds of pressure for 35 minutes for pint jars or 40 minutes for quart jars, adjusting pressure to altitude (see below).
Once the processing time is up, turn off the heat and let the pressure release naturally. Once all the pressure has dissipated, remove the jars from the canner and let them cool on a towel-lined surface.
After your jars have cooled, check to make sure the seals are tight. If any jars didn’t seal properly, they can be refrigerated and used within a few days. Label the jars with the date, and store them in a cool, dark place.
Now, you’ve got homemade fries ready to go whenever you want them!
Altitude Adjustments
With pressure canning, the canning time stays the same, but the pressure goes up as altitude increases. Here are the altitude adjustments for canning raw pack potatoes:
For dial gauge pressure canners:
- 0 to 2,000 feet: 11 lbs pressure
- 2,001 to 4,000 feet: 12 lbs pressure
- 4,001 to 6,000 feet: 13 lbs pressure
- 6,001 to 8,000 feet: 14 lbs pressure
For weighted gauge pressure canners:
- Above 1,000 feet: 15 lbs pressure
- 0 to 1,000 feet: 10 lbs pressure
Serving Canned French Fries
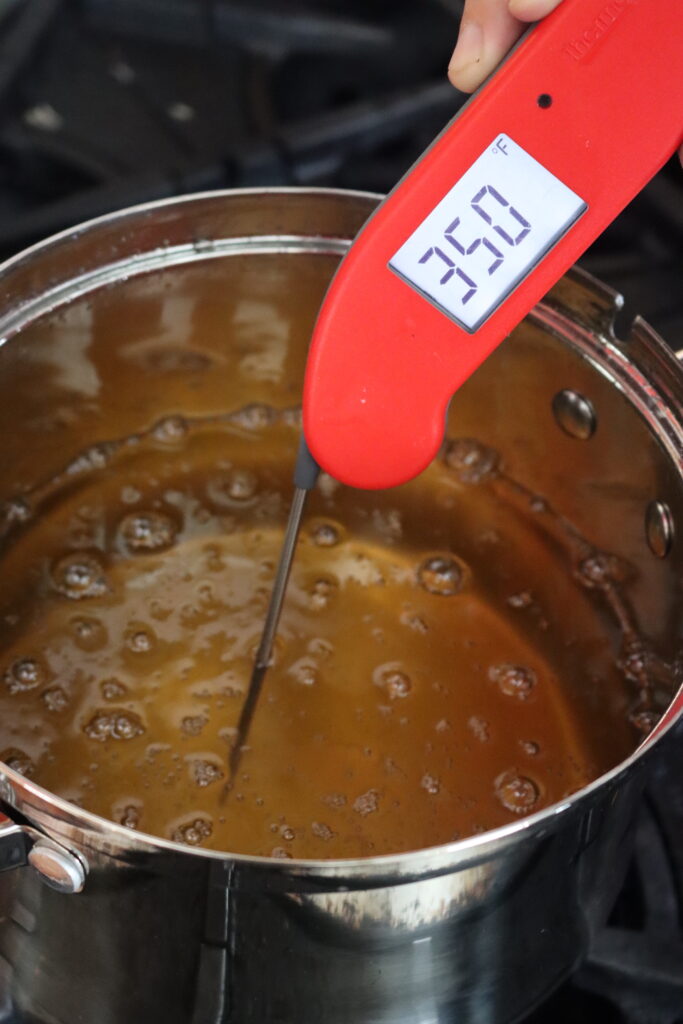
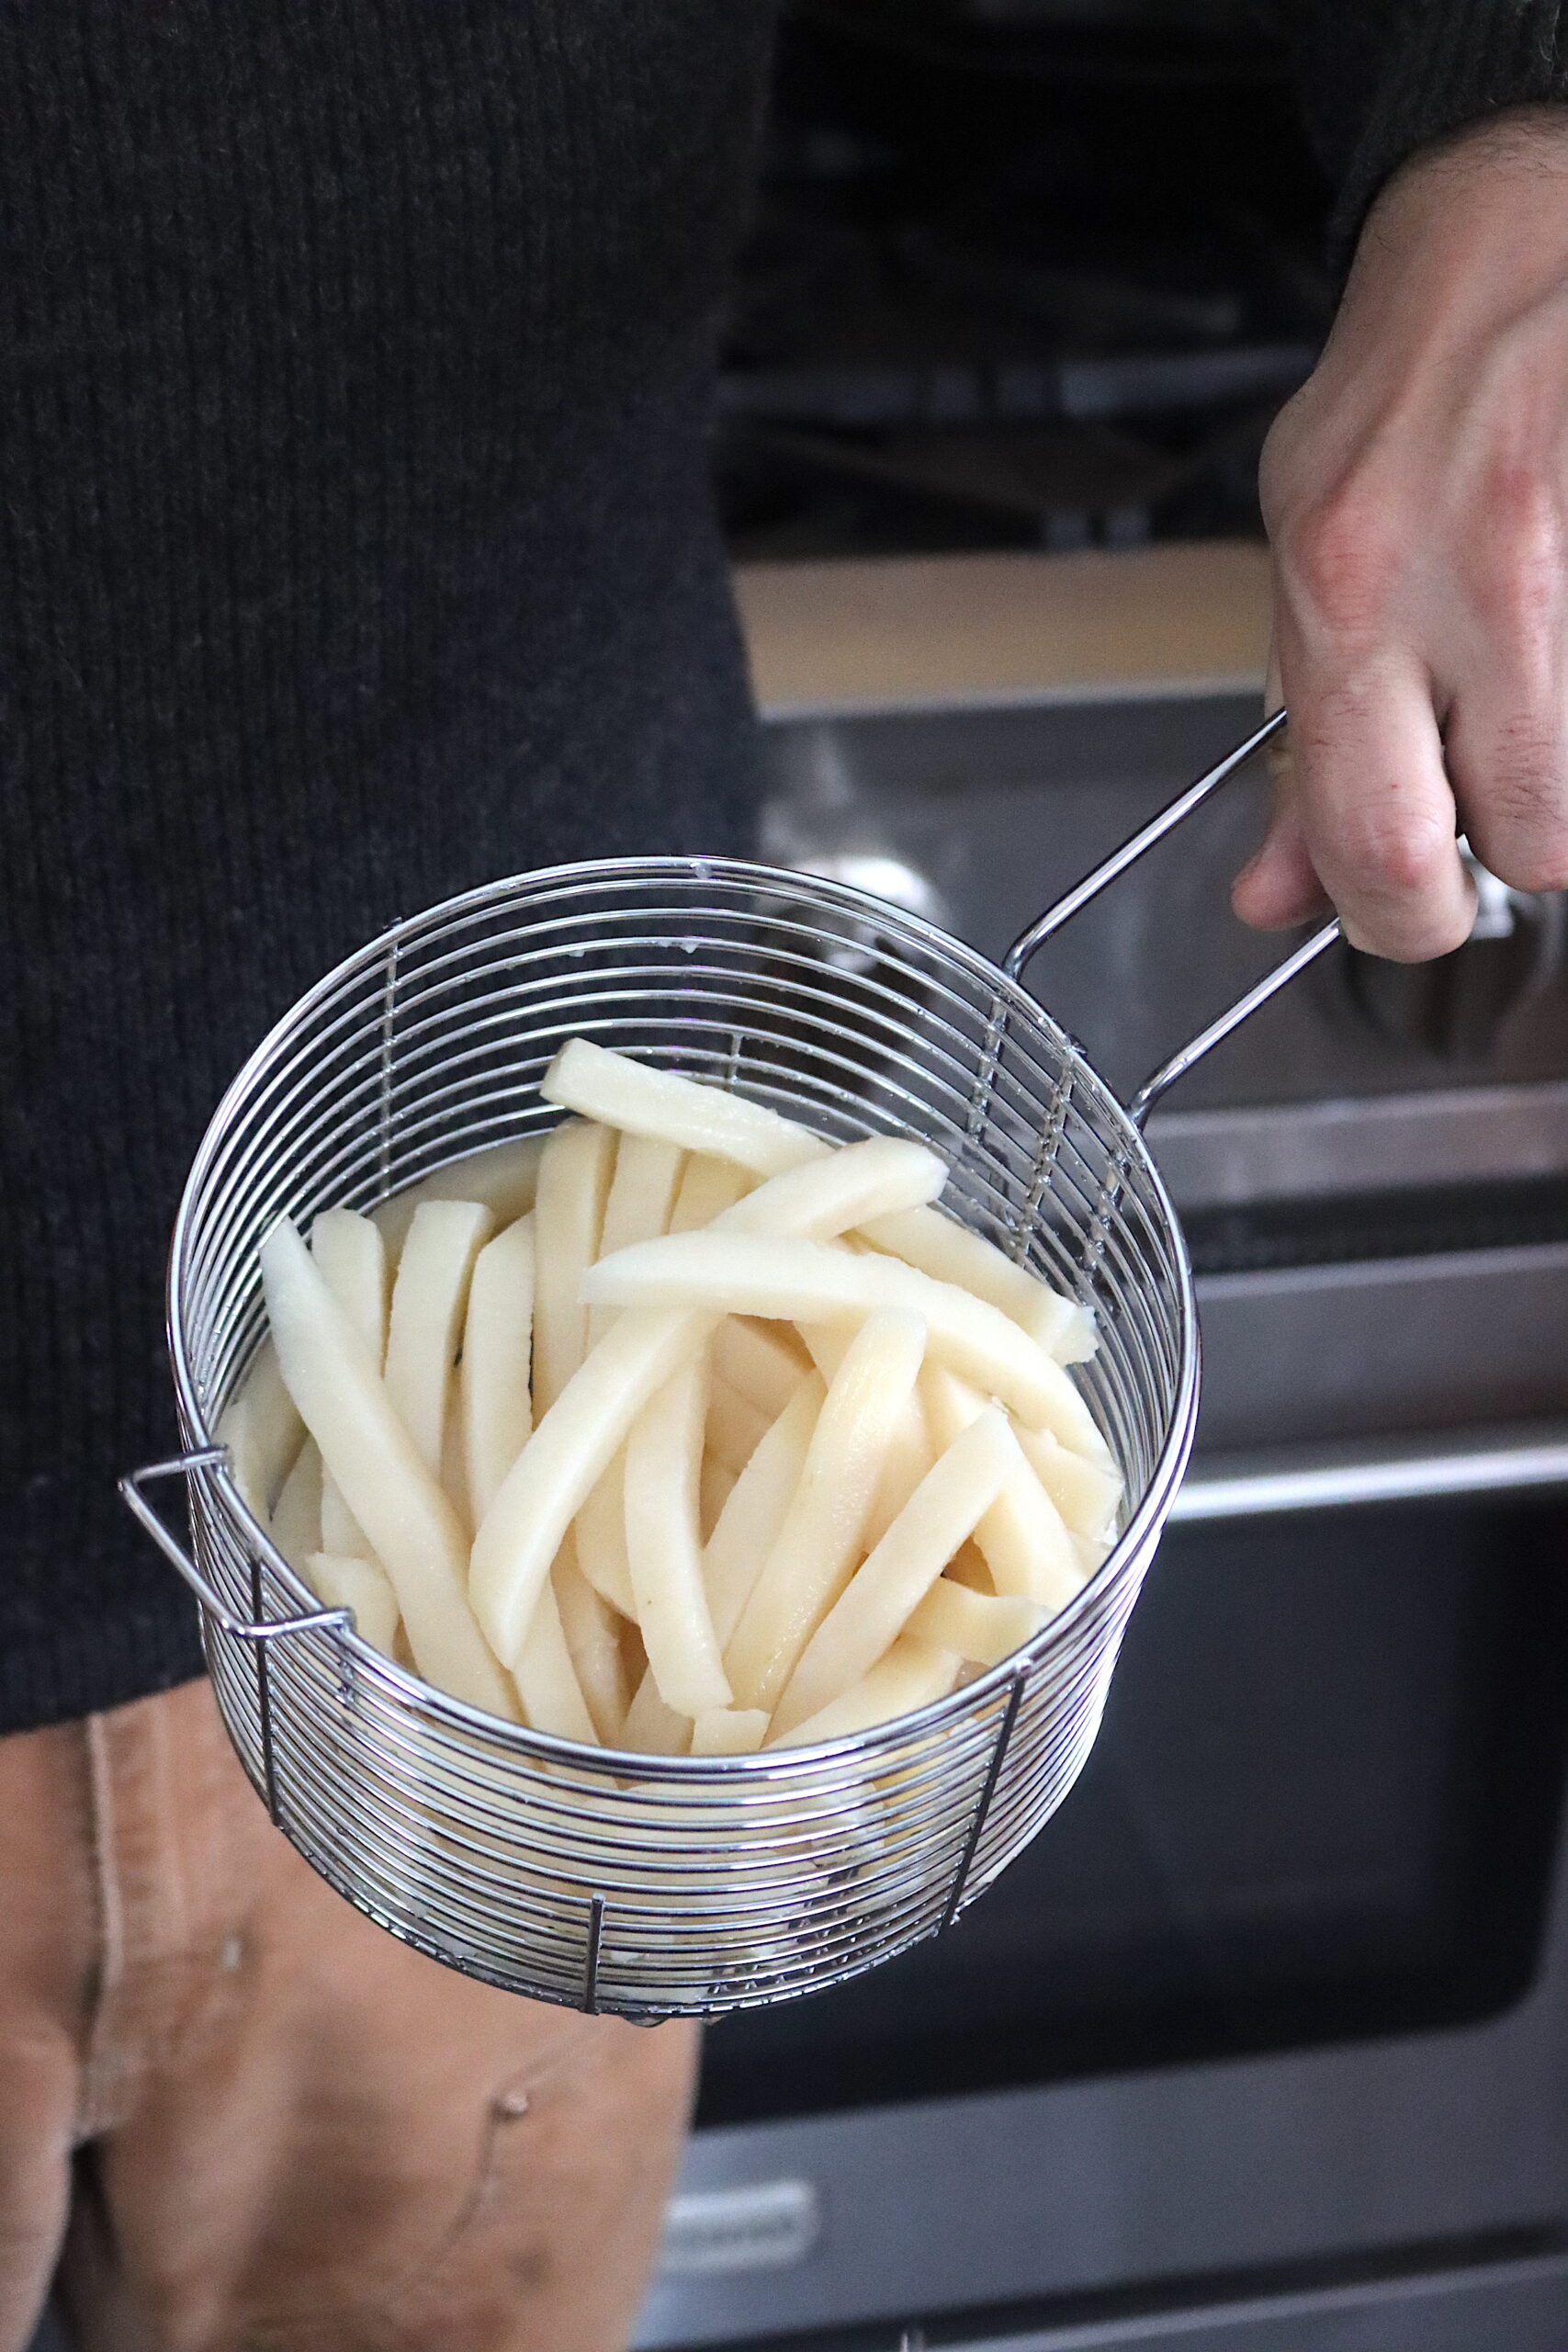
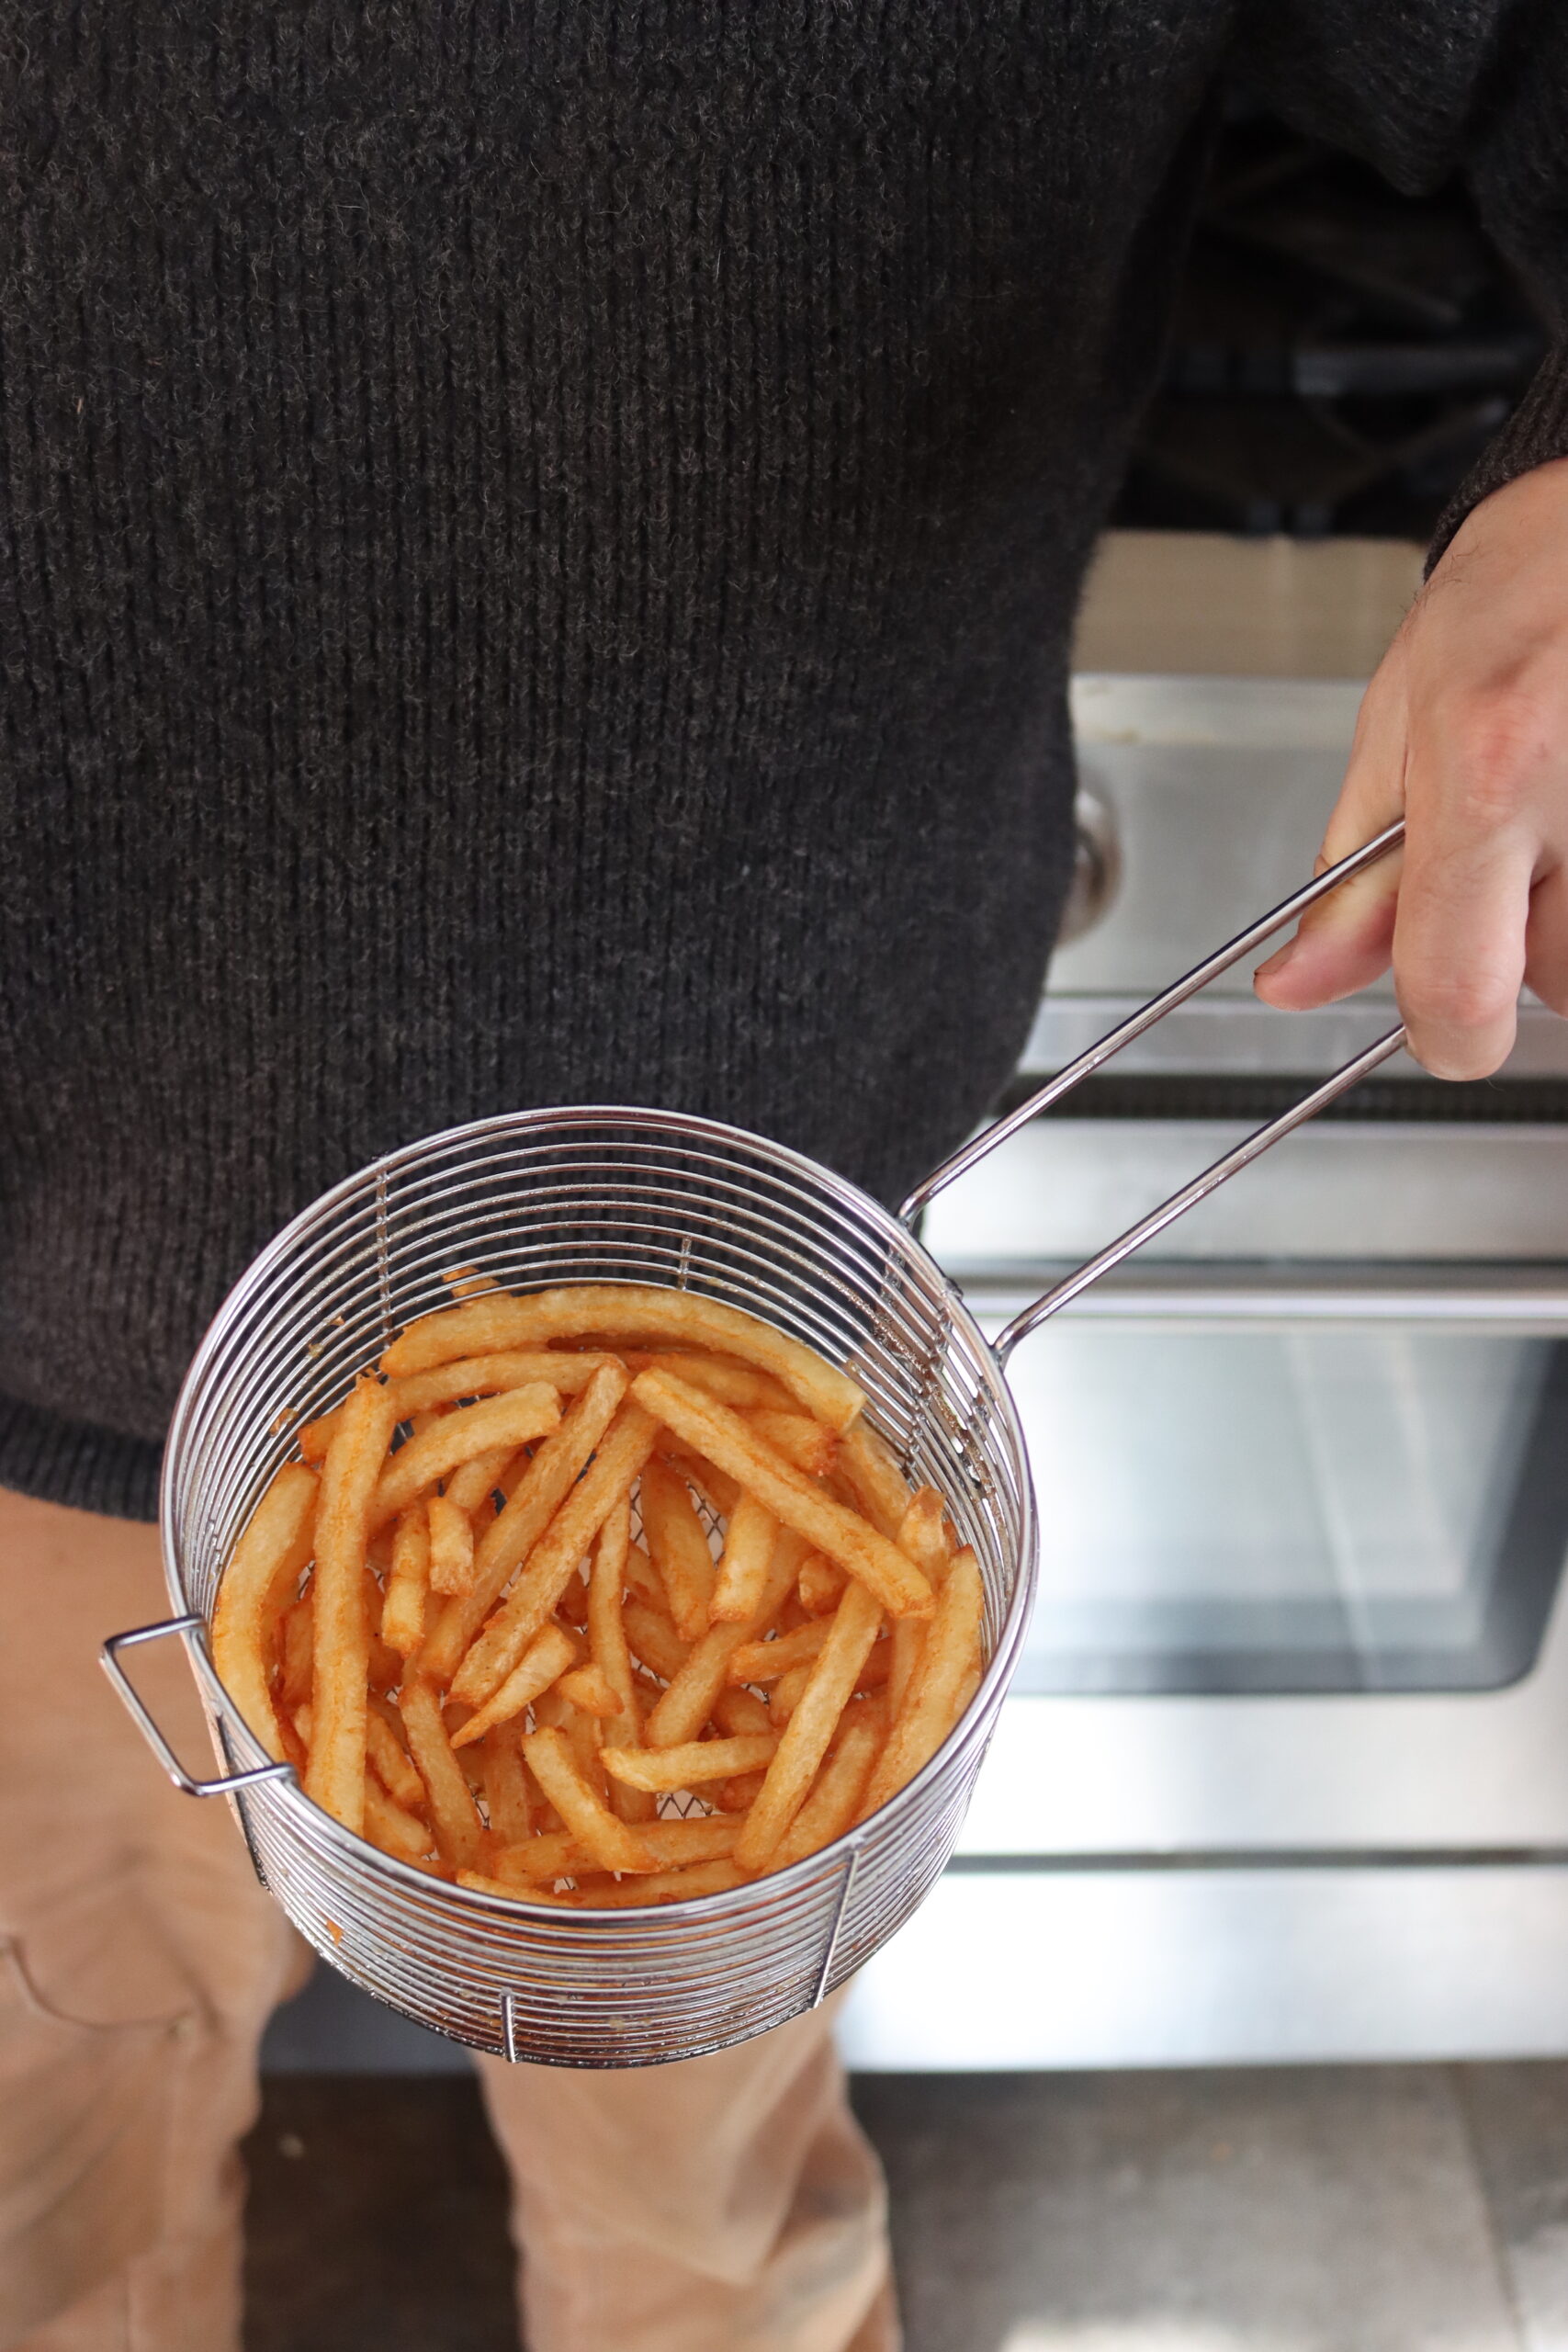
When you’re ready to enjoy your pressure-canned French fries, it’s simple. Just drain the fries from the jar, give them a quick rinse under cold water to remove any extra starch, and then fry them in hot oil until golden brown and crispy.
We found that they took about 7 to 10 minutes to fry in a pot of 350 to 375 degree oil.
Frying obviously gives you crisper fries than baking, and after a lot of tests, I can confirm that frying in tallow is infinitely better than frying in any other oil. It’s not just hearsay, the difference is dramatic.
I also tried frying freshly soaked fries in tallow, and the canned ones were better! The pre-cook in the pressure canner makes them absolutely perfect.
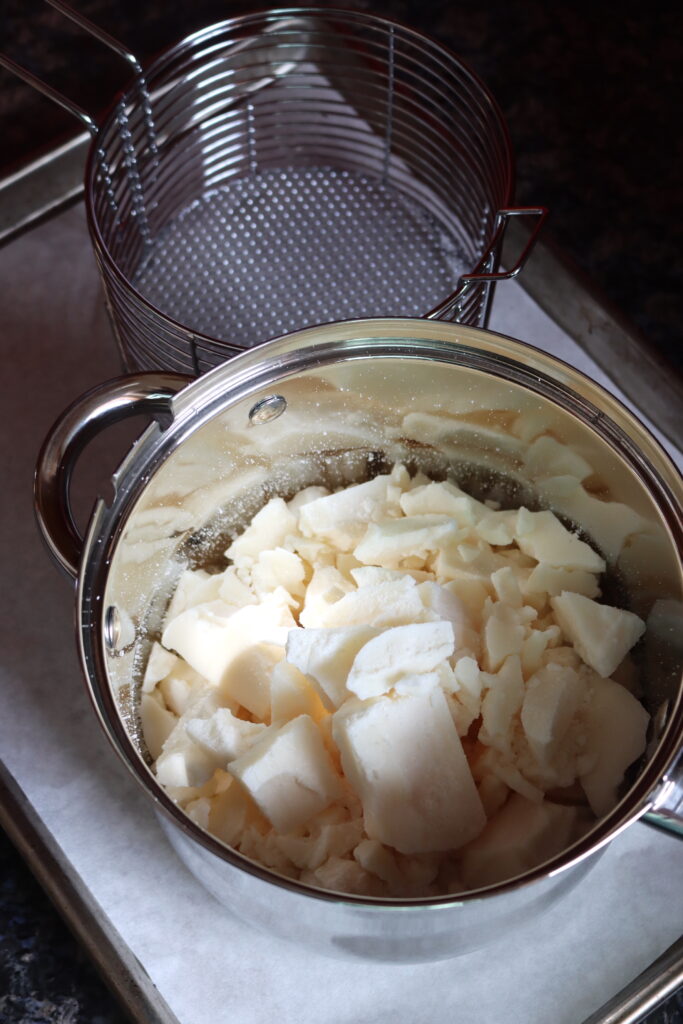
For frying, I’m using homemade tallow that we rendered ourselves, but if you’re going to buy it ready made, Fatworks is the best source for high quality grass fed tallow that I’ve found.
I’m using a simple stainless steel stovetop fryer, and it’s sized perfectly for a single quart of home canned fries.
You can swipe back and forth on the image below to see before and after frying:
Alternatively, you can bake them in the oven at 425°F for 25-30 minutes, flipping them halfway through. Either way, you’ll have perfectly crispy fries with minimal effort.
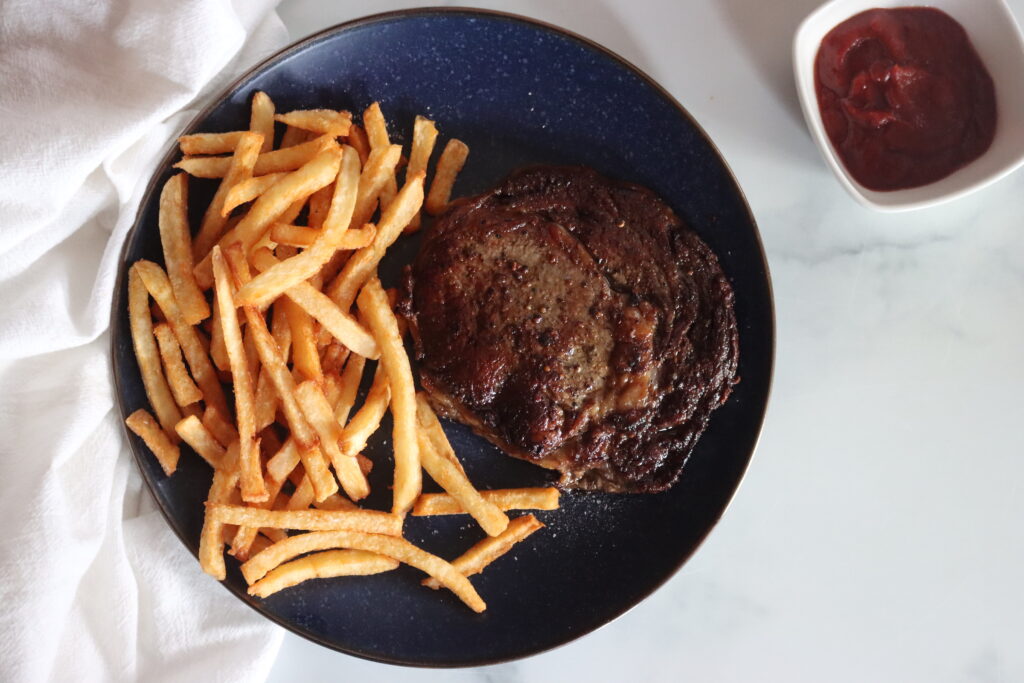
I find that a single quart jar is just right for a quick side for two people, or a pint for one person. With my family of four, I usually open two quart jars for dinner. My favorite way to use them is to make a quick weeknight dinner of “Steak Frites” or steak and fries that sounds fancier because you say it partially in french.
One ribeye and one quart of canned fries is perfect for a dinner for two, and the fries cook in about the same amount of time as a quick seared medium rare steak.
Pressure canning French fries is a convenient way to store this beloved snack for later. It’s perfect for busy nights when you want a quick side dish or when you just want to skip the prep work.
So, the next time you’ve got a surplus of potatoes, consider pressure canning some fries—you’ll love the convenience and the flavor!
Canning French Fries
Equipment
- Pressure Canner I use an All-American Brand 930.
- Wide Mouth Quart Mason Jars
- Jar Lifter
- French Fry Cutter Optional, but it really helps get evenly sized fries
Ingredients
- Potatoes, peeled and cut into fry shapes
- Water, for soaking
- Salt, 1 tsp per quart or ½ tsp per pint
- Boiling water
Instructions
- Prepare the Potatoes: Begin by peeling your potatoes. Peeling is not optional when canning potatoes, regardless of the recipe. All potatoes must be peeled before pressure canning.Once peeled, cut the potatoes into uniform, fry-shaped strips. Aim for fries about ½ to ¾ inch wide. This size works best for canning and gives you that perfect fry texture after canning and cooking.
- Soak the Potatoes: To ensure the best texture, soaking the potatoes in water helps to remove excess starch. Place your cut potatoes in a large bowl, and cover them with water.Change the water three times, allowing each water change to soak for about an hour. You can also soak them overnight for the best results.After the final soak, drain the fries well, and give them a quick rinse in cold water to remove any remaining starch.
- Pack the Jars: Begin packing the raw fries into the jars. The fries should be packed firmly but not squished. Leave 1-inch of headspace at the top of the jar. Make sure that the fries are upright to fit as many as possible.Add 1 teaspoon of salt per quart jar or ½ teaspoon per pint jar.
- Fill with Boiling Water: Bring a pot of water to a boil. Carefully pour the boiling water into the jars over the fries, ensuring the fries are completely submerged. Leave the 1-inch headspace as required.Use a spatula or a non-metallic utensil to remove any air bubbles by gently running it along the inside of the jar. Wipe the rims of the jars with a clean towel to ensure a good seal.
- Pressure Can the French Fries: Place your jars in the pressure canner. Follow the manufacturer's instructions for your pressure canner to ensure safety and proper processing times.Process the jars at 10 pounds of pressure for 35 minutes for pint jars or 40 minutes for quart jars, adjusting pressure to altitude (see notes).After the processing time is up, turn off the heat and allow the pressure to release naturally. Once the pressure has fully released, remove the jars from the canner and let them cool on a towel-lined surface.
- Label and Store: Once your jars are cool, check the seals to ensure they’re tight. Any jars that don't seal properly can be refrigerated and used within a few days.Label your jars with the date of canning, and store them in a cool, dark place.
Notes
Yield
A canner load of 7 quarts requires about 20 pounds of potatoes, and a canner load of 9 pints requires about 12 to 14 pounds of potatoes. Large baking russets work the best in this recipe. Add 1 tsp of salt per quart, and ½ tsp per pint. You’ll also need roughly 2 cups boiling water per quart, and 1 cup per pint. I find that a single quart jar is just right for a quick side for two people, or a pint for one person. With my family of four, I usually open two quart jars for dinner.Shelf Life
For shelf life, I’ve found that potatoes are best when used within 8 to 12 months of canning. They’re still good as long as the jars are sealed, but quality starts to degrade with potatoes faster than many other home-canned products. Just my personal experience, the authorities will tell you that they maintain peak quality for 18 months.Altitude Adjustments
With pressure canning, the canning time stays the same, but the pressure goes up as altitude increases. Here are the altitude adjustments for canning raw pack potatoes: For dial gauge pressure canners:- 0 to 2,000 feet: 11 lbs pressure
- 2,001 to 4,000 feet: 12 lbs pressure
- 4,001 to 6,000 feet: 13 lbs pressure
- 6,001 to 8,000 feet: 14 lbs pressure
- Above 1,000 feet: 15 lbs pressure
- 0 to 1,000 feet: 10 lbs pressure
To Serve Your Canned French Fries:
When you’re ready to enjoy your homemade fries, the process is simple. Here’s how to do it:- Drain and Rinse: Remove the fries from the jar, drain off the liquid, and give them a quick rinse under cold water to remove excess starch.
- Cook: Fry the fries in hot oil until golden brown and crispy. A 375 degree fryer for 7 to 10 minutes is just about right if deep frying. If cooking in the oven, bake them in the oven at 425°F for 25-30 minutes, flipping halfway through. Gently tossing them in a bit of oil before baking will give them a nice crispy outside.
Nutrition
Nutrition information is automatically calculated, so should only be used as an approximation.
Could you do this with sweet potatoes?
No, sweet potatoes can differently and require much more time to properly process. This only works with white potatoes.
Thanks Ashley, I will try these for those special occasions that I want regular potatoes but since my husband is diabetic we try to stay away from white potatoes.
Hi. Awesome tip about canning the fries. I wonder can it be baked instead of frying the fries???
Yes, they’d work just find baked too. Enjoy!
Question: does the water soak need to be refrigerated?
It’s short enough that you can do it on your countertop, just don’t forget them sitting there for days.
Have you tried pickle crisp to prevent the potatoes from breaking down? I use it in carrots and green beans and asparagus and they don’t turn mushy.
I have not tried it with potatoes, but that is an interesting idea! I’ll give it a try next time I make them.
Ashley, thank you so much for all of the work you do. I appreciate all of the effort that you put into what you love and share it with others. After you fry the potatoes in the tallow, what do you do with the tallow? Can it be reused multiple times? If so, how long can it be stored for? Can it be used for other things?
Yes, you can use it many times. I usually get 5-6 re-heats and uses out of a batch before it’s done. After you use it, filter it through a fine mesh screen and store it at room temperature until you’re ready to use it again. The main thing that’s going to cause problems with re-use is a lot of fine particulate in there, so filtering it means many more uses. You can fry anything in it, but if you fry something with a strong taste it will flavor the oil. What I usually do is fry several batches of fries one night for my whole family, then filter and cool. I can do that 5-6 times, and when the oil starts to get a lot of micro particulate or yellow from use, I’ll do fish and chips for the final batch before disposing of the oil. The fish is delicious, but fish frying flavors the oil and that’s gotta be your last use. Enjoy!
Ashley, I also fought the air fryer thing until my girls got me one. I use it all the time. I am making the fries today. Can’t wait to see how they turn out. Bought 50# potatoes yesterday. Love your site.
Lovely! Do let me know how they turn out. I don’t have an air fryer, so I haven’t been able to see how they do in one.
Hey Ashley, you are my “Go To” for safe canning but you mention that you can leave the peels on, which we prefer. Is it okay to leave the peels on? The Ball book and safe canning sites say to peel them. I have always peeled and washed them a few times until the water runs clean but not being a seasoned canner I would just like your opinion on this. Thanks for your input! Love all the great info on your site!
Oh my goodness, thank you so much for catching that! I was writing two articles side by side, this canning article and my tallow fries article for my food blog (https://adamantkitchen.com/tallow-fries/) on the same day and I got myself crossed. I even mention several times in the article itself that the potatoes have to be peeled…and then I got myself crossed in the recipe card. It’s fixed now, and I’ve gone over the whole post to make sure there are no other similar mistakes. Thanks again Cindy!
Thank you for your desire to bless others with your passion and knowledge of canning. I have not tried the French Fries Recipe but I will be as soon as I can buy some potatoes.
Lovely, I hope you enjoy them!
Can this be done by water canning???
No, potatoes aren’t acidic, so they must be pressure canned.
This is wonderful news. My husband and I did not grow up eating home canned food. The potatoes I’ve canned in the past didn’t pass the taste test. It tasted just like canned potatoes off the shelf you buy in the store. My question is does this method carry the “home canned” taste or does the rinsing and soaking remove that taste?
This doesn’t have the canned taste, at least when I made it, but I do know what you’re talking about. That canned taste comes from two things, first, the tin that they’re canned in at the store (rather than glass) and second, the type of potatoes you use. Some potatoes (like yukon golds) have a good bit of natural sugars that caramelize when you pressure can them, and gives them an odd taste plain (thought it’s surprisingly good in something like a home canned beef stew). Make this recipe with russets, and there’s no odd taste. They’re really spectacular, no canned taste.
Hi Ashley,
I have always been told there needs to be an acid such as lemon juice or vinegar when canning anything. Is this not so?
Not with pressure canning. With pressure canning, temperatures get much hotter than waterbath canning and allow you to preserve both vegetables and meats in jars. Things like jams, jellies and pickles are acidic and can be canned in a simple waterbath canner, and it’s waterbath canning that needs the acidity.
Hi Ashley, thank you very much for another great recipe and your guidance on canning. I’ve canned some raw potato pieces in water following your methods and I must not have soaked them enough as some of them are cloudy in the jar. I think we may have cut them after soaking them to fit them in actually which I now realise you shouldn’t do. They appear to be safe in every other way and the seal is intact etc. Would they still be OK for eating with the starch in the water or do I need to throw them out? Thank you for your thoughts.
They should be fine with the starch in the water, and honestly, ball canning doesn’t even have you soak them! They can them without soaking, so it’s not a safety thing there necessarily, it’s more a quality thing for fries in particular. My last few jars I had very long fries and I had to cut them to fit, and all you really need to do is rinse them when they come out of the jar. The extra starch washes off and you can still fry them just fine. Enjoy!
Thanks so much. They have been fantastic as mashed and roasted potatoes. Thank you for your training! Best wishes from Brisbane, Australia!
Hi Ashley,
Have you tried this method with sweet potatoes?
I have not, and sweet potatoes have different canning times. They’re MUCH longer than white potatoes, and sweet potatoes do tend to get really soft in the canner. Some varieties stay firm, if you find the right variety, but they’re still always softer than white potatoes when they come out and I don’t think they’d hold up in french fry shape. I don’t think they’d be good as fries after canning, but as I said, I haven’t specifically tried it. In any case, don’t use these canning times for sweet potatoes, they’re not long enough to process those.
I’m so excited to give this a try. Thanks for your help and guidance in my new adventure of learning how to can.
Wonderful, so glad you’re going to try them!
These look wonderful. Can’t wait to this! Has anyone tried air frying these? I just got one and I’m still getting the hang of it.
I don’t have an air fryer, but I can’t imagine why they wouldn’t be good in one. Hopefully someone who has tried it can chime in. Let me know how it goes if you do try it!
Have you tried air frying these French fries?
I don’t have an air fryer, I know they’re really popular these days, but just not for me. However, I imagine they’d be exactly the same as regular fries. If you try it, please do let me know how it works out for you!