Canning blackberry pie filling is the perfect way to preserve this prolific summer fruit for easy pies year round right off the pantry shelf. Blackberry pie filling also works well for topping cheesecakes, ice cream and yogurt, and it’ll add amazing flavor between layers of a birthday cake.
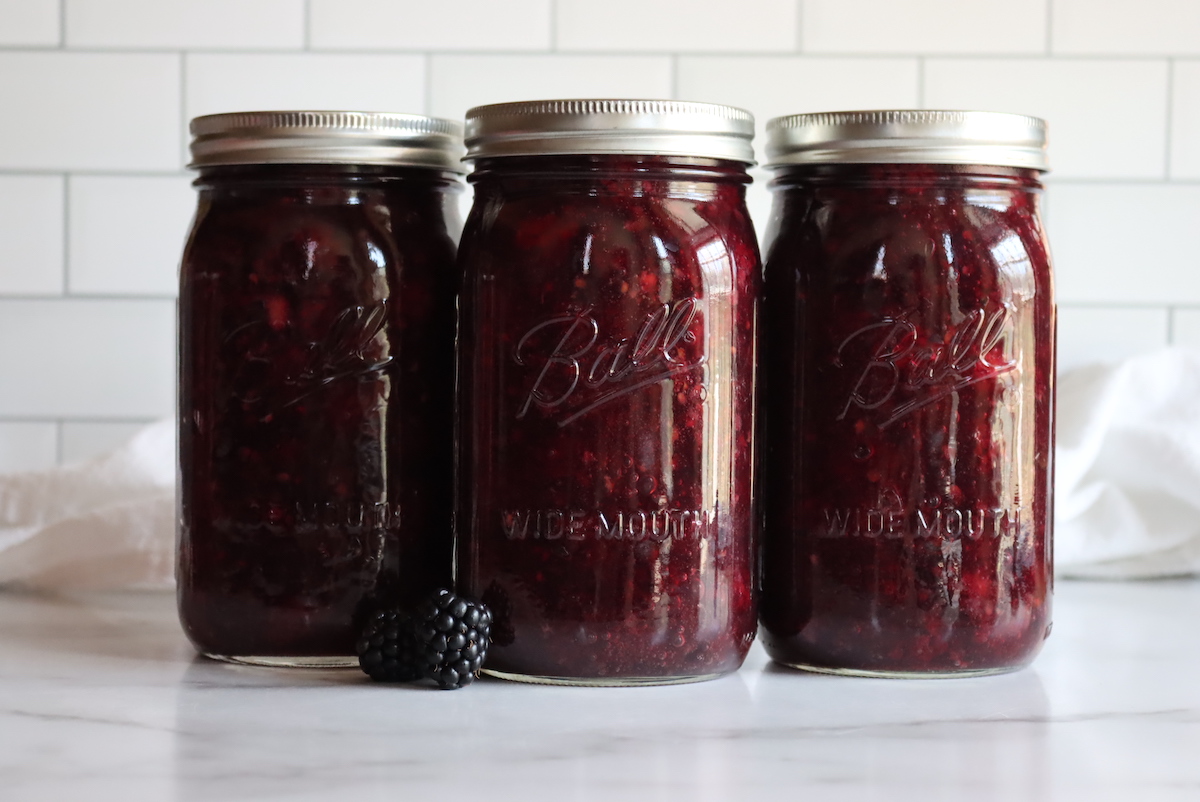
Blackberries are my husbands very favorite fruit, and every year he asks for a blackberry pie for his birthday. The problem is…his birthday’s not in blackberry season!
Freezing blackberries is one option, but fruit actually loses a good bit of it’s natural pectin during freezing, and the pie will often turn out runny. Beyond that, we’re always short on freezer space…and if I had to freeze enough blackberries to please this man, there’d be nothing else in that chest freezer!
Once I’ve filled my pantry with homemade blackberry jam (and blackberry jelly for the kids), I start canning up blackberry pie filling so that we can treat the family to an easy blackberry pie at a moment’s notice…and we don’t have to save them just for special birthday treats.
Ingredients for Canning Blackberry Pie Filling
Home-canned blackberry pie filling is thickened with a canning-approved thickener called Clear Jel (cook type). It’s specially designed to be safe for canning, and it it can be heated and cooled repeatedly without any issue.
Other traditional pie thickeners like flour, tapioca starch, and regular cornstarch are not approved for canning as they can interfere with how heat penetrates through the jar. They also only thicken after a single heating, which means they’ll thicken during canning, but they won’t stand up to re-baking in a pie shell.
For each quart jar of blackberry pie filling, you’ll need:
- 3 1/2 cups of whole blackberries (about 2 lbs)
- 3/4 cup + 2 Tbsp. Sugar
- 1/4 cup + 1 Tbsp. Clear Jel
- 1 cup water (or juice)
- 3 1/2 tsp. Bottled lemon juice
I know those seem like strange measurements, but that’s because it’s broken down to a single quart. You’ll rarely just be canning a single jar, but I’ve given you the numbers for it just in case.
Generally, pie fillings are canned as full 7 quart canner batches, so the numbers work out cleanly.
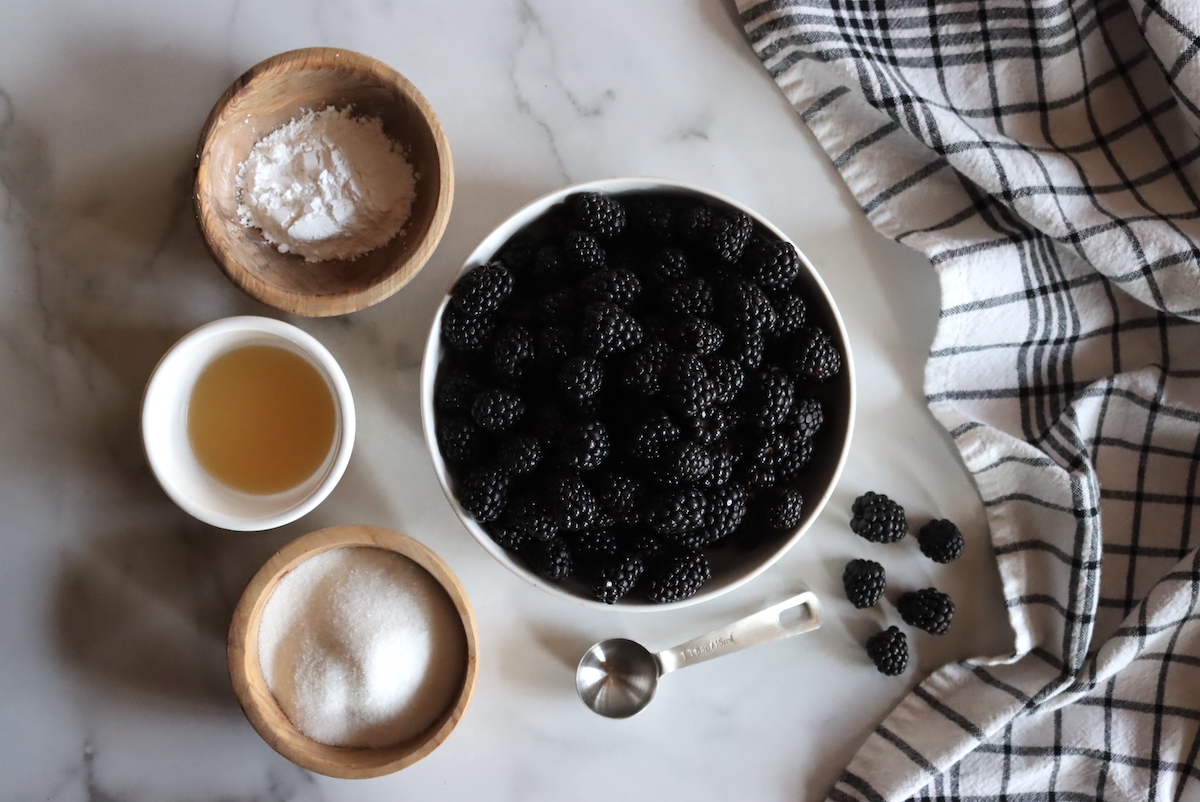
The amounts for a 7-quart canner batch are as follows:
- 6 quarts of whole blackberries (about 14 to 15 lbs)
- 6 cups Sugar
- 2 1/4 cups Clear Jel
- 7 cups Water (or juice)
- 1/2 cup Bottled Lemon Juice
If you’re purchasing clear jel, it usually comes in containers measured by the pound rather than volume. One pound of clear jel equals about 3 cups, so plan accordingly.
Altering the Canning Recipe for Blackberry Pie Filling
You are able to change this recipe slightly without impacting canning safety. According to the Washington State Extension service:
“Adjust the sugar and spices in the recipe to suit your personal preferences. However, the amount of lemon juice should never be altered because it ensures the safety and storage stability of the fillings.“
You can also reduce the amount of clear jel used in the recipe if you try the recipe out and find that you’d like a looser set. I actually think it works wonderfully if you cut the total amount of clear gel down to 3 to 4 Tbsp. per jar. Yes, this is an approved modification, making the mixture less dense.
While the lemon juice cannot be decreased, you can add more if you want the pie to be a bit more tart.
The main things you cannot do are decrease the ratio of lemon juice to fruit, or increase the clear jel beyond what’s stated in the recipe.
Go ahead and adjust the total amount of sugar up or down to suit your tastes. You can also substitute in other canning approved sweeteners, like honey or maple instead.
Blackberry Pie Filling Variations
Beyond altering the amount of sugar and clear jel, you can actually change the fruit in this particular recipe without affecting canning safety. This blackberry pie filling canning recipe is based on the guidance from the Washington State Extension Service, and they’ve tested this particular recipe with many different fruits, including:
- Blackberries
- Blueberries
- Currants (Red, White or Black)
- Gooseberries
- Huckleberries
- Loganberries
- Raspberries
- Strawberries
This exact recipe can be used to make pie filling with any of the berries listed above, or a mix of them. I think blackberry/raspberry makes a particularly good pie, and triple berry with blackberries, raspberries and strawberries is even better.
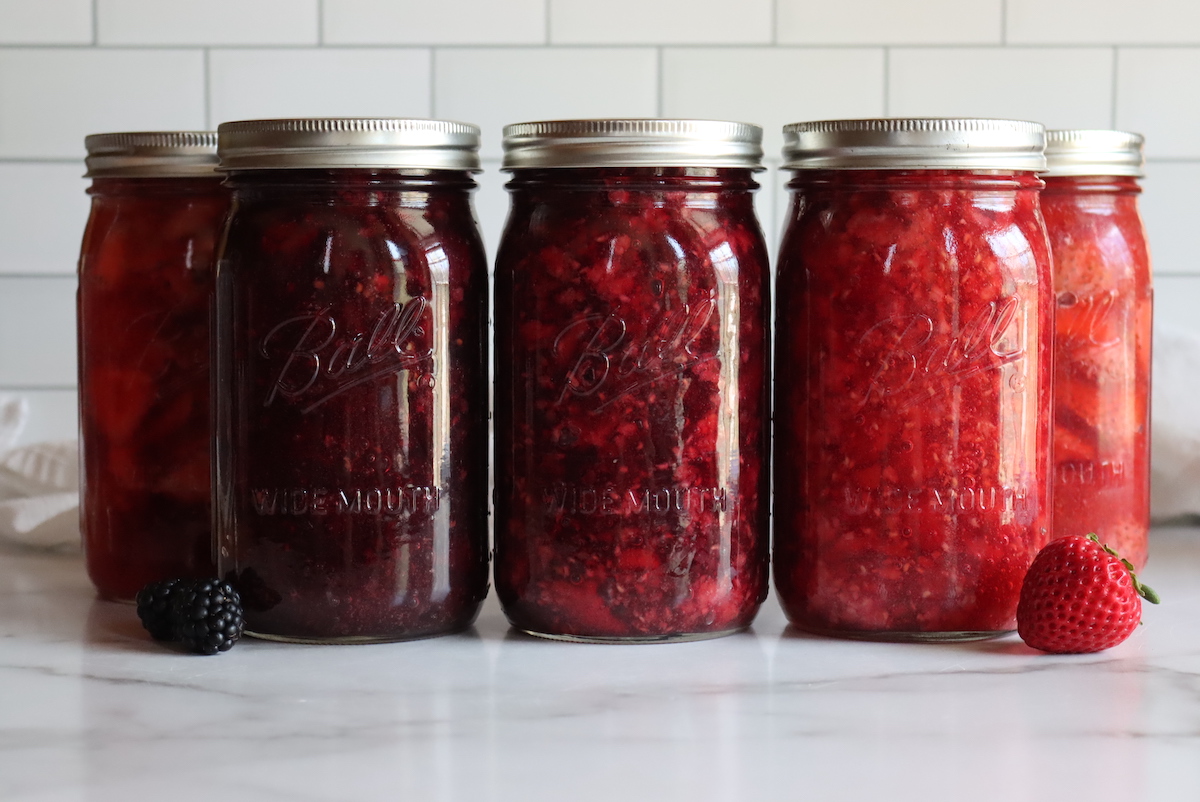
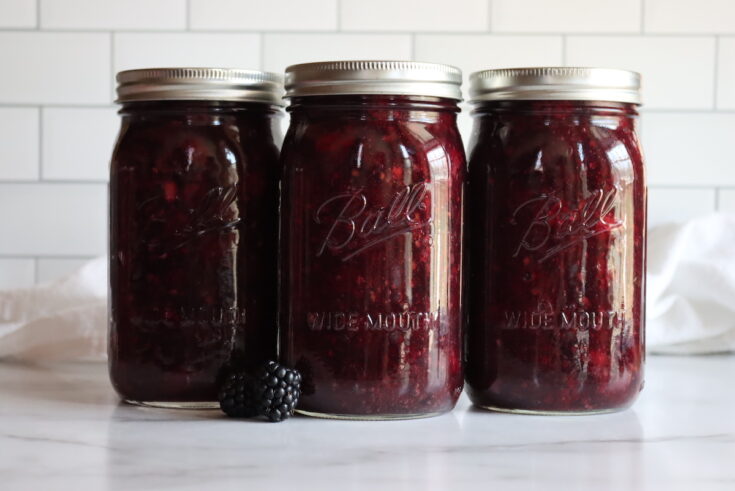
Our own home canned pie fillings made using various canning approved berries, including strawberries, blackberries and raspberries. The center jar is on of my favorites, and it’s a 50/50 mix of blackberries and raspberries.
Be aware that this particular recipe is only tested with the berries listed, and there are other pie filling canning recipes for other fruits including peaches, rhubarb, apples, etc. The main difference in each recipe is the amount of lemon juice used (to correct for acidity and make the fruit safe for canning) and the amount of clear jel (which varies based on how much liquid is in the fruit).
How to Can Blackberry Pie Filling
Canning pie fillings is a bit different than plain fruit, and the order of operations is important.
Clear jel can be finicky, and must be dissolved in cold water before anything else. If you add hot water (or juice), it’ll clump and make a big mess that’s just not usable.
The fruit must also be blanched so that they’re partially cooked, and they’re put into the clear gel mixture hot. If you don’t blanch, they’ll float in the jars and they won’t be cooked thoroughly so it can also be a safety issue when canning.
Be sure to follow the instructions carefully for the best results.
Before you begin, prepare a water bath canner, jars, and lids. If you’re not familiar with water bath canning, I’d suggest reading my beginner’s guide to water bath canning before getting started.
Start by picking over the fruit, removing any debris or spoiled fruit, then wash them thoroughly. If suing frozen fruit, thaw the frozen blackberries in a colander over a bowl and reserve the juice.
Bring a few quarts of water to a boil on the stove and blanch the blackberries for 30 seconds to 1 minute, until they’re heated through. Work in batches, and be gentle with the fruit so it doesn’t fall apart. Remove them with a slotted spoon and keep them warm while you make the clear gel mixture.
Combine sugar and clear jel in a large pot, big enough to hold all the fruit comfortably. Add cold water or cold juice to the pot and whisk to dissolve the clear jel completely. This is important! Do not turn on the heat until the clear jel is fully dissolved into the water.
Turn on the heat to medium-high and whisk continuously until the mixture begins to bubble and thicken. As soon as it bubbles, add lemon juice and cook for 1 additional minute.
Turn off the heat and fold in the drained berries.
Immediately fill the canning jars with the mixture, taking extra care to de-bubble the jars as the mixture will be thick. Leave 1-inch headspace.
Cap the jars with 2 part canning lids and twist on rings to finger tight. Process in a water bath canner for 30 minutes, adjusting for altitude. Canning times are the same for pints and quarts.
Altitude adjustments are as follows:
- 0 to 1,000 Feet in Elevation: 30 minutes
- 1,001 to 3,000 Feet in Elevation: 35 minutes
- 3,001 to 6,000 Feet in Elevation: 40 minutes
- Above 6,000 Feet in Elevation: 45 minutes
Juice or Water for Canning Liquid?
When canning any type of pie filling, you have to decide whether you’re going to dissolve the clear jel with plain water or fruit juice. I think it tastes MUCH better if you use blackberry juice instead of water, and the color comes out better that way too.
If you do that, you’ll need to extract the blackberry juice ahead of time and allow it to cool completely. As I mentioned already, it needs to be cold to initially dissolve the clear jel.
You need just under 2 cups of blackberries and 1/4 cup of water to make one cup of blackberry juice. A full canner batch requires 7 cups water, and you can substitute all or part of that with blackberry juice. I’d suggest using at least half blackberry juice, in which case you’ll need about 9 to 10 cups of blackberries and 1 cup water. To extract the juice, I’d suggest following my instructions for extracting blackberry juice in my blackberry jelly recipe.
In short, it requires bringing the chopped fruit to a simmer on the stove with a bit of water, then mashing with a potato masher before draining through cheesecloth or a jelly bag.
(Allow it to drip for at least an hour, which will extract the most juice, but also ensure that it’s cooled before you start working with the clear jel.)
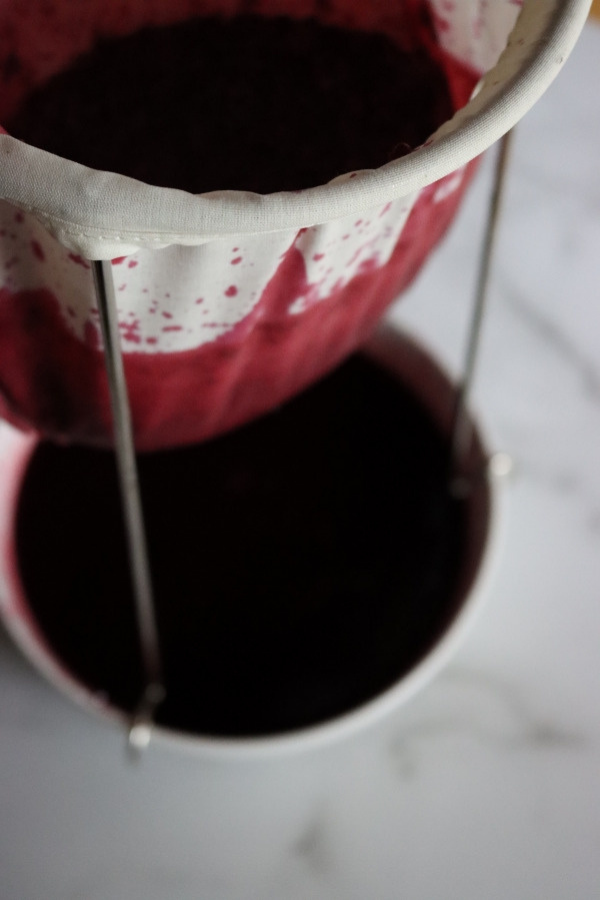
Extracting blackberry juice
If you’re using frozen blackberries, you can thaw them in a colander and collect the juice that way. Then use the thawed berries in the pie filling and the juice to activate the clear jel.
You can also use another type of fruit juice, like apple, cherry, or cranberry. Be aware that they’ll really add their own flavor to the mix, and even though apple juice seems mild, the canned blackberry pie filling will taste a lot like apples.
For best results, I’d suggest using blackberry juice for at least 1/4 to 1/2 of the liquid, as it really does yield the best flavor, even if it does mean sacrificing some volume of your blackberries to the juicer.
(If this is all too much for you, just go with water, it’ll still be delicious, but the flavor won’t be quite as rich or intense.)
Using Blackberry Pie Filling
Obviously, home canned blackberry pie filling works really well in homemade pies. Simply make up your favorite pie crust recipe, pour in the jar and you’re good to go. You can also use it in crumbles, hand pies or just about any other pie variation that suits your tastes.
The pie filling is completely cooked and shelf stable (until opened), and doesn’t need to be re-cooked before eating. You can also use it as a topping for other desserts, like cheesecake or ice cream, spooned right out of the jar.
Canning Blackberry Pie Filling
Home canned blackberry pie filling is an easy way to preserve ready a ready to use pie filling right on the pantry shelf.
Ingredients
For A Single Quart:
- 3 1/2 cups Blackberries (about 2 lbs)
- 3/4 cup + 2 Tbsp. Sugar
- 1/4 cup + 1 Tbsp. Clear Jel
- 1 cup water (or juice)
- 3 1/2 tsp. Bottled lemon juice
For a 7 Quart Canner Batch:
- 6 quarts Blackberries (about 14 to 15 lbs)
- 6 cups Sugar
- 2 1/4 cups Clear Jel
- 7 cups Water (or juice)
- 1/2 cup Bottled Lemon Juice
Instructions
- Before you begin, prepare a water bath canner, jars, and lids.
- Start picking over the blackberries, removing any stems, leaves or debris. Then wash and drain the fruit. (If using frozen fruit, thaw them in a colander over a bowl and reserve the juice.)
- Bring a few quarts of water to a boil on the stove and blanch the blackberries for 30 seconds to 1 minute until they're heated through. Work in batches, and be gentle with the fruit so it doesn't fall apart. Remove them with a slotted spoon and keep them warm while making the clear gel mixture. (This step is important, see notes for why.)
- Combine sugar and clear jel in a large pot, big enough to hold all the fruit comfortably. Add cold water or cold juice to the pot and whisk to dissolve the clear jel completely. This is important! Do not turn on the heat until the clear jel is fully dissolved into the water. See notes for why below.
- Turn on the heat to medium-high and whisk continuously until the mixture begins to bubble and thicken. As soon as it bubbles, add lemon juice and cook for 1 additional minute.
- Turn off the heat and fold in the drained berries.
- Immediately fill the canning jars with the mixture, taking extra care to de bubble the jars as the mixture will be thick. Leave 1-inch headspace, and don't skimp here. Be sure the headspace is no less than 1 inch, but no more than 1 1/2 inch.
- Cap the jars with 2 part canning lids and twist on rings to finger tight. Process in a water bath canner for 30 minutes, adjusting for altitude. Canning times are the same for pints and quarts.
- Once the processing time is complete, turn off the heat and allow the jars to sit undisturbed in the canner for about 10 minutes. This reduces the risk of siphoning as you remove the jars from the canner. (See notes for why.)
- Remove the jars from the canner with a jar lifter and allow them to cool on the counter for 12 to 24 hours. Check seals, and store any unsealed jars in the refrigerator for immediate use.
Properly canned and sealed jars of blackberry pie filling will maintain peak quality on the pantry shelf for about 12 months. Refrigerate after opening.
Notes
Blanching Fruit: This is a "hot pack" recipe and all the ingredients must go into the jars hot, but more importantly, the fruit must be pre-blanched before it's mixed in with the clear jel. If the fruit is not blanched first it will float in the jars, release extra juice during canning which prevents the clear jel from gelling properly, and also potentially be under cooked so that it's not safe for canning. Do not skip blanching.
Clear Jel Dissolved in Cold Water: It's incredibly important that the clear jel is dissolved in cold water, as it'll clump quickly in hot water. I know it's temping to use the water you already have on the stove, or the blanching water from the berries...but don't. Adding hot water to clear jel just makes an unusable mess.
Be sure to follow the instructions carefully for the best results.
Altitude adjustments for canning are as follows:
- 0 to 1,000 Feet in Elevation: 30 minutes
- 1,001 to 3,000 Feet in Elevation: 35 minutes
- 3,001 to 6,000 Feet in Elevation: 40 minutes
- Above 6,000 Feet in Elevation: 45 minutes
Siphoning:
Pie fillings are notorious for siphoning out of the jars when they're removed from the canner. It's a common problem, and it makes a mess, but so long as the jars are sealed they're still safe to store/eat. Just wash off the outside when they're completely cool.
There are a few steps you can take to prevent siphoning.
After the canning time is complete, turn off the heat and allow the jars to cool slightly in the canner before removing. (Wait at least 10 minutes.) You have a greater chance of siphoning if you skip this step as the jars cool too rapidly on the counter.
Be mindful of the headspace, and make sure you leave a generous 1'' (don't skimp).
Recommended Products
As an Amazon Associate and member of other affiliate programs, I earn from qualifying purchases.
Home Canned Pie Fillings
Home canned pie fillings are a convenient way to preserve desserts right in a jar!
- Canning Apple Pie Filling
- Canning Strawberry Pie Filling
- Canning Peach Pie Filling
- Canning Cherry Pie Filling
Fruit Canning Recipes
Keep that canner full of fruit this season! Don’t worry, there are hundreds of fruit canning recipes to keep your jars full.


Sarah Strader
I’m anxious to try this. I have acquired a lot of frozen blackberries that are frozen. Question: Do you still blanch the fruit if it has been frozen?
Ashley Adamant
You don’t have to blanch them if they’re frozen actually. The freezing process drives the air out of the fruit tissues and will accomplish the same thing. You can actually use the juice you get from thawing them as well, which will result in a more flavorful pie filling. Take a look at my recipe for canning cherry pie filling, which uses frozen pitted cherries, and use that process to can the blackberry pie filling. (Be sure you still use the ingredient quantities from the blackberry filling, as the lemon juice and clearjel, etc quantities will be different. Just use the process from the cherry pie filling article).
Info Here: https://practicalselfreliance.com/canning-cherry-pie-filling/
Rachel
I’m wondering if you can make this recipe seedless and can it that way?
Ashley Adamant
Yes. You can process the berries to remove the seeds first, and that’ll give you a very smooth pie filling without actual berry chunks in it. Nothing wrong with that safety wise, but the end product will be very different in texture.
Doris Shell
Can you use surejel with this recipe instead of clear jel
Ashley Adamant
Sure jel works differently than clear jel, and it needs to be cooked with the fruit but not the sugar first before you add the sugar. It also only sets in the jar, but then will be thin inside a pie crust when it’s re-baked. It’s less a canning safety thing, and more that it just won’t work. If you want to do that, use a sure jel blackberry jam recipe instead. The instructions are different, and the order of operations is different…and the final product is very different.
Linda huo
What is the difference between instant clear jel and regular? Do you do anything differently for the recipe?
Ashley Adamant
Clear jel is the only one approved for canning because it distributes heat evenly. That is one difference, but in terms of quality, the clear jel is designed so it can thicken and then liquefy back and forth multiple times. Each time it cools, it will thicken again and then thin out when heated.
Since you’re canning this, it’ll be heated then cool, and then be heated again when baking the pie. Regular corn starch usually only thickens reliably after heating once.
FSethman
Thanks for a great recipe! I followed for the full canner and got only 6qt! But my issue was is that it never got thicker in the boiling pot. It boiled so I folded in the berries like it said to. But in the jars it’s liquidy and not like regular pie filling I’ve canned before. While the jars process, will they possibly thicken up? I measured all ingredients out first then combined when supposed to. Thanks I did use clearjel cook type.
Ashley Adamant
Hmmm…I’ve never actually had that happen to me…so I’m not sure? The clearjel thickens up quickly, often so fast it’s hard to get it in the jar. Maybe it’s a bad batch of clearjel?
Sofie
Is it possible to skip the clear jel and add starch when i’m going to use the pie Filling? It is not easily available in my country?
Ashley Adamant
Yes, that’s fine. In that case, you’re just caning blackberries in syrup and you can use a shorter process time and the lemon juice is optional. These are the canning instructions for blackberries: https://practicalselfreliance.com/canning-blackberries/
You don’t have to use the spices or anything, but just the process times.