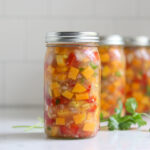
Canning Thai Coconut Squash Soup
A pressure-canned Thai coconut squash soup that keeps a real dinner on the pantry shelf. The squash, chiles, ginger, and lime go in the jar; stir a can of coconut milk in at serving for a creamy bowl that is ready to heat and eat.
Servings: 6 Servings, Makes 6 pints or 3 quarts
Equipment
- Canning Jars, Lids and Bands
Ingredients
- 2 Quart vegetable broth or chicken broth
- 1 ½ lb butternut squash or kabocha, acorn, or some other orange-fleshed winter squash, peeled and cut into ½" (1cm) cubes
- ½ tsp red pepper flakes
- 2 small Thai chile peppers seeded and minced, fresh or dried
- 3 cloves garlic minced
- 1 stalk lemongrass quartered
- 2 inches fresh ginger peeled, grated
- 2 tbsp sugar
- 1 tsp lime zest
- 1 medium red bell pepper chopped
- 4 medium shallots chopped
- 2 tsp salt
- 2 tbsp lime juice ideally fresh, but bottled works too
Serving Add Ins Per Pint
- 2 tbsp red onion slivers for serving
- 1 tbsp cilantro for serving
- ½ cup coconut milk for serving
- Lime wedges for serving
Instructions
- Prepare a pressure canner for a hot pack according to the manufacturer's instructions, and have hot jars and lids ready.
- Wash, peel, seed, and dice the squash into even cubes. Seed and mince the chiles, mince the garlic, grate the ginger, quarter the lemongrass, chop the bell pepper and shallots, and zest and juice the lime.
- Bring the broth to a boil in a large stainless steel or enameled Dutch oven. Stir in the ground red pepper, garlic, Thai chiles, ginger, and lemongrass. Simmer 20 minutes, stirring often.
- Remove the lemongrass, then add the squash, sugar, salt, lime zest, lime juice, shallots, and bell pepper. Return to a boil, reduce the heat, and simmer uncovered for 5 minutes, stirring occasionally.
- Ladle the hot soup into hot jars, leaving 1 inch of headspace. Remove air bubbles, wipe the rims, and apply lids and bands fingertip tight.
- Process in a pressure canner: pints for 75 minutes or quarts for 90 minutes, at 10 lbs pressure in a weighted gauge canner or 11 lbs in a dial gauge canner, adjusting for altitude.
- Let the canner return to zero pressure naturally, wait 5 minutes, then open the lid. Cool the jars in the canner for 10 minutes, then remove and cool for 12 hours. Check seals, label, and store.
To serve, heat a jar to a boil and stir in coconut milk, slivered red onion, and chopped cilantro. Per pint use 1/2 cup coconut milk, 2 Tbsp red onion, and 1 Tbsp cilantro, and double those for a quart. Finish with lime wedges.
Notes
This is a tested recipe from The All New Ball Book of Canning and Preserving, page 284. It is packed as a hearty soup and processed at the hearty soup times of 75 minutes for pints and 90 minutes for quarts. The processing time and pressure are the safety control for this low-acid soup, so they are never shortened, lowered, or replaced with a water bath. Only a pressure canner reaches a safe temperature.
Coconut milk has no tested home canning process, so it is stirred in at serving, not before canning. Fresh cilantro, slivered red onion, lime wedges, and any thickener also go in at serving.
You can adjust the seasonings and add reasonable amounts of dried spices, but do not add more solids than the recipe calls for.
A full batch uses about 5 cups of cubed squash, which is roughly 1 1/2 lb. That is a starting amount measured before cubing.
Store sealed jars in a cool, dark place and use within about 12 to 18 months for best quality. Refrigerate after opening and use within 3 to 4 days.
When serving, ball canning suggests adding the following ingredients to each pint of soup (or twice this much per quart):
2 tbsp red onion slivers (for serving)
1 tbsp chopped cilantro (for serving)
½ cup coconut milk (for serving)
Lime wedges (for serving) Altitude Adjustments for Canning Soup With pressure canning, the processing times stay the same at higher altitudes, but the pressures change. Here are the altitude adjustments for pressure canning soup: For dial gauge pressure canners:
- 0 to 2,000 feet in elevation – 11 lbs pressure
- 2,001 to 4,000 feet in elevation – 12 lbs pressure
- 4,001 to 6,000 feet in elevation – 13 lbs pressure
- 6,001 to 8,000 feet in elevation – 14 lbs pressure
- 0 to 1,000 feet in elevation – 10 lbs pressure
- Above 1,000 feet – 15 lbs pressure
Nutrition
Serving: 2cups | Calories: 144kcal | Carbohydrates: 28g | Protein: 2g | Fat: 4g | Saturated Fat: 4g | Polyunsaturated Fat: 0.1g | Monounsaturated Fat: 0.2g | Sodium: 2048mg | Potassium: 578mg | Fiber: 3g | Sugar: 12g | Vitamin A: 13380IU | Vitamin C: 56mg | Calcium: 71mg | Iron: 2mg