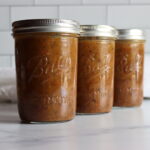
Canning Taco Meat
The beauty of this pressure-canned taco meat is that it’s an easy, shelf-stable solution for quick meals. It’s perfect for busy nights when you need a meal in a hurry but don’t want to sacrifice flavor. Canning taco meat means you can stock up on homemade taco fillings and have them ready whenever the taco cravings hit. It’s truly a homemade convenience food!
Servings: 16 servings (4 pints)
Equipment
- Wide Mouth Pint Jars
- Wide Mouth Canning Lids
- Jar Lifter
Ingredients
- 3 lbs ground beef
- 4 tsp salt Adjust to your tastes, this is the NCHFP recommendation, but I like a bit less at around 3 tsp.
- 2 Tbsp. Onion Powder or Minced Onion
- 1 Tbsp. Garlic Powder
- 1 Tbsp. Chili Powder
- 1 Tbsp. Cumin
- 1 tsp. Oregano preferably Mexican oregano
- 1 tsp. Red Pepper Flakes optional, for heat
- 3 cups Beef broth or tomato juice About 3 cups for canning liquid, you may need a bit more to bring jars to 1'' headspace.
Instructions
- Add a bit of oil to a large skillet, and cook the ground beef over medium heat. Break it up as it cooks, browning on all sides.
- Once the beef is browned and excess fat is drained, stir in the salt, minced onion, chili powder, cumin, red pepper flakes, and oregano. Mix well to evenly coat the meat with the spices.
- Sterilize 4 pint-sized canning jars and their lids. (You can adjust the recipe to make more jars as needed, depending on your canner’s capacity.)
- Choose either beef broth or tomato juice as your canning liquid. You'll need about ¾ cup of liquid per pint jar (about 3 cups total for this recipe). Bring the canning liquid to a hard boil and keep hot as you pack the jars.
- Spoon the seasoned ground beef into the jars, packing it tightly but without overpacking. Leave about an inch of headspace at the top.
- Pour the boiling hot beef broth or tomato juice into each jar, ensuring the meat is mostly covered, but still leaving that inch of headspace.
- Use a clean, damp cloth to wipe the rims of the jars to remove any grease or residue that could affect the seal.
- Place sterilized lids on the jars and screw on the bands until they’re just finger-tight.
- Process the jars in a pressure canner at 10 pounds of pressure for 75 minutes (for pints and half pints) or 90 minutes (for quarts). If you’re above 1,000 feet in altitude, adjust the pressure as needed (see notes).
- After canning, turn off the heat and let the canner cool naturally. Once the pressure has dropped to zero, carefully remove the jars and place them on a towel-lined surface. Allow the jars to cool completely before storing them in a cool, dark place.
Notes
Adjust the Spice Level: If you prefer milder taco meat, reduce the amount of red pepper flakes or skip them entirely. For more heat, feel free to add extra chili powder or even some cayenne powder to the mix.
Broth or Juice? You can experiment with the canning liquid. Beef broth gives the meat a savory richness, while tomato juice adds a tangy twist. You can even mix both together for a balanced flavor profile.
Add-ins: If you like, you can throw in some diced bell peppers or chopped tomatoes into the jars before sealing them. Just remember to adjust your headspace to ensure proper sealing. If you’re adding veggies, be sure to follow the guidelines for canning hearty soups.
Altitude Adjustments
The total time required does not change with elevation, but the pressure required does increase at higher elevations.Weighted Gauge Canner:
- Under 1,000 Feet Elevation Use 10 lbs
- Over 1,000 Feet Elevation use 15 lbs
Dial Gauge Canner:
- 0 to 2,000 Feet Elevation Use 11 lbs
- 2,001 to 4,000 Feet Use 12 lbs
- 4,001 to 6,000 Feet Use 13 lbs
- 6,001 to 8,000 Feet Use 14 lbs
Nutrition
Serving: 0.5cup | Calories: 235kcal | Carbohydrates: 4g | Protein: 15g | Fat: 17g | Saturated Fat: 7g | Polyunsaturated Fat: 1g | Monounsaturated Fat: 8g | Trans Fat: 1g | Cholesterol: 60mg | Sodium: 665mg | Potassium: 390mg | Fiber: 1g | Sugar: 2g | Vitamin A: 587IU | Vitamin C: 8mg | Calcium: 39mg | Iron: 3mg