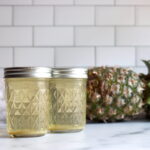
Canning Pineapple Juice
Canning your own pineapple juice is an easy way to preserve the sweet, tropical flavor of fresh pineapples. Whether you're using it in cocktails, smoothies, or just for sipping, this homemade juice is far superior to anything you’ll find on store shelves. So next time you see pineapples on sale, grab a few extra and make your own juice—you’ll taste the difference!
Servings: 2 cups per pineapple
Ingredients
- Fresh Ripe Pineapples —about 1 pineapple per pint of juice
- Sugar optional
Instructions
- Choose firm, ripe pineapples. Overripe fruit can make the juice less crisp, and underripe fruit will leave you with a tart flavor. Wash the pineapples thoroughly, then cut off the tough outer skin with a sharp knife. Be sure to remove any eyes (those little spiky bits). There’s no need to remove the core—the fiber from the core will be filtered out when you make the juice, and leaving it in helps increase your yield. Finally, cut the fruit into chunks or slices, ready for juicing.
- If you have a juicer, just toss the pineapple chunks in, and let the juicer do the work. If you don’t have a juicer, don’t worry! Use a blender to puree the pineapple chunks into a smooth mix. Then strain the juice through a fine mesh strainer or cheesecloth to remove any pulp, leaving you with clear, fresh juice. For a sweeter flavor, you can add a little sugar or honey and stir until it dissolves.
- Before you begin pasteurizing the juice, get your canning jars ready by washing and sterilizing them. Bring a water bath canner to a gentle simmer. Since pasteurizing the juice only takes a few minutes, having the canner ready will help keep things moving smoothly.
- Pour the fresh juice into a large pot and heat over medium heat. Stir occasionally to ensure it heats evenly. You want the juice to reach between 185°F and 210°F (85°C to 99°C). If you don’t have a thermometer, you’ll know the juice is ready when small bubbles start forming along the edges, but it shouldn’t be boiling. Be sure to skim off any foam that forms at the surface. Avoid boiling the juice to prevent cloudiness and a cooked flavor.
- Carefully pour the hot, pasteurized juice into the sterilized jars, leaving about ½ inch of headspace at the top. Wipe the rims of the jars with a clean cloth to remove any juice residue that could affect the seal. Place the lids on the jars and tighten the rings until they’re “fingertip tight”—don’t overtighten, or the jars won’t seal properly.
- Carefully lower the jars into the simmering water bath canner, ensuring the water covers the jars by at least an inch. Process the jars for 10 minutes at elevations below 6,000 feet, or 15 minutes above 6,000 feet.
- Once the processing time is up, carefully remove the jars from the canner and allow them to cool. Check the seals by pressing down on the center of each lid—if it doesn’t pop back, the jar has sealed properly. Store the sealed jars in a cool, dark place, and your homemade pineapple juice is ready to enjoy!
Notes
These instructions are based on answers from the Extension's helpline, which says that pineapple juice can be canned using the University of Oregon's instructions for canning apple juice with a quick no-boil pasteurization.
I use this same process for canning apple cider to keep the fresh apple flavor in the jar.
Nutrition
Serving: 1cup | Calories: 125kcal | Carbohydrates: 30g | Protein: 1g | Fat: 0.3g | Saturated Fat: 0.02g | Polyunsaturated Fat: 0.1g | Monounsaturated Fat: 0.03g | Sodium: 5mg | Potassium: 307mg | Fiber: 0.5g | Sugar: 24g | Vitamin A: 12IU | Vitamin C: 24mg | Calcium: 31mg | Iron: 1mg
