Canning Beef Burgundy (Julia Child's Recipe)
Classic Beef Burgundy is a delicious meal in a jar canning recipe.
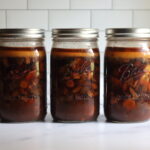
Servings: 14 servings, Makes 7 quarts
Equipment
Ingredients
- ¼ lb bacon chopped, *See notes
- 4 lbs chuck roast cubed into 1" or 2.5 cm pieces
- 6 cups carrots peeled and sliced
- 4 cups onions chopped
- 2 lbs mushrooms sliced
- 14 cloves garlic minced
- 2 Tbsp parsley
- 1 Tbsp thyme
- 1 Quart beef broth or water
- 2 cups dry red wine
- 6 oz tomato paste 1 small can, optional
- 1/4 cup Worcestershire sauce
- 1 Tbsp salt or more to taste
Instructions
- Begin by preparing the canning jars, lids, and pressure canner. Fill the canner with several inches (8 cm) of water, depending on your manufacturer's recommendations, and place the canner on the stove. Place it on low heat with the jars inside to stay warm.
- Fry the bacon in a large stockpot, cooking pot over medium-high heat or for about 10 minutes (it will be crispy). remove the bacon with a spatula or slotted spoon. Keep the bacon grease in the pan.
- Use the bacon grease to sear the cubes of beef. Stir often to make sure the edges are adequately browned but don't stick to the bottom of the pan.
- If you were working in batches, add all the beef back into the pan once it's all browned.
- Add the carrots, onions, mushrooms, and garlic.
- Add the bacon next, along with the remaining ingredients, including spices, broth, wine and tomato paste (if using).
- Bring everything to a boil, then turn the heat to a low simmer for five minutes.
- Remove the stockpot from the heat, then ladle the mixture among the jars, dividing evenly. Put the solids in the jars first, then add the liquids. Leave an inch (2.5 cm) of headspace.
- Using a bubble removal tool, remove the bubbles. Double-check the headspace if you're short on liquid, you can top the jars off with boiling water.
- Wipe the rims clean with a damp cloth, then put the bands and lids on the jars. Tighten each one until it is fingertip-tight. Load them into the pressure canner.
- Process the jars, based on the pressure canner manufacturer's instructors, at 10 lbs of pressure for 90 minutes. Adjust for altitude if necessary.
- Once the processing time has finished, you can let the canner depressurize naturally. Then, remove the jars and allow them to cool on the counter for 12 hours. Check the seals, label the jars, and store for up to one year.
Notes
Altitude Adjustments for Canning Beef Burgundy
With pressure canning, the processing times stay the same at higher altitudes, but the pressures change. Here are the altitude adjustments for pressure canning:For dial gauge pressure canners:
- 0 to 2,000 feet in elevation – 11 lbs pressure
- 2,001 to 4,000 feet in elevation – 12 lbs pressure
- 4,001 to 6,000 feet in elevation – 13 lbs pressure
- 6,001 to 8,000 feet in elevation – 14 lbs pressure
For weighted gauge pressure canners:
- 0 to 1,000 feet in elevation – 10 lbs pressure
- Above 1,000 feet – 15 lbs pressure
Is Canning Bacon Safe in this Recipe?
At this point in time, the USDA and National Center for Food Preservation in the US have only tested a limited number of recipes that include bacon and they haven't developed instructions for canning bacon (or other cured meats) due to lack of funding. Out of an abundance of caution, they recommend not canning bacon in recipes besides the few specifically tested recipes (Boston Baked Beans, for example, is one of the tested recipes). That said, the US is not the whole world, and small amounts of bacon are commonly added to soups and meal-in-a-jar recipes in other countries for flavoring (though cured meats such as ham and bacon are not canned alone outside of commercial facilities). This particular recipe uses 1/4 pound of bacon chopped finely, distributed across 7 quart jars. That's less than a tablespoon per jar, and considerably less than is used in the much denser recipe for canning baked beans. Personally, I feel comfortable canning this recipe as is for my family, as does Angi, the author of the canning book this recipe comes from. That said, when canning at home, you're responsible for using your own best judgment, and you'll have to do that here. The main purpose of the bacon is to render out flavorful fat to fry the remaining veggies, and you could choose to just fry the bacon in a pan, remove it with a slotted spoon, and use the flavorful fat to fry the remaining ingredients. The main objection to bacon in canning is a density issue, in that cured meats may (or may not) have different thermal properties than fresh meats. The fat is not the issue, it is the tiny bacon bits themselves. The other option is to simply use lard or olive oil to fry the veggies and then add a tiny dash of salt, a pinch of sugar, and maybe a splash of liquid smoke (or smoked paprika). That'd give you a similar flavor, and you could skip the bacon. The choice is yours, use bacon or not, either way, it's delicious!Nutrition
Calories: 374kcal | Carbohydrates: 17g | Protein: 30g | Fat: 19g | Saturated Fat: 8g | Polyunsaturated Fat: 2g | Monounsaturated Fat: 9g | Trans Fat: 1g | Cholesterol: 95mg | Sodium: 1112mg | Potassium: 1112mg | Fiber: 4g | Sugar: 8g | Vitamin A: 9447IU | Vitamin C: 14mg | Calcium: 75mg | Iron: 4mg